



 Ultra subscription.

As a new streamer, you may be asking yourself how to start a live stream on Twitch? You may even ask yourself which platform you should stream on. While there is no right answer, Twitch is continually breaking records and the most-watched platform compared to YouTube and Facebook.
We recommend getting familiar with each platform. If you already have an established community on Facebook or YouTube, start there. You may find it helpful to Multistream at first to see which platform gets traction.
In this blog, we are going to focus on Twitch. The platform allows for a ton of customization and has tools to help you create and establish a unique brand.
Setting up a Twitch stream can seem like a daunting experience. In this blog, we are going to discuss several key factors you should consider before going live on Twitch, and going through the basic setup steps to get your stream up and running.
Before we begin, it’s important to remember there is no secret to success. If you’d like to become a full-time streamer, hard work, dedication, long hours, and a deep commitment to creating engaging content is required. For many people, becoming a full-time streamer isn’t necessarily the end goal, and that’s okay. Either way, these tips will help you create a great Twitch channel.
Table of Contents
- Create a Twitch account
- Quick Setup Guide
- Setup for Streamlabs Desktop
- Setup for OBS with Streamlabs Plugin
- Setup for Streamlabs Mobile app
- Setup for Streamlabs Talk Studio
- Setup for Streamlabs Console
- Create a tip page
- Create a consistent brand
- Add live stream alerts
- Get the best stream settings
- Advanced features
- FAQ
How to create a Twitch account for streaming
Setting up an account on Twitch is easy.
1. Reference community guidelines.
Before you start creating content on Twitch it is a good idea to reference the community guidelines. Any content that is deemed inappropriate or legal is grounds to get your account on Twitch and Streamlabs suspended. So read them carefully, and make sure you are streaming approved content for the website.
2. Create an account.
On a desktop computer, simply click the “sign up” button and fill out the appropriate information.
3. Enable two-factor authentication.
Before you can start broadcasting you’ll need to enable 2FA. On a desktop computer, log into your account, navigate to security settings, and enable 2FA.
Quick Setup Guide
Step 1: Choose your streaming software.
- Streamlabs Desktop (recommended)
- Streamlabs Plugin for OBS
- Streamlabs Mobile
- Streamlabs Talk Studio
- Streamlabs Console
Step 2: Connect your account
Step 3: Set up your scenes
Step 4: Go live!
In the rest of the article, you can find specific instructions on the setup process depending on which Streamlabs tool you choose.
Setup for Streamlabs Desktop
Step 1: Download Streamlabs Desktop here.
Step 2: Connect Your Twitch account
- Open Streamlabs Desktop.
- If this is your first time opening Desktop, you'll choose Twitch when you’re on the login page.
- Click Connect.
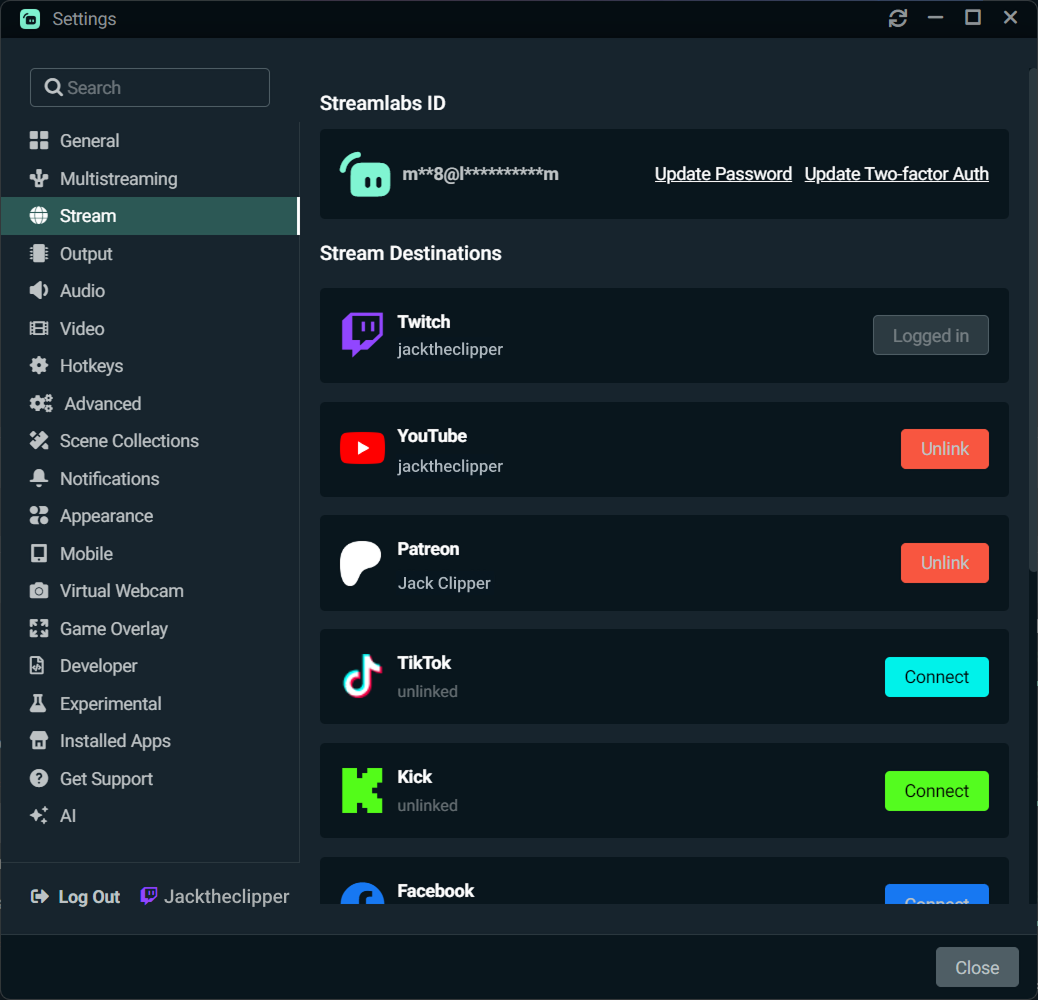
- Authorize Streamlabs to access your Twitch account. Your account will now show as connected in your Stream settings.
- If you already have platforms connected, and want to add Twitch as an additional platform, head to Settings, then the Stream tab, then connect your Twitch account there.
Step 3: Set up your scenes and sources
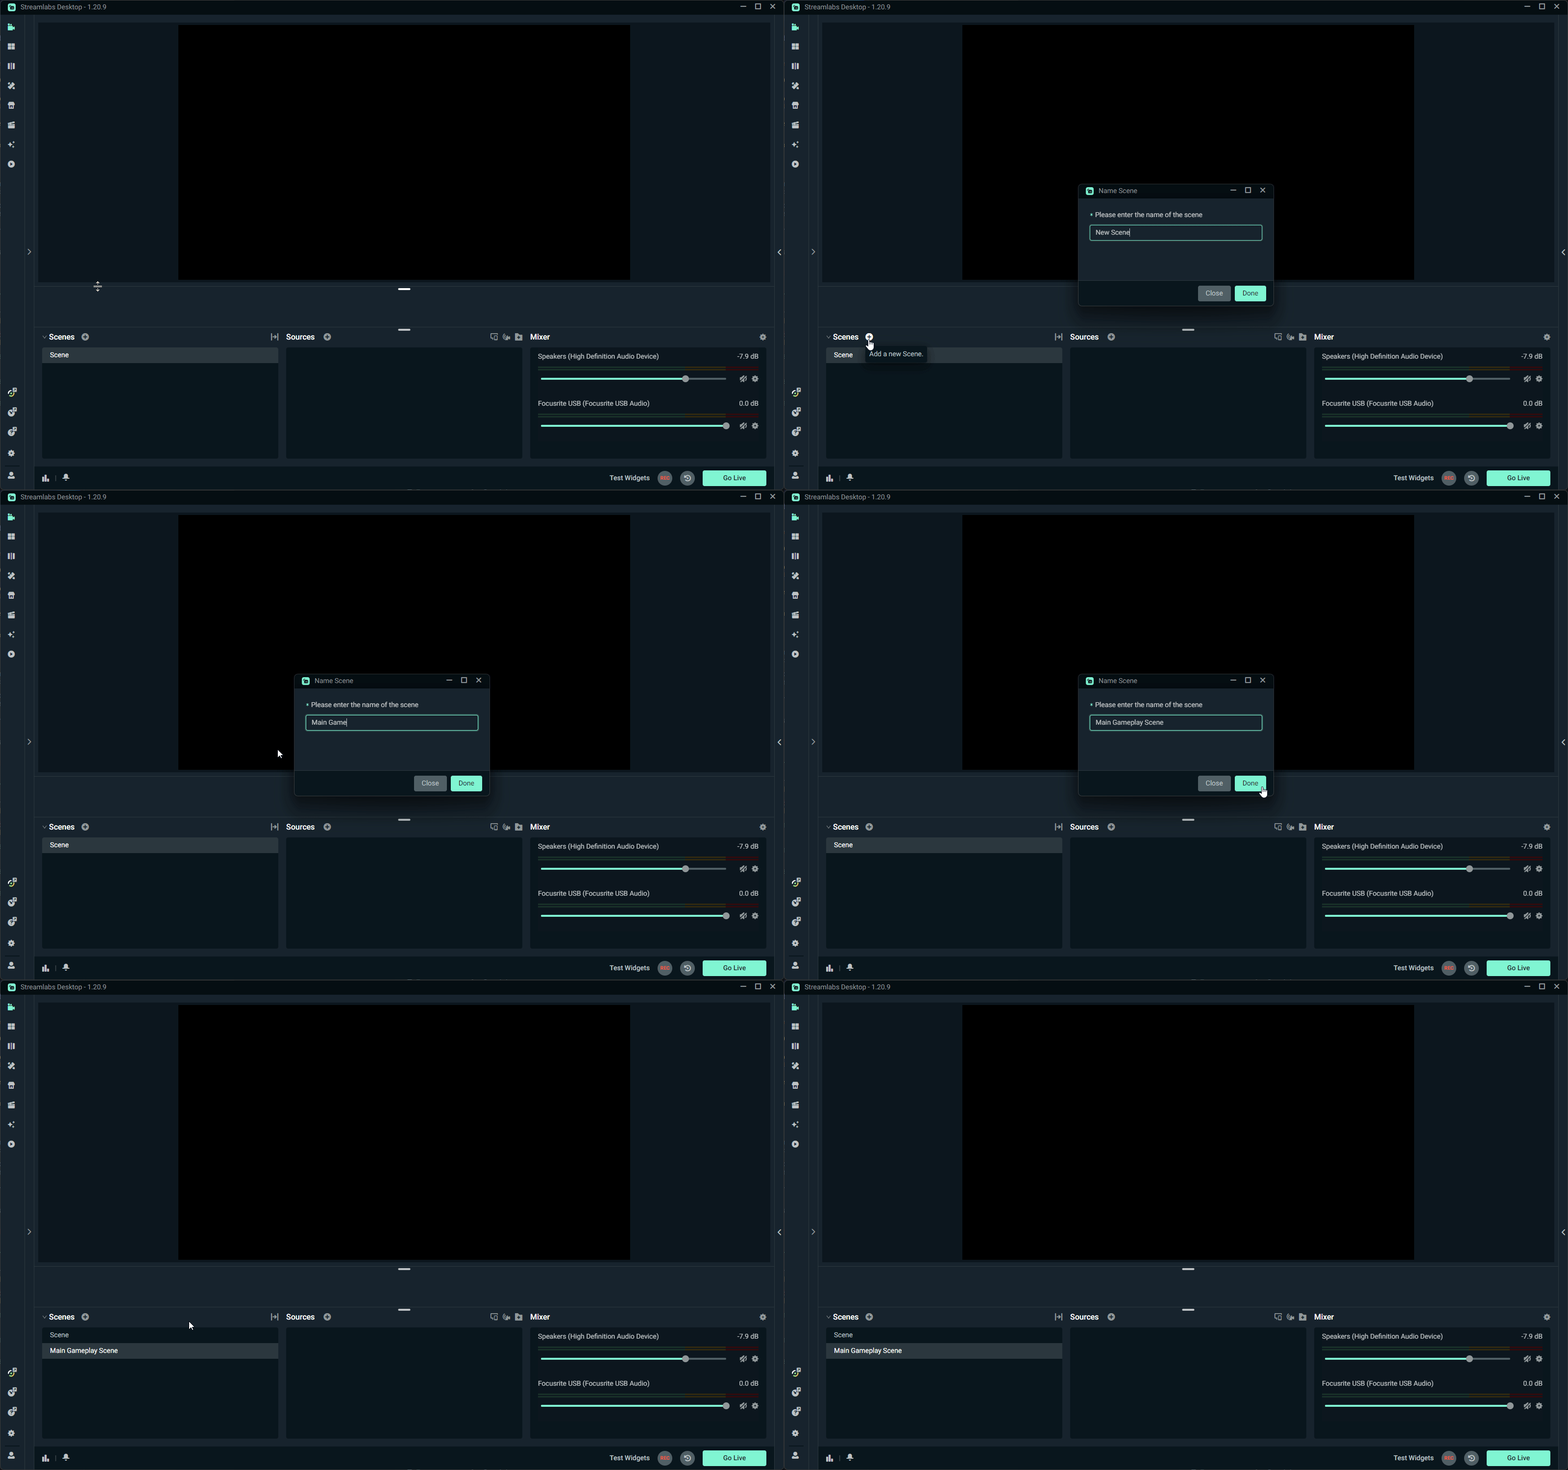
- Go to the Scenes panel (bottom-left) and click the + icon.
- Name your scene clearly (such as Live Scene, Starting Soon, or BRB).
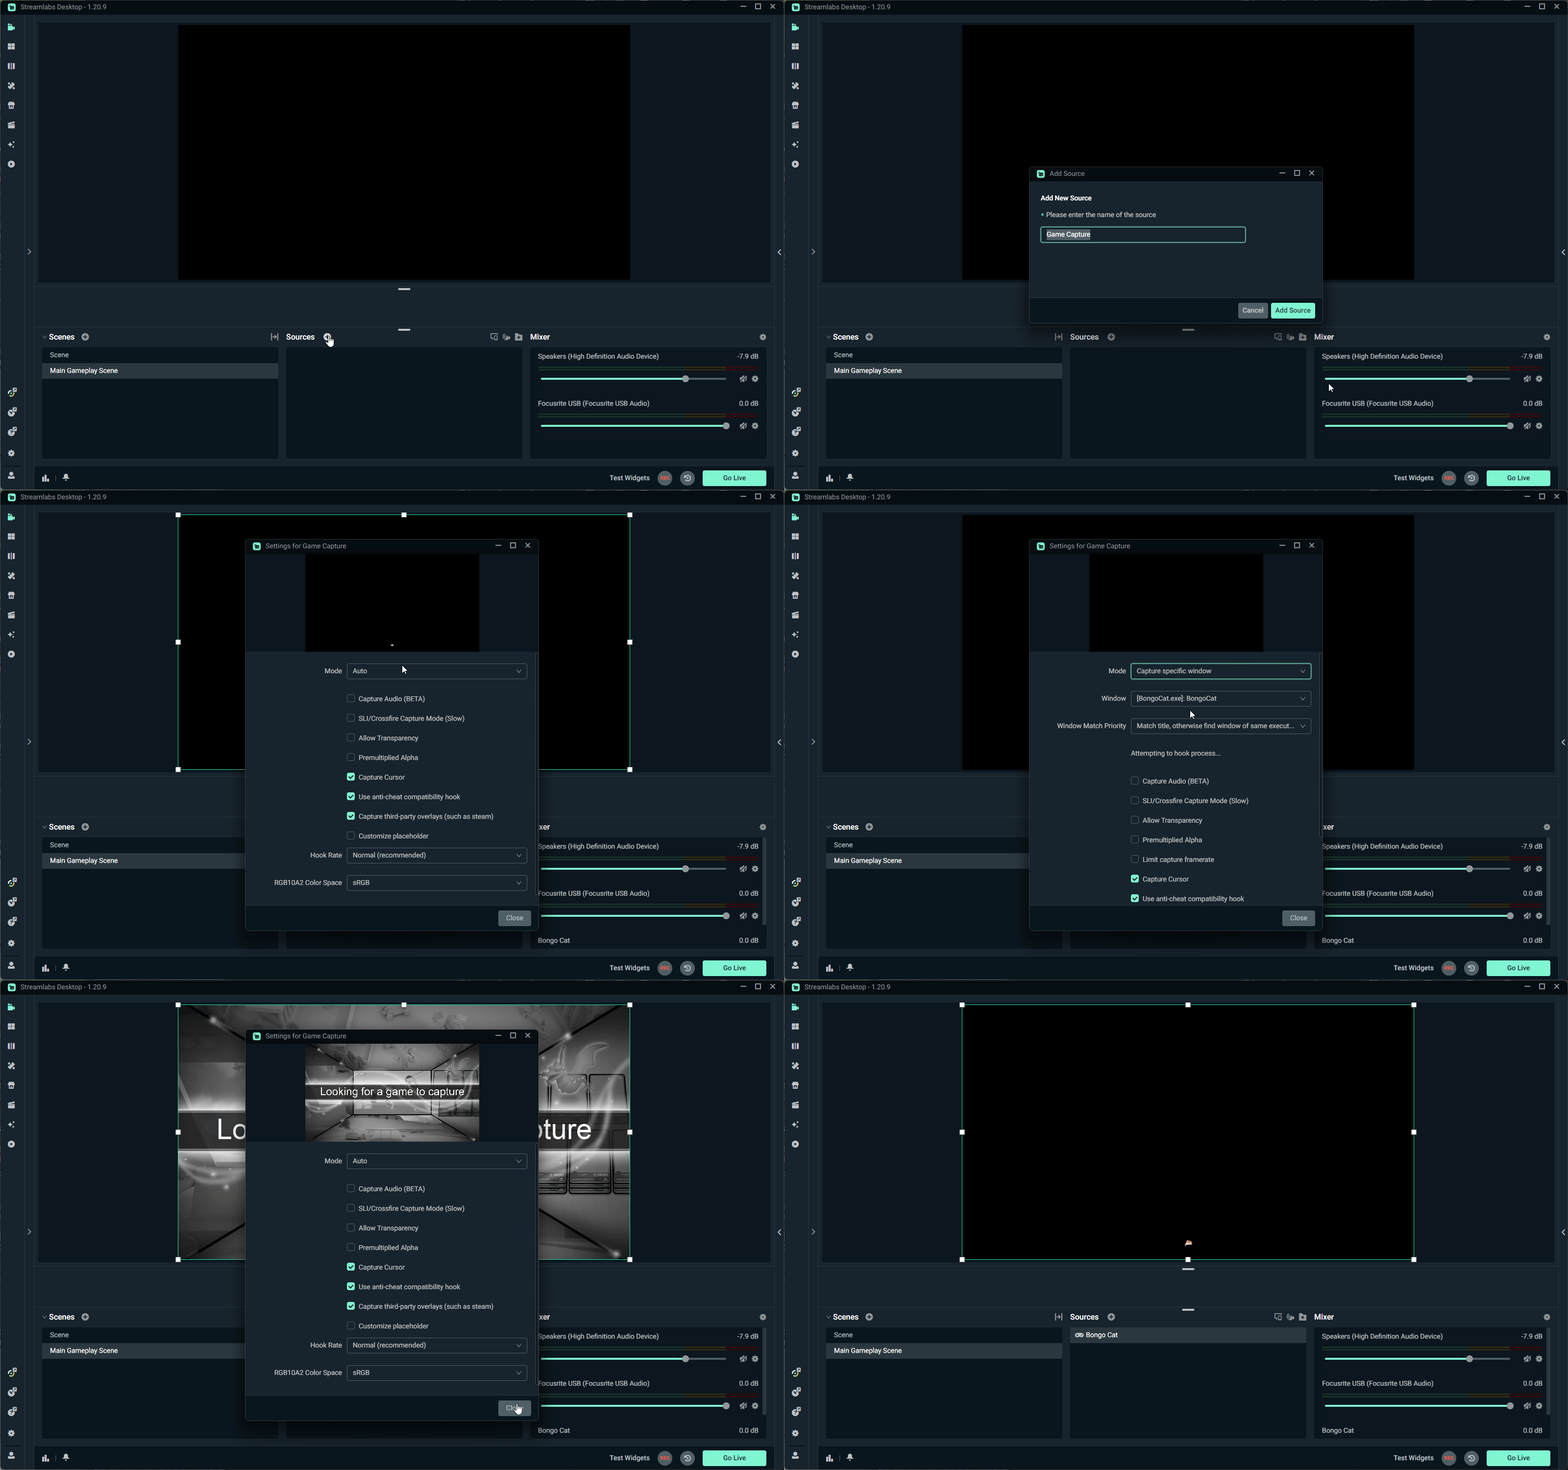
- Go to the Sources panel and click the + icon to add your gear:
- Game Capture or Screen Capture: Adds your gameplay or computer screen.
- Video Capture Device: Adds your webcam feed.
- Audio Capture Device: Adds your microphone sound.
- Click the + icon again to add optional engagement tools:
- Alert Box
- Chat Box
- Donation Goal Widget
- Left-click and drag your sources in the list to change their layers. Keep your webcam source at the top of the list so it stays in front of your gameplay video.
- Click and drag the corners of the items in the video preview window to resize and move them.
Step 4: Go live!
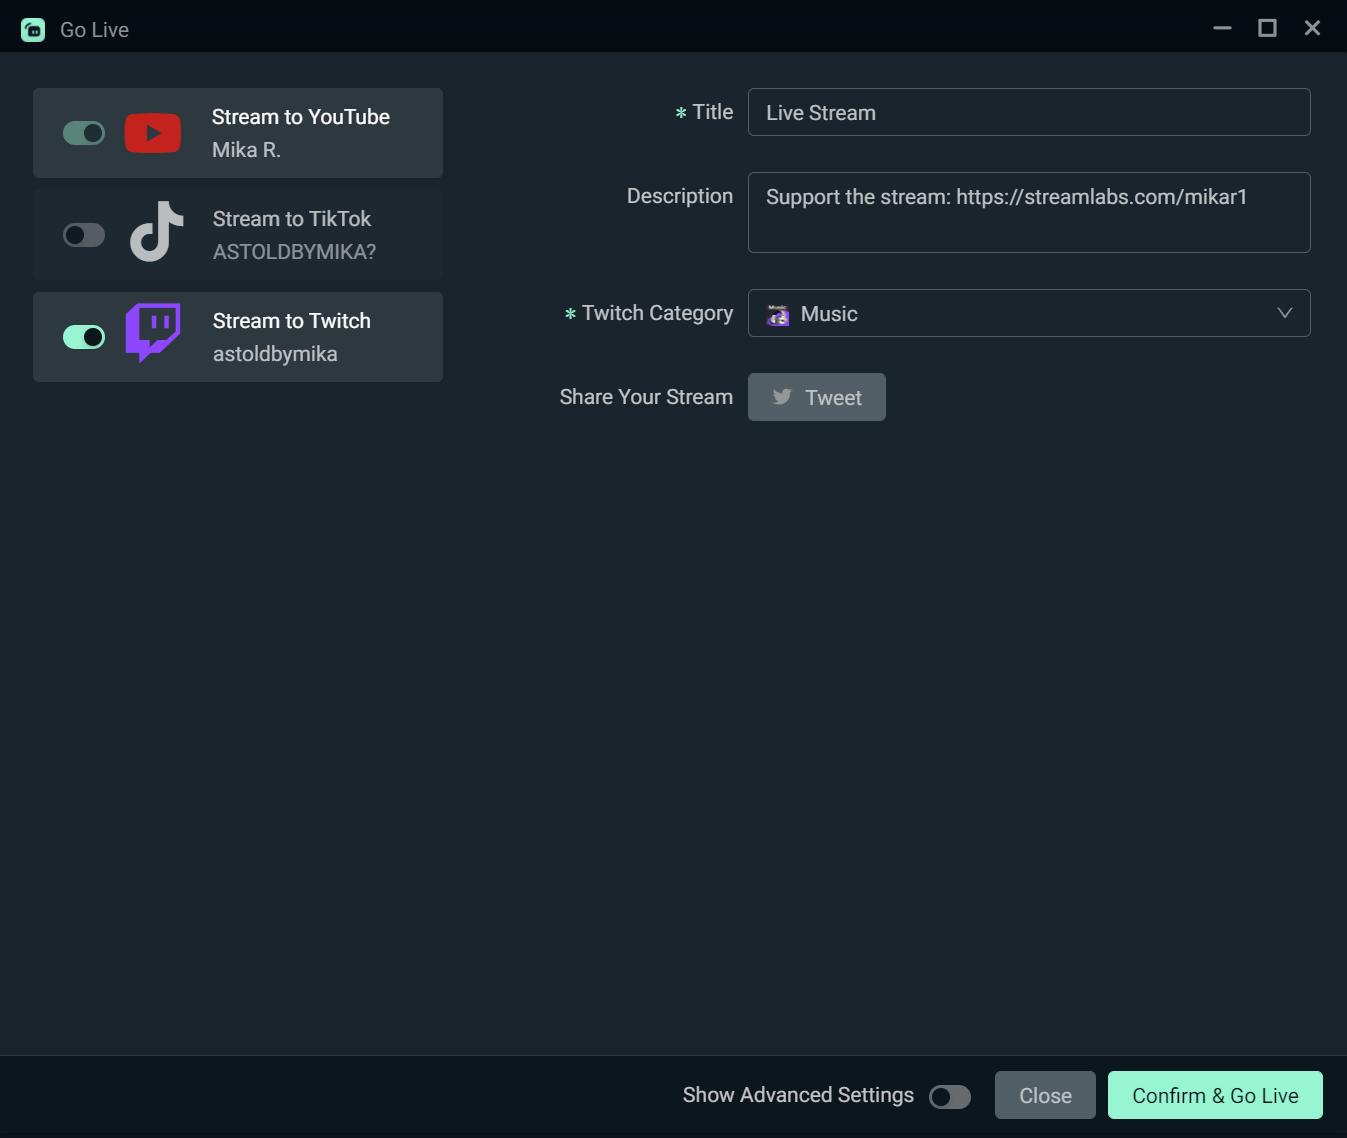
- Click Go Live in the bottom-right corner.
- Select Twitch as your platform.
- Enter your video Title, Description, and Category.
- Click Confirm & Go Live.
Setup for OBS with the Streamlabs Plugin
Step 1: Download the Plugin for OBS here.
Step 2: Connect your Twitch account
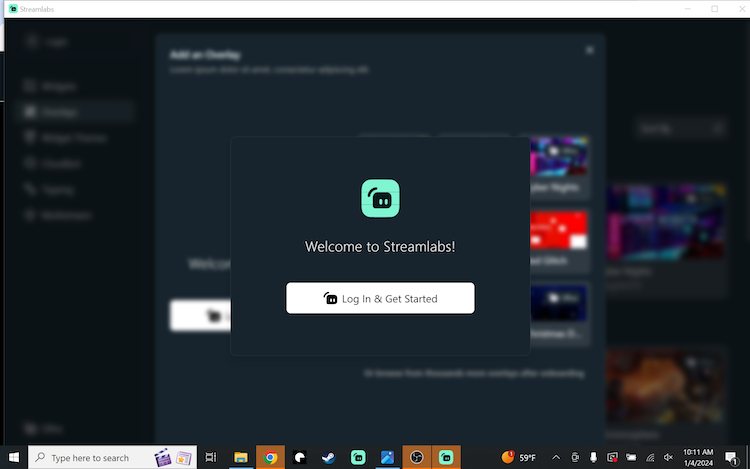
- The first time you launch OBS after downloading the Streamlabs plugin, we will direct you to a sign-in screen: Login and Get Started. If the sign-in screen does not pop up automatically, select Streamlabs from the top menu bar.
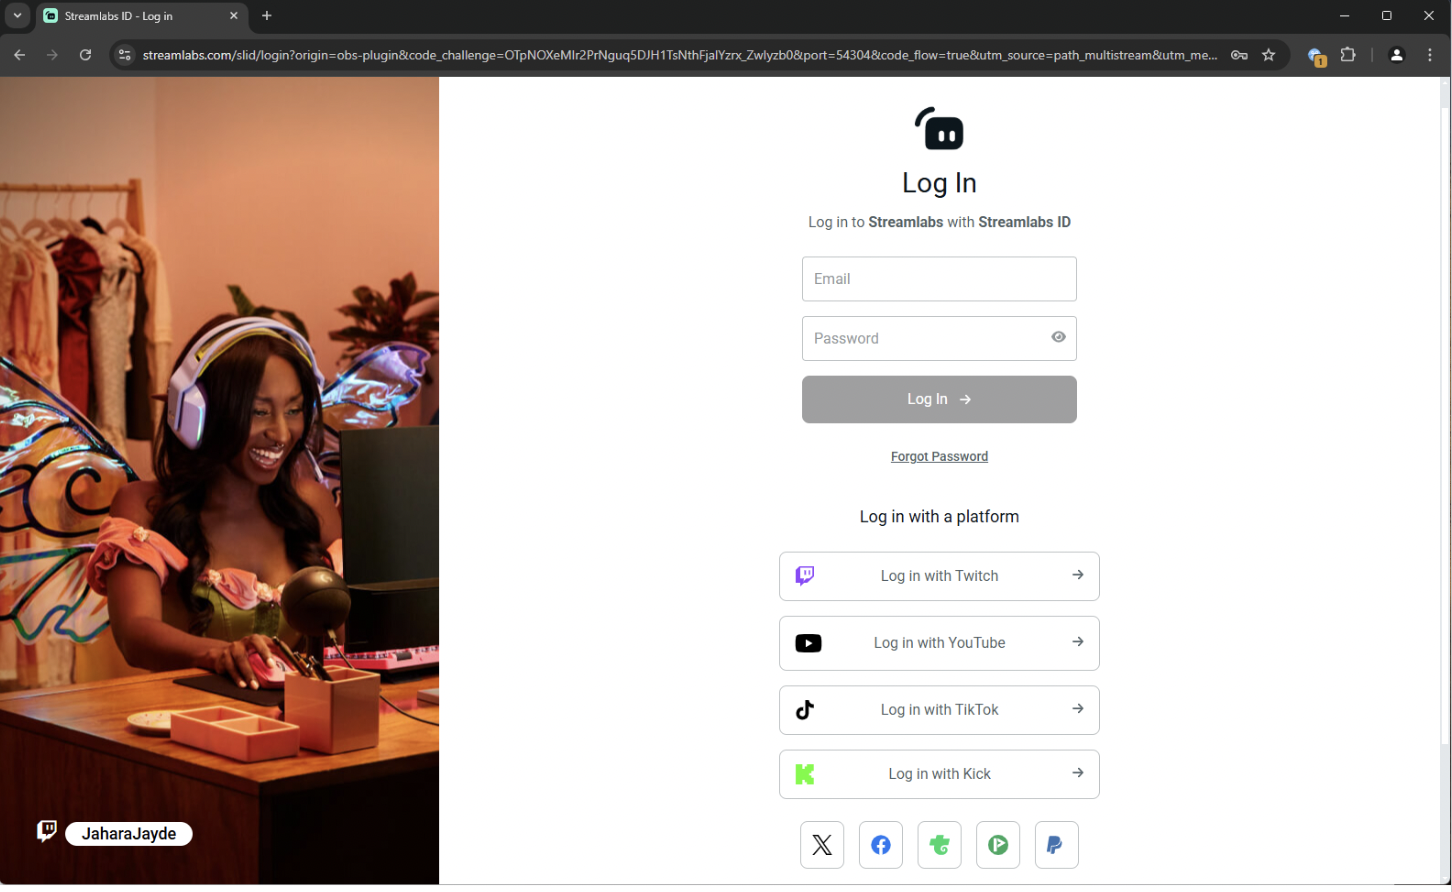
- Login with your Twitch account from the list of platforms.
- Authorize the plugin to connect to your Twitch channel.
Step 3: Setup your scenes and sources
- In the OBS Scenes panel, click the + icon and name your screen.
- In the OBS Sources panel, click the + icon to add your essential items:
- Display Capture or Game Capture: For your game or screensharing.
- Video Capture Device: For your camera.
- Audio Capture Device: For your active microphone.
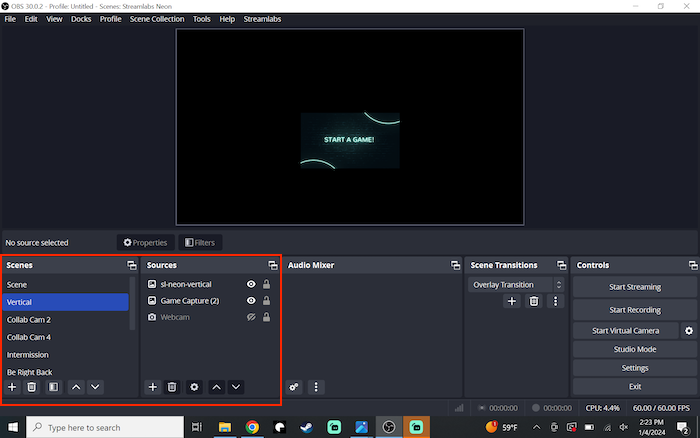
- Drag your camera source to the top of the list so it is layered correctly over your other sources to make sure it's visible.
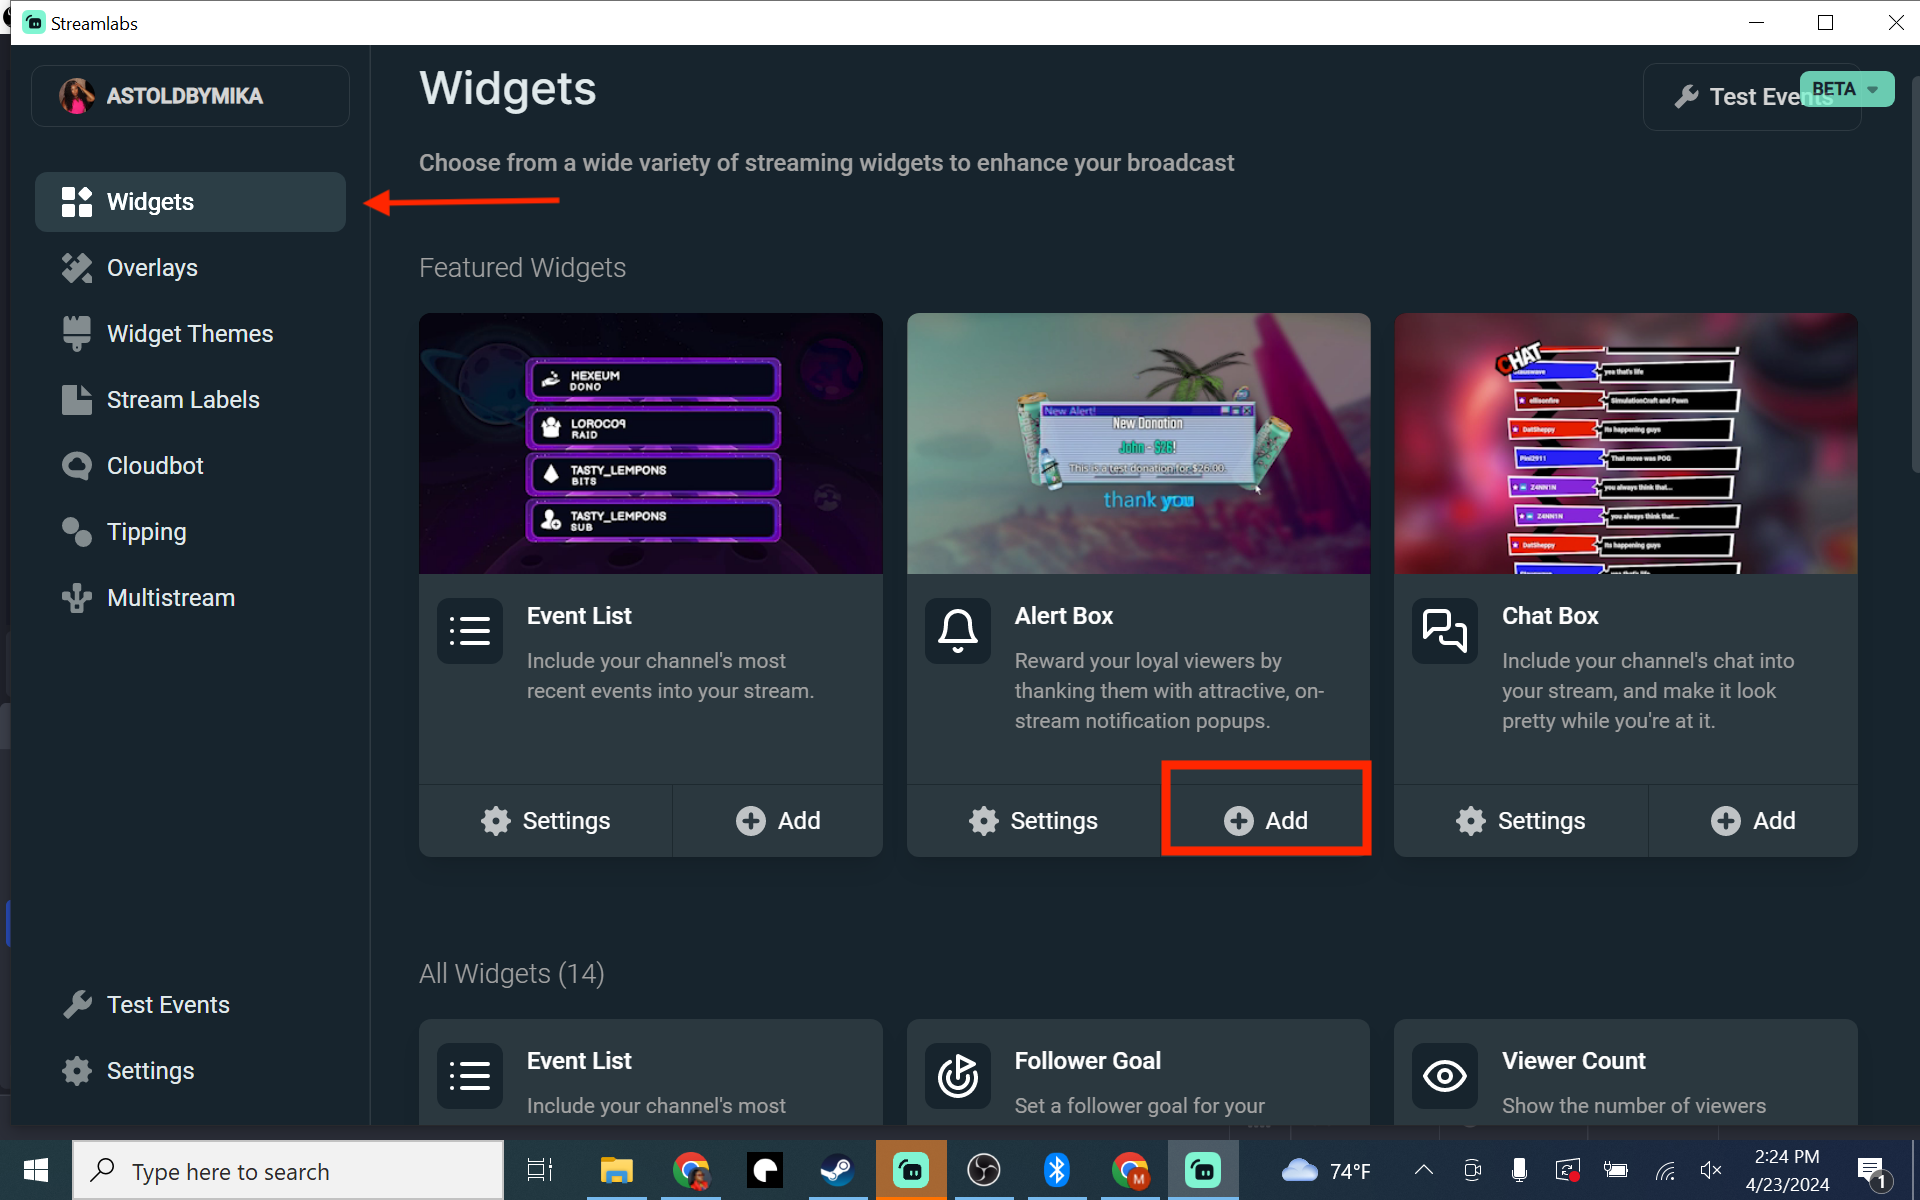
- To add fun widgets, open the Streamlabs Plugin window, click Widgets, and choose the items you want to install with one click.
Step 4: Go live!
- Click Start Streaming in the main OBS editor window.
- Make sure the toggle switch for Twitch is turned on.
- Fill out your stream Title, Description, and Category.
- Click Confirm & Go Live.
.png)
Setup for Streamlabs Mobile App
Step 1: Download the Mobile app.
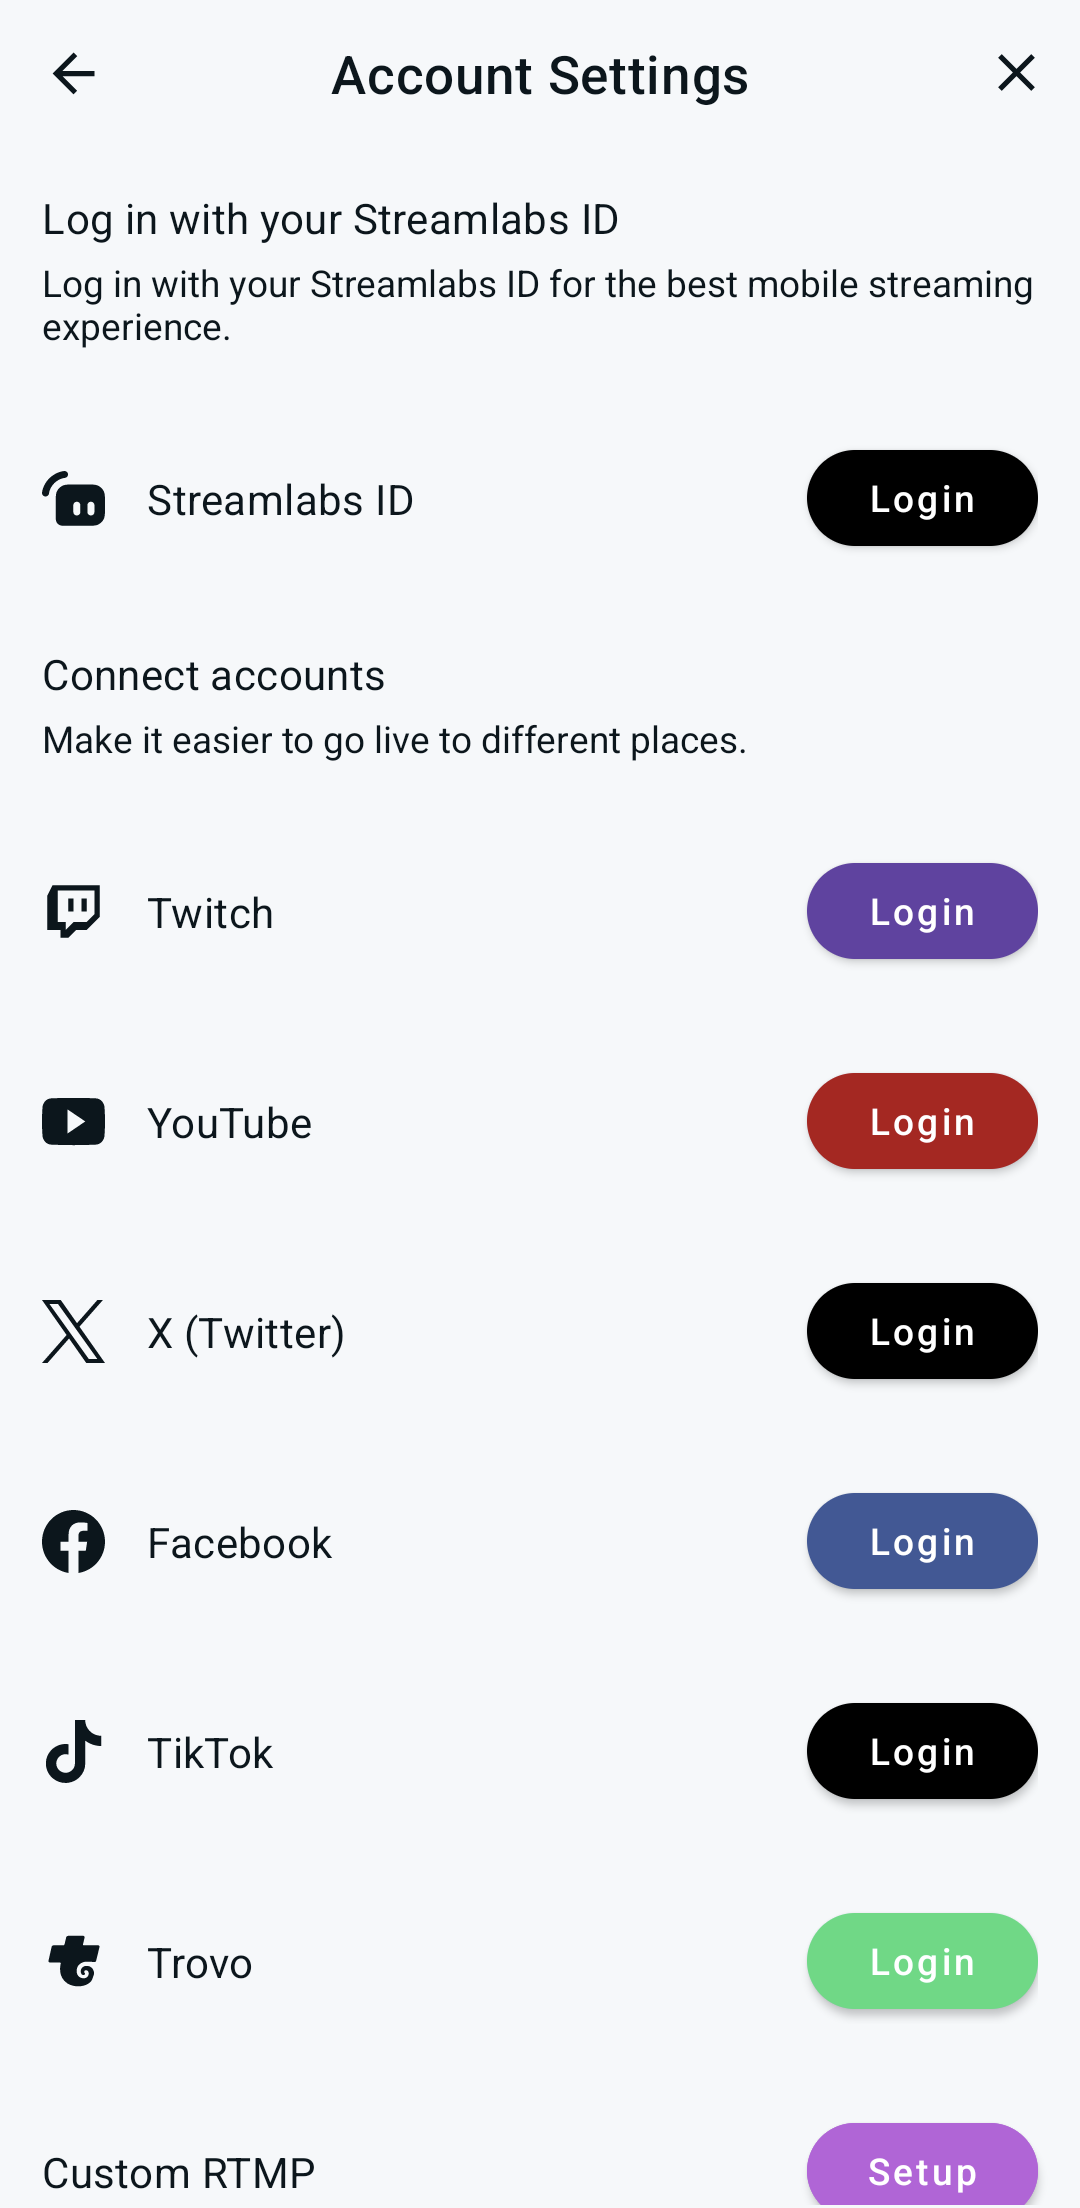
Step 2: Connect your Twitch account
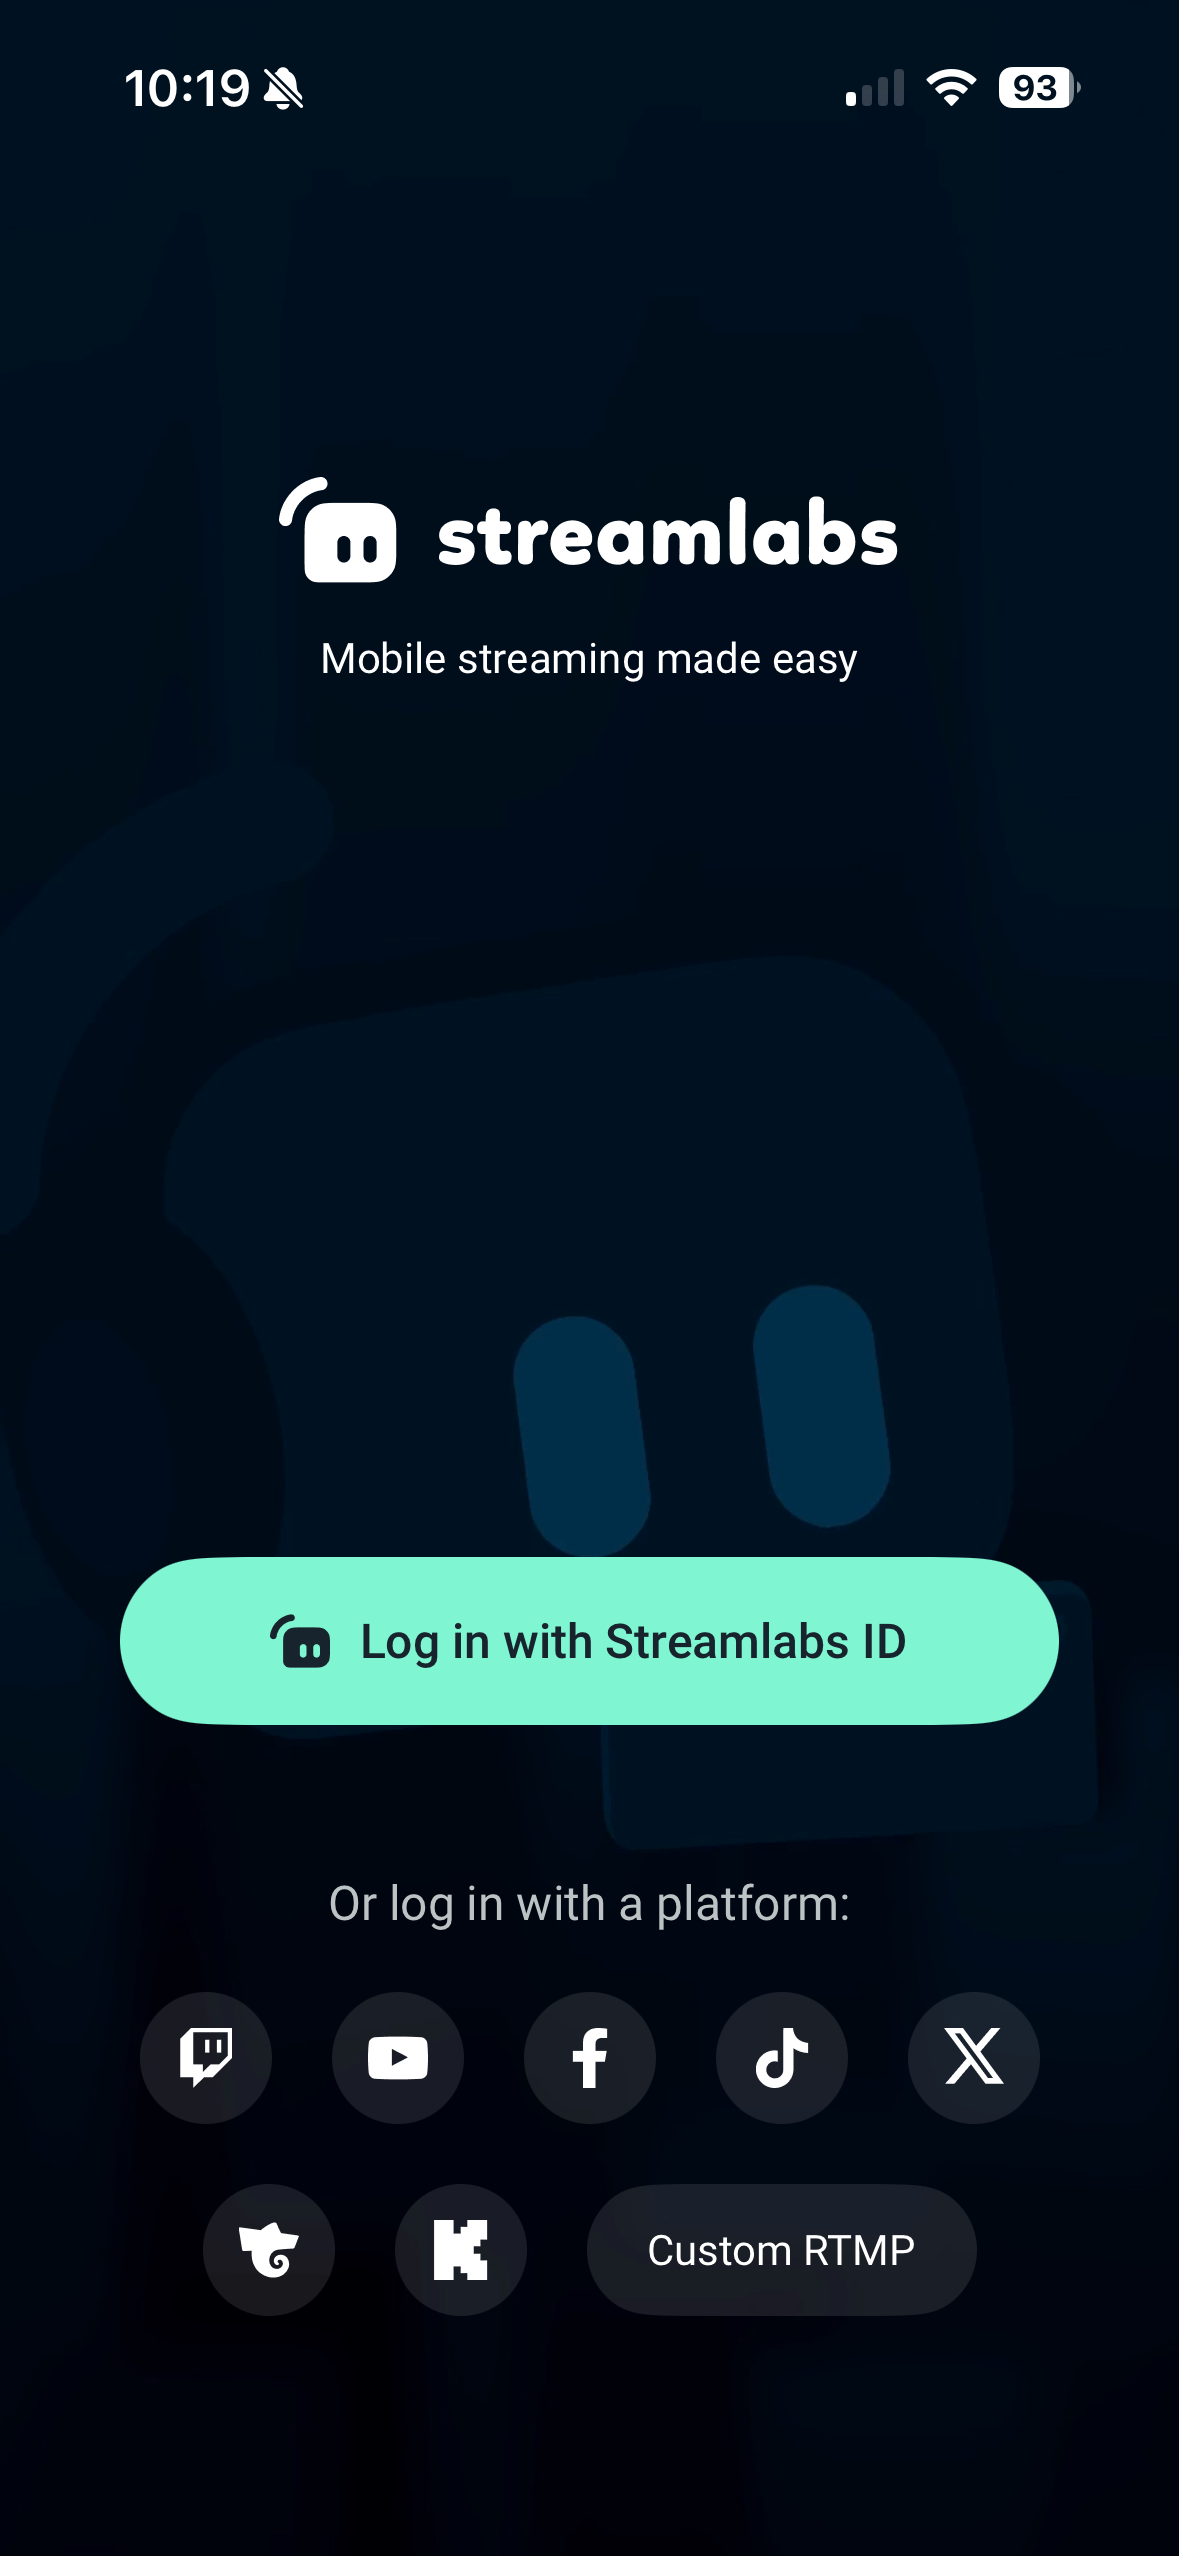
- Open the app and tap the Twitch button to log in.
- Authorize the app to connect your channel.
- Give the app permission to use your mobile camera and microphone.
Step 3: Set up your layout
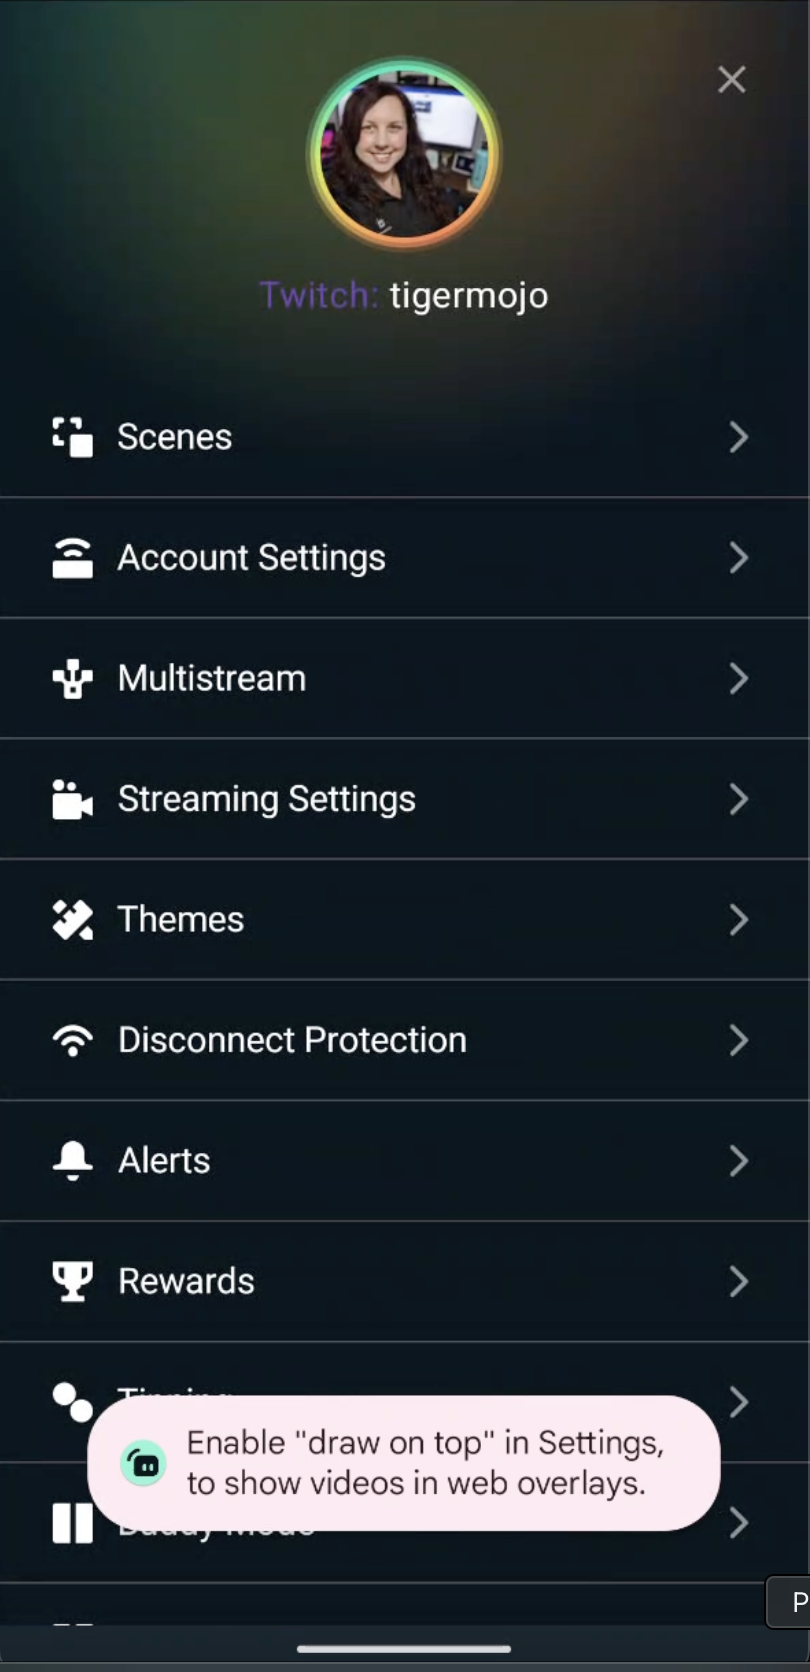
- Tap the Menu button (three horizontal lines) in the top-left corner.
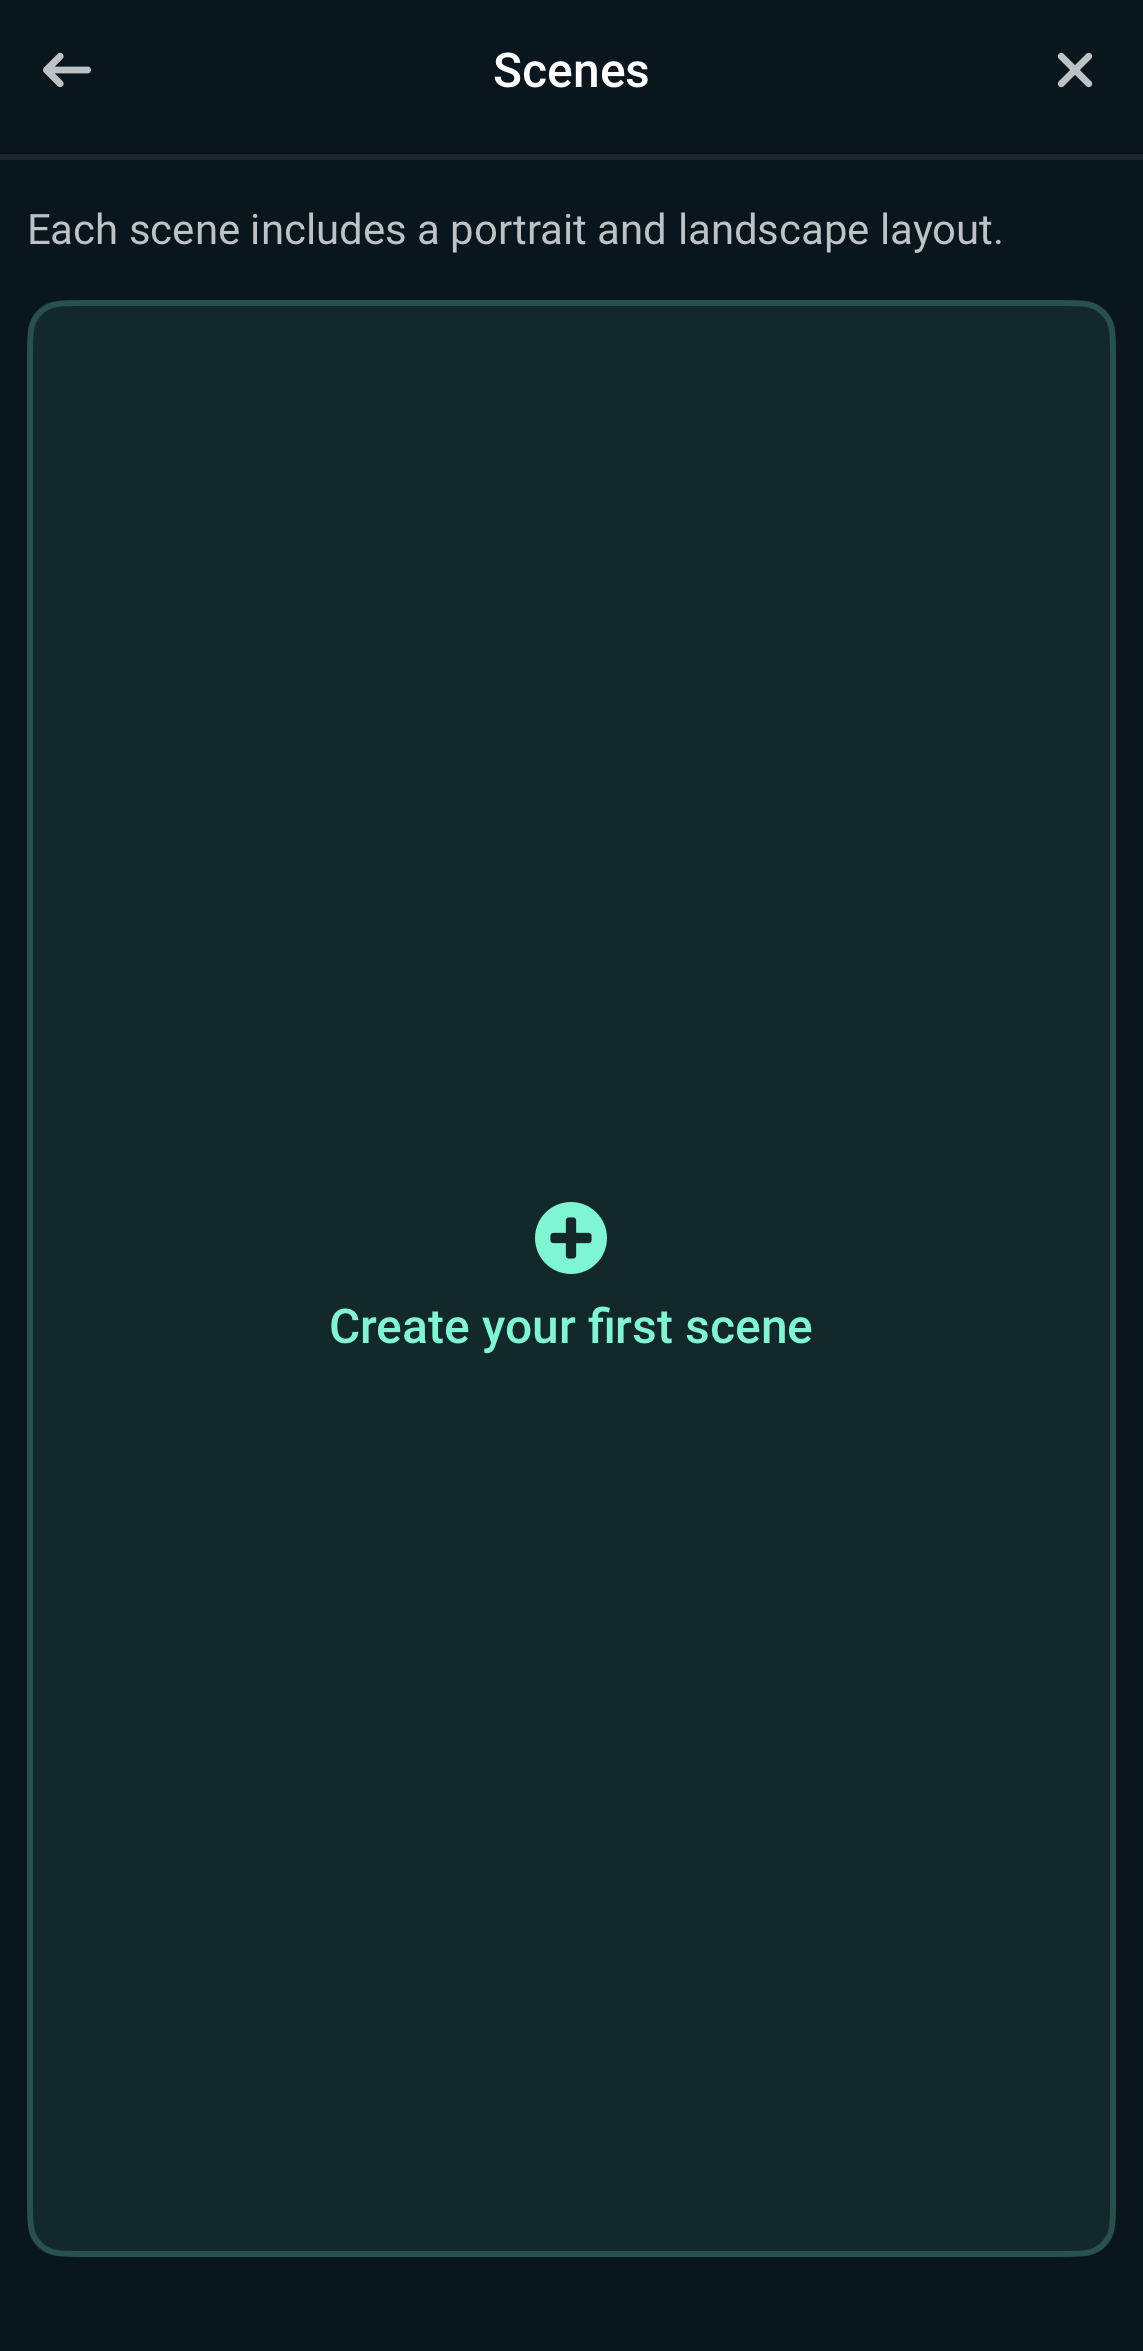
- Select Scenes.
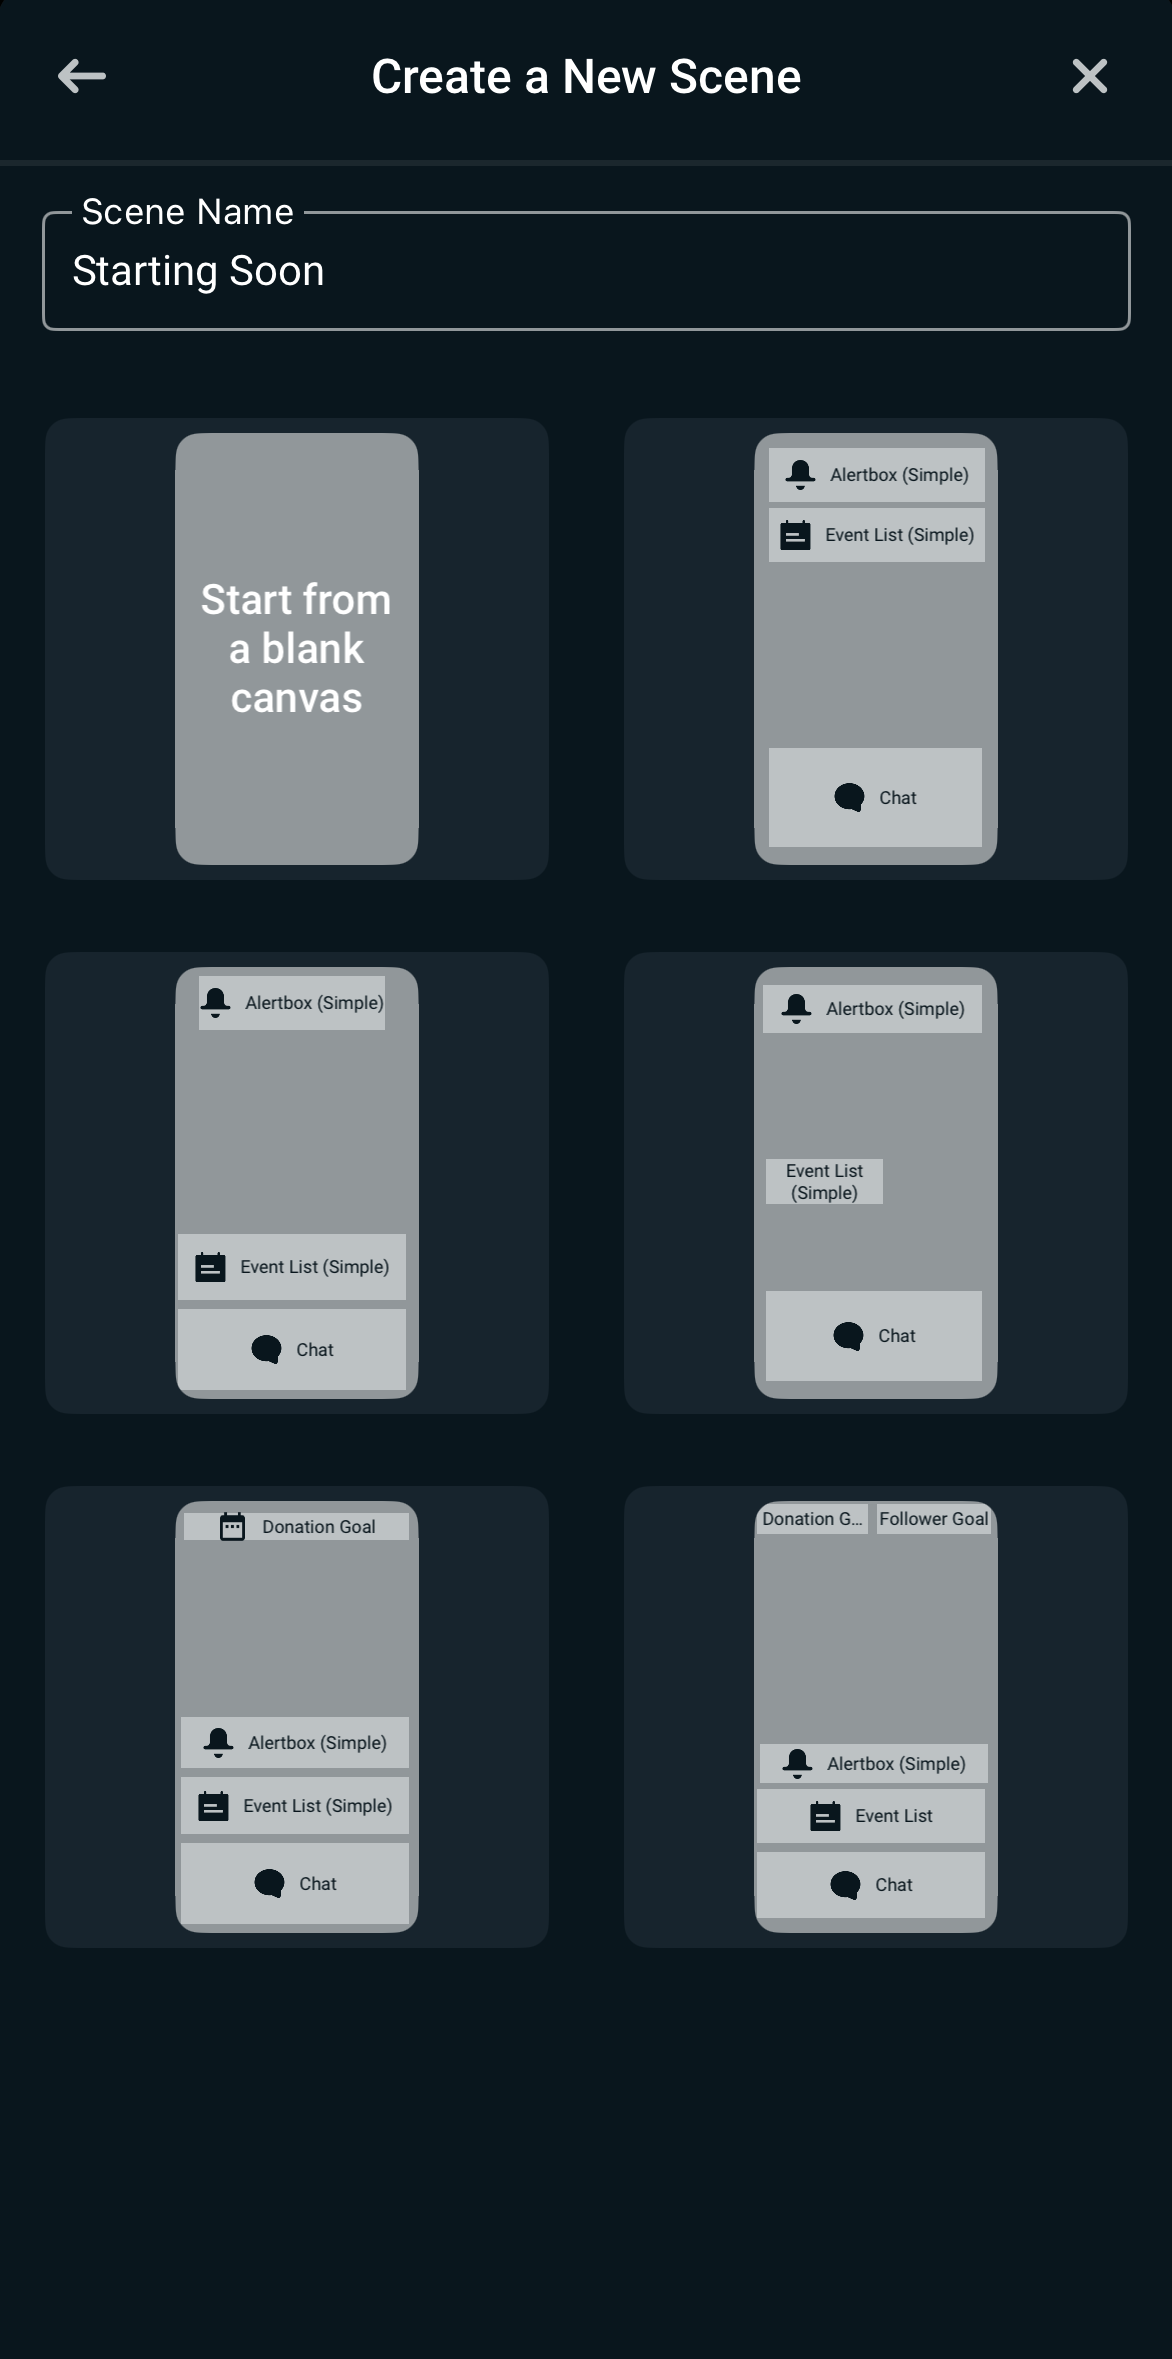
- Tap Create New Scene and give it a name. You can build a Custom Scene or pick a Preset Template that automatically lays out your chat and alerts.
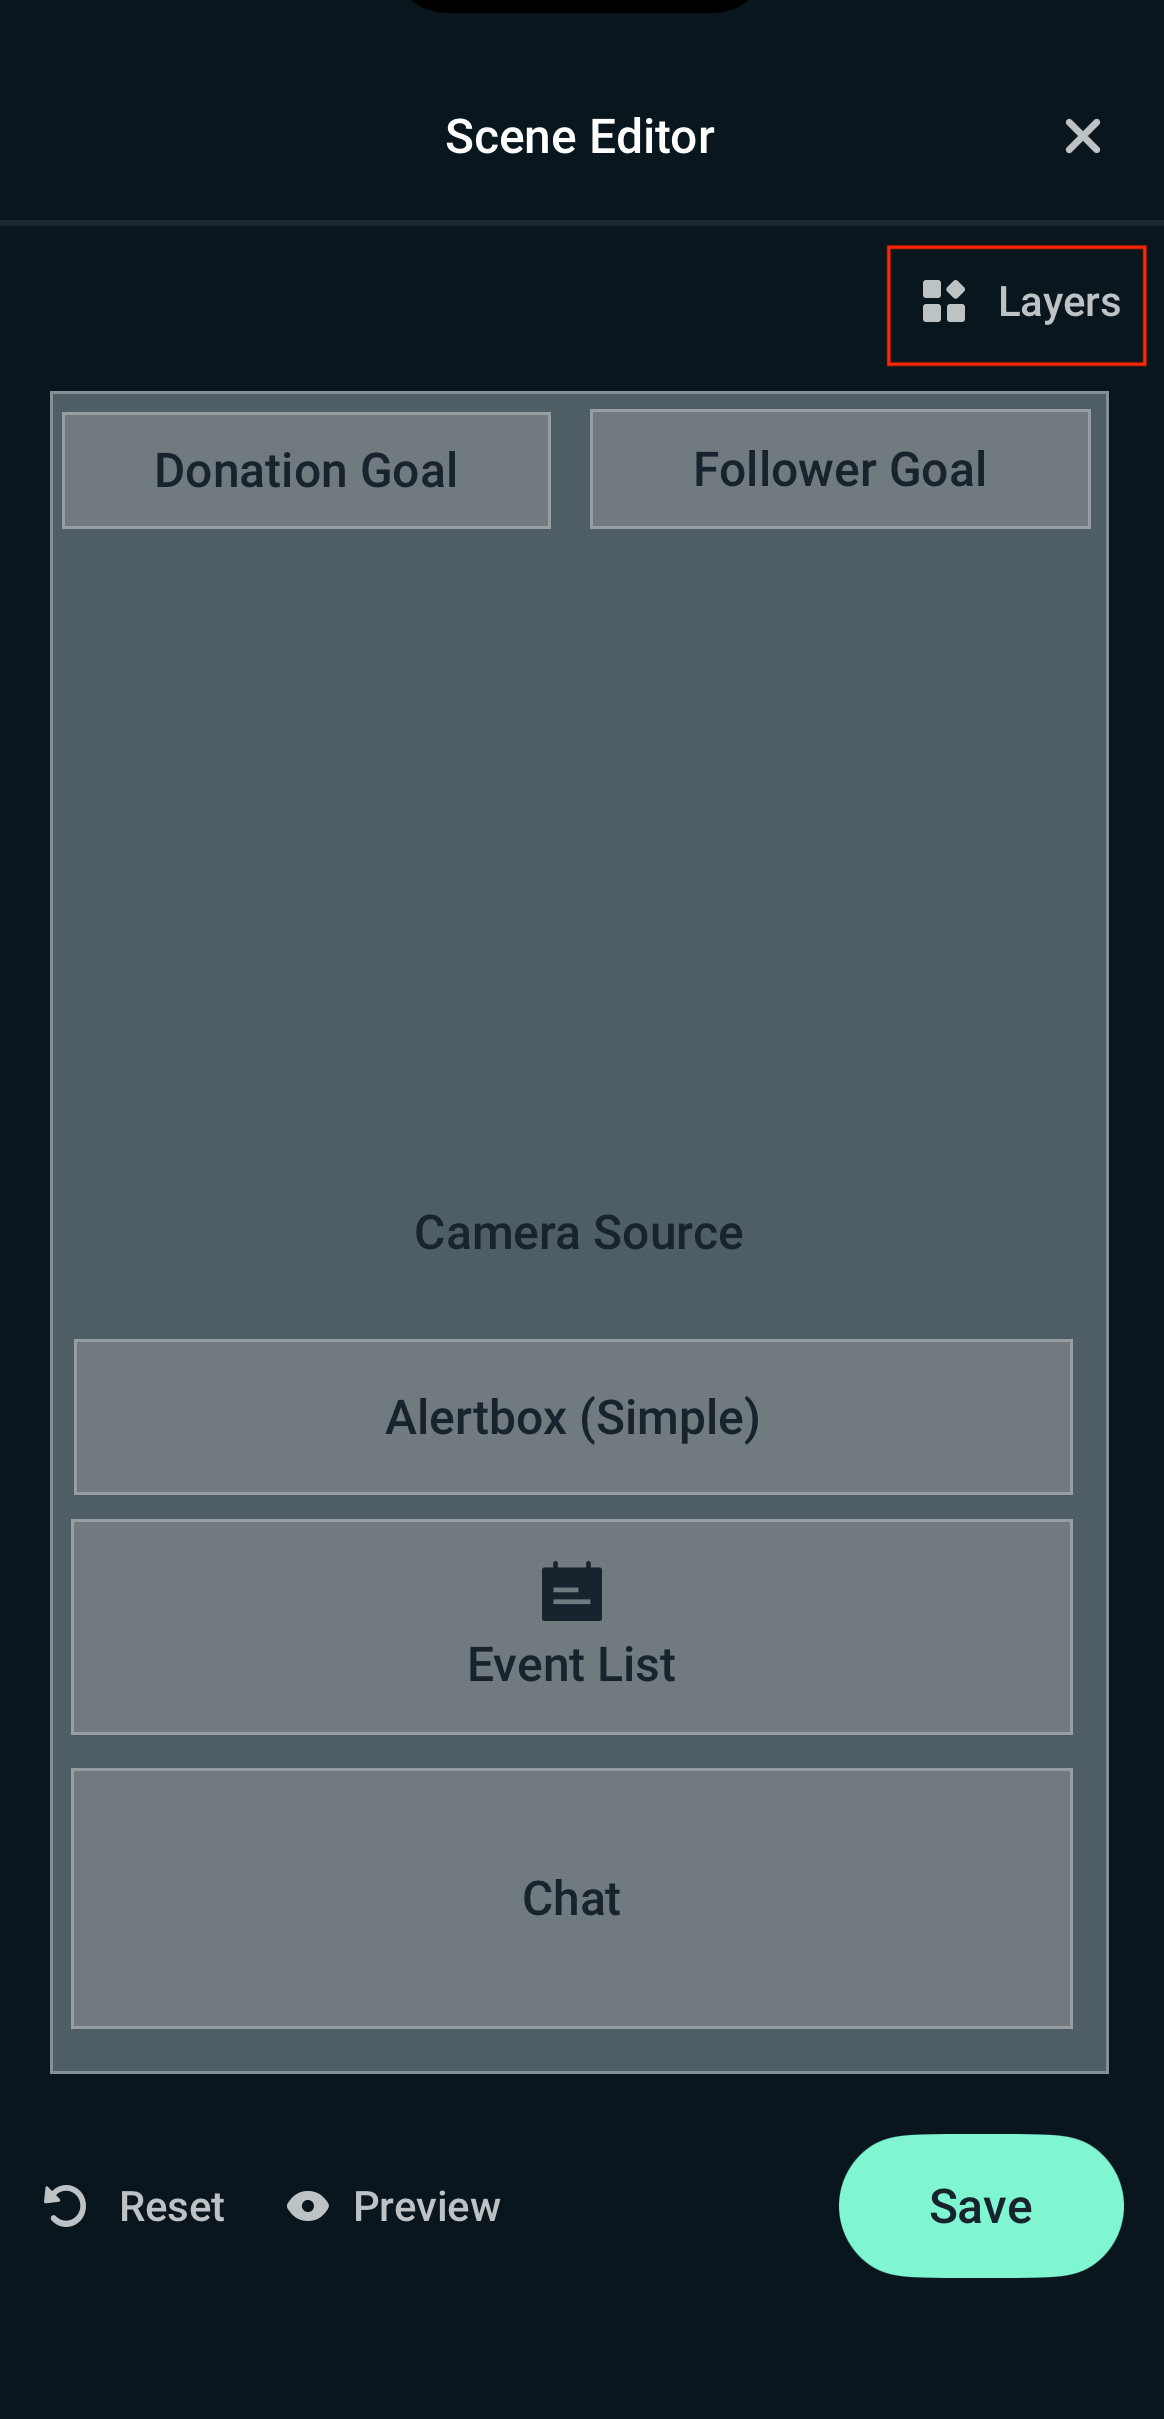
- Tap Layers to see and rearrange your active items.
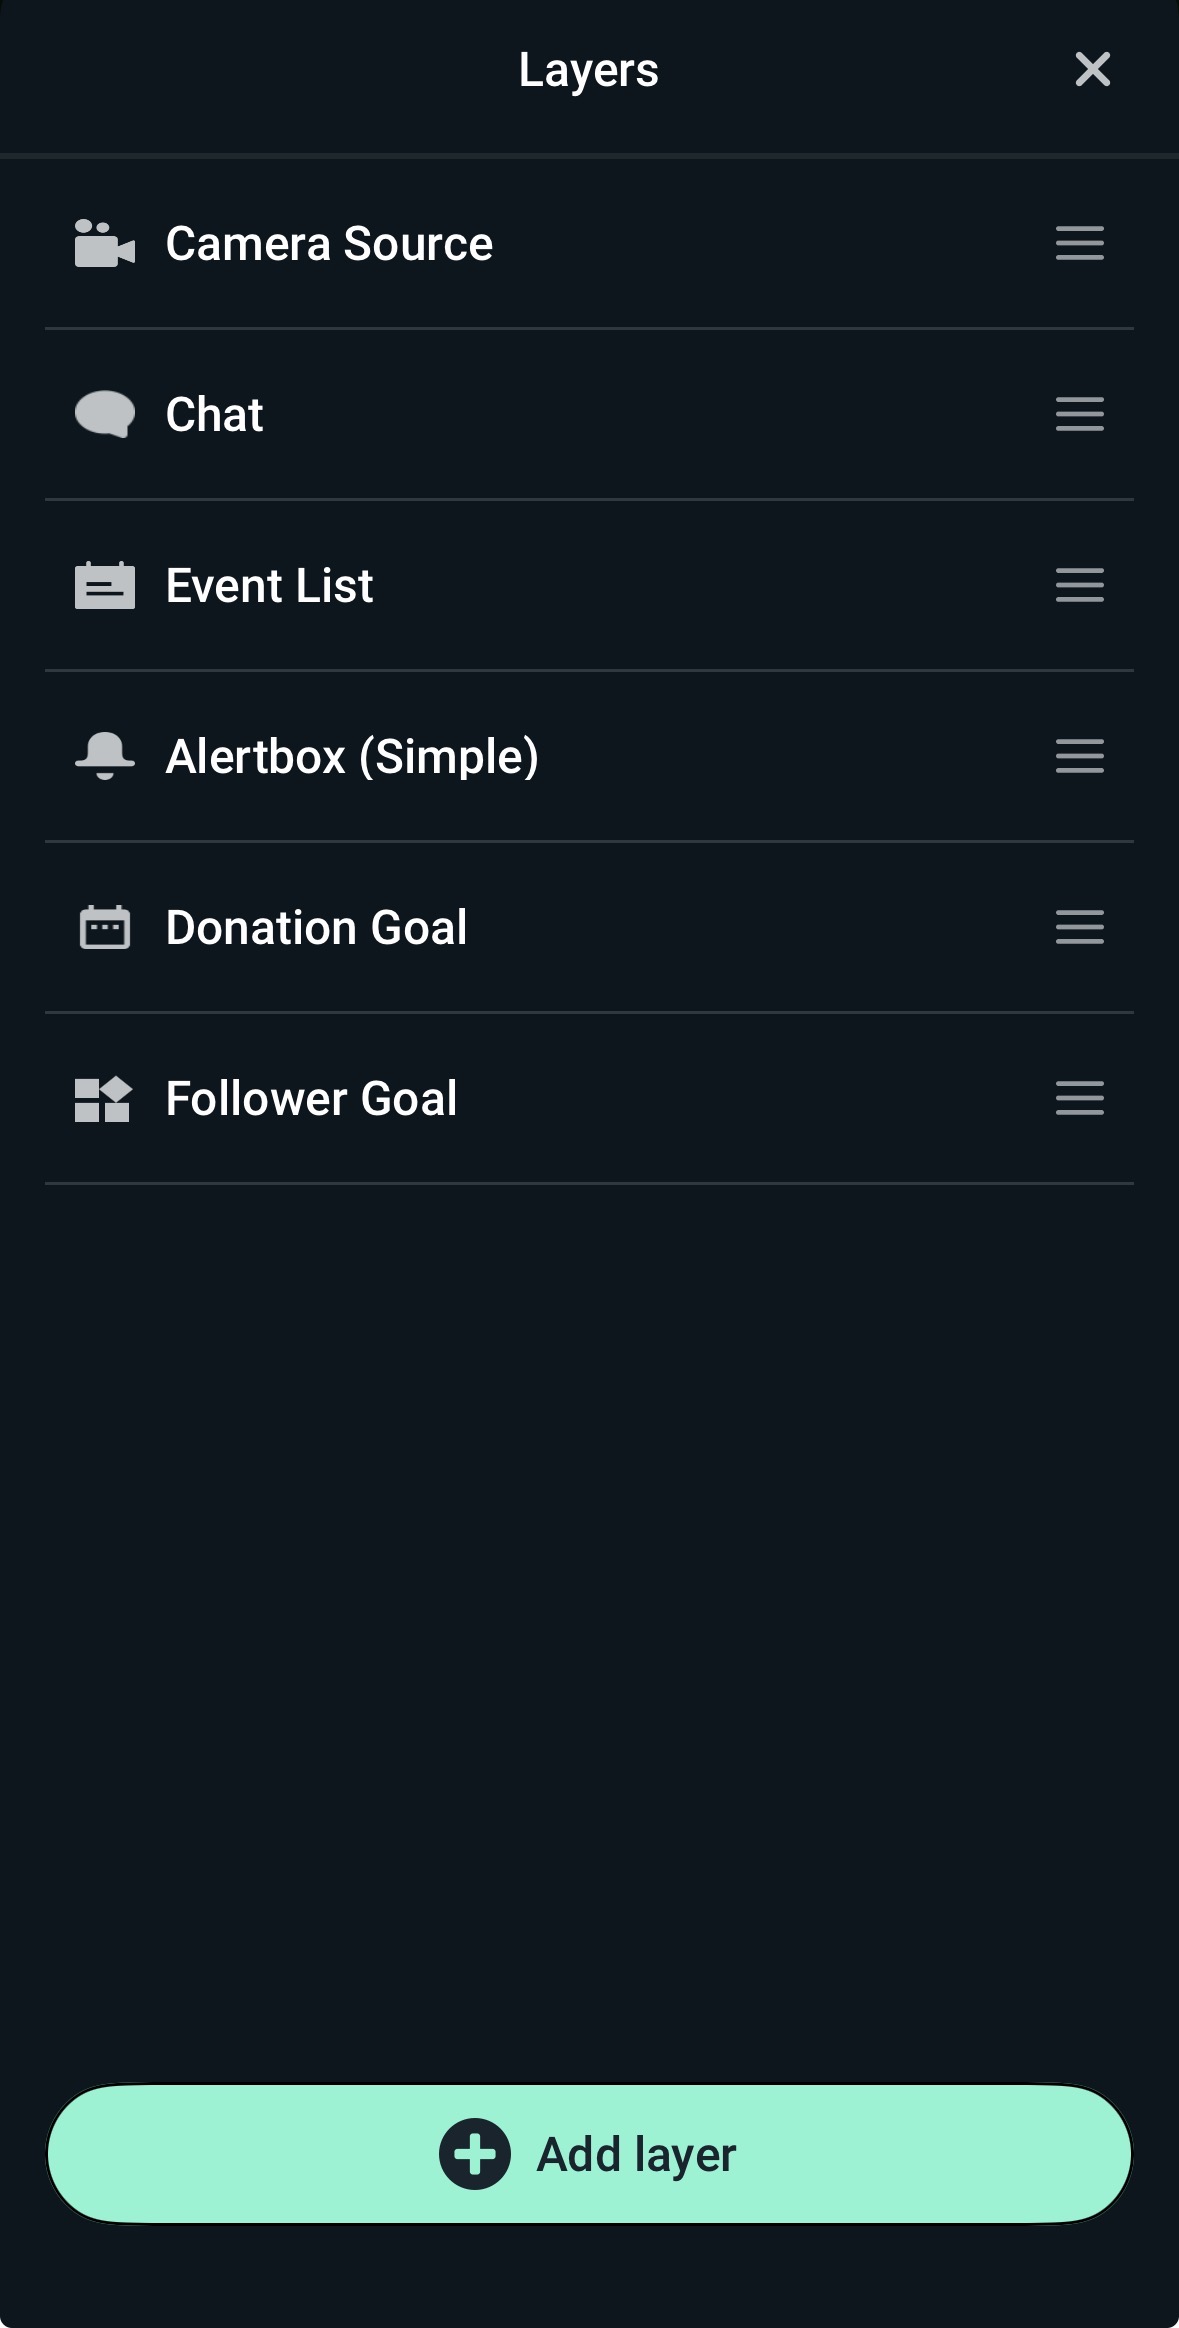
- Tap Add Layer to customize your layout with these elements:
- Camera: Adds your phone's built-in camera feed.
- Widget: Adds alerts, chat tracking, and stream event goals.
- Theme: Adds graphic overlays (requires a Streamlabs Ultra subscription).
- Guest: Adds a friend's video feed to your live mobile broadcast.
- Streamlabs Graphic / Stream Label: Adds text overlays like top donor names.
- Custom Item: Lets you paste web URLs, text, or local images.
- Reorder layers by dragging them up or down in the list. Items at the top will sit on top of items below them.
- Tap Preview in the bottom-left corner to test how your alerts look, then tap Save.
Step 4: Go live!
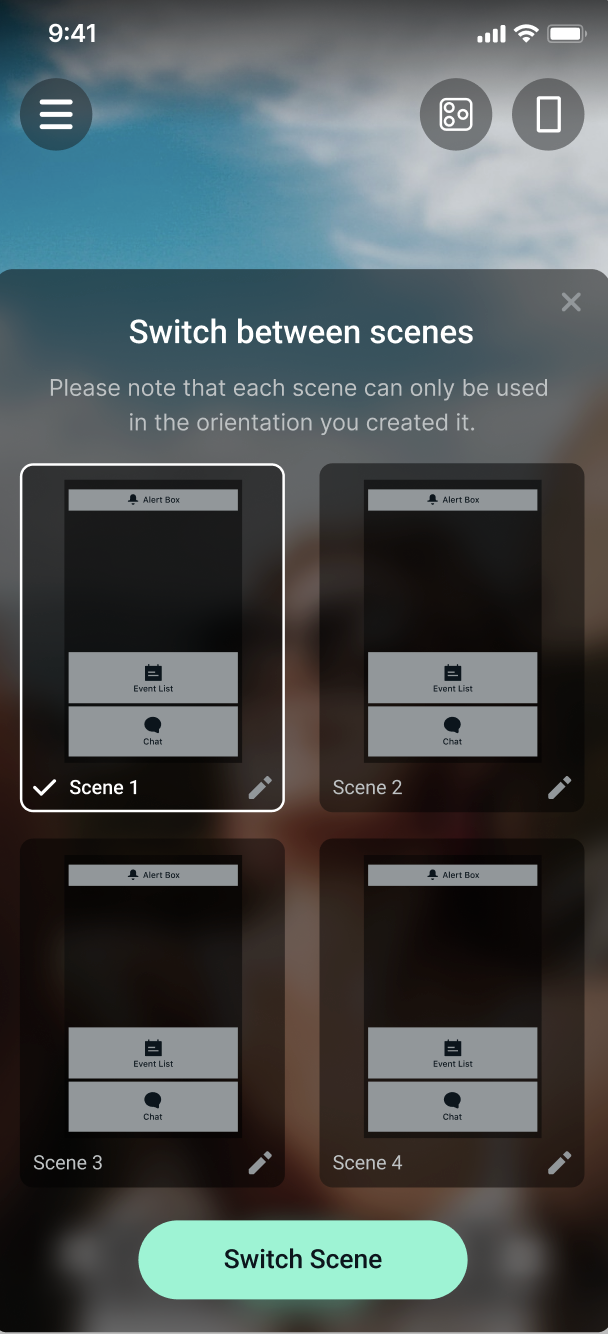
- Before going live, tap the phone icon (top right of your screen) to select the scene you want your viewers to see. You can also switch between scenes when you're live.
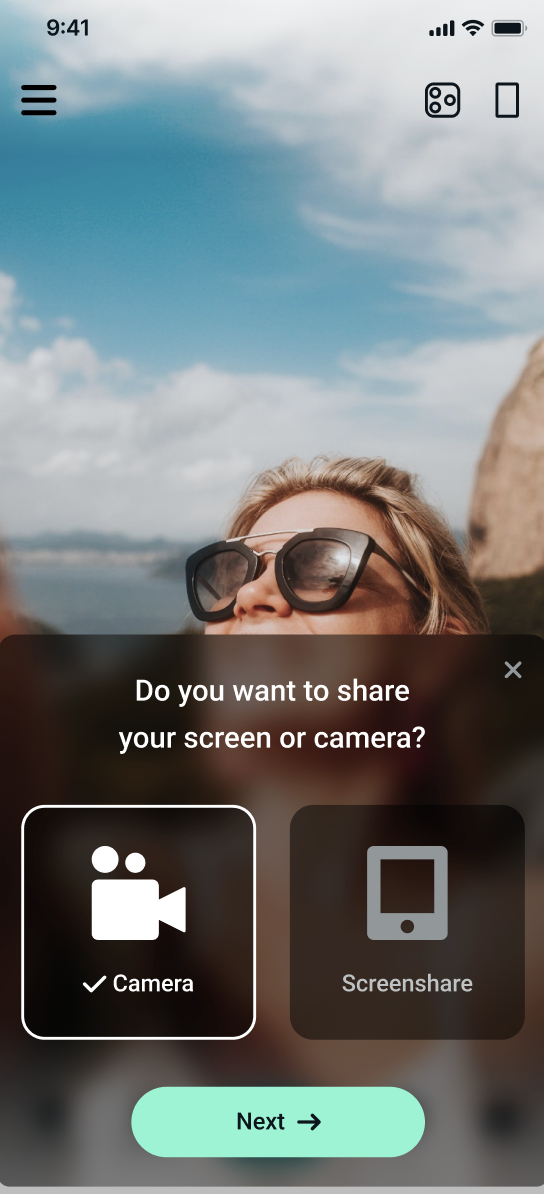
- Tap the main Go Live button and choose whether to stream your physical Camera or share your phone Screen.
- Choose Twitch as your platform.
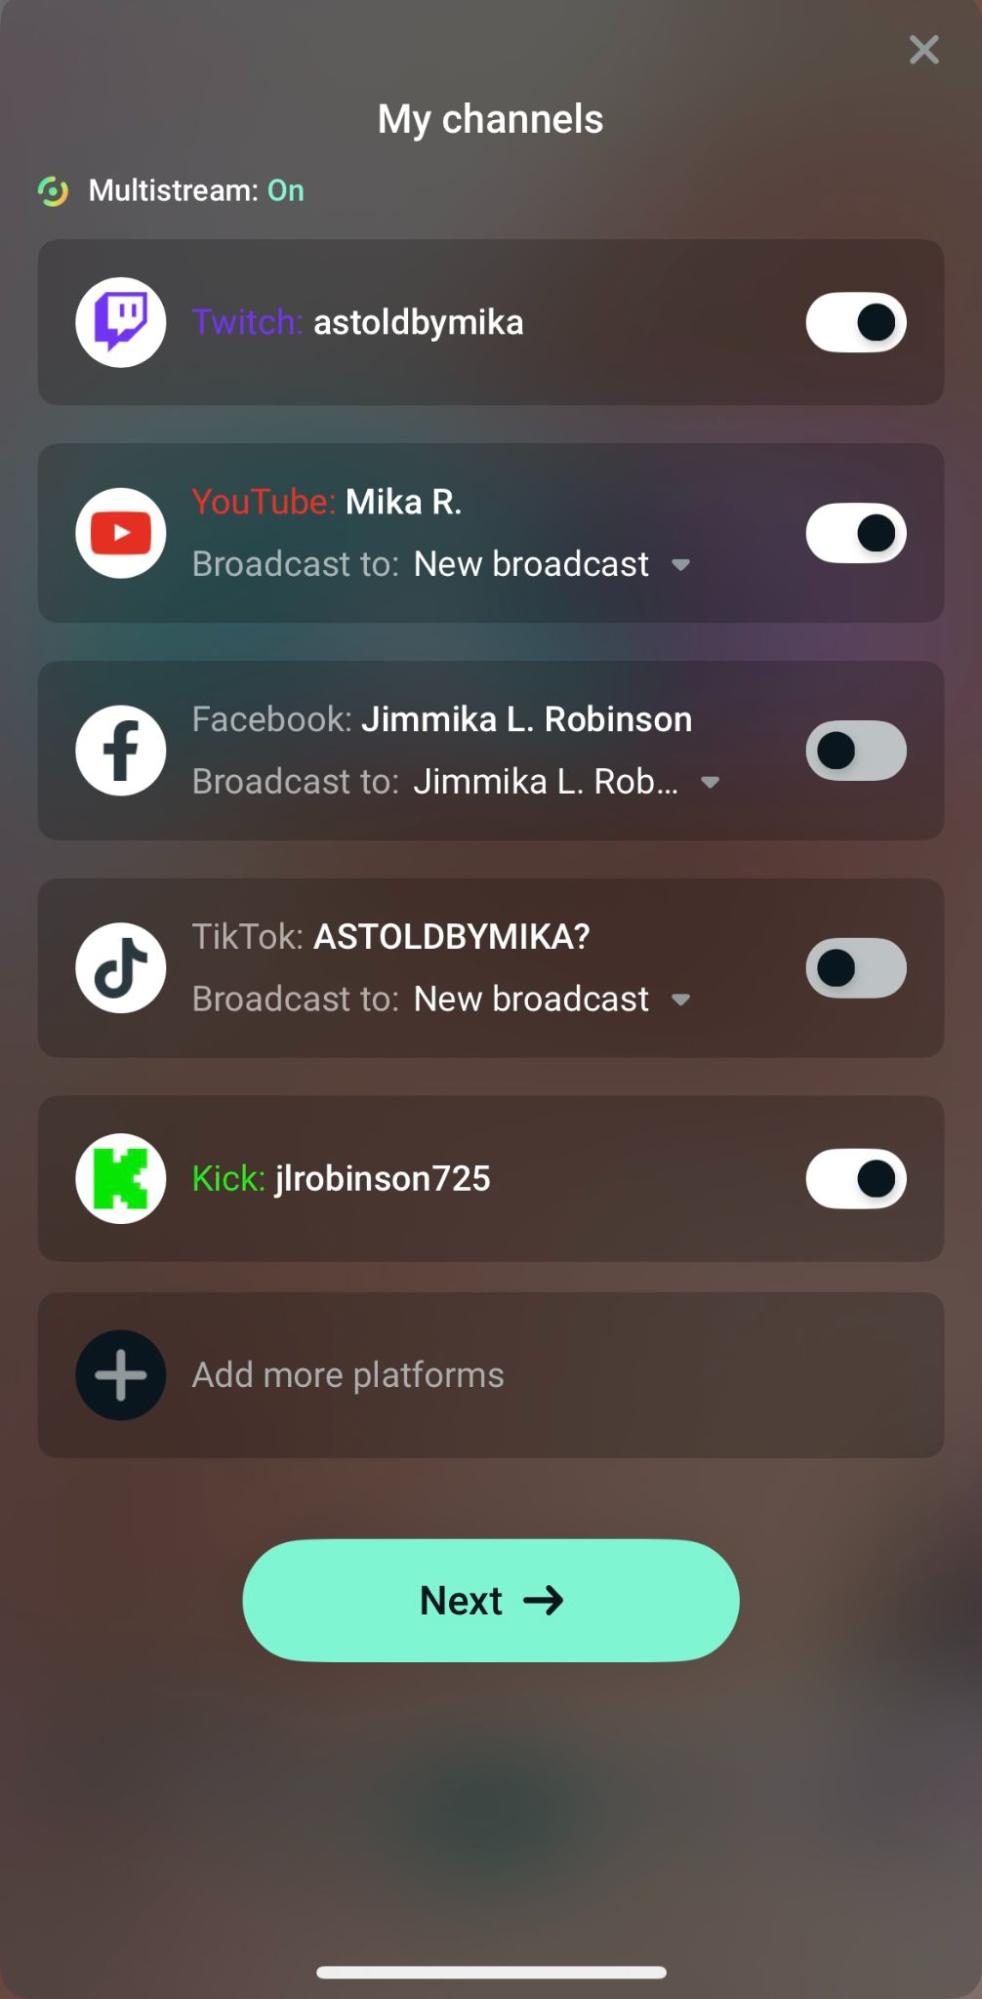
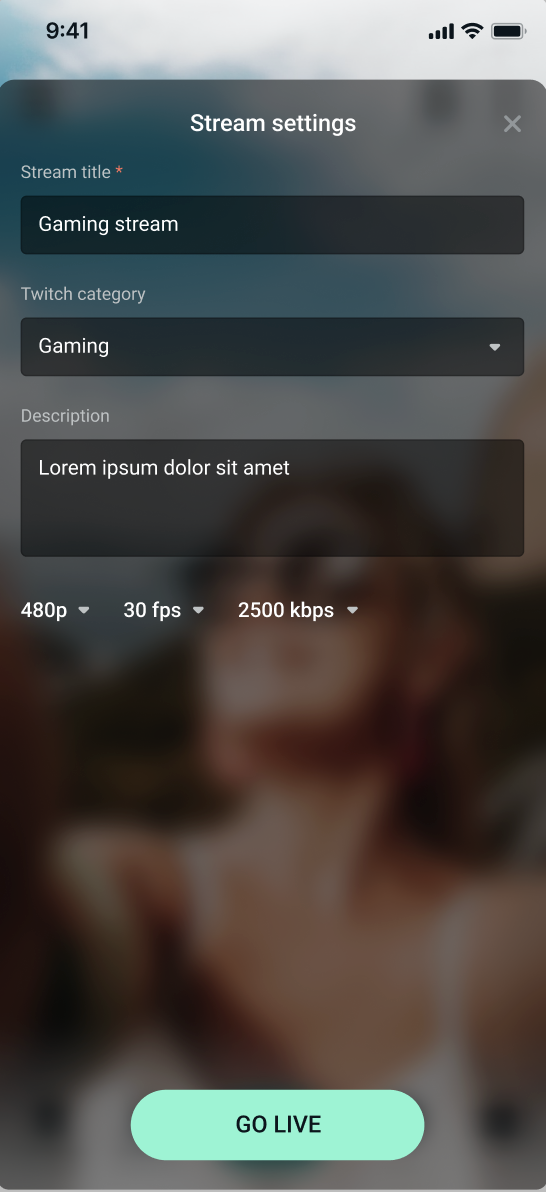
- Enter your video details: Title, Description, and Category.
- Pick your quality settings: video resolution, frames per second (FPS), and maximum bitrate.
- Tap Go Live to begin your broadcast.
Setup for Streamlabs Talk Studio
Step 1: Connect your Twitch account
- Open your internet browser and navigate to Streamlabs Talk Studio.
- Click Log in with Twitch and authorize the connection.
- Click Allow when your browser requests access to your microphone and camera.
Step 2: Set up your canvas
- Click Show on Stream in the left menu toolbar to place your webcam video onto the screen canvas.
- Use the right toolbar to style your video layout.
- To add alerts, click Apps > Widgets in the right sidebar. You can turn on the Alert Box, Tip Goal, Chat Box, or Cloudbot.
- Click, drag, and resize your widgets directly on the video editor preview window.
Step 3: Go live!
- Click Go Live on the bottom-right side of the web editor.
- Choose your connected Twitch account.
- Type in your stream Title, Description, and Category.
- Click Go Live to begin your broadcast.
Setup for Streamlabs Console
Step 1: Head to Streamlabs Console on your browser and login from either Desktop or Mobile.
Step 2: Connect your Twitch account
- Go to Stream Destinations.
- Link your Twitch account.
- Turn on the stream output for Twitch.
- Choose your layout (horizontal or vertical works for Twitch.)
- Use the Editor to set up your webcam, chat, and alerts.
Step 3: Set up your scenes.
- Select New Scene Collection to begin creating the horizontal/vertical layouts for your Xbox stream. Or click a scene to edit.
- Add transitions between scenes. They will be added to all scenes in the collection.
- Add different elements to your scenes called Components, such as an alert box, events list, chat box or image. You may also layer the components by dragging to match your desired order.
Note: On Mobile, click the arrow to get back to your scene collection, switch between scenes or change the transition between scenes. You'll be asked to save the current scene you're working on before being redirected.
Step 3: Go live!
- Start the game you want to play.
- Press the Xbox button on your controller to open the menu.
- Go to the Capture & Share menu. Select Live streaming.
- Log into your Twitch account.
- Once authenticated, you will see a menu where you can scroll to More options.
- Set the Destination to Streamlabs. You can also adjust other stream output and audio settings from this menu.
- Select Stream name to type in a title for your stream.
- Select Go live now. Once your stream starts, the menu items on your Xbox update to include Stop live stream and Pause live stream. Use these options as needed throughout your live stream.
Connect Paypal and Create a Streamlabs Tip Page
Setting up a Streamlabs tip page is one of the easiest ways to start earning an income from streaming. Setting up a tip page is entirely free and will never take a cut of the money you receive. Setting up your tip page only takes a few seconds, so let’s dive into it.
If you are logging into Streamlabs.com for the first time, the onboarding process will ask you to add your Paypal email address or other supported payment processors. Once you finish that step, your tip page is ready to go; this is the fastest way to set up your tip page, but if you’ve already logged in or skipped the onboarding, you can also set up your tip page from the settings. To do that:
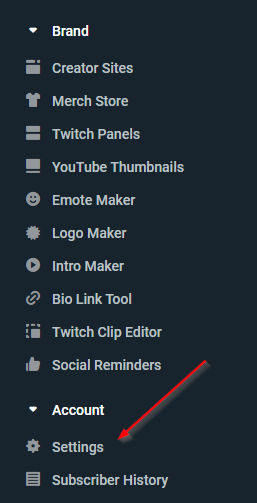
- Log in to the dashboard on Streamlabs.com. Click on ‘Settings’ in the lower left-hand corner.
2. Click on Donation Settings > Methods and choose your preferred Payment Processor.
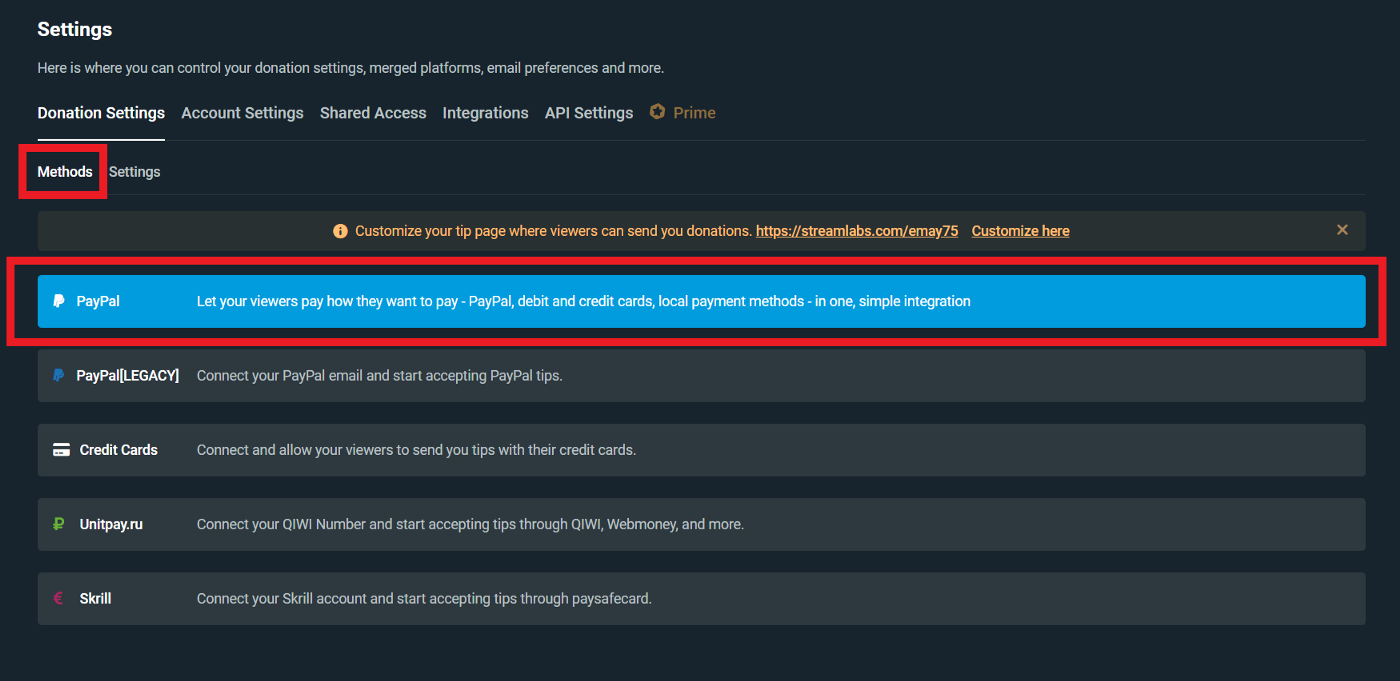
3. Go through the necessary steps to connect your account.
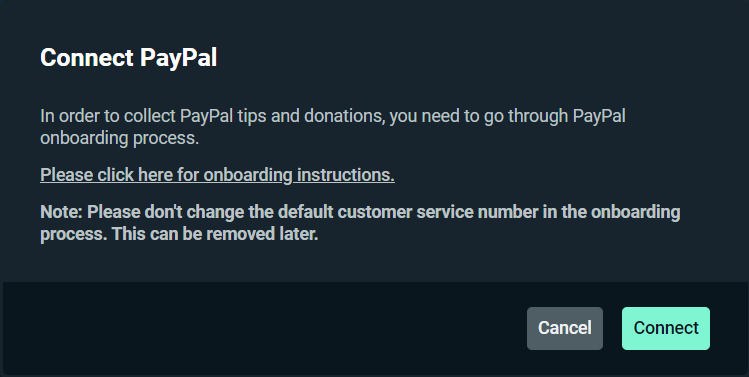
After your account is connected, your tip page will be available at Streamlabs.com/USERNAME.
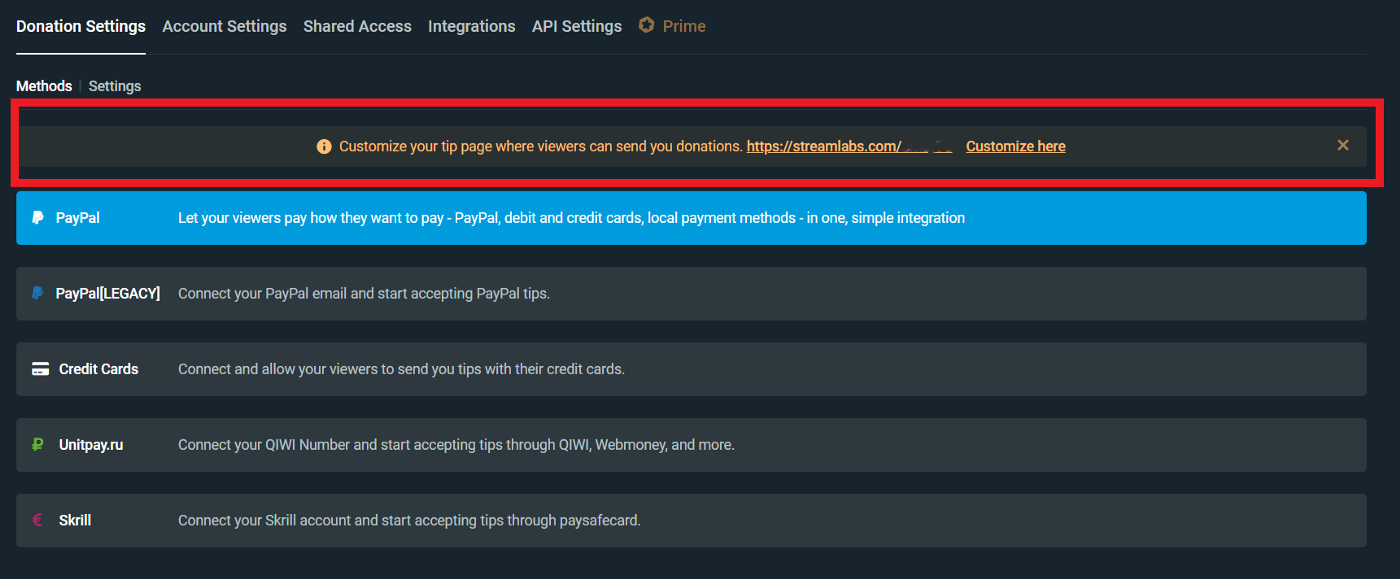
Manage Tip Page Settings
You can manage a range of tip page settings from the Streamlabs dashboard. Not based in the US? You can choose which currency you’d like donations to appear in. Set the minimum amount required to donate, and even adjust the recommended amount that appears for a user when they visit your tip page.
You can also edit the message that appears on your page when users visit, adjust profanity filters to block out offensive words, and even customize the image that appears as your donation page header.
Visit the dashboard to view all of the tip page settings.
Create a Consistent Brand
You may find that creating a unique look or aesthetic for your channel is a good way for people to remember you. The best ways to create a unique brand include:
- Social media
- Overlays
- Twitch Panels
- Alerts
Social Media
Your brand starts with social media. There are many social media platforms to choose from, but we recommend starting with TikTok and YouTube because they are most popular in the creator and gaming space. Start communicating with the world about your stream. Promote your social channels when you stream. Plug your handles when you are live. Include links in your about section. Social media acts as a way to amplify your reach when you stream and gives your community a place to interact with you.
Stream Overlays
Stream overlays make it easy to grab people's attention while showing off your personality and unique style.
There are over 250 free overlay themes available in the Streamlabs Library. You can also get access to thousands of stream overlays and alert box and widget themes designed by top artists in the industry like Nerd or Die, Visuals by Impulse, OWN3D, and more when you subscribe to Streamlabs Ultra.
Visit our theme library to browse all of the overlay assets available to you.
Twitch Panels
Panels help keep your brand cohesive and consistent throughout your channel. Panels provide viewers with links to important websites that you want them to see. This can be everything from your Twitter, Instagram, tip page, and anything in between.
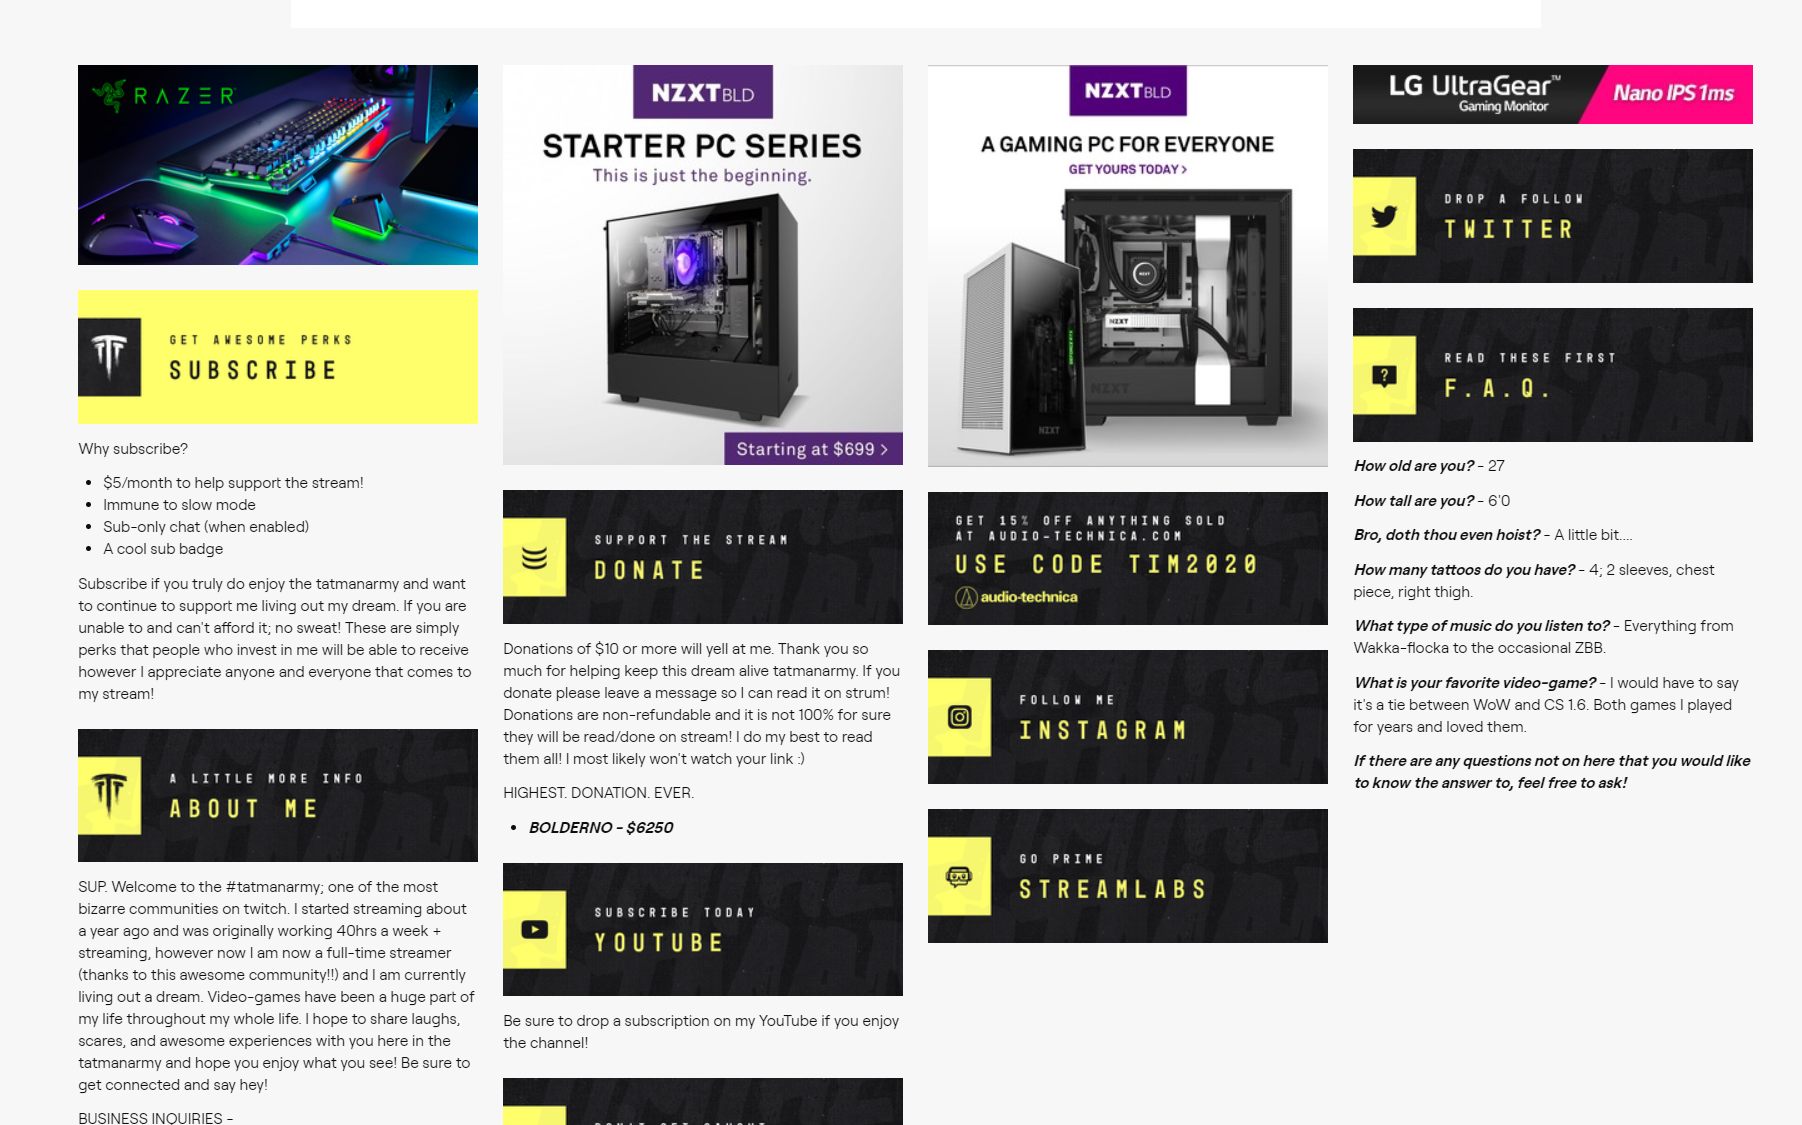
While not absolutely necessary for everyone, a professional-looking stream can encourage new viewers to stick around and drop a follow.
If you have skills in photoshop you can create Twitch panels yourselves. Or, you can use the free Streamlabs Twitch Panel Editor.
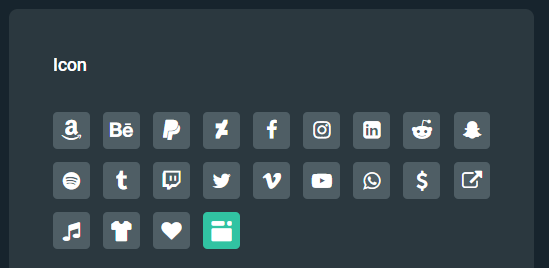
Our Twitch panels are professionally designed and come with over 50 different templates.
Each template comes with a panel for your donations, YouTube, Instagram, Twitter, merch store, and Creator Site.
Don’t see a panel for a website you want to promote? There are 20 different additional icons you can choose from to match the website or social media you want the panel to link to. Completely customize the font style, text, size, and position.
How to Add Live Stream Alerts
Having alerts is a crucial element of any live broadcast on Twitch and helps you stand out from the crowd, keep viewers coming back, and encourage others to interact with your live stream.
On-screen alerts are often your viewer’s first impression. We recommend spending time to make them unique and memorable.
Add an Alert Box Widget
The first thing you want to do is add an Alert Box widget to your live stream. Widgets are features you can add in Streamlabs Desktop and other streaming software to help you interact and engage with your community. You can check out all of the widgets we offer here.
Quick setup instructions for Streamlabs Desktop are below or you can check out our full guide to setting up stream alerts.
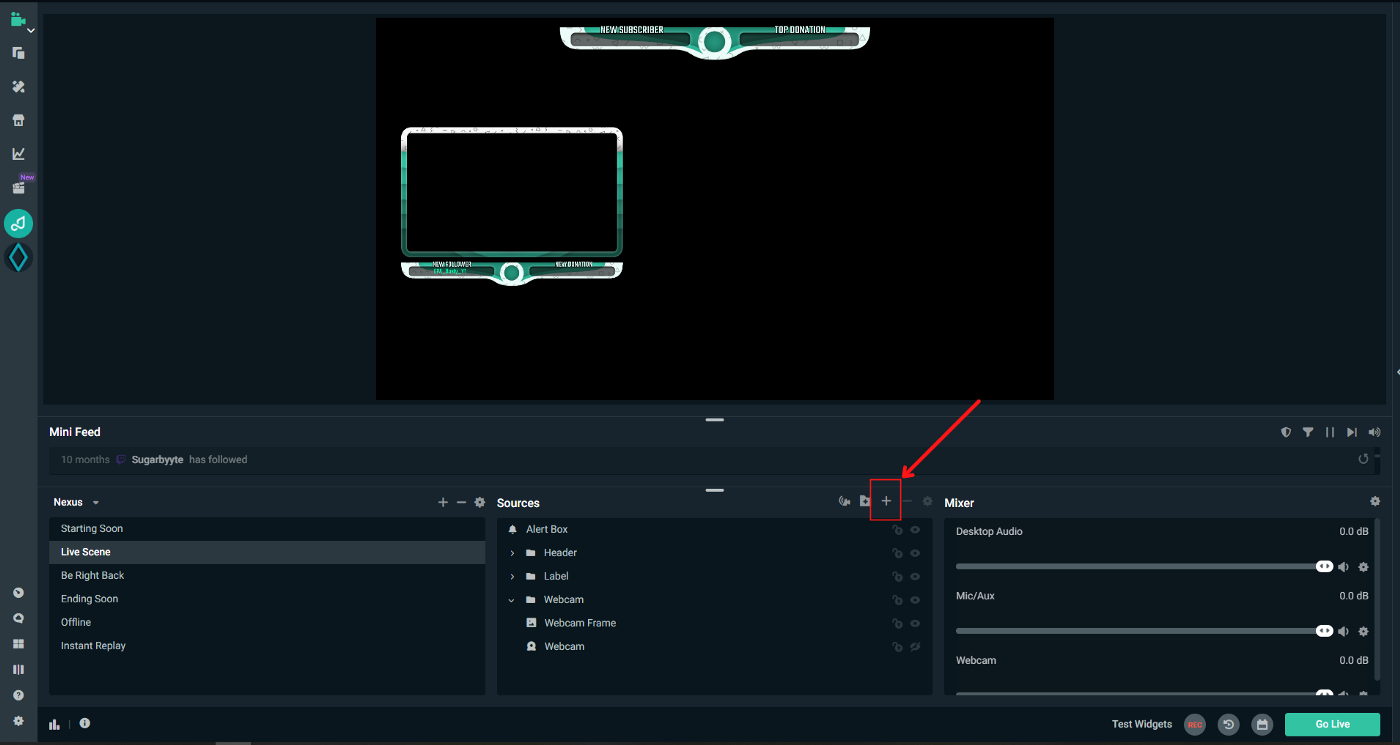
To add an Alert Box, press the plus sign in the Sources section of Streamlabs Desktop.
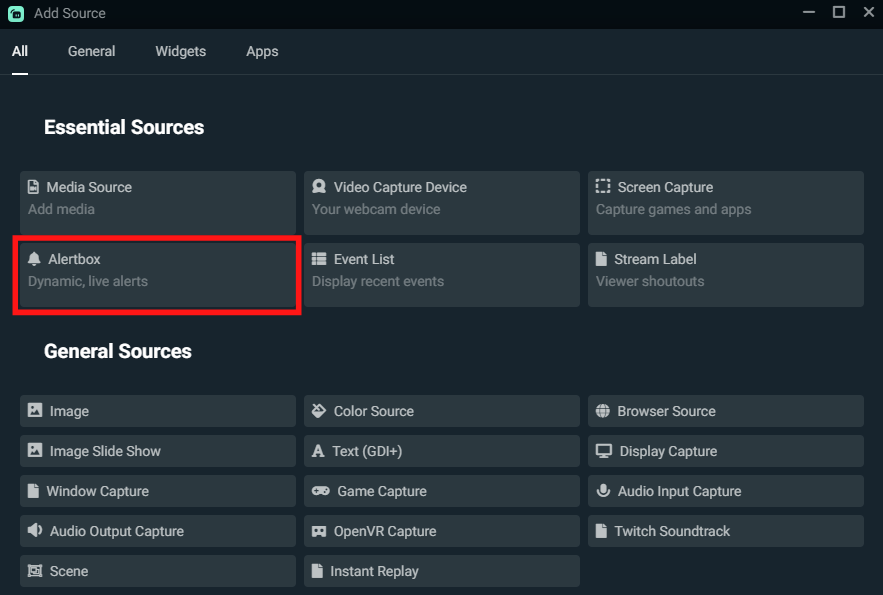
Now select Alert Box from the pop-up menu.
After you are done adding the source, viewers will see our default alert appear on the screen when you get a new subscriber, bit, follow, host, etc. You can take you alerts a step further by custmozing them with premade or custom themes, variations for different events, and more. Check out our guide for step-by-step instructions.
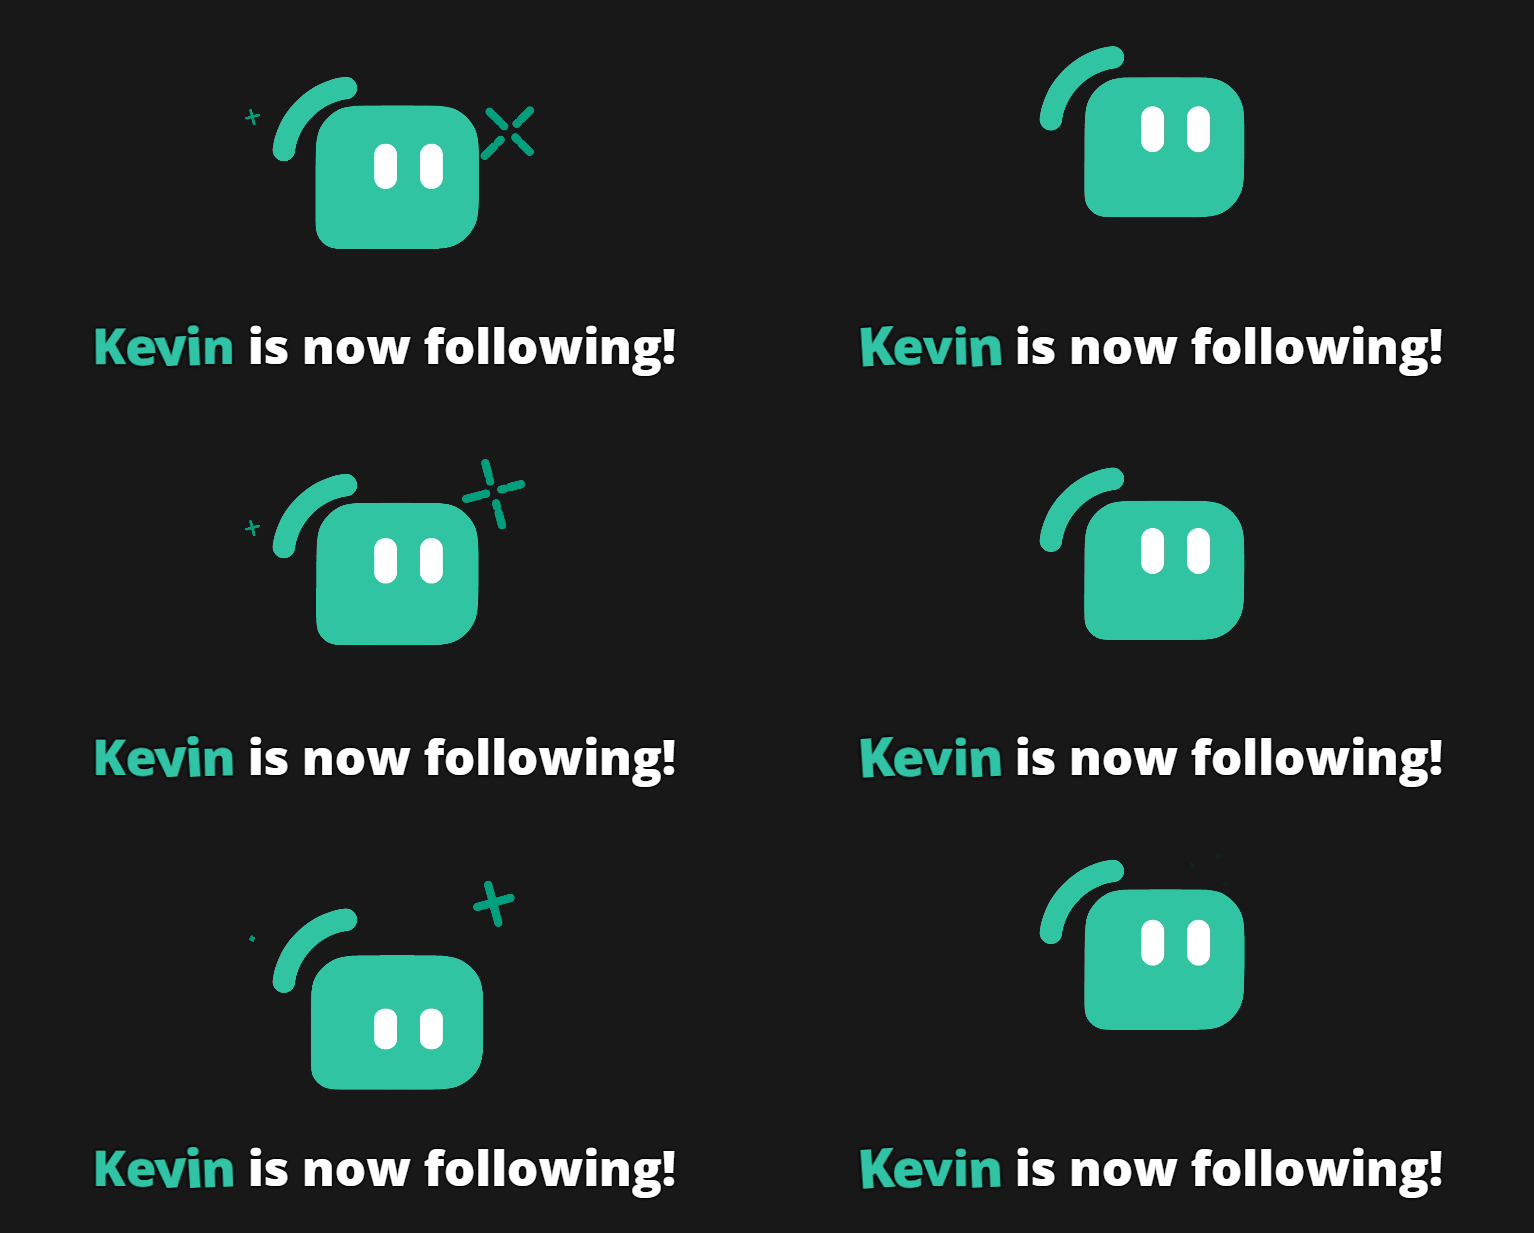
Use this opportunity to acknowledge your viewers for contributing to the stream. Recognition makes your viewers feel good and also encourages others to support you.
How to Get The Best Streaming Settings on Twitch
Having settings that are too high for your computer’s hardware can cause performance issues for your live stream. For new Twitch streamers, Streamlabs Desktop has an Auto Optimize feature that automatically scans your internet speed and computer hardware to give you our recommended settings. Access this feature by opening Streamlabs Desktop, navigating to Settings > General. It’s a fantastic way to jump right in without having to mess with the finer details.
If you are more technically savvy, you can adjust settings within Streamlabs Desktop to help ensure optimal quality.
Quality and Resolution
The output of your video resolution can have a significant impact on the quality of your live stream and the performance of Streamlabs Desktop. For example, streaming at 1080p vs 720p will double the number of pixels, meaning your computer will be using more resources.
To adjust your resolution, select “Video” from the side panel in the setting window.
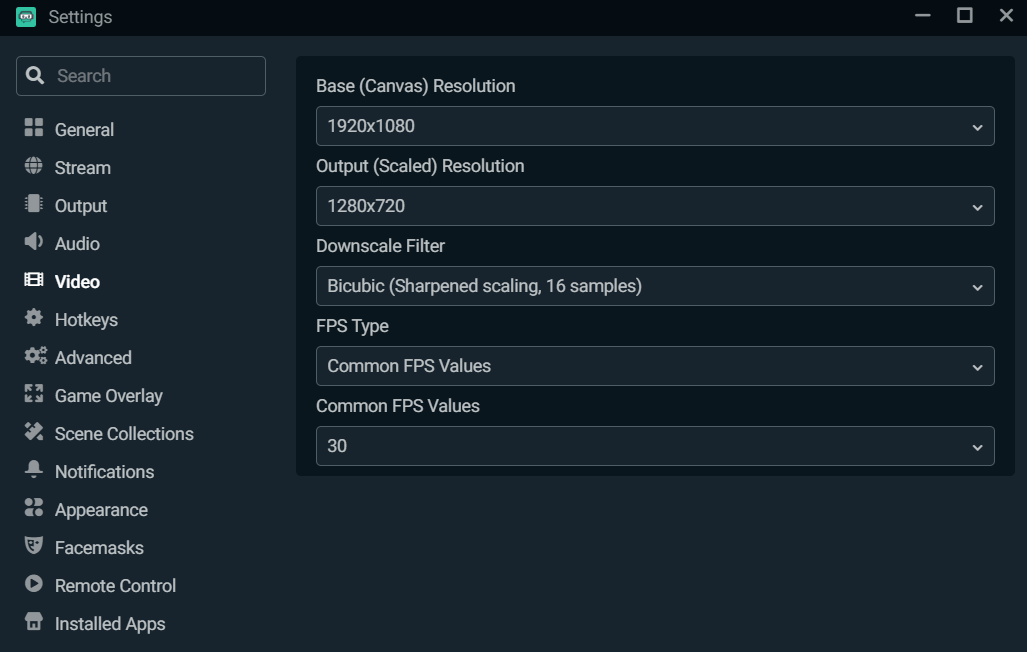
You can leave the base (canvas) resolution as your computer's native resolution. We recommended lowering the Output (Scaled) Resolution since streaming in 1080p can have a significant impact on your CPU. We recommend lowering the Output (Scaled) Resolution to 1280x720 for a good balance between performance and quality.
Choose your Encoder
When it comes to encoders, there are two types: software (x264) and hardware (NVENC). The software encoder (x264) will use your CPU to encode video, while hardware encoders like NVENC utilize a dedicated encoder in the GPU, allowing you to play and stream without compromising game performance. If you are using an NVIDIA graphics card we recommend you stream with NVENC.
Change the CPU Usage Preset
To change the CPU usage preset, navigate to “Output” in the settings window.
x264 offers a range of usage preset. This refers to how fast the CPU encodes video. The faster it encodes, the less CPU it uses. By default, this is set to “Very Fast”, which provides the best balance between performance and quality.
NVENC presets range from low-latency, optimal performance, and max quality. We recommend starting with the “Quality” preset and experimenting from there to find what works best for you.
Enable Dynamic Bitrate
In a recent update to Streamlabs Desktop, we included a feature called Dynamic Bitrate. This feature allows our software to automatically adjusts your bitrate based on network conditions to prevent dropping frames.
If you’re computer and internet speed can’t handle the bitrate you’ve set, you may experience dropped frames to improve the stability of your stream and minimize latency.
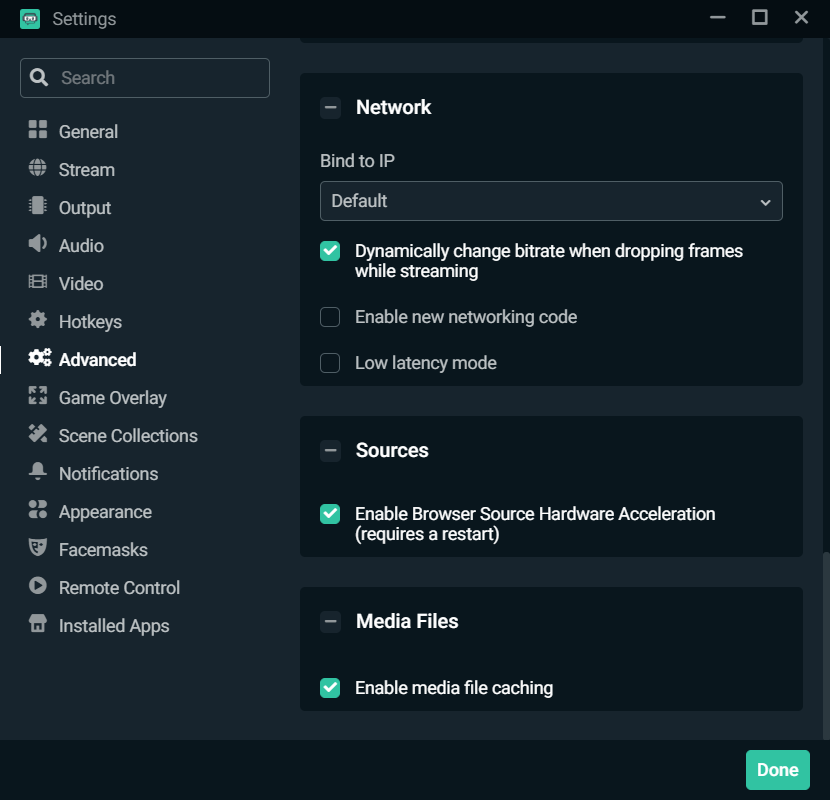
To enable Dynamic Bitrate, navigate to the settings window, and click “Advanced.” Scroll down and toggle the box next to the option that says “Dynamically change bitrate when dropping frames while streaming”.
Edit Bitrate Manually
You can also manually edit your bitrate. Below is Twitch’s own recommend specs for NVIDIA NVENC depending on the resolution and fps you’d like to achieve.
1080p 60fps
- Resolution: 1920x1080
- Bitrate: 6000 kbps
- Rate Control: CBR
- Framerate: 60 or 50 fps
- Keyframe Interval: 2 seconds
- Preset: Quality
- B-frames: 2
1080p 30fps
- Resolution: 1920x1080
- Bitrate: 4500 kbps
- Rate Control: CBR
- Framerate: 25 or 30 fps
- Keyframe Interval: 2 seconds
- Preset: Quality
- B-frames: 2
720p 60fps
- Resolution: 1280x720
- Bitrate: 4500 kbps
- Rate Control: CBR
- Framerate: 60 or 50 fps
- Keyframe Interval: 2 seconds
- Preset: Quality
- B-frames: 2
720p 30fps
- Resolution: 1280x720
- Bitrate: 3000 kbps
- Rate Control: CBR
- Framerate: 25 or 30 fps
- Keyframe Interval: 2 seconds
- Preset: Quality
- B-frames: 2
Please remember, everybody’s setup is going to be different so make sure to play around with the settings yourself to find out what works best for you.
Advanced Features
Here are more advanced features, information and in-depth guides to building out your Twitch stream across Desktop, Plugin for OBS, Mobile, Talk Studio, or Console.
Streamlabs Desktop
- Ultimate Guide to Multistreaming
- Multistream on Mobile
- Tips for Troubleshooting Multistreaming on Desktop
- Multistream with Console
Monetization
Explore Engaging Tools to Keep Stream Exciting
- Learn about Stream Shift
- Setup Intelligent Streaming Agent
- Learn about the Game Pulse Widget
- Use Highlighter to automatically clip your streams
FAQ
What do you need to start streaming on Twitch?
You need a Twitch account with two-factor authentication enabled, your choice of Streamlabs software, and a stable internet connection with sufficient upload speed. A computer capable of running your content while encoding video is essential, and most streamers add a microphone and webcam to enhance their broadcasts.
Is streaming to Twitch from Streamlabs tools free?
Yes, streaming to Twitch is completely free. Creating a Twitch account costs nothing, and you can stream using Desktop, Plugin for OBS, Talk Studio, or the Mobile app for free. Console does require a subscription to stream, and you can access even more features like multistream, Highlighter, Reactive overlays and more if you upgrade to Streamlabs Ultra, but it is not necessary to begin your streaming journey.
What is the best streaming software for Twitch?
Streamlabs Desktop is the best streaming software for beginners due to its integrated features, auto-optimization, and one-click Twitch connection. Our Plugin for OBS Studio is an excellent alternative for users who prefer the OBS Studio interface. Both applications produce identical stream quality and support all standard Twitch features, so the choice depends on whether you prefer guided setup or maximum customization. If you don't want to download any software, we'd recommend our browser-based platform Talk Studio. If you're a mobile streamer, our Streamlabs Mobile app will be best for you.
Can you stream to Twitch and other platforms at the same time?
Yes, you can multistream to Twitch, YouTube, and Kick simultaneously with a Streamlabs Ultra subscription. This broadcasts your single stream to multiple platforms without requiring additional bandwidth per platform.
Where can you check your Twitch stream stats and performance?
Access your stream statistics in the Streamlabs Dashboard under the "Analytics" section. After each broadcast, we provide stream summaries.
Q: Where can I find overlays and themes for my stream?
A: Browse free and premium themes in our Theme Library. We have many free themes, and you can get access to the entire library, including exciting dynamic options like Reactive Overlays, when you subscribe to Streamlabs Ultra.
Q: How do I stream vertically and horizontally to Twitch?
A: You can enable Dual Output and take advantage of the new Dual Format Twitch feature by streaming one vertical and one horizontal canvas for free. Check out our guide here for more detailed layout setup instructions.
If you have any questions or comments, please let us know. Remember to follow us on Twitter, Facebook, Instagram, and YouTube. Download Streamlabs Desktop.