

Alerts are sounds and messages that pop up on your screen when you stream. Creators use them to celebrate events like a new follow or subscription. This guide will teach you how to get your alerts set up quickly as well as dive into more advanced customization and troubleshooting topics.
Table of Contents
Quick Setup Guide
Before You Start: Link Your Channels
If you stream on multiple platforms like Twitch, YouTube, or Kick, you can link them all together. We highly recommend creating a Streamlabs ID to combine your accounts. If you need help creating a Streamlabs ID, check out our step-by-step guide on how to set up your Streamlabs ID here. Here’s how to merge your accounts:
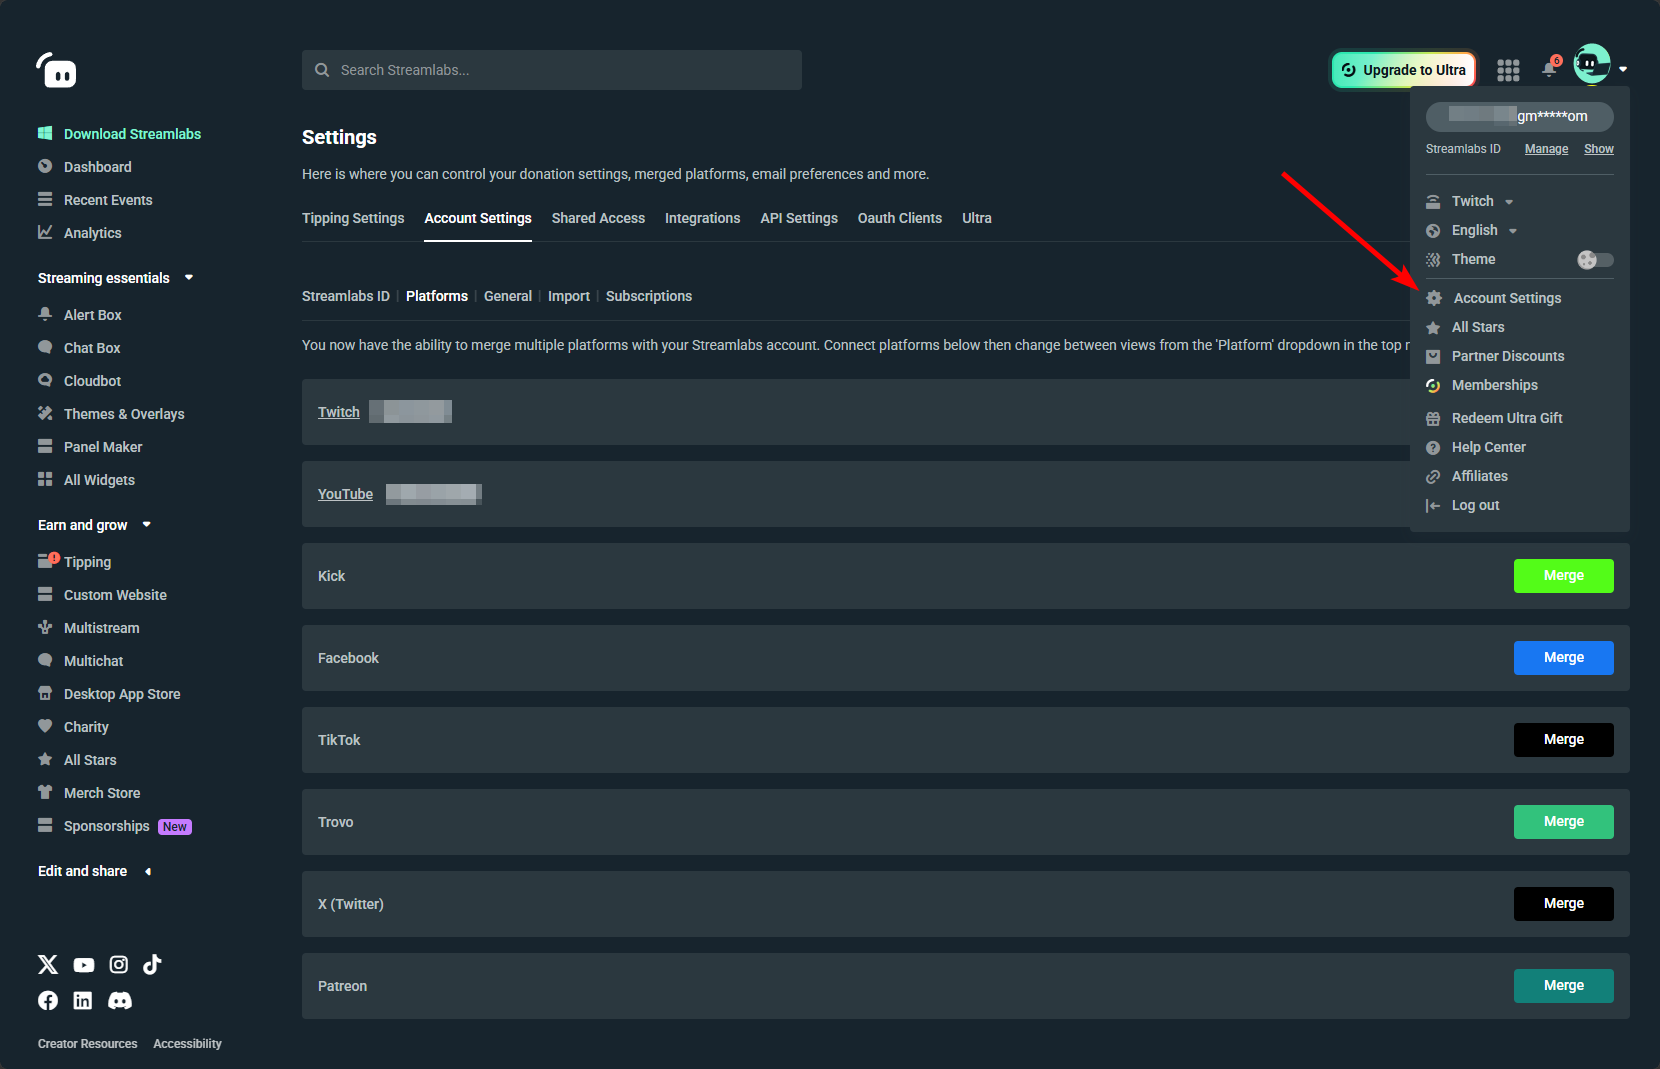
- Log into streamlabs.com.
- Click the arrow next to your profile picture in the top right corner.
- Click Account Settings.
- Click the Platforms tab on the left menu.
- Find the platform you want to add and click the Merge button next to it.
Step 1: Find Your Alert Settings
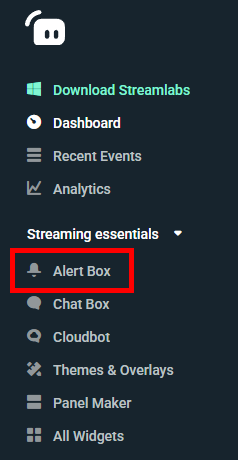
- On the left side, find Streaming essentials.
- Click Alert Box.
Step 2: General Settings
This is where you can control how alerts work overall.
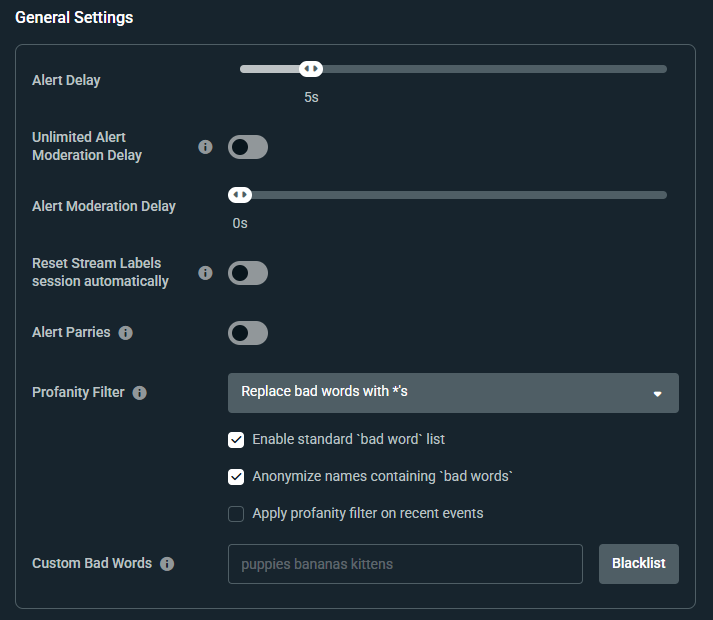
- Alert Delay: Pick how many seconds to wait before the alert shows up. We recommend between 2-5 seconds.
- Moderation Settings: You can turn on Alert Moderation to approve alerts before they appear on stream. The difference between Unlimited and regular is that with Unlimited you have as much time as you want to approve, while regular requires approval within a certain timeframe or the alert won't appear.
- Reset Stream Labels session automatically: Choose whether you want your Stream Labels session to reset a few minutes after you go live. Requires an Alert Box source to be added to your stream. You can learn more about Stream Labels in our guide.
- Alert Parries: Set whether a new alert interrupts the alert currently on screen.
- Profanity Filter: This blocks "bad words" from appearing in your alerts.
- Custom Bad Words: You can type in your own list of words to block.
Step 3: Fast Design (Global Editing)
The Global Editing tab lets you give all of your alerts the same look at the same time. You can still change individual alerts later if you want to.
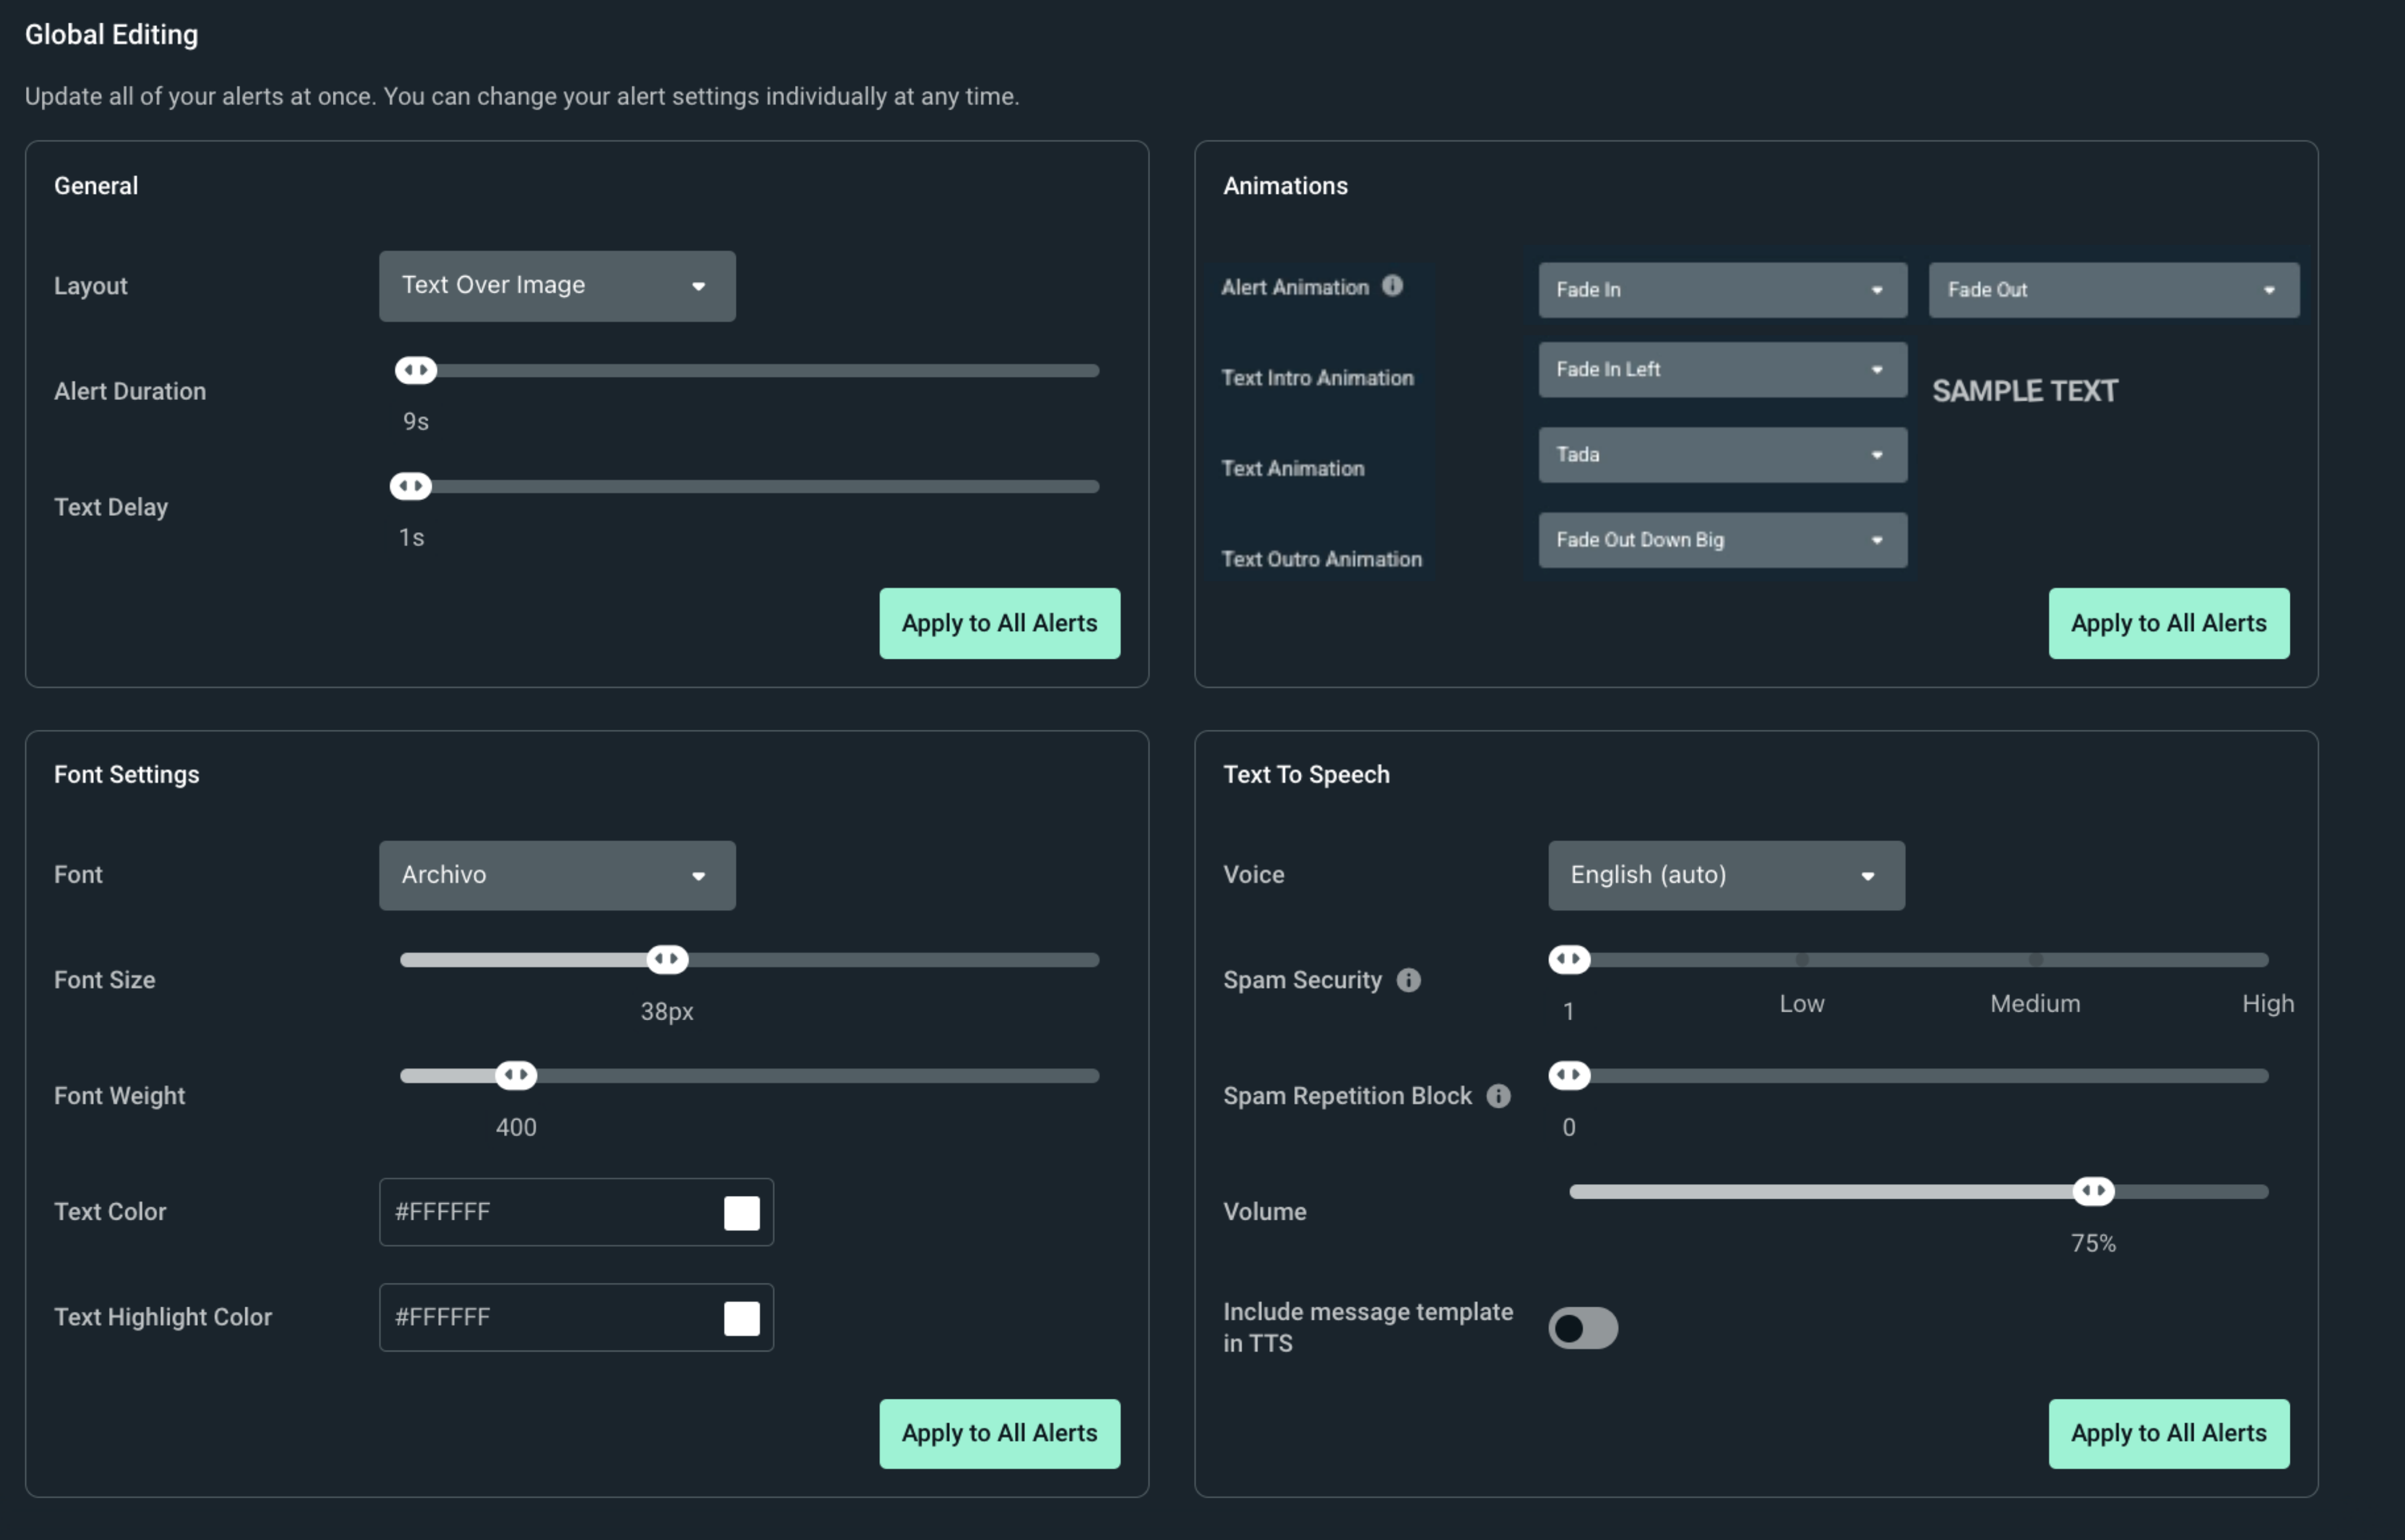
- Layout: Choose if the text goes over, under, or next to your image.
- Alert Duration: Choose how long your alert stays on your stream.
- Text Delay: Choose how long it takes for alert text to appear after an alert starts playing.
- Text and Alert Animations: Pick how the alert and the text moves onto and off of the screen. You can also animate the text while onscreen.
- Font Settings: Change the size, color, and style of your text.
- Text to Speech: Set a voice to read alerts out loud including spam protection mechanisms.
Step 4: Customize Specific Alerts & Variations
Once your general look is set, you can customize individual events like Twitch Follows. You can change everything from the look of your images and GIFs to the sounds, fonts, and more.
Select Your Platform and Event
All of your linked platforms will show in the left navigation panel of the Alert Box settings. Click a platform (like Twitch) and pick an event (like Follows) to start customizing it.
.png)
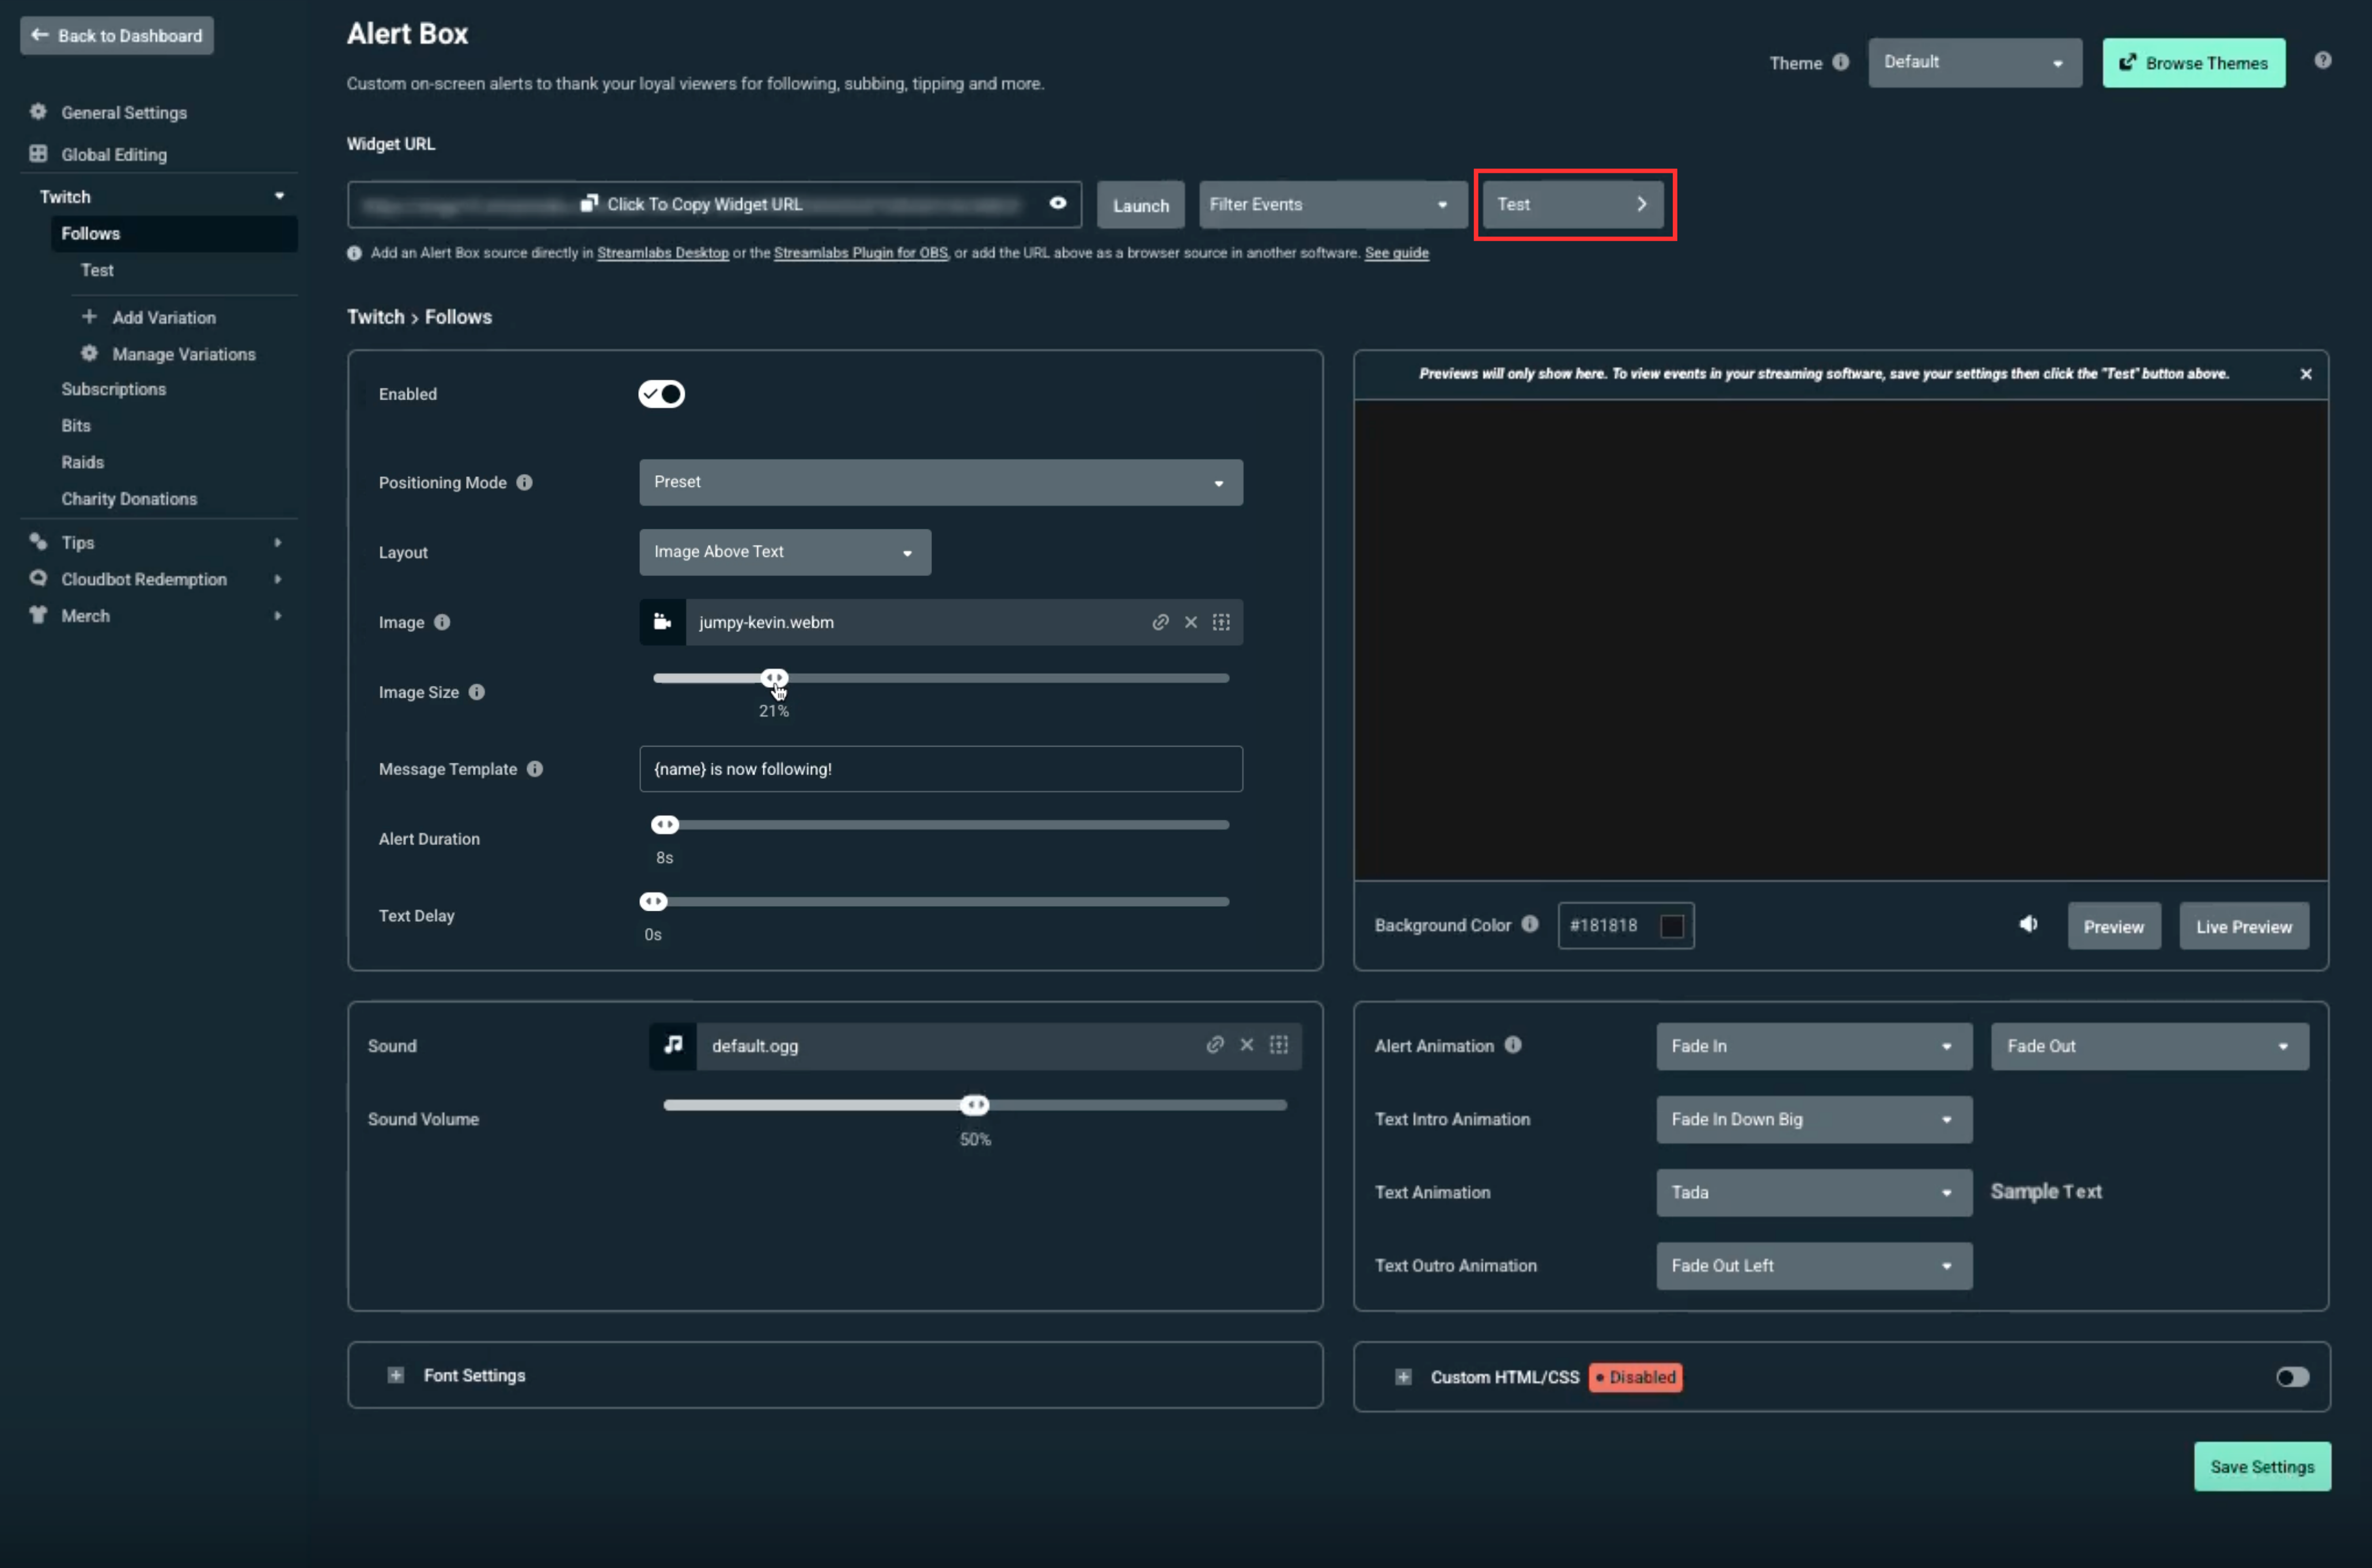
Customization Options
- Enable/Disable: If you don't want an alert to show for a specific event type, disable with the toggle.
- Image and Text Positioning: Choose between preset or manual positioning to customize image and text offsets.
- Preset Mode: Keep the setting on Preset to choose from a list of pre-made layouts. This lets you quickly place your text below, over, or next to your image.
- Manual Mode: Switch the setting to Manual if you want to use sliders. This lets you slide your text and image to the exact spot you want.
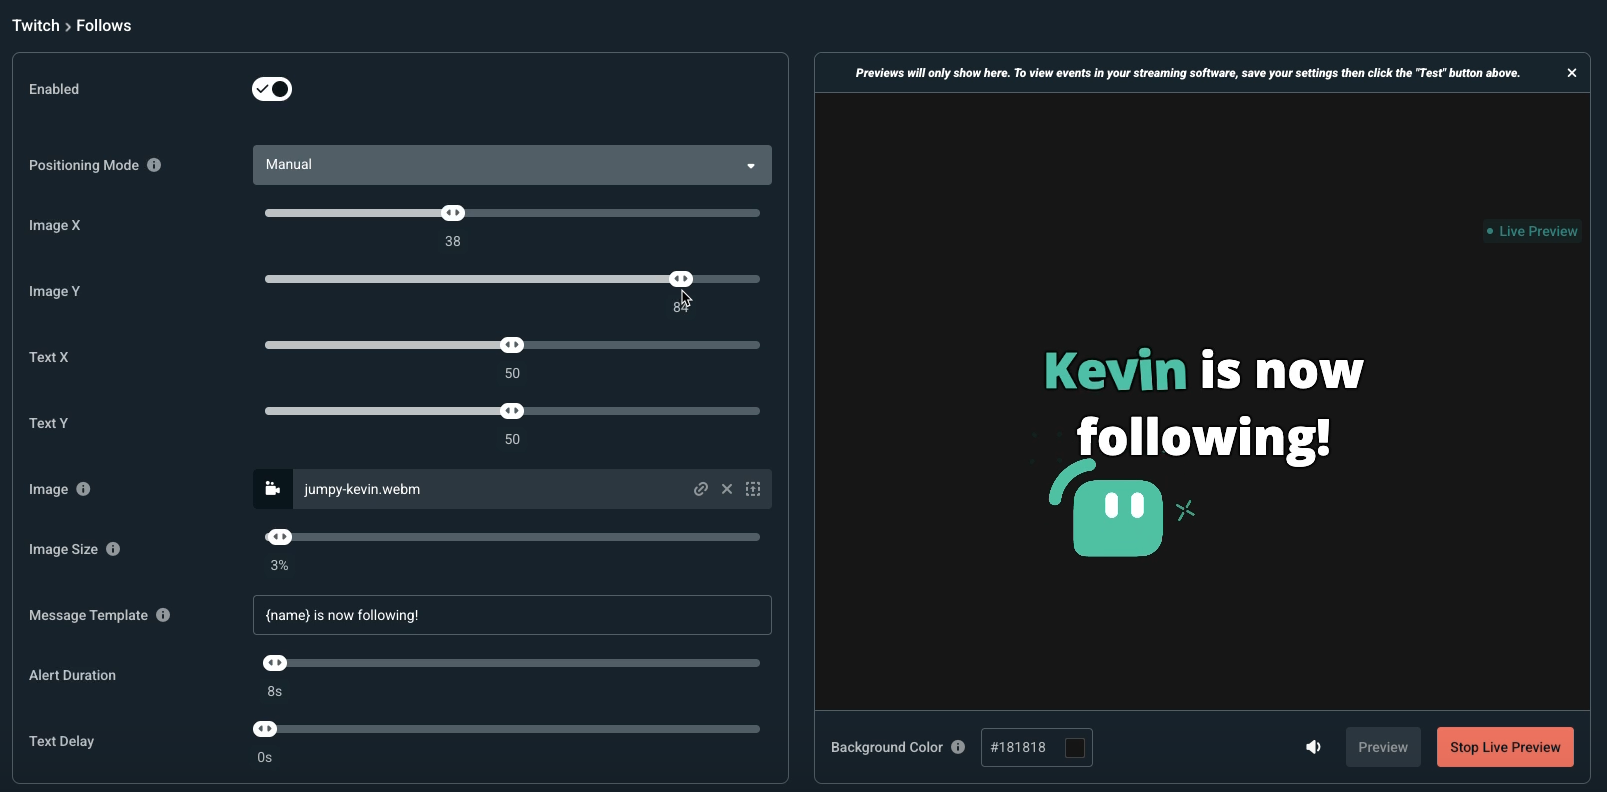
- Image: Select a stock image or video or upload your own.
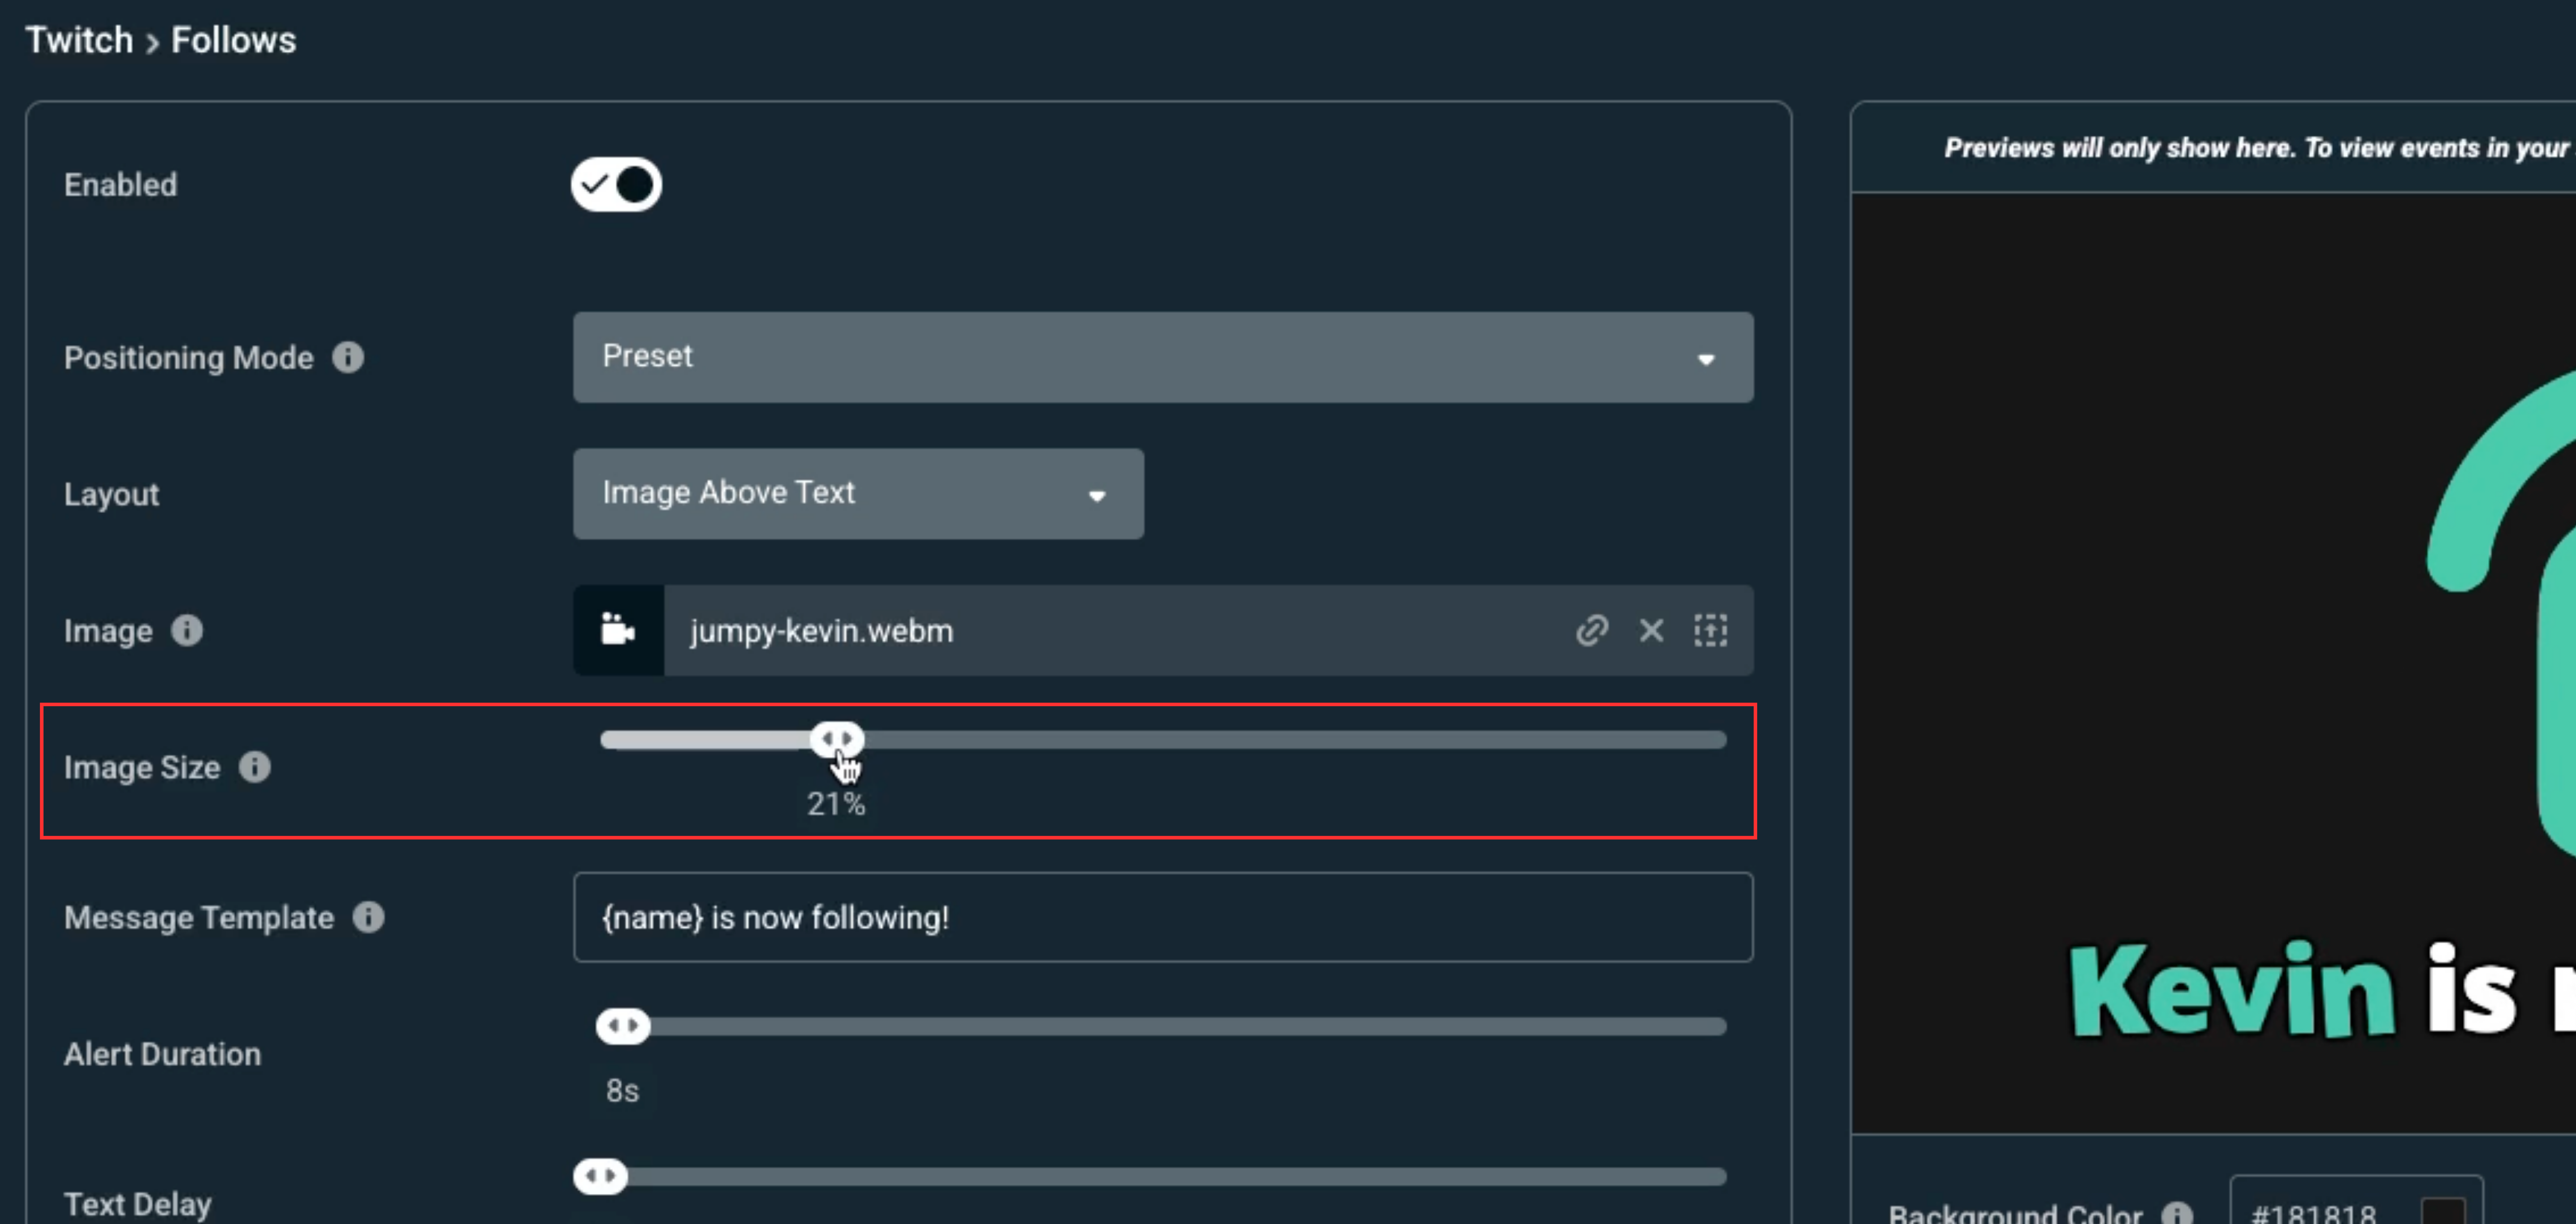
- Image Size: Adjust the size of your image.
- Message Template: Choose the text that will be displayed for the alert. {name} will be replaced with the name of the follower, subscriber, etc.
- Alert Duration: Set how long the alert will stay on stream for.
- Text Delay: Choose how long the image will display before the text is displayed.
- Sound: Choose the sound that will play alongside the alert and set its volume. Pick between stock sounds or upload your own.
- Font Settings: Change the size, color, and style of your text.
- Animations: Choose how your alert appears and disappears and any desired text movement.
- Custom HTML/CSS/JS: Toggle on for advanced funcationality and customization.
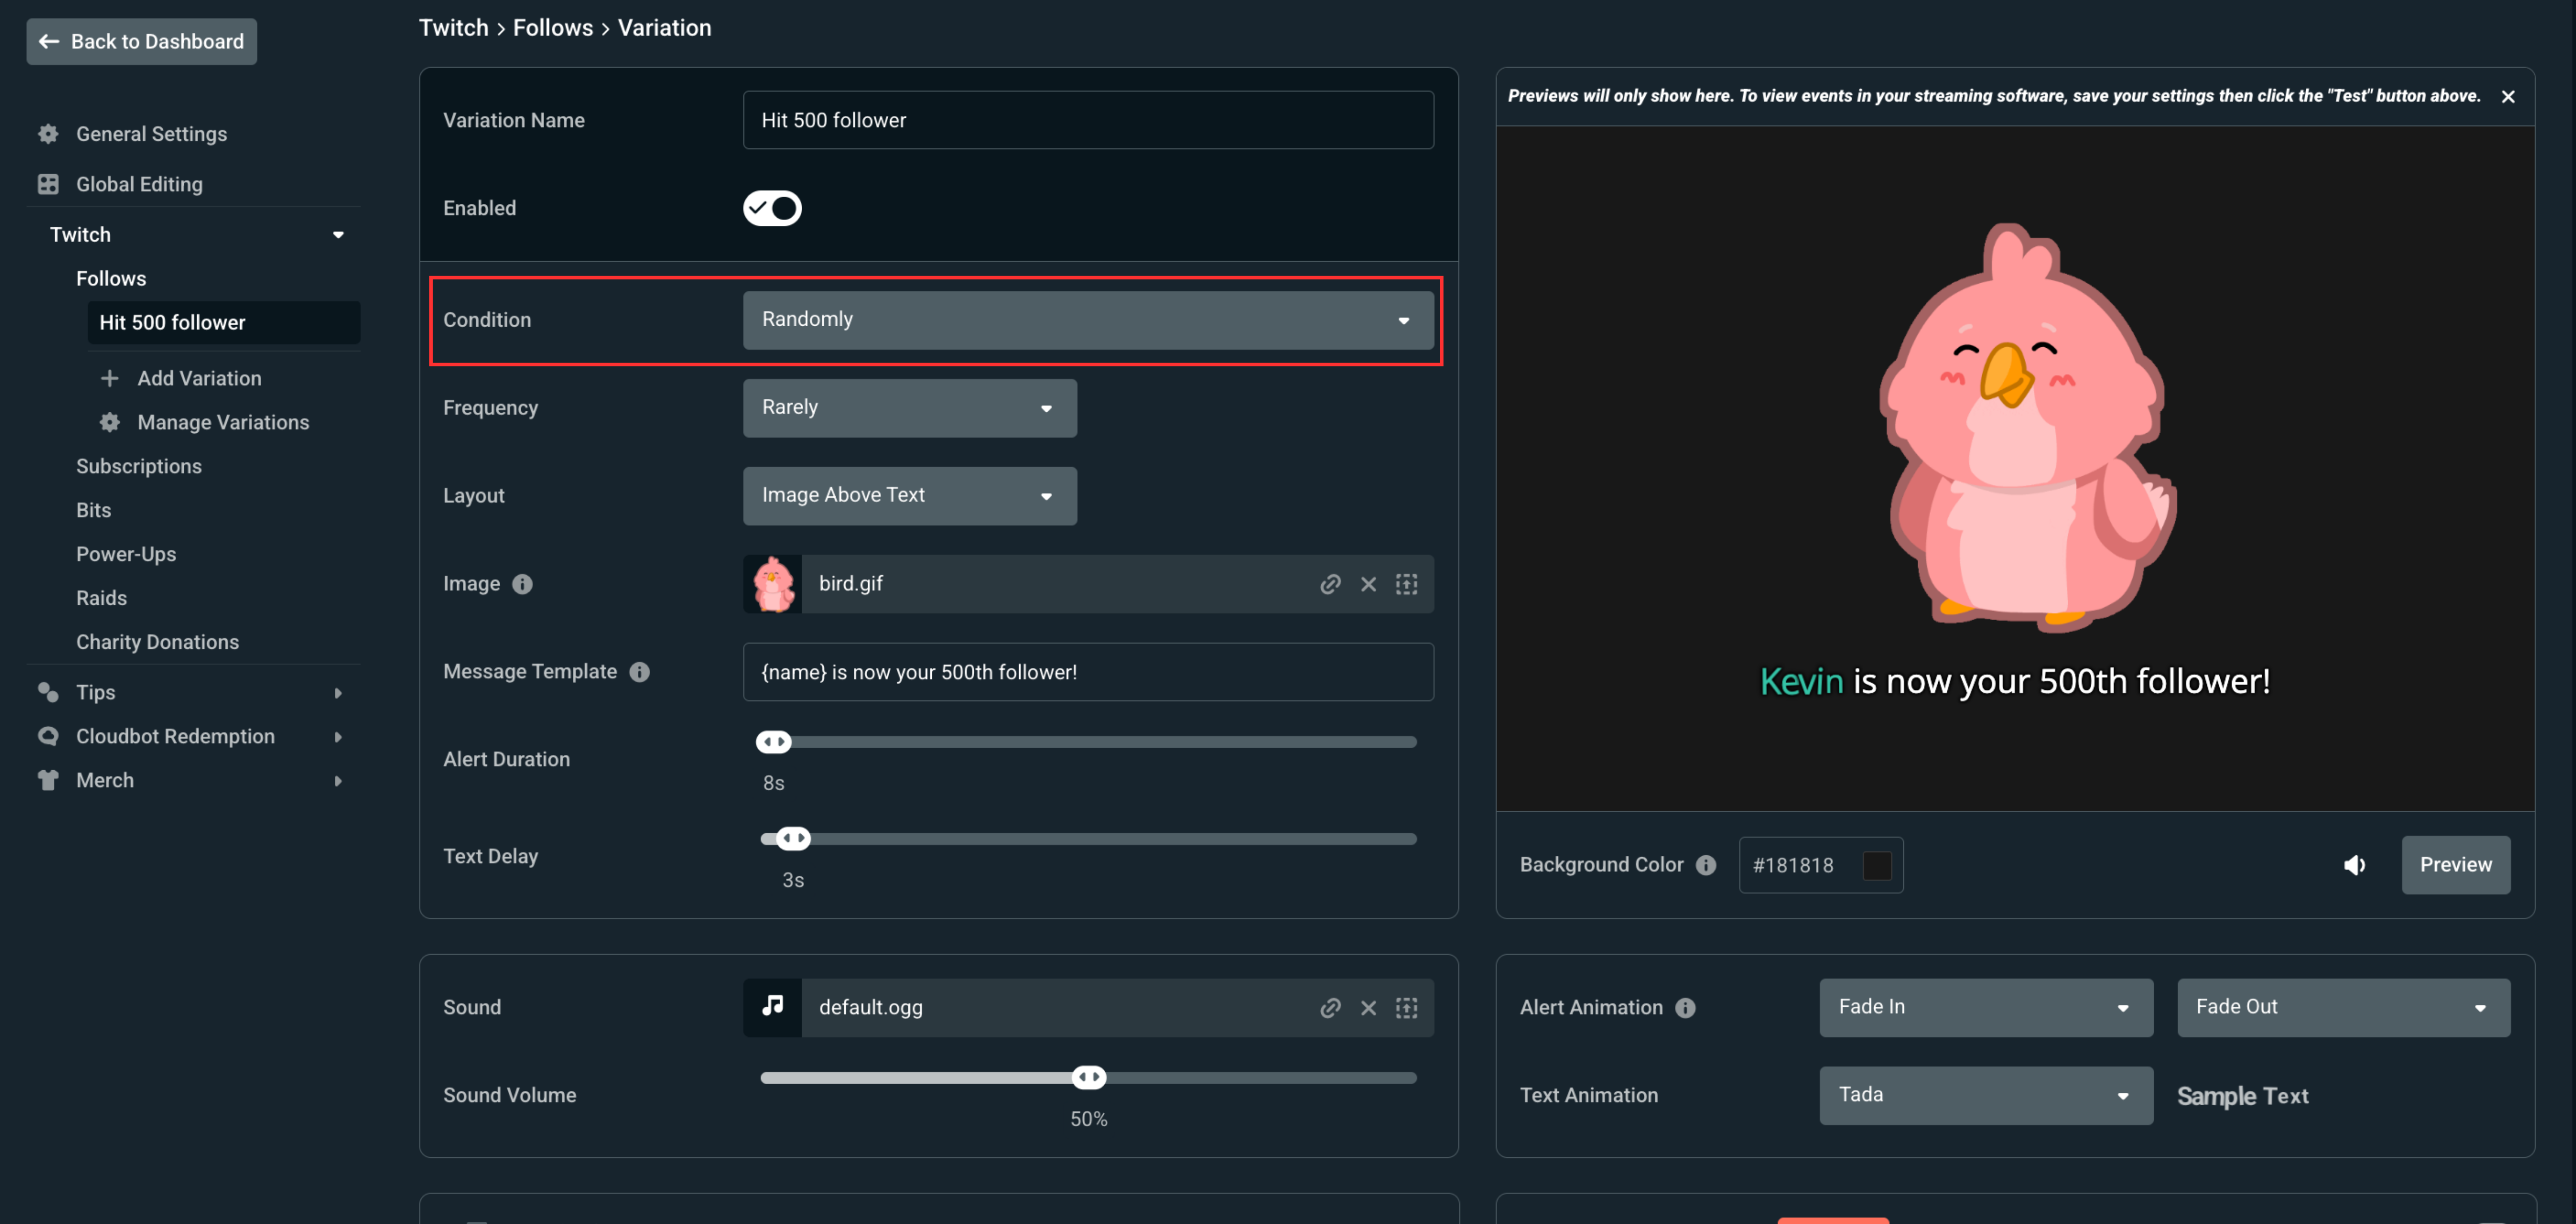
Variations
Variations let you play a special alert for special events. For example, you can show a normal alert for a $5 tip, but a huge, flashy alert for a $50 tip!
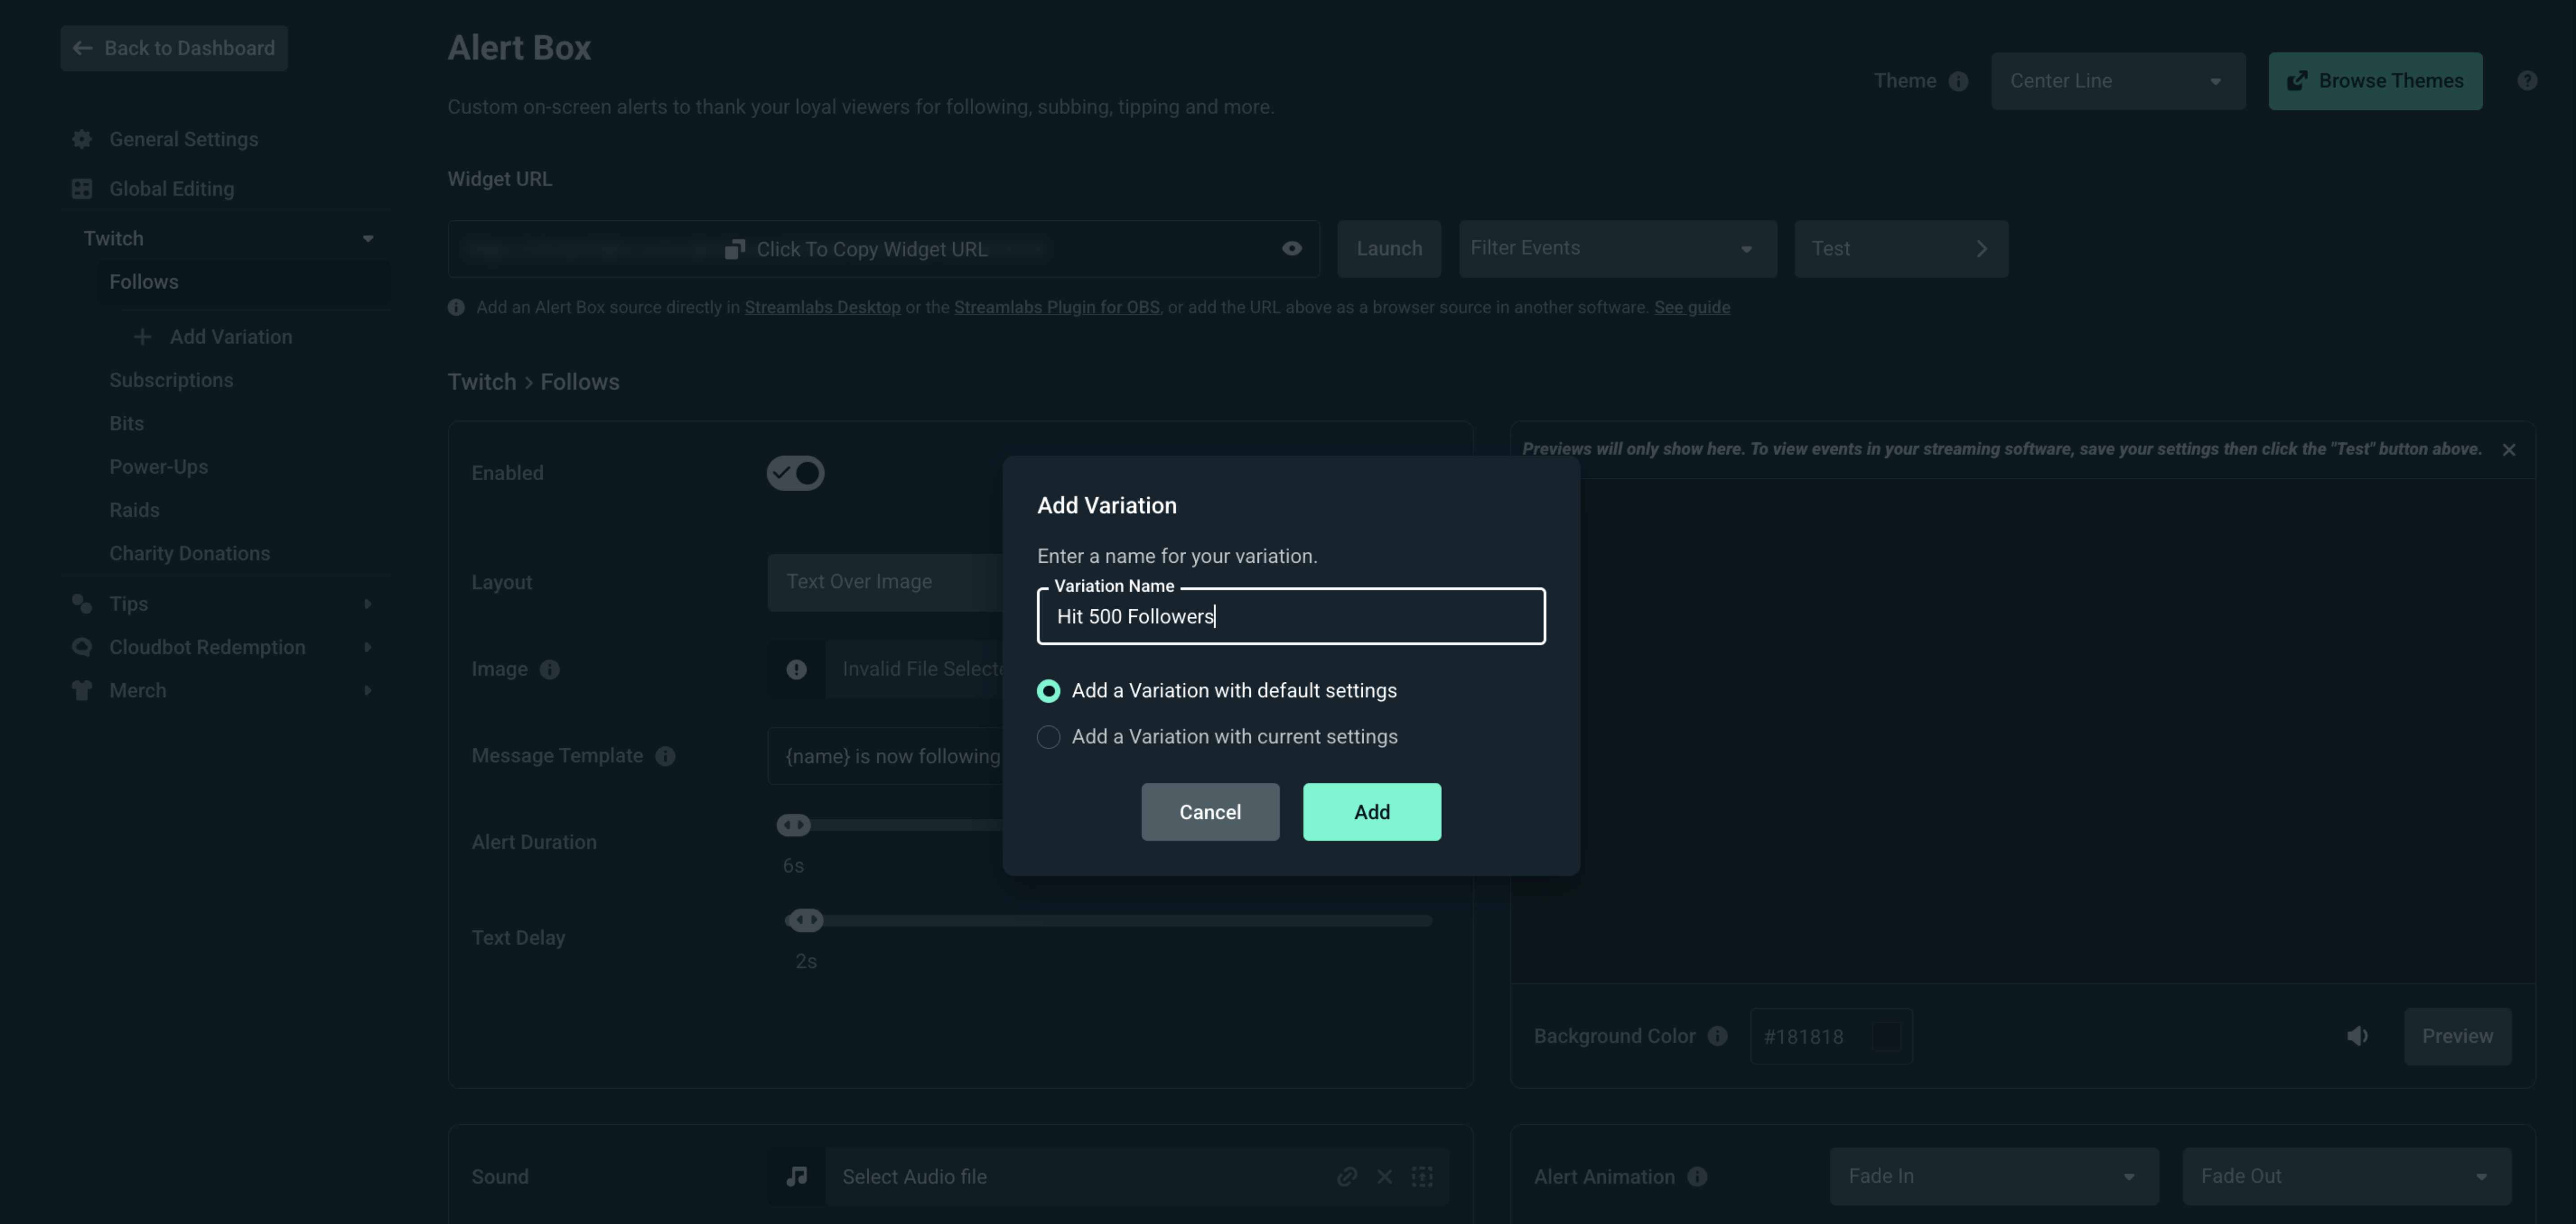
- Scroll to the bottom of the page and click + Add Variation.
- Give your variation a name.
- Use the Condition setting to choose what makes it play (like a specific amount of money or months subscribed).
- Customize it just like you did for your normal alerts.
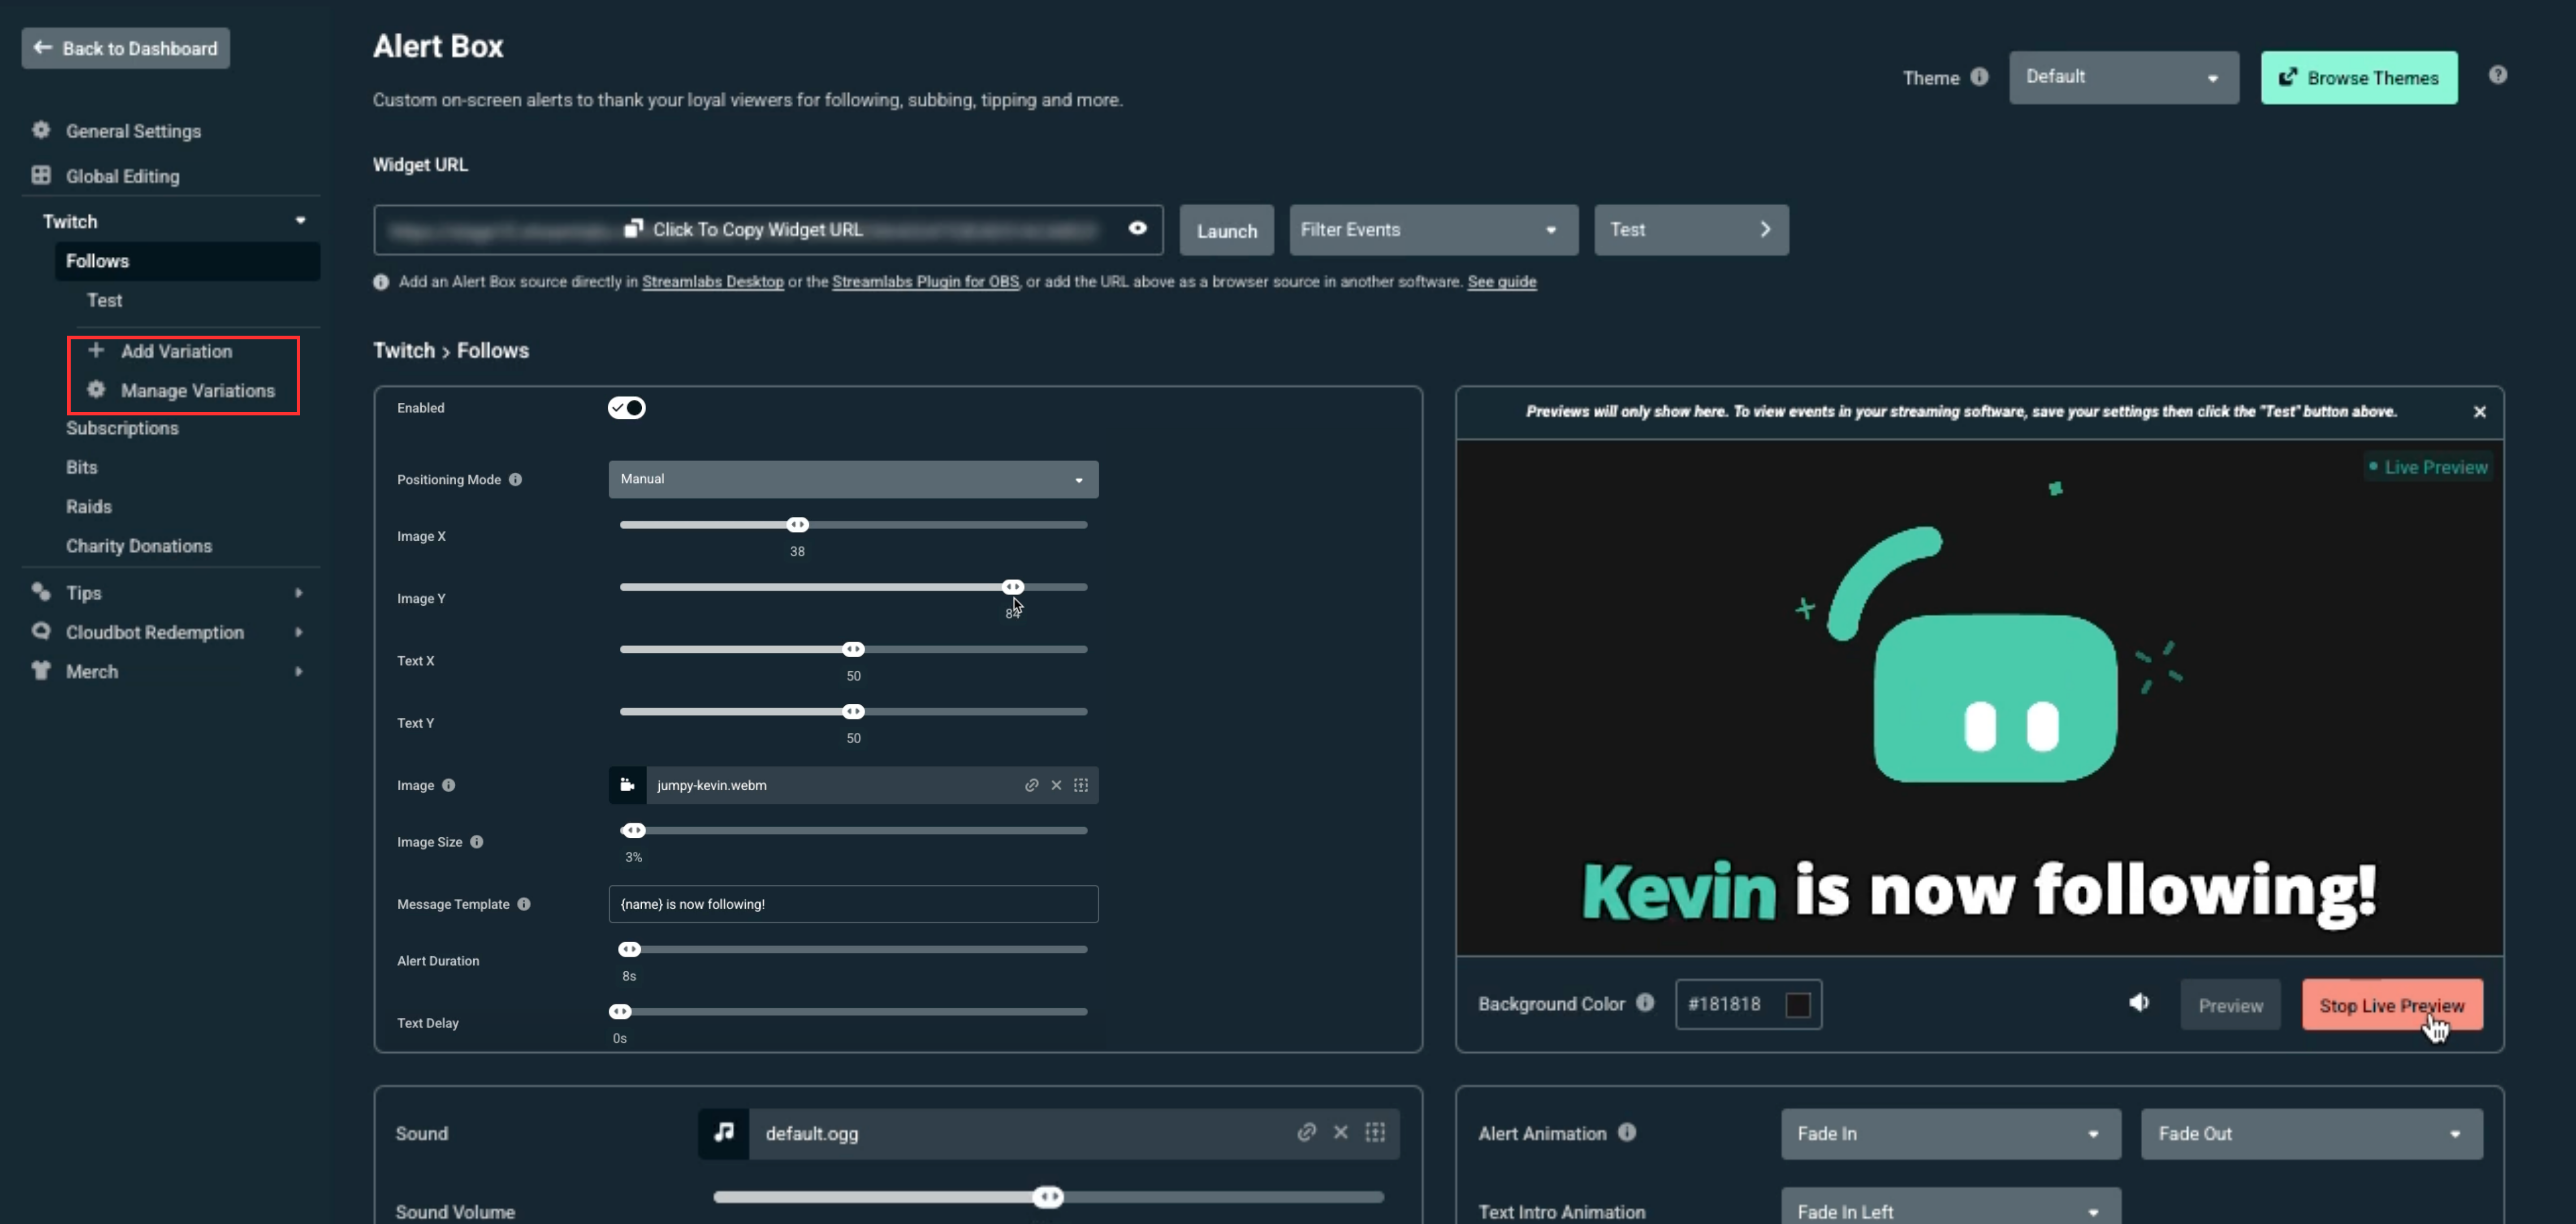
Click the Manage Variations button to see all of your special alerts in one quick list. Use this page to turn your variations on or off, delete old ones, or instantly jump in to edit them.
.png)
.png)
Check out our in-depth guide for setting up alert variations if you need more help.
Step 5: Adding Alert Box to Your Software
Now that your Alert Box has been customized, you're ready to add it to your streaming software so it will show up on your stream. Quick steps are below but you can find detailed instructions below the quick steps.
- Streamlabs Desktop: Click the plus (+) sign in your Sources box and pick Alert Box.
- Streamlabs Plugin for OBS: Click Streamlabs in the top menu, click Widgets, and then click Add on the Alert Box widget.
- OBS without Streamlabs Plugin and Other Software: Copy the Widget URL at the top of the page and paste it as a Browser Source in your streaming program.
.png)
.png)
.png)
.png)
.png)
Step 6: Testing Your Alerts
Testing your alerts allows you to see what they look like after you have saved your changes before you go live. As mentioned previously, you can use the Live Preview to view your changes in real-time while editing events before you have saved your changes, as well.
.png)
.png)
.png)
More About Alert & Widget Themes
A widget theme is a collection of designs for all of your stream features. This includes your Alert Box, Chat Box, and Goals. You can make or choose a theme from our library for events like holidays, or pick one for a specific game so everything matches. You can also mix and match different themes together to build your own custom look! Keep reading for a quick setup, or you can check out our full widget themes guide for more informration.
With widget themes you have a few options for customization including:
- Editing your Default theme: When getting started for the first time you will be dropped into your "Default" theme that you can update directly.
- Creating custom themes manually: Design your own themes and keep them separated so you can switch them out as you desired.
- Installing premade themes: Choose from thousands of premade themes from the library.
How to Separate Your Alerts
You can choose exactly which types of alerts show up in your Alert Box. This is a great choice if you want to separate your events by platform or you want specific events separated. For example, you can make your Twitch alerts show up in one spot and your Kick alerts show up in another. Another example would be having your followers be small in the corner and your subs be huge in the middle of the screen.
How to set it up:
- Go to your Alert Box settings page.
- Click the Filter Events dropdown menu.
- Check the boxes for the exact events you want to keep, and uncheck the ones you want to hide.
- Copy your unique web link (Widget URL) and add it as a Browser Source in your streaming program. Now, only your chosen events will play through that link!
FAQs
Why should I add alerts to my stream?
Alerts are a great way to help your community feel valued by thanking them for their support. Most people appreciate the chance to see their name on screen as a shout-out whether they have followed, subscribed, or purchased your merch. Once viewers realize that engaging opens the door to being featured, they may be encouraged to participate more, as well.
Is Streamlabs Alert Box free?
Yes! Alert Box is free to use and customize as much as you want. You can access hundreds of premade themes for free as well as stock images and sounds. You may optionally upgrade to Ultra for full access to the widget theme library that includes thousands of Alert Box and other widget themes along with thousands of overlay designs.
What file types does Alert Box support?
- Supported image formats: .png, .gif, .jpg, .jpeg, .webp, .webm, and .mp4
- Supported audio formats: are .mp3, .ogg, and .wav
What platforms and events does Alert Box support?
Streamlabs Alert Box has built-in support for a wide range of platform and events including:
- Twitch
- Follows
- Subscriptions
- Bits
- Power Ups
- Raids
- Charity Donations
- YouTube
- Subscriptions
- Memberships
- Super Chats
- Jewel Gifts
- Super Stickers
- Kick
- Follows
- Subscriptions
- Kicks
- Facebook
- Likes
- Follows
- Stars
- Shares
- Supports
- Supports Gifters
- Streamlabs
- Tips/Donations
- Cloudbot Redemptions
- Merch Sales
- Streamlabs Charity Donations
- Other
- Patreon
- Tiltify
Why is a different alert showing up than I expect?
Make sure you have the desired widget theme set as your active theme on the widget themes page in your Dashboard. If your alert still doesn't match what you expect, double check the settings for each event for each platform and the relevant variations. Viewing with live preview enabled makes it easy to quickly check your styles for each alert type.
How do Alert Box variations work?
Alert Box variations allow you to customize your alerts based on a variety of factors. Learn more in our Alert Box variations deep dive here.
Can I use multiple Alert Box themes at once?
Yes, you can use multiple Alert Box themes by copying and pasting each theme's respective Alert Box widget URL. Learn more in our guide on using widgets from multiple widget themes at the same time.
I'm having an issue with my Alert Box, what should I do?
Check out our Alerts and Widgets Troubleshooting guide for common issues. If that doesn't solve your issues or you any additional questions about setting up your alerts, our support team is happy to assist you at https://streamlabs.com/support.