From setting up your live stream with overlays to optimizing your settings for top-notch performance, this guide will walk you through the essentials of Streamlabs Desktop, empowering you to create engaging live stream content with ease. Whether you're a newcomer or a seasoned streamer, Streamlabs Desktop equips you with the tools and features needed to captivate your audience and elevate your content to new heights.
Table of Contents:
- Setting up Your Live Stream
- How to Add Your Webcam & Mic
- How to Share Your Screen/Gameplay
- How to Add Widgets
- Recording and Going Live
- Customizing Your Live Stream
- Optimizing Your Live Stream Settings
- Features to Grow Your Stream
- Troubleshooting Streamlabs Desktop
Getting Started with Streamlabs Desktop: The Basics
When you’re brand new to Streamlabs Desktop, there are a few things you need to do before you can start streaming.
For Mac users, when you first launch Streamlabs Desktop, the application will detect your built-in mic and webcam. Grant Streamlabs permission to use them for your live stream and press Continue. FYI, you can also add an external microphone and/or webcam later on (via sources). More on that in a bit.
Tell us if you’re using Streamlabs for live streaming (with some recording sprinkled in), strictly for recording your screen, or with a camera. Also, let us know if you’re a beginner, intermediate, or advanced user—this will determine how much assistance you need with the setup. Make your selections, then press Continue.
Log in with your Streamlabs ID or your preferred streaming platform. If you don’t have an account yet, click the signup option and follow the steps.
If you previously used OBS Studio, you can import your scene and profiles in just one click. If this doesn’t apply to you, select Start Fresh.
Now, it’s time to set up your mic and webcam. Choose your equipment from the respective dropdown list. Here, you can also select a visual preset (e.g. Grayscale. Sepiatone, Action Movie) and more.

Get your live stream started on a good note by adding a theme to your live stream. Choose one from one of the themes presented to you during this initial setup or personalize your stream later.

Streamlabs Ultra subscribers get access to features such as premium overlays, multistreaming, custom tipping pages, and much more. If you’d like to sign up for Streamlabs Ultra, click Choose Ultra. If you’d like to continue with the free version to get a feel for Streamlabs, choose Starter instead. P.S. you can sign up for Ultra at any time you choose.
Once you’ve completed the initial setup, you will see your main Streamlabs Desktop editing window.
How to Add Your Webcam & Mic
Having a webcam and microphone for your live stream is essential. Below is how to add both (just in case you didn’t add them during the initial install or want to change your webcam or mic source to a different one).
Adding a Webcam
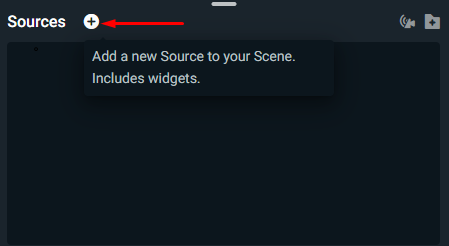
Step 1: Click the plus sign (+) next to Sources in the Streamlabs editor window.
Step 2: Click on Essentials and select Video Capture Device, then Add Source.
Step 3: If you’d like to add your computer’s webcam as a video source, select it from the existing sources. A preview of your webcam should show to the right. If this is the webcam you want to show, click Add Source.
Step 4: If the webcam you want to use doesn’t show up, select Add a new source instead, name the source, and then select Add Source.
Step 5: In the next window, you’ll be able to select the new video source under the Device dropdown. You’ll also see a preview of the webcam source. Lastly, you can enable audio for the video capture device if it also has a built-in microphone that you wish to use.
Adding a Mic
Adding a microphone is pretty straightforward!
Click Settings, go to Audio and then select your Mic from the dropdown.
How to Share Screen/Gameplay
If you’d like to share your screen with your audience (e.g. sharing gameplay on your live stream), there’s a source for that as well.
Step 1: From the main editor window in Streamlabs, click the plus sign (+) next to Sources.
Step 2: On the next screen, under Essentials, select Screen Capture, then Add Source.
Be sure to name your source, then click Add Source again.
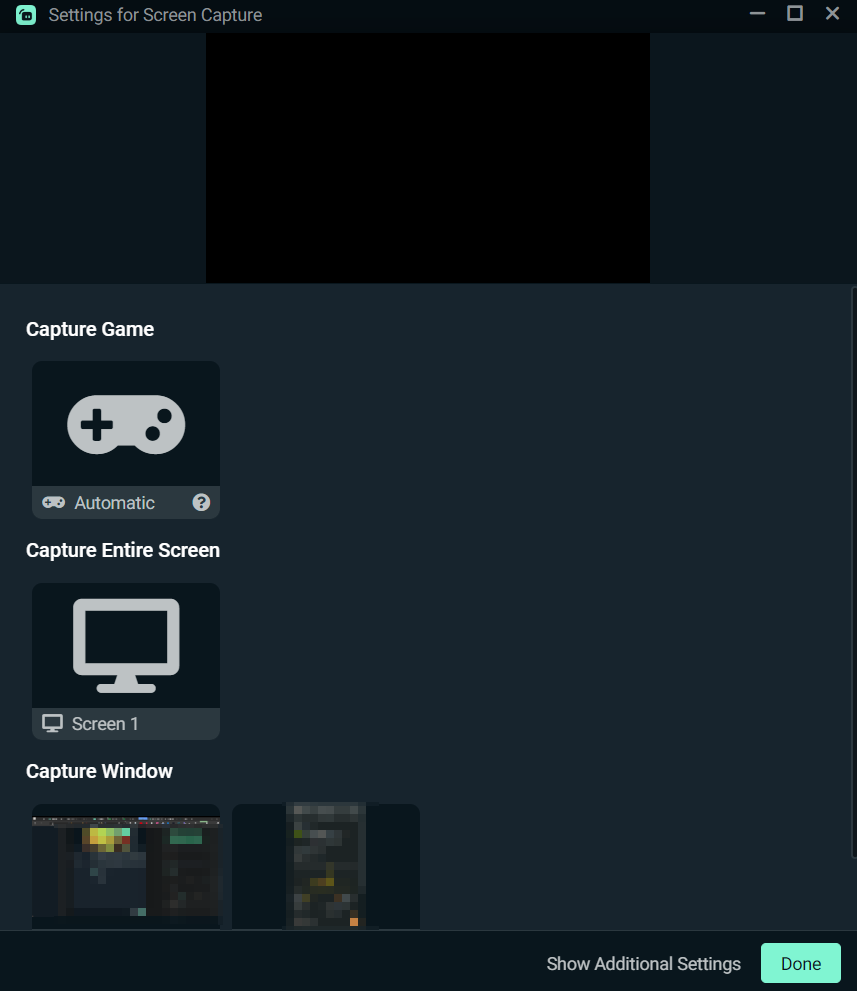
Step 3: Next, select the Game, Screen or Window you want to capture. Always double-check that you’re choosing the correct window, and refrain from displaying personal information or anything that is against guidelines (both Streamlabs’ and the platform you’ll be streaming on).
When you’re finished, click Done to add the source to your live stream.
P.S. You also have the option of adding the source individually for more customizable options. Choose whichever option makes the most sense for your live stream. For your safety, make it a habit to close all windows not related to your live stream before pressing the Go Live button.
How to Add Widgets to Your Live Stream
Widgets are elements you can add to Streamlabs Desktop to help spruce up your live stream and interact and engage with your community. On-screen alerts are often your viewer’s first impression—we highly recommend adding alerts and spending time to make them unforgettable.
Today, we will show you how to add an Alert Box widget to your live stream. However, the same process works to add other widgets, such as browser sources (to display webpages or HTML), Collab Cam (to add guests to your stream), and Tip Ticker (to shoutout fans who are supporting your live stream via tips).
Step 1: Press the plus sign (+) in the Sources section of Streamlabs Desktop.
Step 2: Next, select Alert Box from the pop-up menu.
Step 3: After you are done adding the source, viewers will see our default alert appear on the screen when you get a new subscriber, bit, follow, host, etc. You can also customize your Alert Box to your desired specifications. Keep reading for more info later.
Use this opportunity to acknowledge your viewers for contributing to the stream. Recognition makes your viewers feel good and also encourages others to support you.
Step 4: To add other widgets to your live stream, follow the same exact steps above, selecting the ones you want from the list of sources. We recommend checking out all the options for sources and coming up with fun ways to incorporate some into your live-stream content. Check out our top recommendations for widgets to improve your stream.
How to Record and Go Live
After you’ve added all of your sources, widgets, etc., the heavy lifting is done and you can start live streaming and recording.
Recording
Step 1: To check or change where your recordings are saved, go to Settings then Output. Under Recording you can select a new path to save your recordings, change how the files are named, recording quality and format. We recommend keeping your output mode at the top Simple, but if you want more settings (like Audio Tracks, Bitrate, etc), you can change this to Advanced.
Step 2: To begin recording, click the red Record button at the bottom right of your screen in the main Streamlabs Desktop Editor Window.
Step 3: To stop recording, press the record button once more.
When you stop recording, a message will appear at the bottom of your screen confirming that your recording has been saved. Click on the message to get more information about your recording or to open it in another Streamlabs application (such as Video Editor) to edit your recording.
Going Live
Step 1: To start your live stream, click the Go Live button at the bottom right corner of Streamlabs Desktop. You can adjust any going live settings under Settings, then Output. As we mentioned with recording, we recommend keeping your output mode at the top Simple, but if you want more settings (like Audio Tracks, Keyframes, etc), you can change this to Advanced.
Step 2: In the next window, select the platform(s) you want to stream on and confirm details of the live stream including the title, description and thumbnail where applicable. If you are multistreaming, you can click on Additional Settings to change the settings of each site individually. When you’re done, click Confirm & Go Live.
Step 3: To end your live stream, click the red End Stream button.
Customizing Your Live Stream
Custom Stream Overlays
Stream overlays are a quick way to give a bland live stream some visual appeal. The Streamlabs overlay library includes thousands of overlays that you can apply to your live stream to make it more interesting. Remember to filter your search by category, game, or even popularity so you can find one that best suits your needs.
Streamlabs App Store

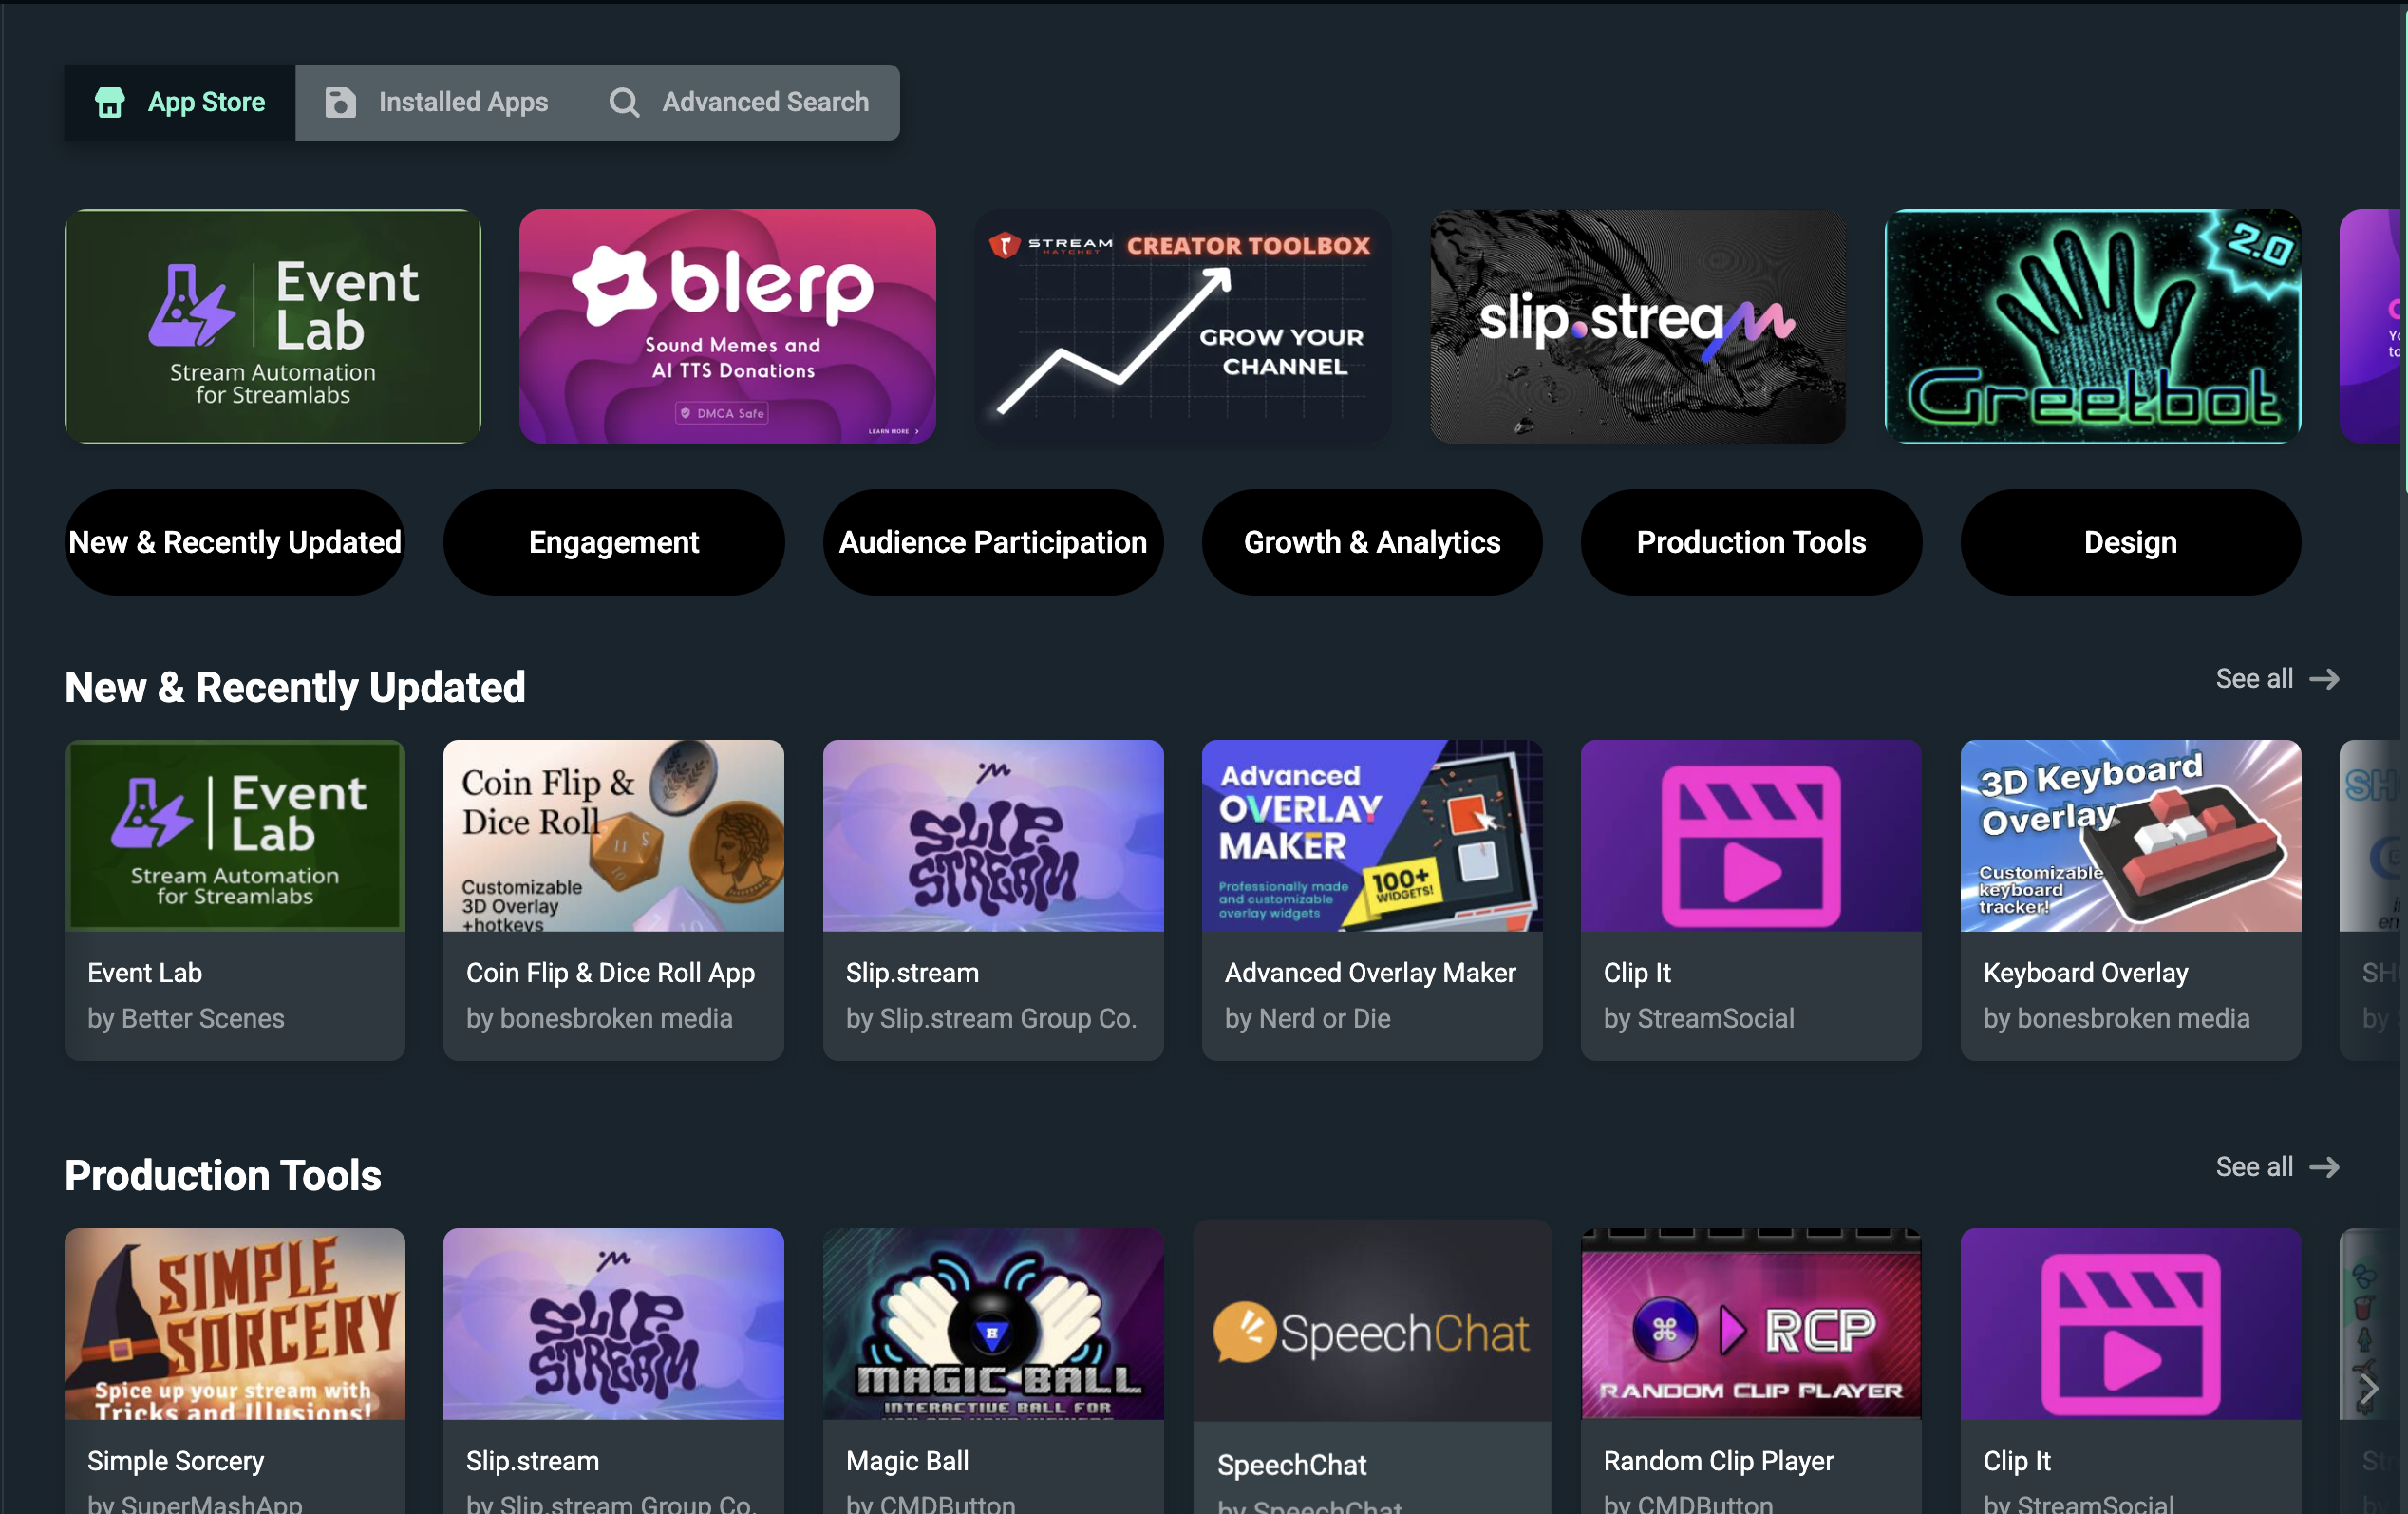
The diverse collection of apps in the Streamlabs App Store enables you to improve the production quality of your stream. The App Store has the tools to help make your stream better, from playing stream-safe music with Pretzel or Slip.Stream to improving the design of your stream and interacting with your viewers in new ways.
Visit the Streamlabs App Store to view our full collection of plugins available for Streamlabs Desktop.
Pre-Made Alerts
If you don’t want to use the default alert, Streamlabs offers pre-made alerts created by top designers in the industry, like Tactical Lion Designs, Visuals by Impulse, and StreamSpell.
You can visit our Alert Box Themes page to browse the full collection of alert themes.
Create Custom Alerts
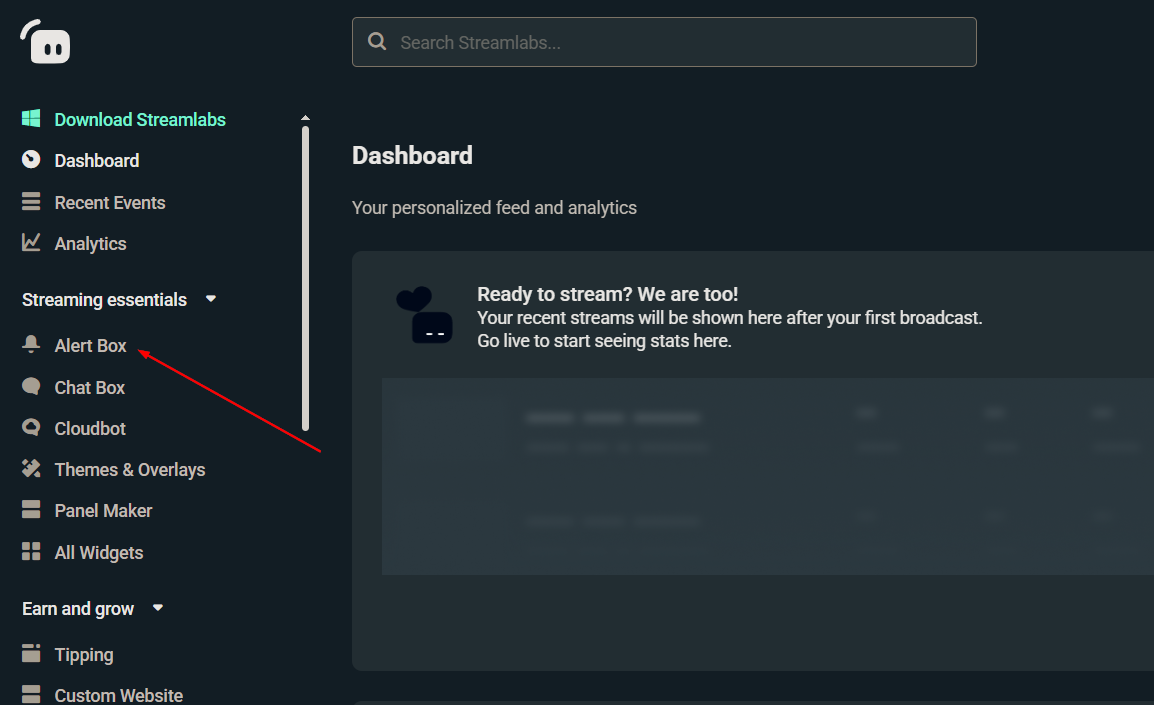
If you don’t want to use a pre-made alert, you can manually customize your own by navigating to the Streamlabs Dashboard and clicking on Alert Box on the left-hand side.

From here, you can choose to edit your General Settings, which are some basic settings for your Alert Box such as moderation setttings, alert delay, and alert parries. 
Our Global Editing tool allows you to update select settings on all of your alerts and variations at once, cutting down on setup time.

The alert types in the left navigation will differ depending on the streaming platforms that you have linked to your account. For example, if you have Twitch and YouTube linked, you will have the option to customize alerts for all Twitch and YouTube event types.
From the Alert Box page, you can customize all of your alert types, and even add variations (exclusive alerts when specific conditions are met). Spend some time in the Alert Box to familiarize yourself with these customization options and also check out our guide for setting up alert variations.
Choosing the Right Stream Settings in Streamlabs Desktop
Having settings that are too high for your computer’s hardware can cause performance issues for your live stream. Adjusting settings within Streamlabs Desktop can help ensure optimal quality. The following are some common settings to adjust to help give you the best stream possible.
Change Quality and Resolution
The output of your video resolution can have a significant impact on the quality of your live stream and the performance of Streamlabs Desktop. For example, streaming at 1080p vs 720p will double the number of pixels, meaning your computer will be using more resources.
To adjust your resolution, select Video from the side panel in the Settings window.
Leave the base (canvas) resolution as your computer’s native resolution. We recommend lowering the output (Scaled) resolution to 1280x720 for a good balance between performance and quality since streaming in 1080p can have a significant impact on your CPU.
Choose Your Encoder
When it comes to encoders, there are two types—software (x264) and hardware (NVENC). The software encoder (x264) will use your CPU to encode video, while hardware encoders (like NVENC) utilize a dedicated encoder in the GPU, allowing you to play and stream without compromising game performance. If you are using an NVIDIA graphics card we recommend you stream with NVENC New.
Change the CPU Usage Preset
To change the CPU usage preset, navigate to Output in the settings window and change the Output Mode to Advanced. NVENC presets range from low-latency, optimal performance, and max quality. We recommend starting with the Quality preset and experimenting from there to find what works best for you.
x264 offers a range of usage presets. This refers to how fast the CPU encodes video. The faster it encodes, the less CPU it uses. By default, this is set to Very Fast, which provides the best balance between performance and quality.
Edit Bitrate Manually
You can manually edit your bitrate. Below are Twitch’s recommended specs for NVIDIA NVENC, depending on the resolution and fps you’d like to achieve. We recommend streaming at 720p 30fps to get the best performance out of your streaming software. Also, check the platform you wish to stream on for their specific recommended settings.
1080p 60fps
- Resolution: 1920x1080
- Bitrate: 6000 kbps
- Rate Control: CBR
- Framerate: 60 or 50 fps
- Keyframe Interval: 2 seconds
- Preset: Quality
- B-frames: 2
1080p 30fps
- Resolution: 1920x1080
- Bitrate: 4500 kbps
- Rate Control: CBR
- Framerate: 25 or 30 fps
- Keyframe Interval: 2 seconds
- Preset: Quality
- B-frames: 2
720p 60fps
- Resolution: 1280x720
- Bitrate: 4500 kbps
- Rate Control: CBR
- Framerate: 60 or 50 fps
- Keyframe Interval: 2 seconds
- Preset: Quality
- B-frames: 2
720p 30fps
- Resolution: 1280x720
- Bitrate: 3000 kbps
- Rate Control: CBR
- Framerate: 25 or 30 fps
- Keyframe Interval: 2 seconds
- Preset: Quality
- B-frames: 2
Please remember that everybody’s setup will be different, so make sure to play around with the settings yourself to find out what works best for you.
Streamlabs Features to Help You Grow Your Live Stream
Between configuring your streaming settings, setting up your channel, crafting a unique online presence, and interacting and engaging with viewers, live streaming can become a bit overwhelming.
At Streamlabs, we’ve built a suite of features to give our streamers a one-stop shop for all of their needs. Below are some of the top features we recommend to help you build your brand and grow your channel.
Multistream
As a new streamer, you may be asking yourself which platform you should stream on. You may even try to build a schedule that includes specific days for different platforms. Each platform offers a unique opportunity to engage with a community of viewers. To find out which platform is the right fit for you, we recommend you begin by multistreaming.
Multistreaming via Streamlabs Desktop allows you to stream simultaneously to integrated platforms such as YouTube, Twitch, TikTok, Instagram, and even RTMP destinations that don’t currently have native connections. Multistreaming is as simple as linking your accounts, toggling it on, and going live. FYI, multistreaming is available exclusively to Streamlabs Ultra subscribers—they can stream to as many destinations as they’d like.
Set up a Streamlabs Tip Page
Whether you want to turn live streaming into a career or you do it just for fun, enabling a Streamlabs tip page can help you along the way.
Setting up a Streamlabs tip page is one of the easiest ways to start earning an income from streaming. We work with various payment processors, including PayPal, giving you more ways to monetize your channel than anyone else in the industry. Most importantly, setting up a tip page is completely free.
Setting up your tip page only takes a few seconds. Learn how to set up PayPal and credit card tipping with our guides.
Collab Cam
If you’re looking to let others join in on your live stream, Collab Cam allows you to integrate multiple camera feeds into a single stream seamlessly (with just the share of a link). Co Host teammates while gaming, invite a friend to chat, bring in players for a tabletop RPG, or host a video conference.
Dual Output
If you're a multistreamer who loves broadcasting or recording for both horizontal and vertical platforms at the same time, you'll be thrilled with how Dual Output can simplify your content creation process. For instance, while you're live on YouTube, you can also stream to TikTok, provided you meet the live streaming requirements and possess a valid stream key.
Troubleshooting
If you’re experiencing issues with Streamlabs Desktop, there are a few courses of action that you can take. Keep reading for some troubleshooting tips.
Install VC++ 2017
Streamlabs Desktop requires some additional files to be installed on your system before using the software, else it might run into issues. Please download and run both of these Microsoft Visual C++ 2017 redistributables and reboot your computer afterward.
Both the 32-bit and 64-bit versions should be installed, even if you have a 64-bit version of Windows.
Updated Drivers and Software
Make sure that your drivers, especially your video graphic card drivers, and Windows are fully up to date. If you did update any drivers or software, make sure that you have rebooted your computer before continuing.
Open Firewall
It is important to open your firewall for Streamlabs Desktop to properly connect to the internet and allow widgets, like Alert Box, to update promptly. If you do not have any other firewall installed, then you can follow this article to open the Windows Firewall. If you have another installed firewall, make sure you whitelist Streamlabs Desktop for both public and private networks.
Whitelist in Antivirus
If you have anti-virus software installed on your computer, make sure to whitelist Streamlabs Desktop (C:\Program Files\Streamlabs Desktop\Streamlabs Desktop.exe) to prevent it from scanning this executable and child processes. Perhaps you want to whitelist the whole folder containing the executable as well. By whitelisting, you prevent your antivirus from scanning each and every alert or widget update that happens, which could cause displaying issues!
Streamlabs is full of features, all designed to help you build your brand and create more fun and interactive live streams—the features outlined here are just the tip of the iceberg. We recommend visiting the dashboard, perusing the Streamlabs Desktop application, and playing with all of the features available to you.
If you have any questions or comments, please let us know by contacting us. Remember to follow us on Twitter, Facebook, Instagram, and YouTube.
If you haven't already done so, make sure you download Streamlabs Desktop.


