

Simulcasting (also known as multistreaming) your live stream to multiple platforms can be a great way to grow your audience—but when Twitch is involved, there are specific rules you need to follow. One of the most important areas is chat visibility and engagement.
Table of Contents:
- About Twitch Simulcasting Guidelines
- Twitch-Compliant Multi-Chat Setup
- How to Create a Split Multi-Chat Chat Boxes with Streamlabs
- How to Add Split Chat Boxes to Your Stream
About Twitch Simulcasting Guidelines
While Dan Clancy did say in February 2026 that Twitch would not be enforcing split chat requirements, Twitch’s Simulcast Guidelines do still technically require that:
- Twitch viewers receive an experience that is no worse than viewers on other platforms.
- Twitch chat remains a complete, standalone experience and is not merged with chat from other services. This means a single “combined” chat widget is not compliant.
- You do not provide links or direct viewers to leave Twitch to watch your simulcast on other platforms.
Twitch-Compliant Multi-Chat Setup
The solution for these requirements is simple and effective. Use two Chat Box widgets on your stream.
- Chat Box 1: Twitch-only chat as a native Chat Box widget
- Chat Box 2: Chat from all other platforms (YouTube, Kick, Facebook, etc.) with the Chat Box widget as a browser source
By separating your platforms between two Chat Boxes, chats are displayed independently, ensuring Twitch chat is not mixed with other platforms.
Fortunately, Streamlabs provides an elegant, fully-compliant solution using two separate Chat Box widgets. In this guide, we’ll walk through exactly how to set this up, step by step.
How to Create a Split Multi-Chat Setup with Streamlabs Chat Box
To create a Twitch-compliant setup that displays all of your text options, you will need to create two separate Chat Box widgets using widget themes. You can read more about widget themes and how they work in our in-depth guide here or keep reading step-by-step instructions on setting up Twitch-compliant multi-chat.
Create a Twitch‑Only Chat Box
To create your Twitch-only Chat Box, you will need to create a widget theme where the Chat Box widget has only Twitch chat enabled.
Step 1: Visit the Chat Box widget settings by visiting your Streamlabs Dashboard and clicking Chat Box in the left navigation or by clicking here to be taken directly to the settings.
Step 2: Make sure the desired widget theme for your Twitch-only chat is selected in the top right of your screen (switch to another theme, if needed), then deselect all platforms except Twitch, and click Save Settings.
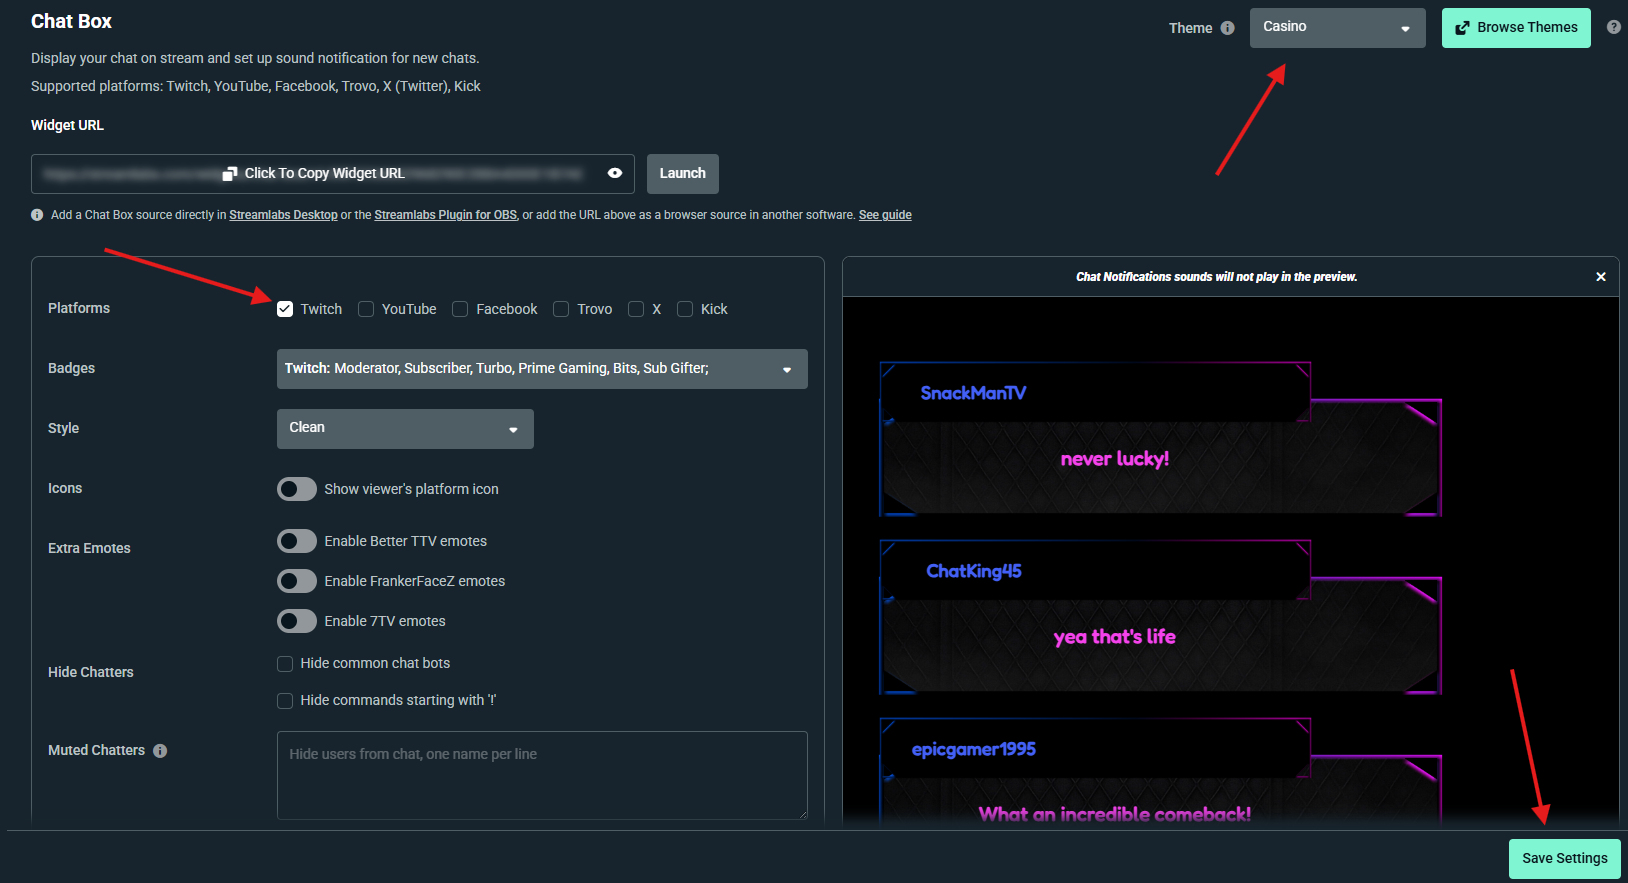
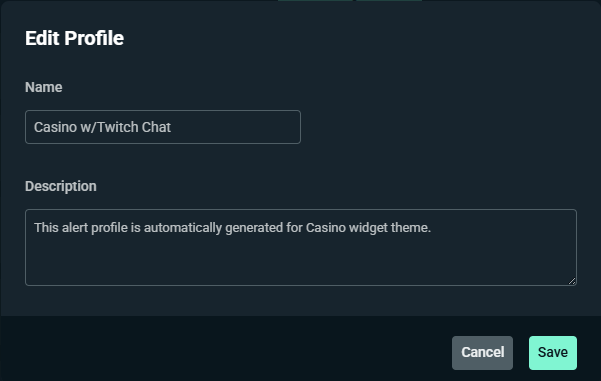
Step 3 (Optional): It can be helpful to update the name of the current theme in the Widget Themes settings to denote it as the version with your Twitch chat. Visit your Widget Themes settings, click the pencil icon next to the current theme, and name accordingly.
Creating a Chat Box for Non-Twitch Chat
To create your non-Twitch multi-platform Chat Box, you will need to create a second widget theme where the Chat Box widget has only non-Twitch platforms enabled.
Step 1: Open your Chat Box settings and click the Theme dropdown in the top right corner. If you want to match your non-Twitch chat with your Twitch chat, ensure the Twitch-only theme you set up in the previous steps is selected, then click Add a Theme.
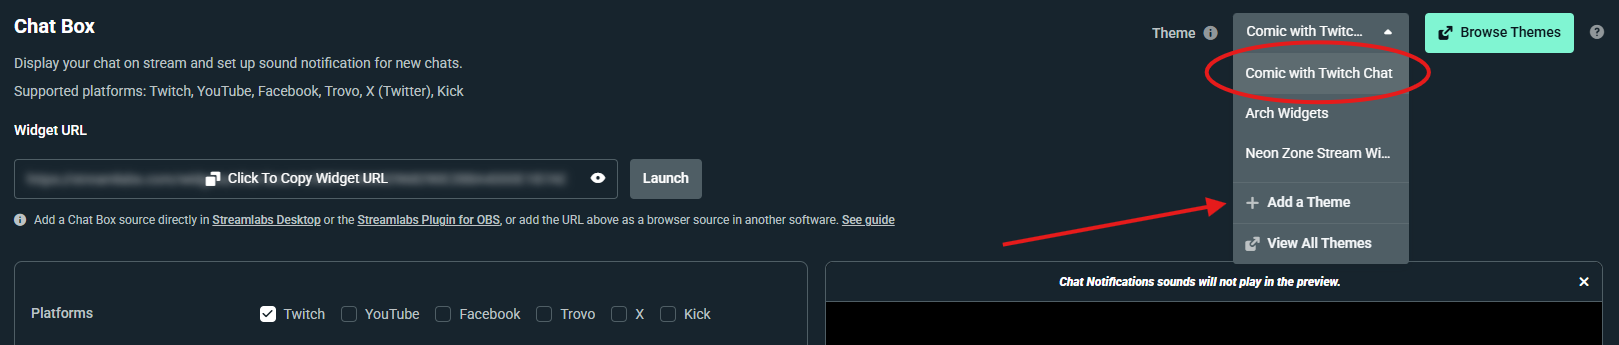
Step 2: Name your new theme (we recommend using something descriptive).
If you want to create a duplicate of your existing theme so Twitch and non-Twitch chat match, leave the Create with Streamlabs default settings toggled OFF and click Start from Scratch.
If you want a different style, you can follow the steps above and then modify the duplicated theme, browse new themes, or turn the toggle ON to start with the default settings.
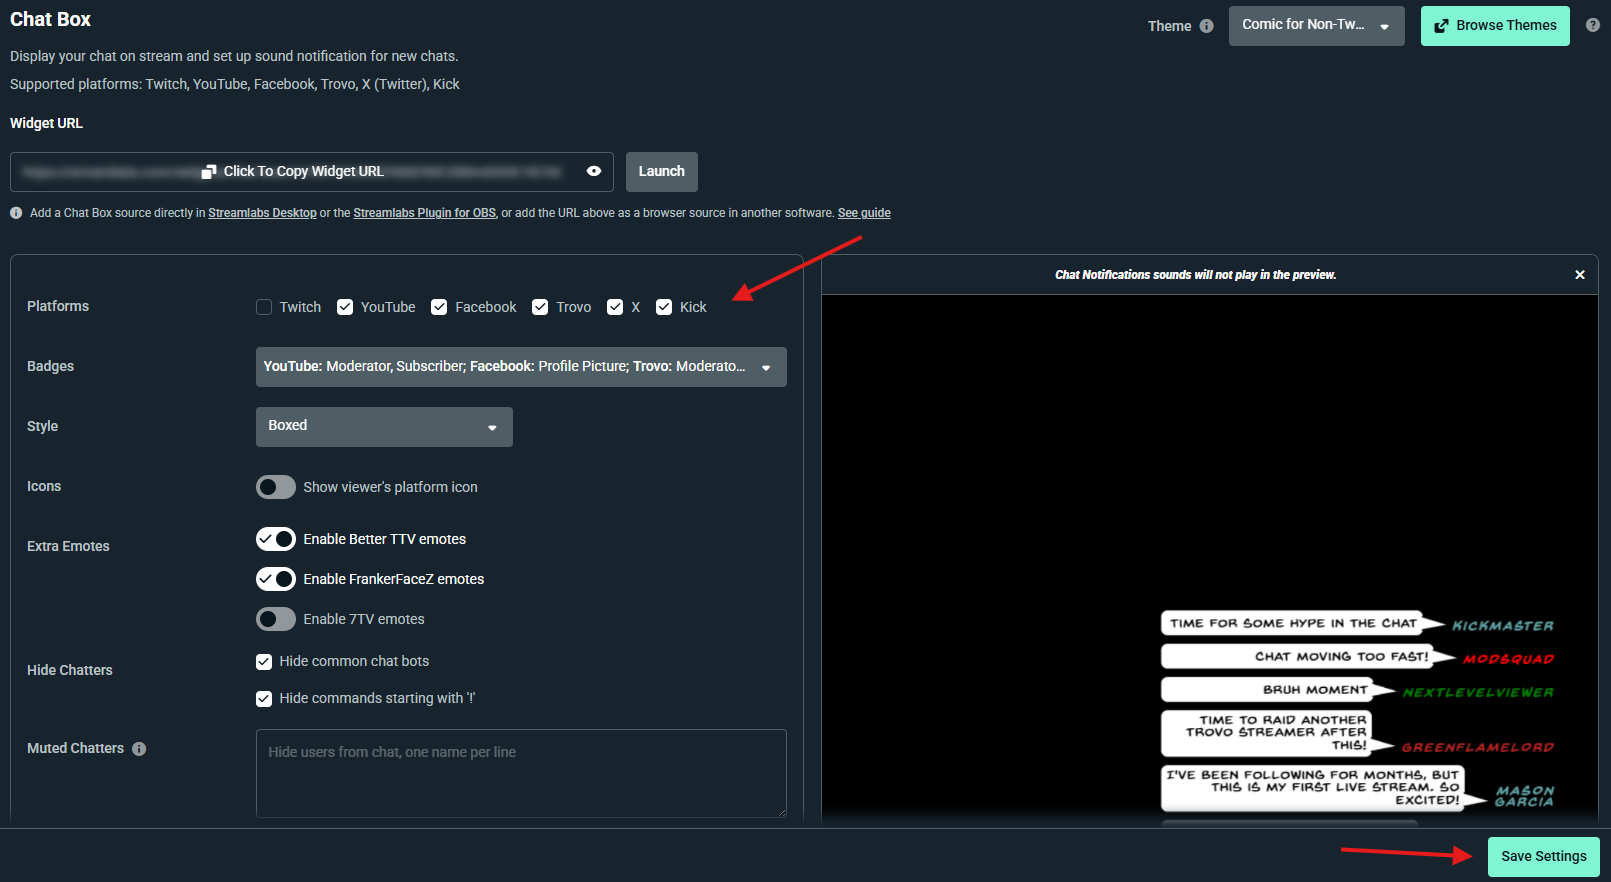
Step 3: Within your new theme, deselect Twitch and select the platforms you would like to show, then click Save Settings.
How to Add Split Chat Boxes to Your Stream
Whether you use Streamlabs Desktop, OBS, or another streaming tool, you can easily add both chat variations to your stream with these instructions.
How to Add Split Chat Boxes in Streamlabs Desktop
Adding the Chat Box Source for Twitch Chat
We’ll start by adding the Chat Box you created for Twitch chat as a Chat Box widget.
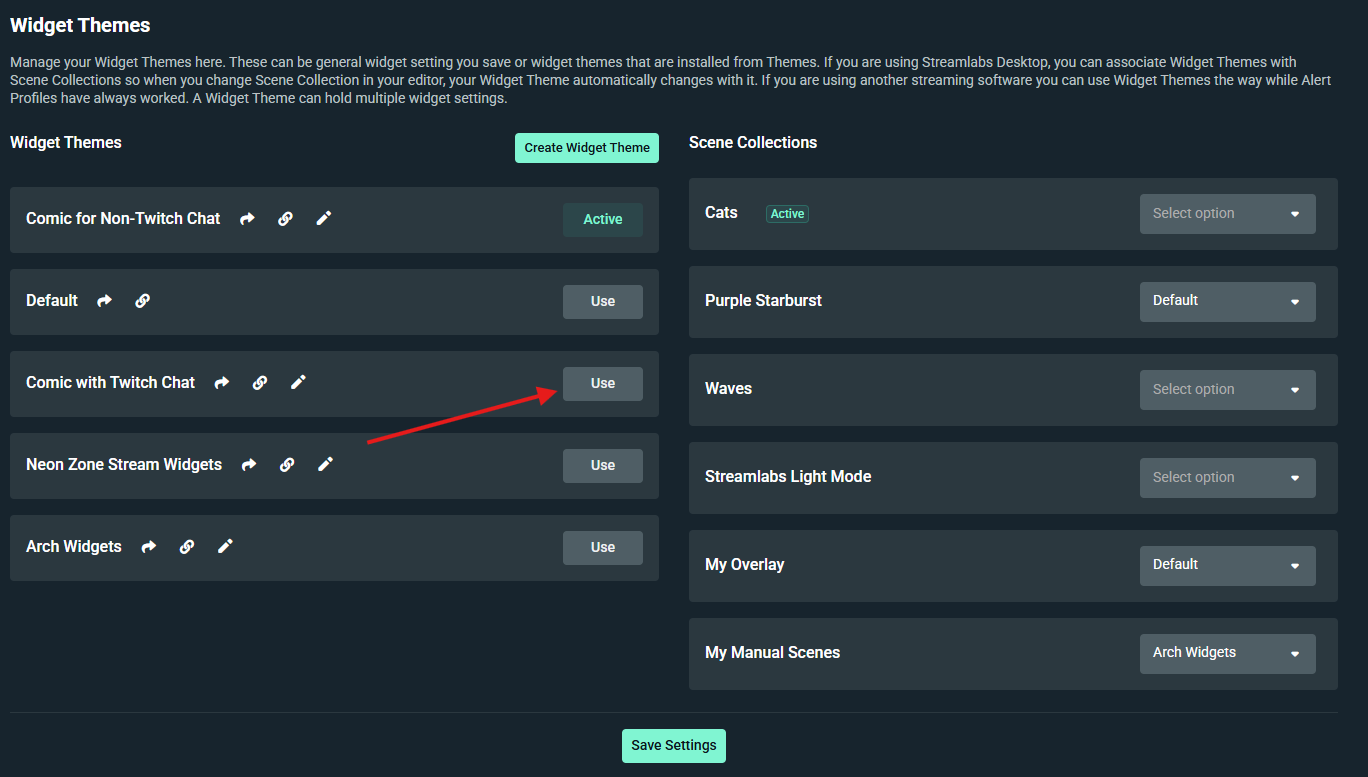
Step 1: Visit your Widget Themes page and make sure the theme you set up for Twitch chat is set to Active. If it’s not, click Use next to the theme.
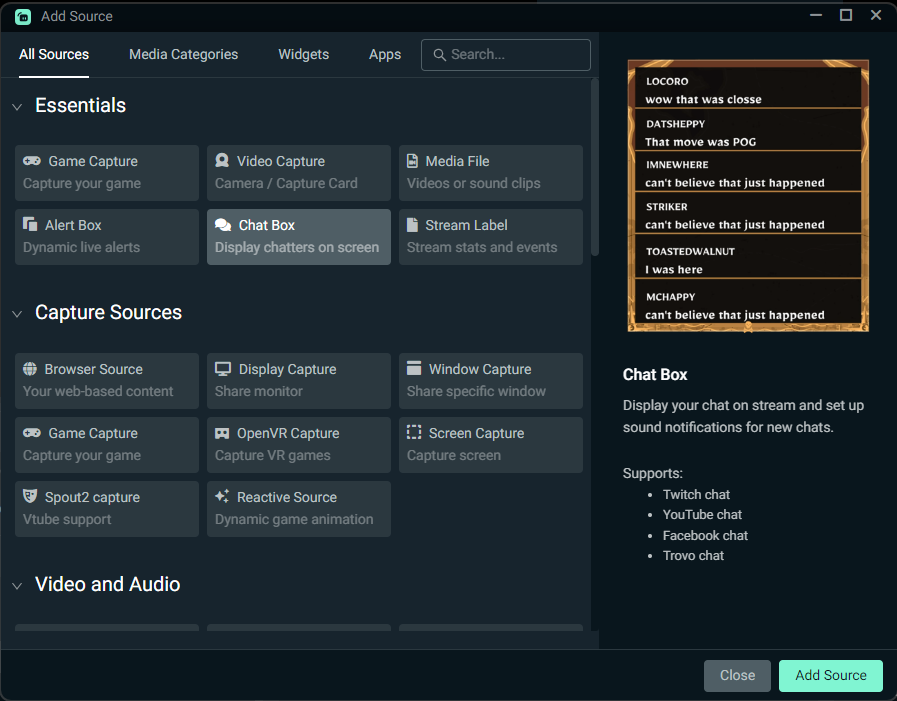
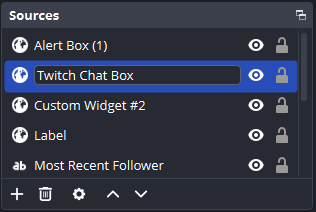
Step 2: Open Streamlabs Desktop and check to see if you already have an active Chat Box in your existing scenes in the Source list.
If you do not, click the + icon in the sources section, select Chat Box, and click Add Source.
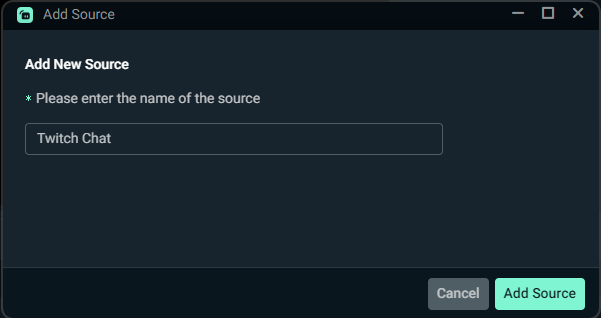
Step 3: Name the Chat Box source to indicate it includes Twitch chat and click Add Source. Adjust the size and position as desired.
Note: If you follow these steps and the Twitch-chat specific theme you created isn’t showing on your stream, make sure you haven’t overridden the active theme on your Scene Collection. The selected option should either be either Default or the custom theme you created. Adjust, if needed, and click Save Settings.

Adding the Chat Box Source for Non-Twitch Chat
Next we’ll add the Chat Box you created for non-Twitch chat as a browser source.
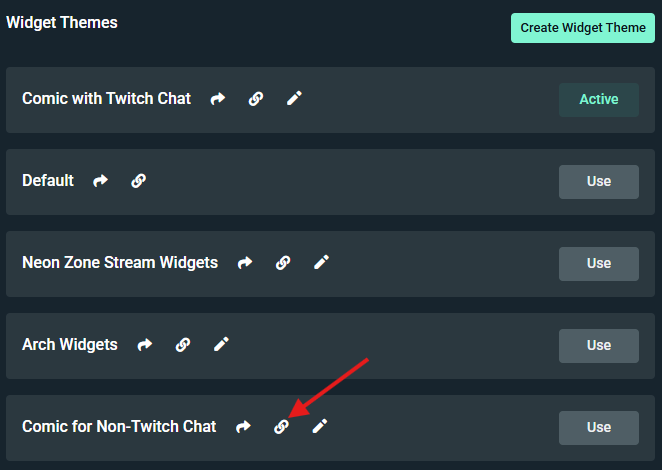
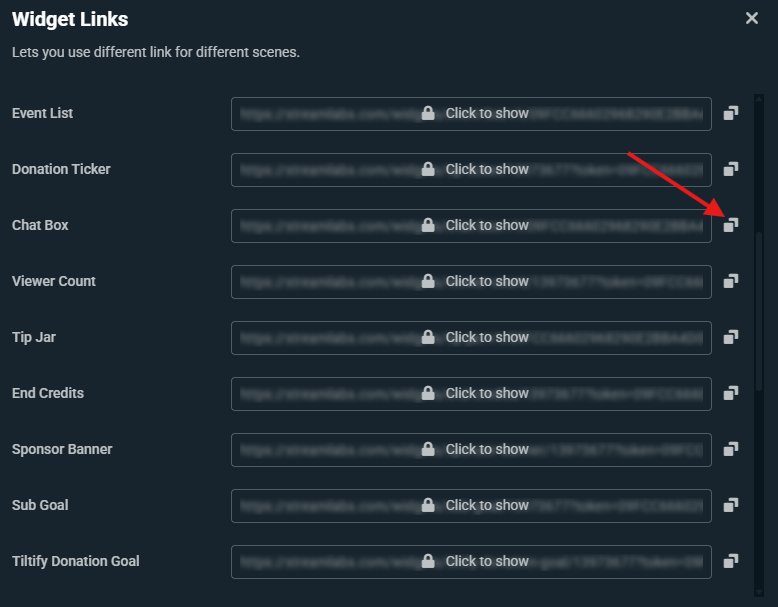
Step 1: Return to your Widget Themes page and click the link icon 🔗next to your non-Twitch chat theme.
Step 2: Locate the Chat Box link and click the copy icon on the right.
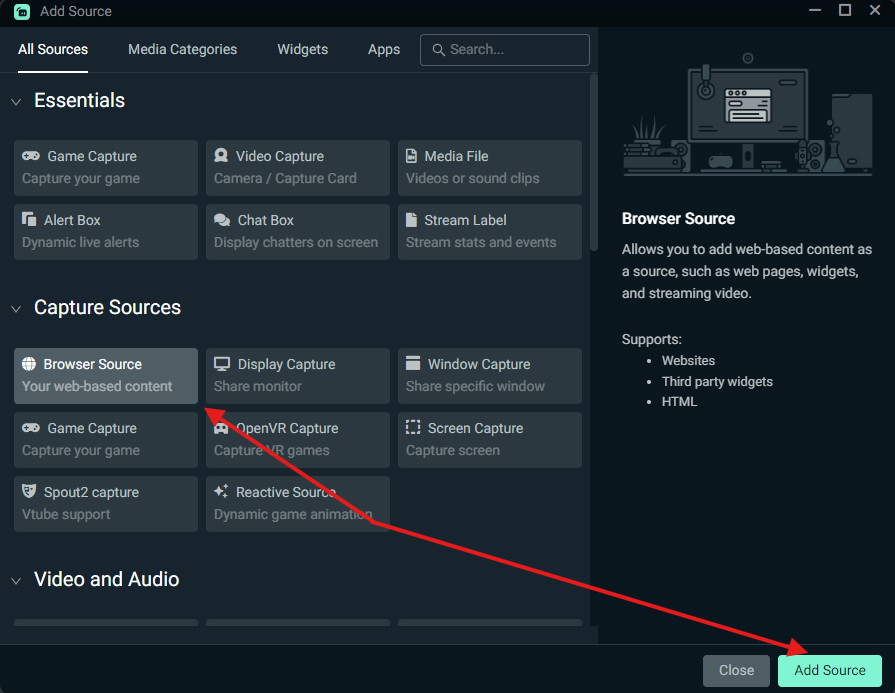
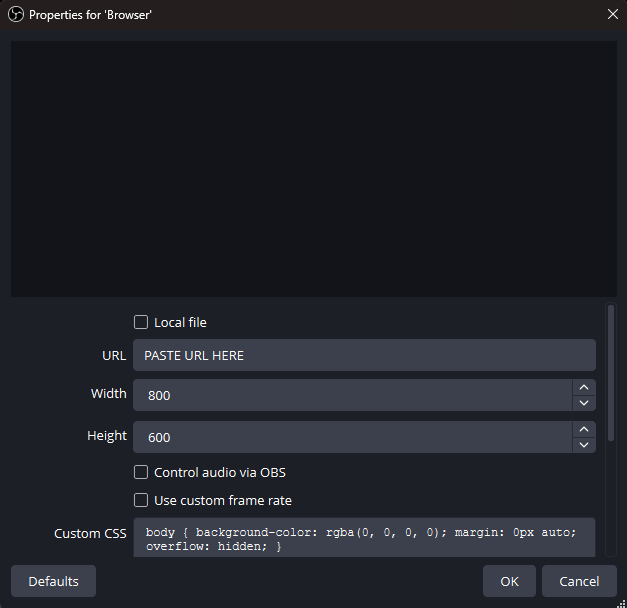
Step 3: Return to Streamlabs Desktop and click the + icon in the Sources section, then select Browser Source, and click Add Source.
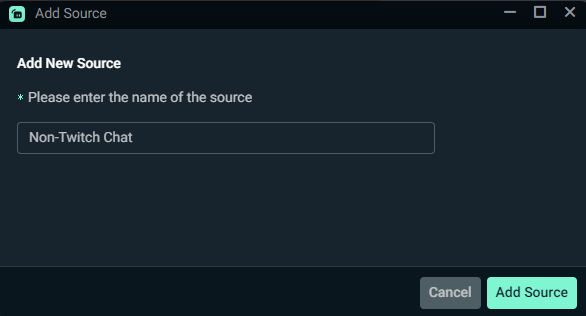
Step 4: Give your source an appropriate name and click Add Source.
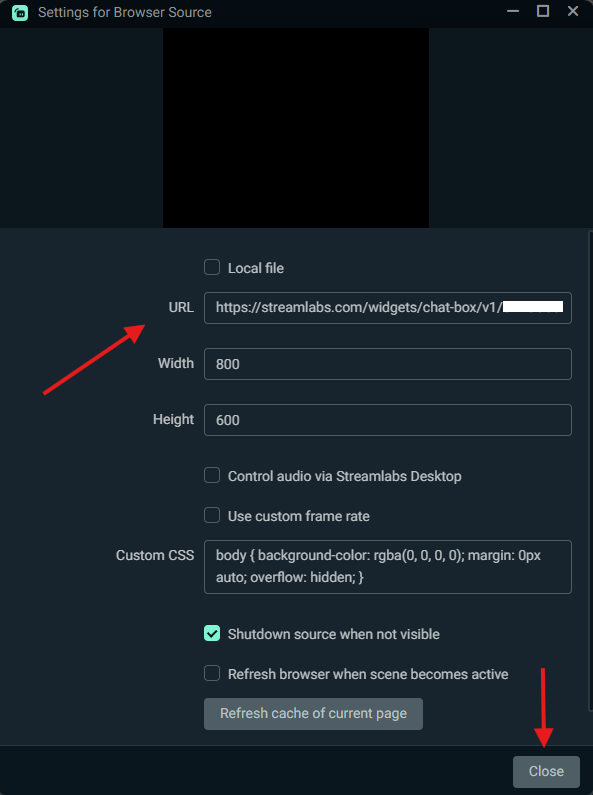
Step 5: Paste the URL you copied in step 2 into the URL field, set your desired height and width, and click Close.
Adjust the size and spacing of your two chat boxes and you’re all set with split chat!
How to Add Split Chat Boxes to OBS with the Streamlabs Plugin
Adding two Chat Boxes to OBS when you are using the Streamlabs Plugin is very similar to adding them to Streamlabs Desktop.
Adding the Chat Box Source for Twitch Chat with the Streamlabs Plugin for OBS
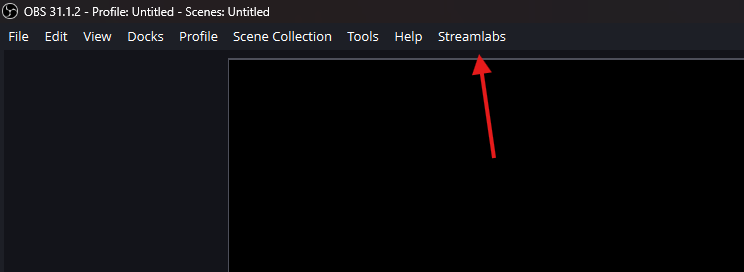
Step 1: Open OBS and click Streamlabs in the top navigation bar. If you don’t have the plugin installed yet, you can do so here first.
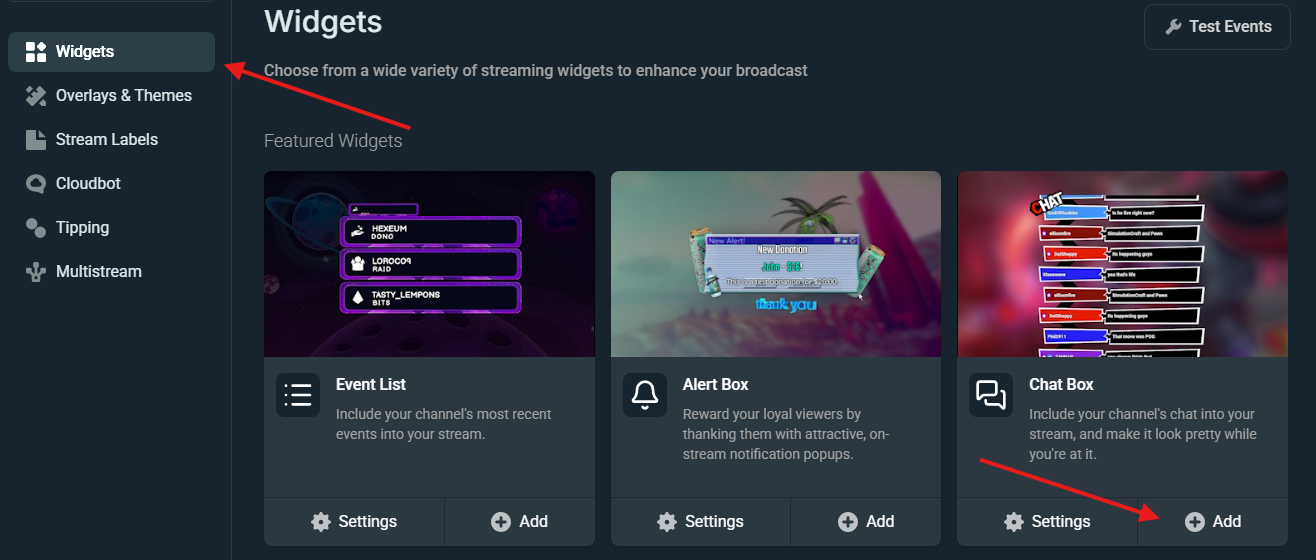
Step 2: Click on Widgets in the window that pops up, locate Chat Box, and click Add.
Step 3: Optionally rename your Chat Box source to make it clear this is your Twitch-only chat.
Adding the Chat Box Source for Non-Twitch Chat in OBS
Next we’ll add the Chat Box you created for non-Twitch chat as a browser source.
Step 1: Return to your Widget Themes page and click the link icon 🔗next to your non-Twitch chat theme.
Step 2: Locate the Chat Box link and click the copy icon on the right.
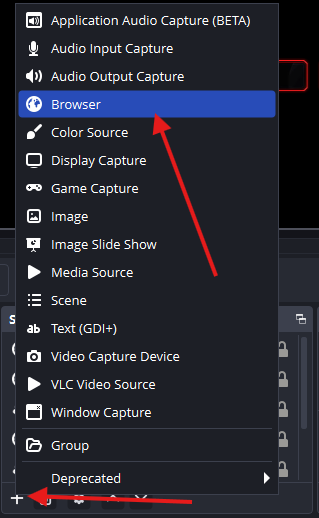
Step 3: Open OBS, click the + icon under Sources, and select Browser.
Step 4: Add the URL you copied before to the URL field and click OK.
Step 5: Customize the size and spacing of your two chat boxes and you’re all set with split chat!
How to Add Split Chat Boxes to OBS without the Streamlabs Plugin
If you want to add two Chat Boxes to OBS without any plugins, you can do so by creating two browser sources.
Step 1: Follow the steps in the Adding the Chat Box Source for Non-Twitch Chat in OBS section above.
Step 2: Repeat the process with the Twitch-chat widget URL as a second browser source.
No matter which steps you followed, you should now have two fully separate, Twitch-compliant Chat Boxes on screen.
Final Tips & Best Practices
To avoid confusion for viewers and stay in Twitch’s good graces, we recommend some additional considerations:
- Place Twitch chat in a primary or prominent position.
- Place the other platform chat slightly offset or in a visually distinct area.
- Add labels such as:
- “Twitch Chat”
- “YouTube & Other Platforms”
- Test your stream privately to confirm chats are separated.
- Avoid verbally reading messages from other platforms while ignoring Twitch.
- Keep Twitch chat visually clear and easy to read.
- If in doubt, prioritize Twitch engagement first.
Conclusion
Multistreaming chat doesn’t have to be complicated—or risky. With Streamlabs’ flexible widget system, you can easily create a clean, professional, and Twitch‑compliant chat experience using two Chat Boxes. If you have any questions or comments, please let us know by contacting us or joining our Discord server.