

If you’re an advanced creator, you may want to create your own Custom Widgets for use with Streamlabs and with the Custom Widget, you can do just that! In this guide we’ll walk you through the basics of the Custom Widget, but do note it is intended for advanced users and our team won’t be able to advise you on how to create your widgets (though we do have thousands of pre-built widget themes available for our dozens of widgets if you’re not ready to set off on your own just yet). If you’re ready to do some experimenting, read on!
Beware: Because of the inherent risks of using custom code, we remind you to be extra careful when using code that you did not write.
Table of Contents:
- Accessing the Custom Widget
- How to Create Multiple Custom Widgets
- How to Add Custom Widgets to Your Stream
- Documentation
Accessing the Custom Widget
There are two ways you can access the custom widget—via your Streamlabs Dashboard or directly in Streamlabs Desktop. We recommend editing within Streamlabs Dashboard as custom fields are easier to view, you will have more testing options available, and you can switch between themes more easily (more on that later), but we’ll walk you through how to access the widget in both locations.
How to Access the Custom Widget in Streamlabs Dashboard
To access the custom widget in your Dashboard:
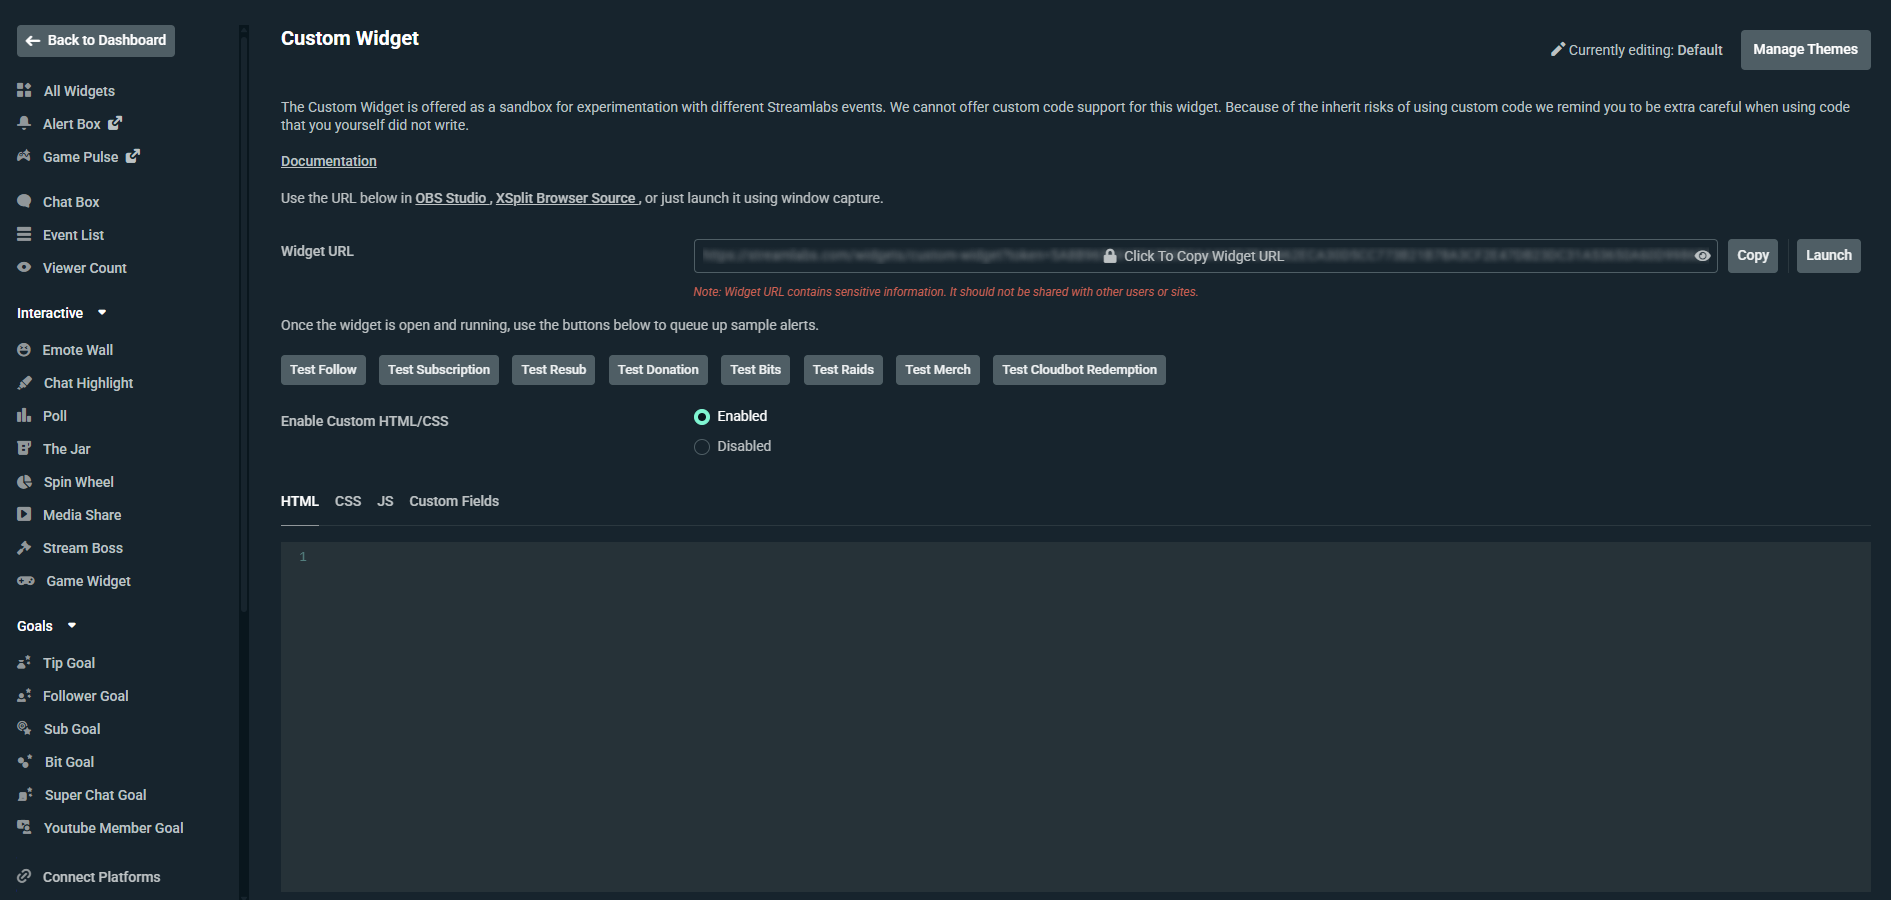
Step 1: Make sure you are logged into your Streamlabs account
Step 2: Visit the custom widget page here: https://streamlabs.com/dashboard#/widgets/customwidget.
How to Access the Custom Widget in Streamlabs Desktop
While it’s typically easier to edit the custom code via the Streamlabs DashboardTo access the custom widget in Desktop:
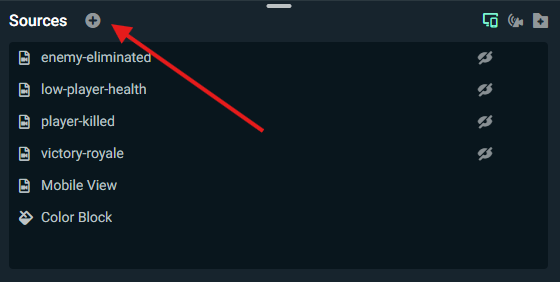
Step 1: Click on the + icon in your sources menu.
Step 2: Scroll to the bottom of the Widgets section, select Custom Widget, and click Add Source.
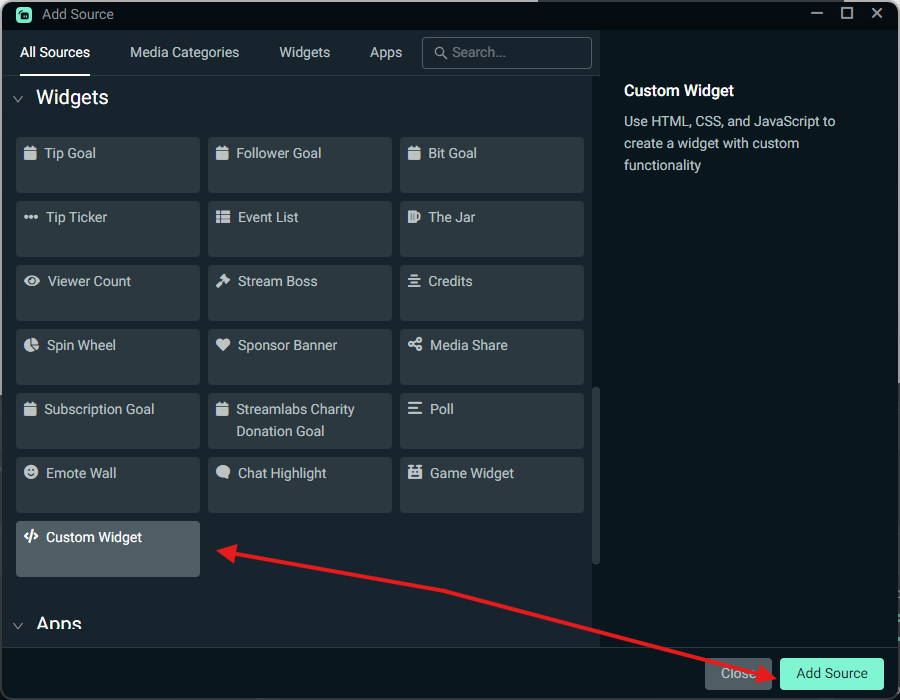
Step 3: Give your custom widget a name in the popup, then click Add Source.

Step 4: From here you can adjust some basic settings under Browser Settings or expand the Custom Code section and click Edit Custom Code to access the Custom Fields, HTML, CSS, and JS.
How to Create Multiple Custom Widgets
In some cases, you may wish to create multiple custom widgets. A custom widget is just like any other widget in that its data is stored in what we call a widget theme. Each widget theme can have one of each type of widget, including one custom widget, but you can create more custom widgets by creating additional widget themes. Your active widget theme will determine which custom widget can be added via widget sources in Streamlabs Desktop, but you can add widget themes as browser sources in any streaming software, allowing you to add more than one to your stream.
To create multiple custom widgets follow these shortened instructions or check out our widget themes guide for more information.
Step 1: Visit your Widget Themes management page here: https://streamlabs.com/dashboard#/widgetthemes.
Step 2: Click Create Widget Theme to create a new theme.
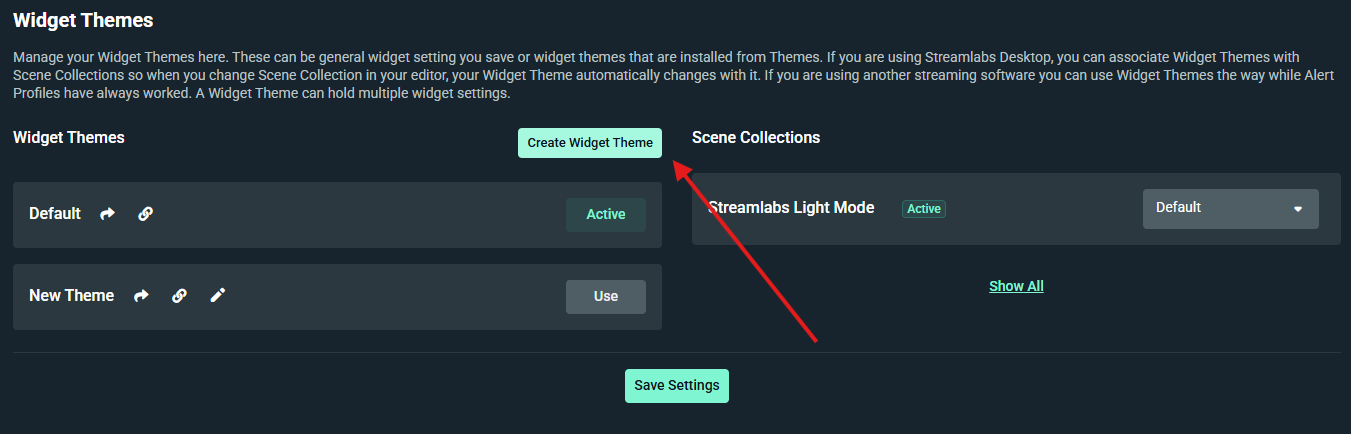
Step 3: Name your new theme. If you’re creating this theme only for the purpose of generating a URL for a custom widget, it is smart to name it for that purpose and add a description. Once you are happy with your naming, click Create.

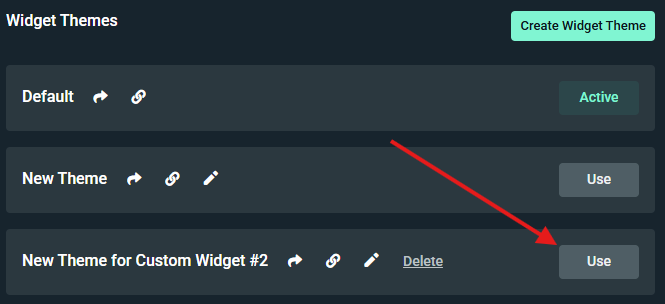
Step 4: Click Use next to the theme you just created so that you are editing your custom widget under the correct theme. Verify it says Active next to the desired theme before moving on.
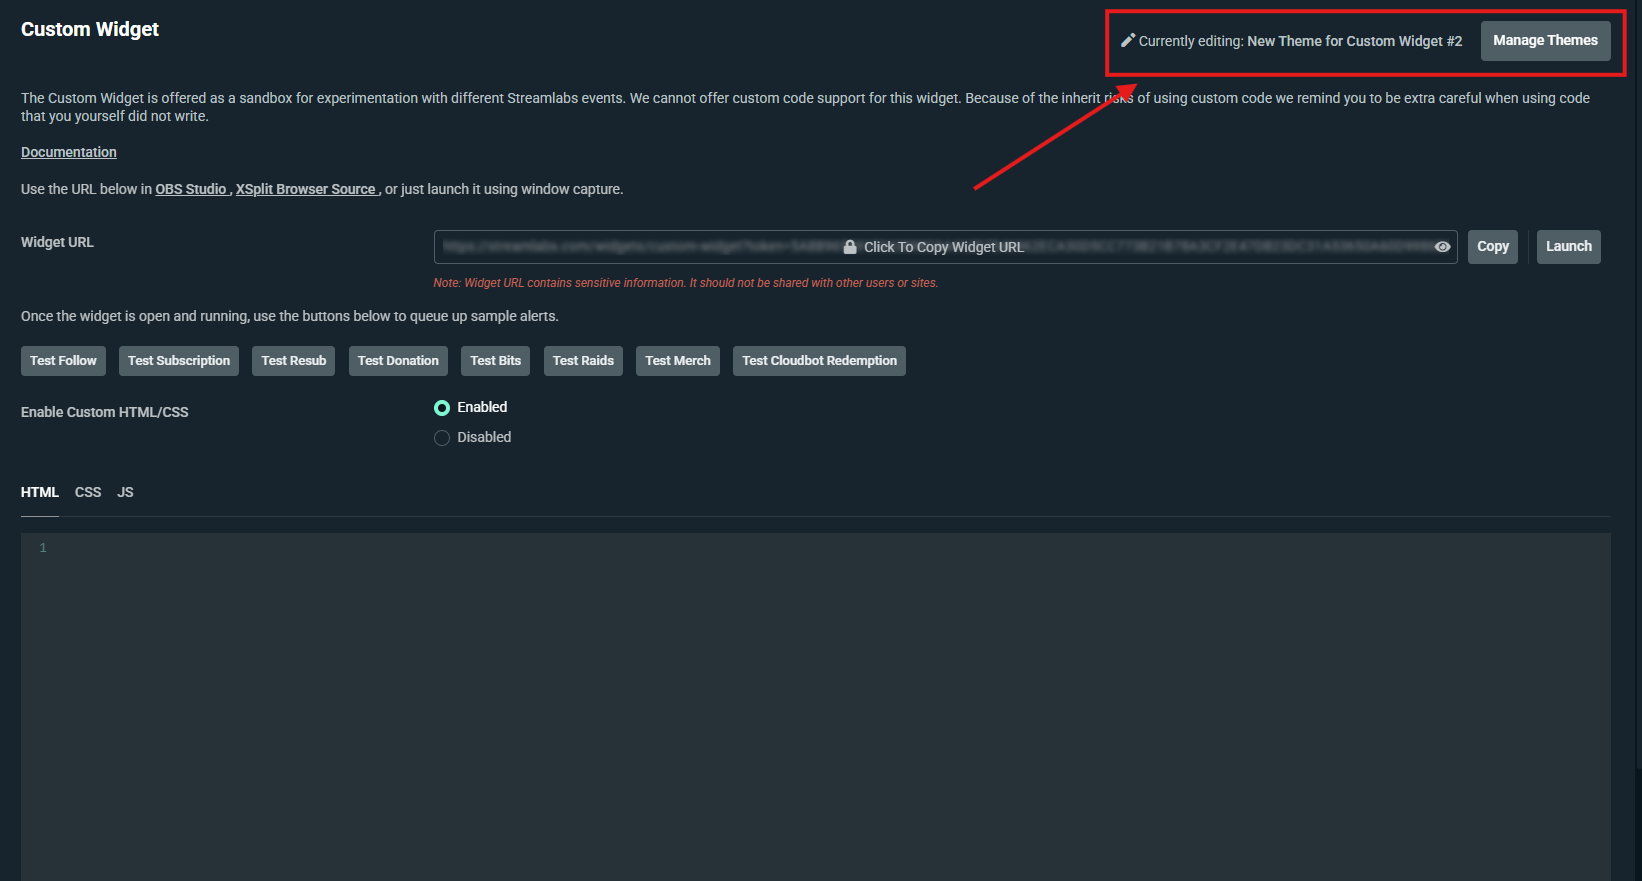
Step 5: Return to the custom widget page to edit your widget. You should see the theme you set active in the top right of your screen.
If you wish to change which custom widget you are working on, click Manage Themes in the top right and choose another theme to edit by clicking Use to make it the active widget.
Step 6: Repeat this process for as many custom widgets as you would like to create.
Step 7: Once you are done editing, ensure the widget theme that has the alerts and other widgets you want to display on stream is active before you go live again.
Step 8: Add your custom widget to your stream either directly with Streamlabs Desktop or via Browser Source with Desktop, OBS, or other streaming software (detailed instruction below).
How to Add a Custom Widget to Your Stream
How to Add a Custom Widget in Streamlabs Desktop
If you have the custom widget you want to use within your active widget theme, the steps to add your custom widget in Streamlabs Desktop are exactly the same as the steps outlined here.
Note: If you expect you will change widget themes but want to keep a consistent custom widget on your stream or you want to add multiple custom widgets, you will want to add your custom widget as a browser source as outlined in the following sections.
How to Copy Your Custom Widget URL for Use as a Browser Source
Follow these steps to get the URL for your custom widget or widgets that you can use as a browser source.
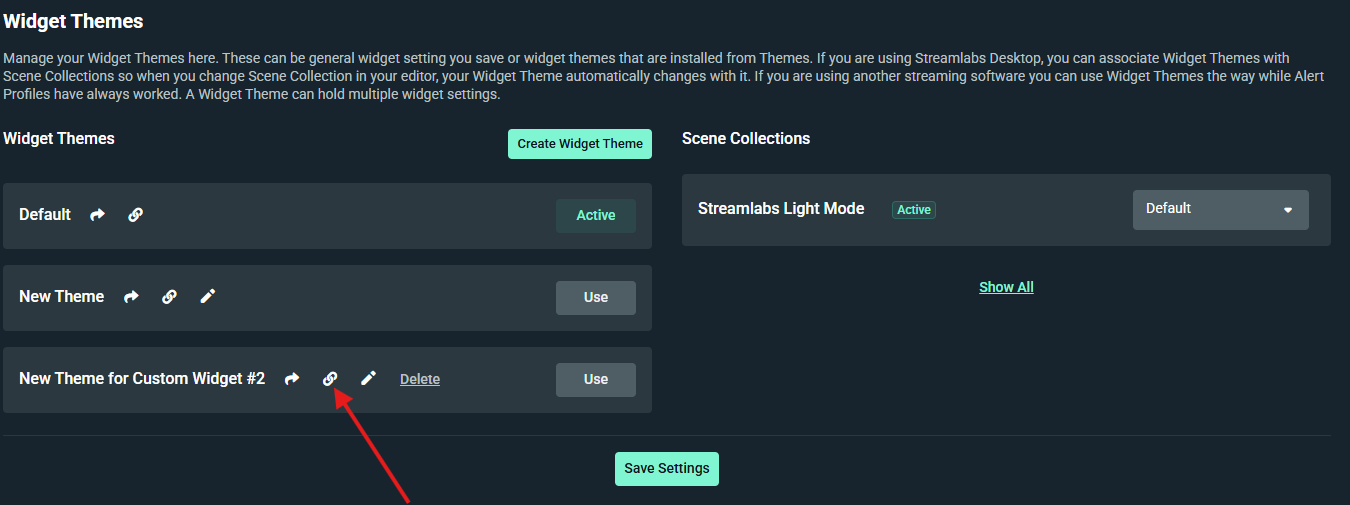
Step 1: Visit the Widget Themes page in your Streamlabs Dashboard.
Step 2: Click the link icon next to the desired widget theme.
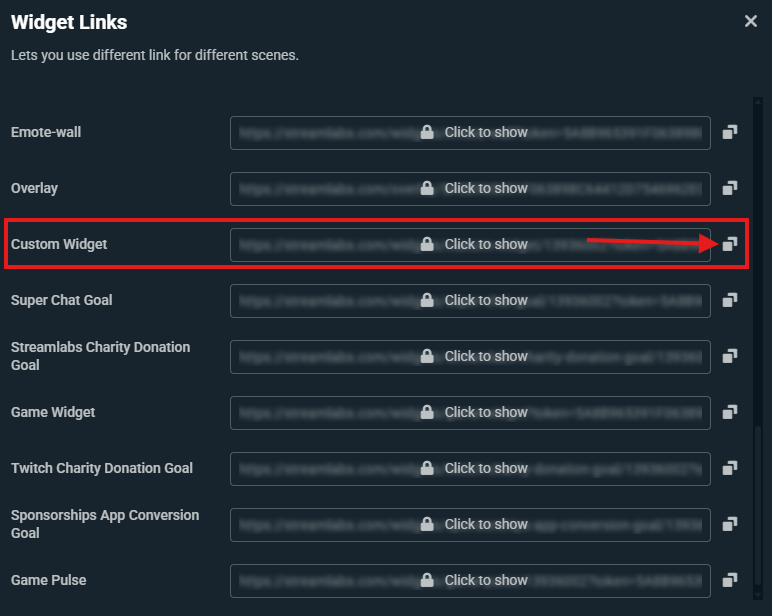
Step 3: Scroll until you find Custom Widget and click the copy icon to the right of the URL.
Step 4: Jump to the following section depending on if you want to add your custom widget to Streamlabs Desktop or OBS.
How to Add Multiple Custom Widgets in Streamlabs Desktop
To add multiple custom widgets in Streamlabs Desktop, you will need to add the widgets as browser sources by following these instructions.
Step 1: Copy your custom widget URL as outlined above.
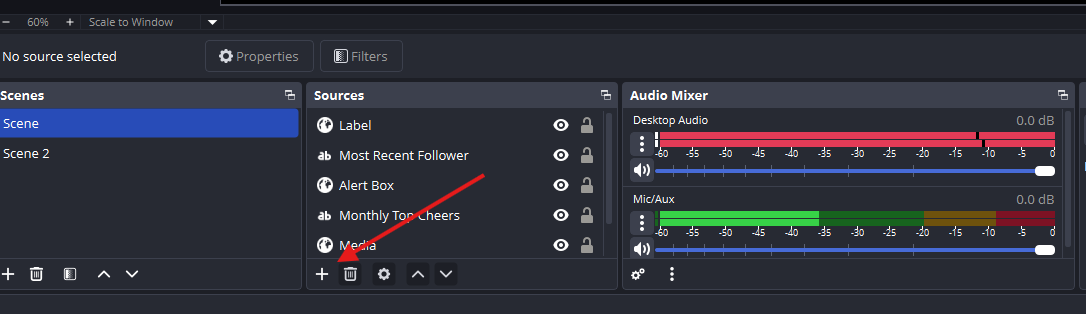
Step 2: In Streamlabs Desktop click the + icon in the Sources section.
Step 3: Select Browser Source under Capture Sources and click Add Source.
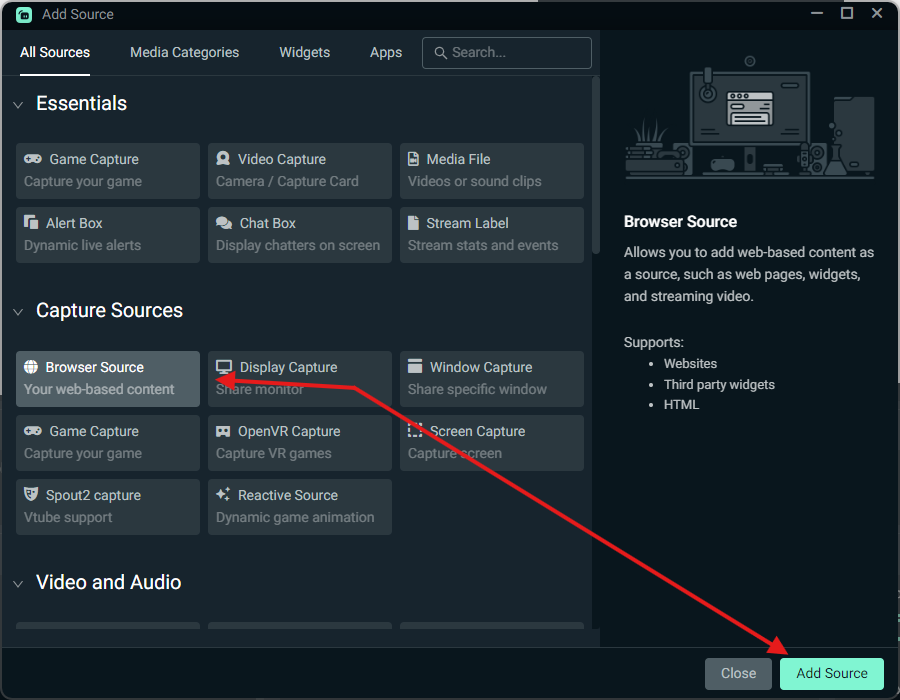
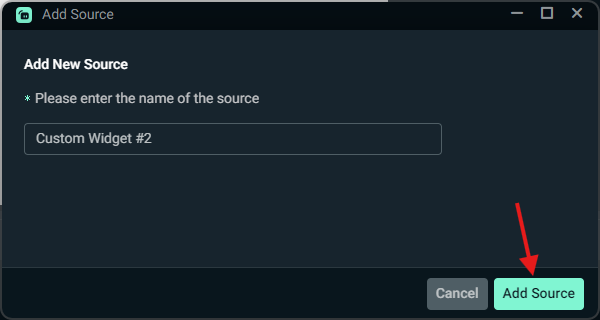
Step 4: Name the source to match the custom widget URL you currently have copied and click Add Source.
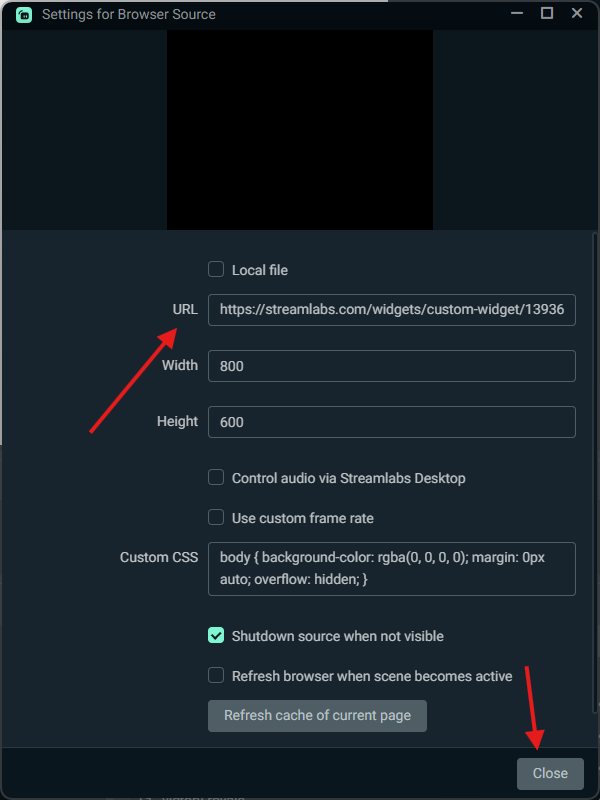
Step 5: Paste the custom widget URL in the URL field, adjust the width and height to match the dimensions of your custom widget, click close, and you’re done!
How to Add a Custom Widget in OBS
If you want to add a custom widget you have created into OBS, it’s as simple as adding a Browser source. Read on for step-by-step instructions.
Step 1: Copy your custom widget URL as outlined above.
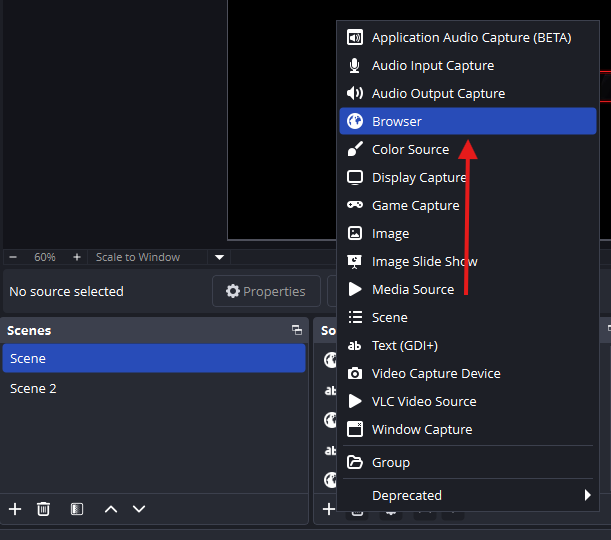
Step 2: In OBS click + icon in the Sources section to add a source and choose Browser.
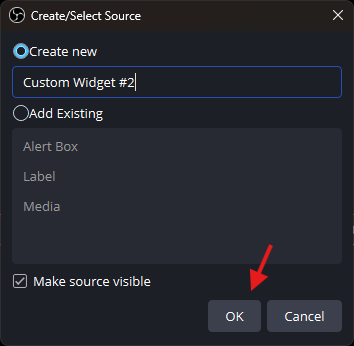
Step 3: Name the source to match the custom widget URL you currently have copied and click OK.
Step 4: Paste the custom widget URL in the URL field, adjust the width and height to match the dimensions of your custom widget, click OK, and you’re done!
Custom Widget Documentation
While we can’t help you build your Custom Widgets, our development team has provided some information and code snippets to help get you started.
The Event Object
The Custom Widget listens to most events that Streamlabs dispatches. This includes:
- Streamlabs: Tips, Merch sales
- Twitch: Follows, Subscriptions, Bits, Raids, Chat Messages
- YouTube: Subscriptions, Members, Super Chats
- Kick: Follows, Subscriptions, Kicks
- X (Twitter): Follows, Subscriptions, Raids
- Patreon: Pledges
- Facebook: Follows, Stars, Likes, Shares, Supports, Support Gifters
We can see the event through addEventListener(). Let’s start with looking at the object associated with an event. To do so we can just use the browser console to log it.
|
|
If we look at the object inside the browser’s console we will see something like this.
|
|
There is quite a bit of information here, and most of it is just data that we need on the Streamlabs side for our processes. The information that you are most likely interested in is within the detail key. Below are some examples of events from different platforms.
|
|
|
|
Looking at the sample object from a YouTube Super Chat we can see everything that we would need to turn that event into an alert, put it into a label, or anything else you can imagine.
Object Handling
Each event has different details associated with it, so one catch-all listener that does everything may not be the best choice. Instead it is a good idea to set up one listener that can then re-dispatch the events that you need, in a format that you can use.
|
|
You can then listen for that event and do what needs to be done with the data it provides.
|
|
Build Your Own Queue
The custom widget has one major limitation—unlike the regular Streamlabs Alert Box Widget, this widget does not have any queuing system built in. Events come in at real time as they happen, and they will come in at the same time, and not necessarily in the same order they happen.
One way to avoid this is to build your own simple queue by pushing new events into an array then reduce() that array within a Promise.
Below is a working example of a simple event queue that shows new events, 5 seconds apart as they appear.
|
|
External Helper Libraries
If you need to use a helper library you need to import them from a CDN. Because the loading times differ between libraries and CDNs you run the risk of an event happening before the library is loaded which could cause errors making the widget fail.
To avoid this you should write something where the libraries will load before allowing the widget to do its things. Below is an example script that always makes sure the library is loaded and ready before doing anything that is wrapped in its function.
|
|
We hope you have found this guide helpful. We’re excited to see what you create! Jump into our Discord server to join our community or share your creations with us on socials.