

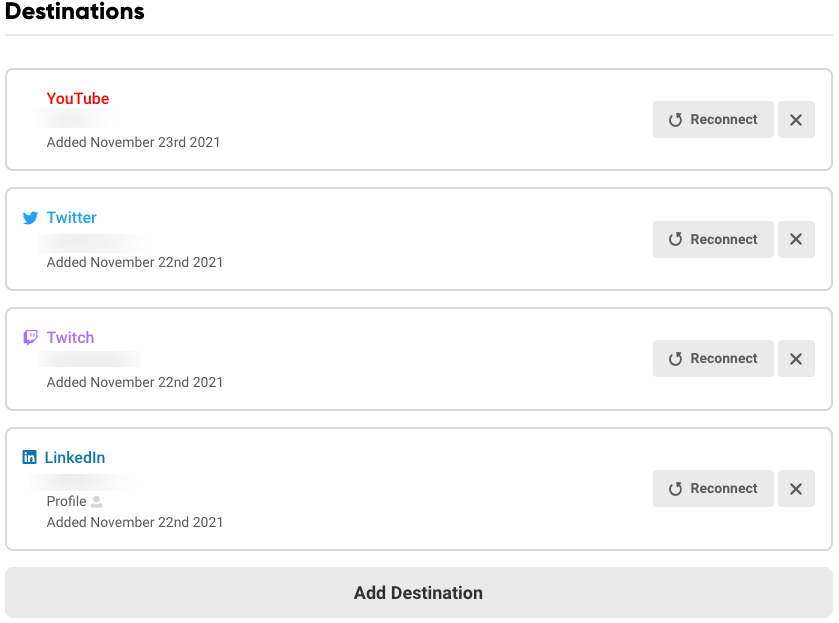
Your social media accounts are defined as your Destinations on Talk Studio. Major platforms supported. (eg. YouTube, Facebook, Twitch, Twitter, Linkedin) Below are guidelines to follow per social media account.
Destination Setup
1. To locate your Destinations page, click your Account icon and click Account Settings.
![[BILLING]%20Account%20>%20Account%20Settings.png](https://contenthub-cdn.streamlabs.com/static/imgs/posts/talk-studio/[BILLING] Account > Account Settings.png)
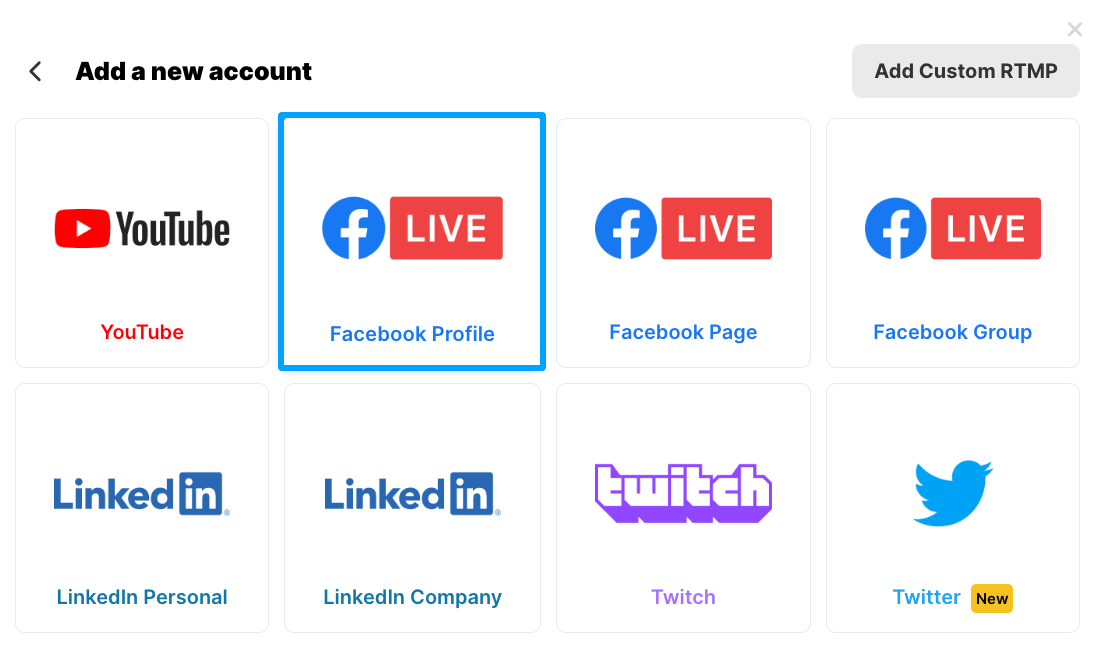
2. From your Destinations page, click Add Destination to connect your social media accounts.
(*If you own multiple accounts per email address, please log out of the account domain first (eg. Facebook.com, YouTube.com, Twitch.com, etc.), then press Add Destination so that you are prompted to log in to the appropriate account.)
Facebook Setup
When adding Facebook, there will be specific requirements you will need to install or grant permission to.
Facebook Profile - For any Group or Page you own or manage, your profile will always be marked as an 'admin'. It is preferred that you add your profile first since you will need to grant permission to allow Talk Studio to access your Facebook account.
1. You will receive a few prompts on-screen after selecting Add Destination > Facebook Profile. Please continue through each accordingly.
2. When you are asked to "Choose what you allow", please click on the link provided.

3. Enable permissions to manage content for any Group or Page you own, which will be tied to your Facebook personal profile.
(*To edit your profile permissions or privacy settings, please visit your Facebook Business Integrations page.)
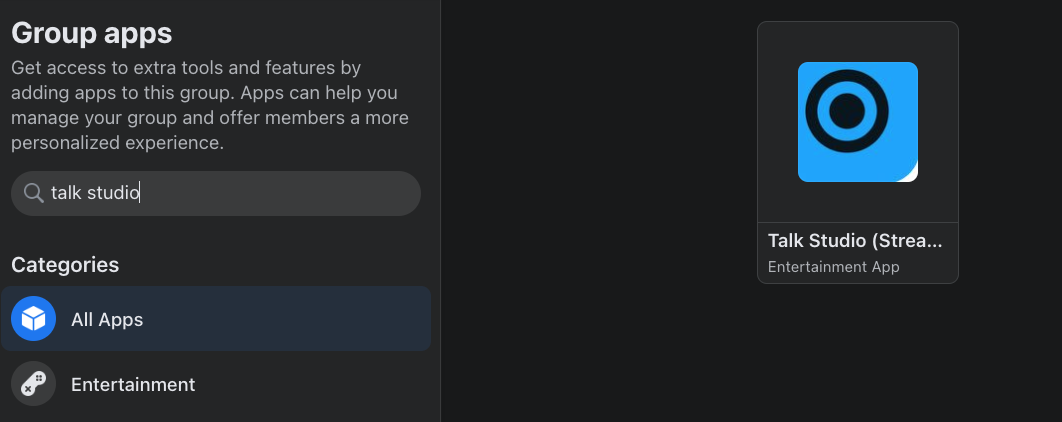
Facebook Group - There are two (2) steps you must complete when adding a Facebook Group. To start, please visit your Group homepage and Members section where you should see your FB Profile listed as an 'admin'.
*If you do not see your profile displayed, your group may be registered under a different email address. Please contact the owner of the group to send you an invite in order to mark your profile as an admin.
1. From your Destinations page, click Add Destination > Facebook Group.
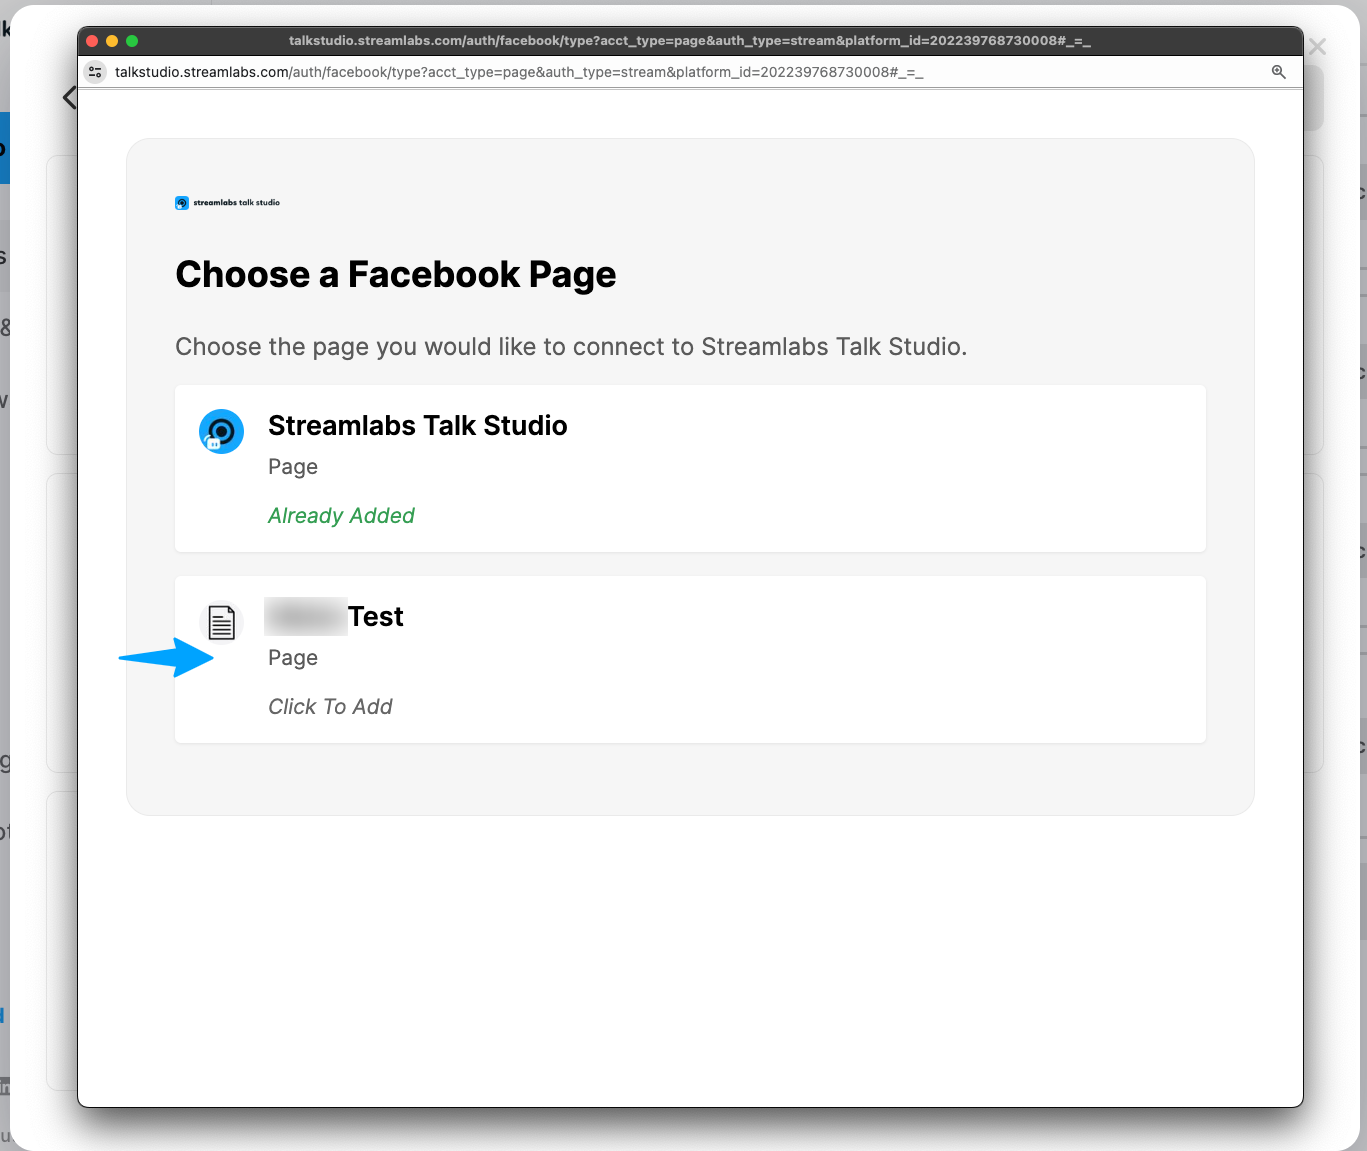
2. Please install the 'Talk Studio (Streaming)' app by visiting your Group Settings > Apps page and then type in "talk studio" in the search box provided.

Facebook Page - Your page will not require an app download but will require that your FB profile has Page Access. To check, please visit your Page and then locate & click Settings > New Pages Experience > Page Access. You will see your personal profile listed under People with Facebook access.

YouTube Channel Setup
YouTube has two (2) verification steps per channel you must complete before choosing to record or live stream on Talk Studio. If you just created your YouTube account or channel, please visit the link below to verify your channel through SMS/text messaging. (approximately 24 hours to verify)
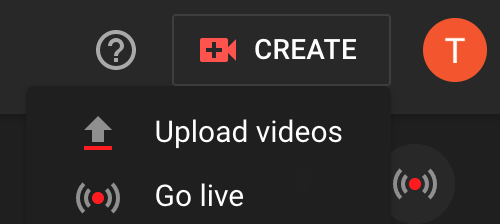
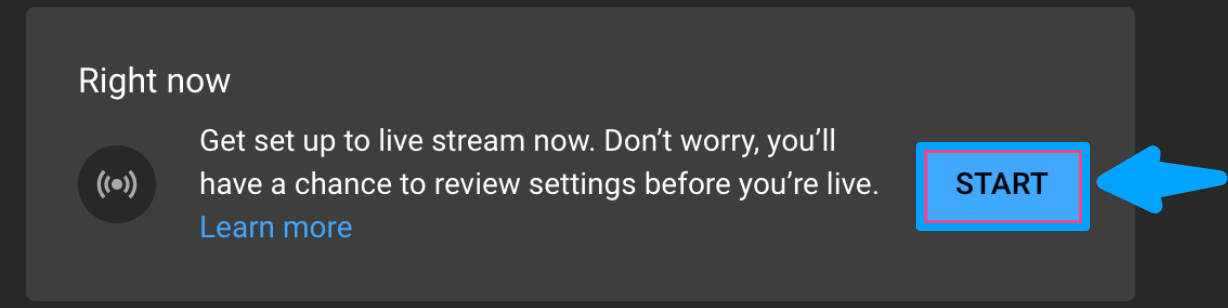
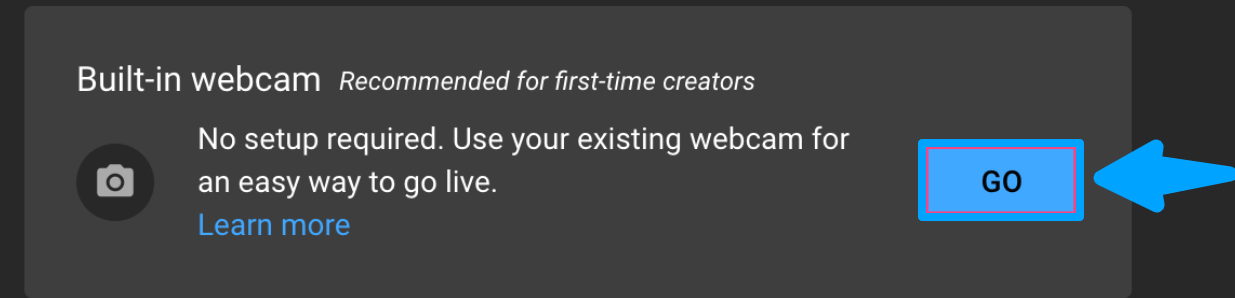
Once verified, please then visit your YouTube Studio. At the top right of your screen, locate and click Create > Go-live > Right now > Built-in webcam. *This step is very important to complete so that YouTube can verify your account is not spam.
When setting up your test stream, please mark it as "Unlisted" so that your verification stream does not end up in your public channel's search results. After 24 hours from the time that you went live has elapsed, you will be able to go live to your YouTube channel from your Talk Studio anytime afterward.
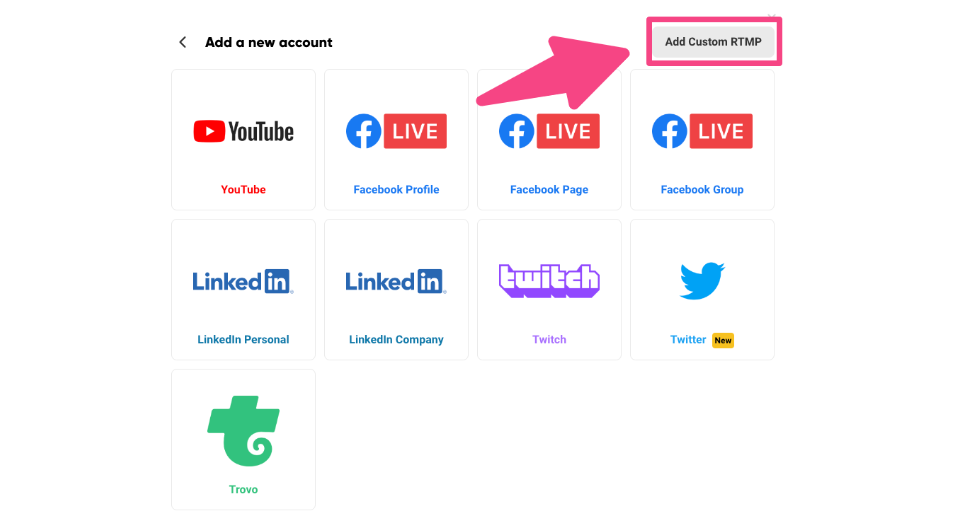
Custom RTMP Setup
Also known as a Real-Time Messaging Protocol (RTMP), RTMP settings will allow you to connect to any other social media platform that Talk Studio does not natively support such as Instagram or Rumble. Simply enter the Ingest Server URL and Stream key that would be provided on your settings page on the third-party platform.
1. From your Destinations page, click Add Destination > Add Custom RTMP.
2. Then enter the unique name, RTMP URL, and Sream key in the fields provided.