Having alerts is a crucial element of any live broadcast on YouTube. Think of them as an extension of your brand. They can be completely customized to match your personality or aesthetic. In short, having unique alerts will help you stand out from the crowd, keep viewers coming back, and encourage others to interact with your live stream on YouTube.
On-screen alerts are often your viewer’s first impression, so we recommend spending time making them unique and memorable. Today, we will show you how to create custom alerts for YouTube Live using Streamlabs’ Alert Box widget.
Pre-Made Alerts
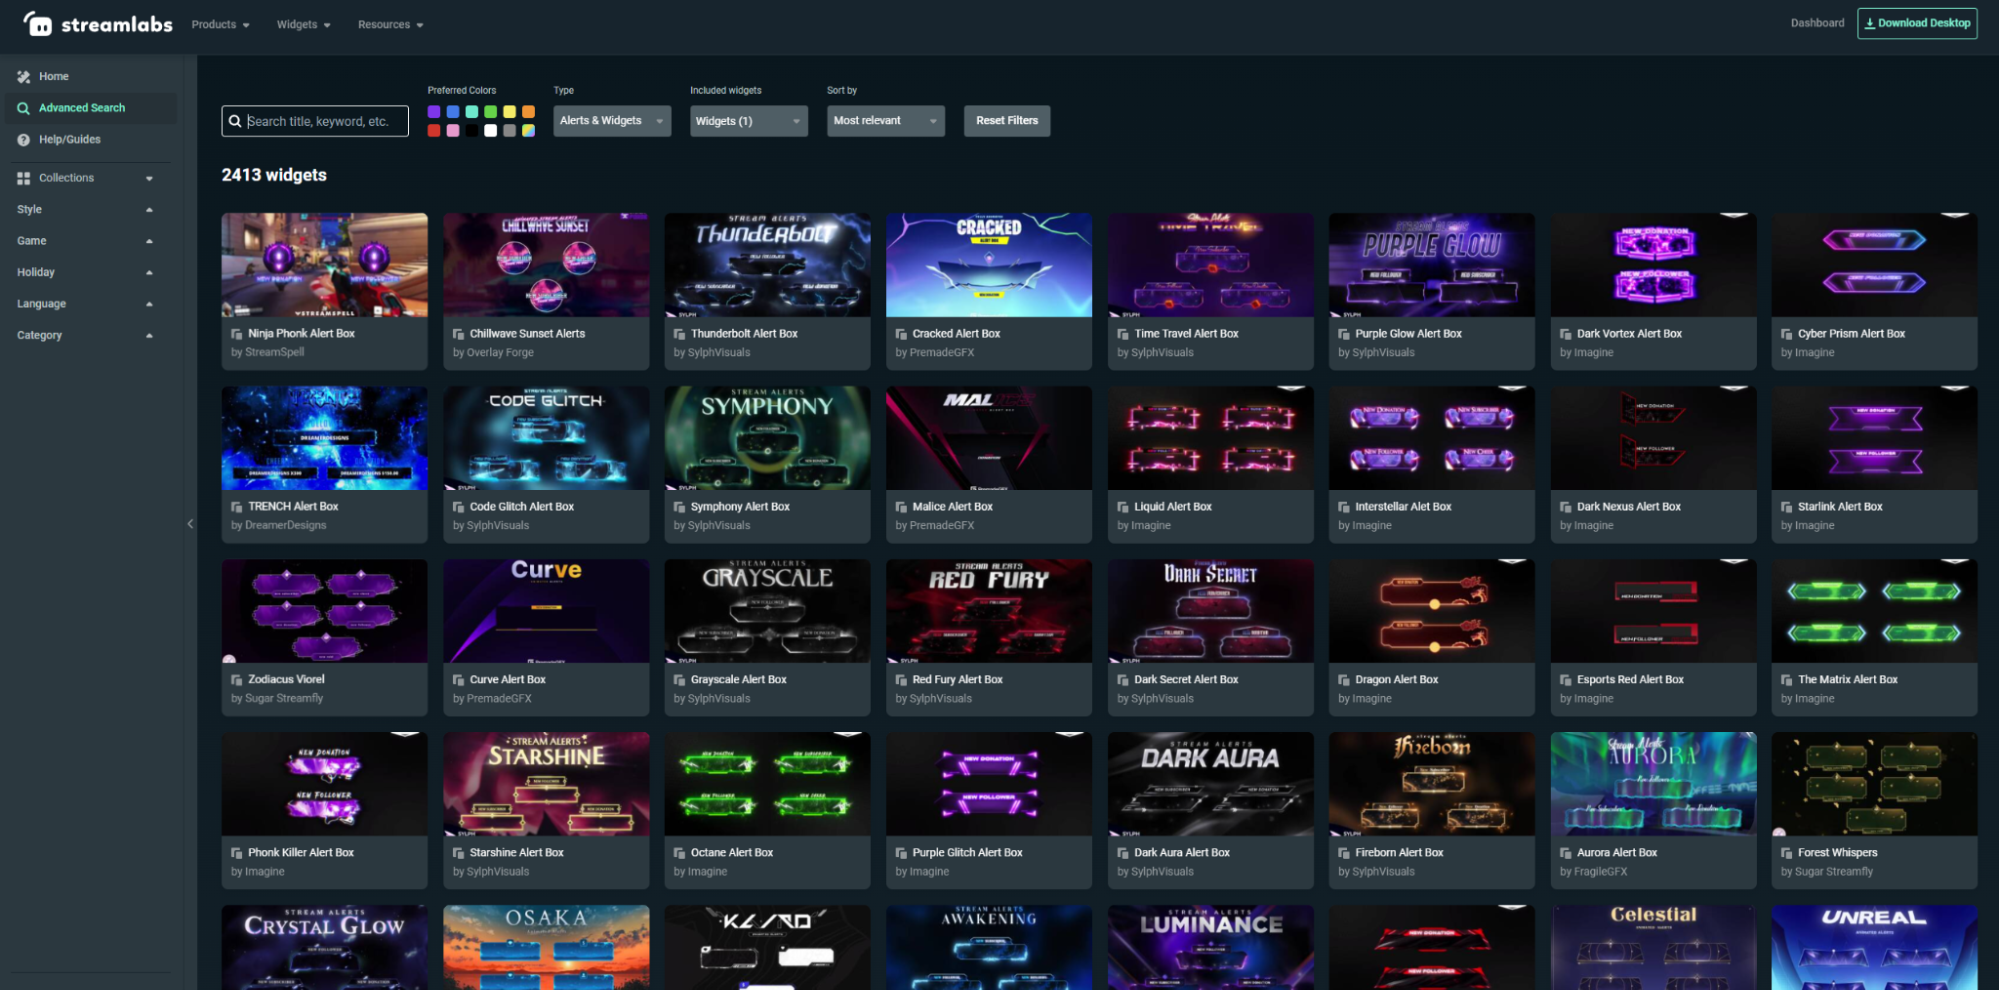
If you want to get customized alerts on your YouTube live rather quickly, Streamlabs also offers pre-made alerts for you to add to your live stream, created by top designers in the industry. Visit our themes library, click on Advanced Search, and then filter Type to Alerts & Widgets to view our collection. You can also access this library by logging into Streamlabs.com and clicking on Themes & Overlays from the left navigation panel.
Create Custom Alerts
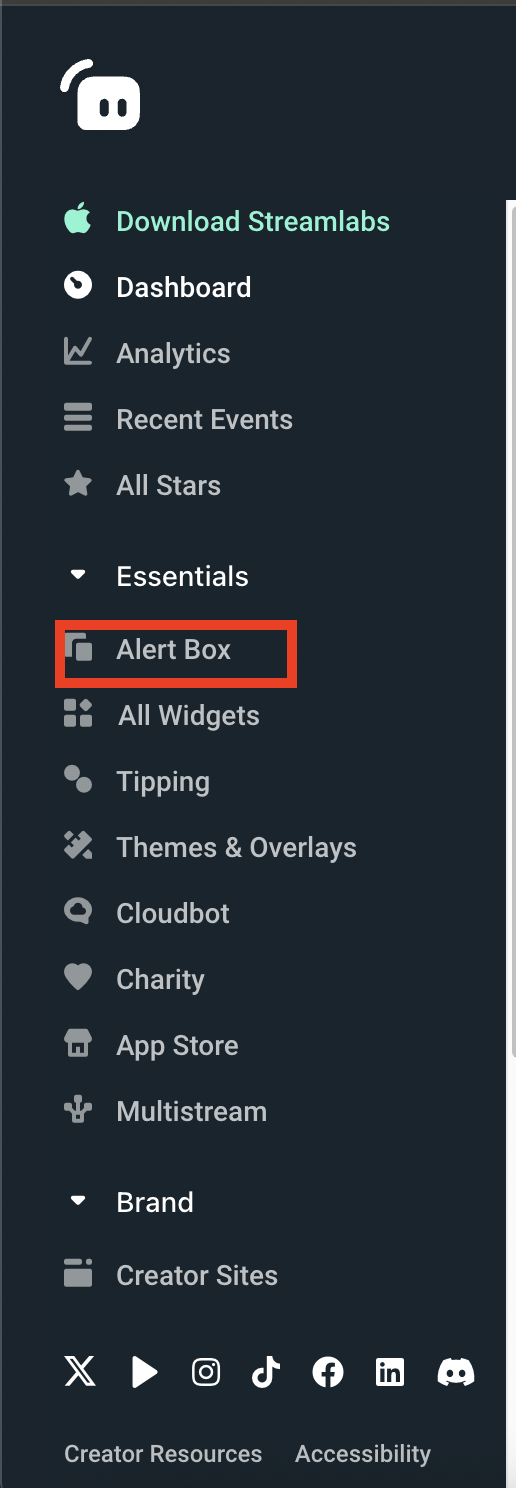
If you don’t want to use a pre-made alert, you can manually customize your own by navigating to the Streamlabs dashboard and clicking on Alert Box from the left navigation window.
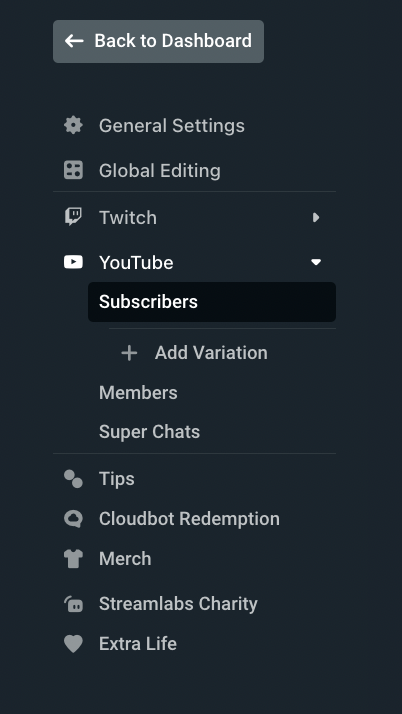
The alerts you can edit will differ depending on which platform you have selected. Since the account pictured below has YouTube selected, we can see options such as Subscribers, Members, and Super Chats.
Below are some of the customizations you can make for each YouTube alert type.
Subscribers: Viewers who have chosen to follow your YouTube channel.
Superchat: A feature that allows viewers to pay to have their messages highlighted during a YouTube live stream.
Members: Viewers who pay a recurring fee to access exclusive perks from a YouTube channel, such as special badges, emojis, and additional content.
Also, you can preview your alerts in the right preview window while you’re editing. Additionally, you can test alerts by navigating to the top menu bar of your Alerts Settings on your Streamlabs Dashboard. Click Test, then select the alert(s) you’d like to test from the drop-down menu.
You can also test your alerts by clicking the Test Widgets in Streamlabs Desktop (at the very bottom), and then selecting the alert type you’d like to test.
General Settings
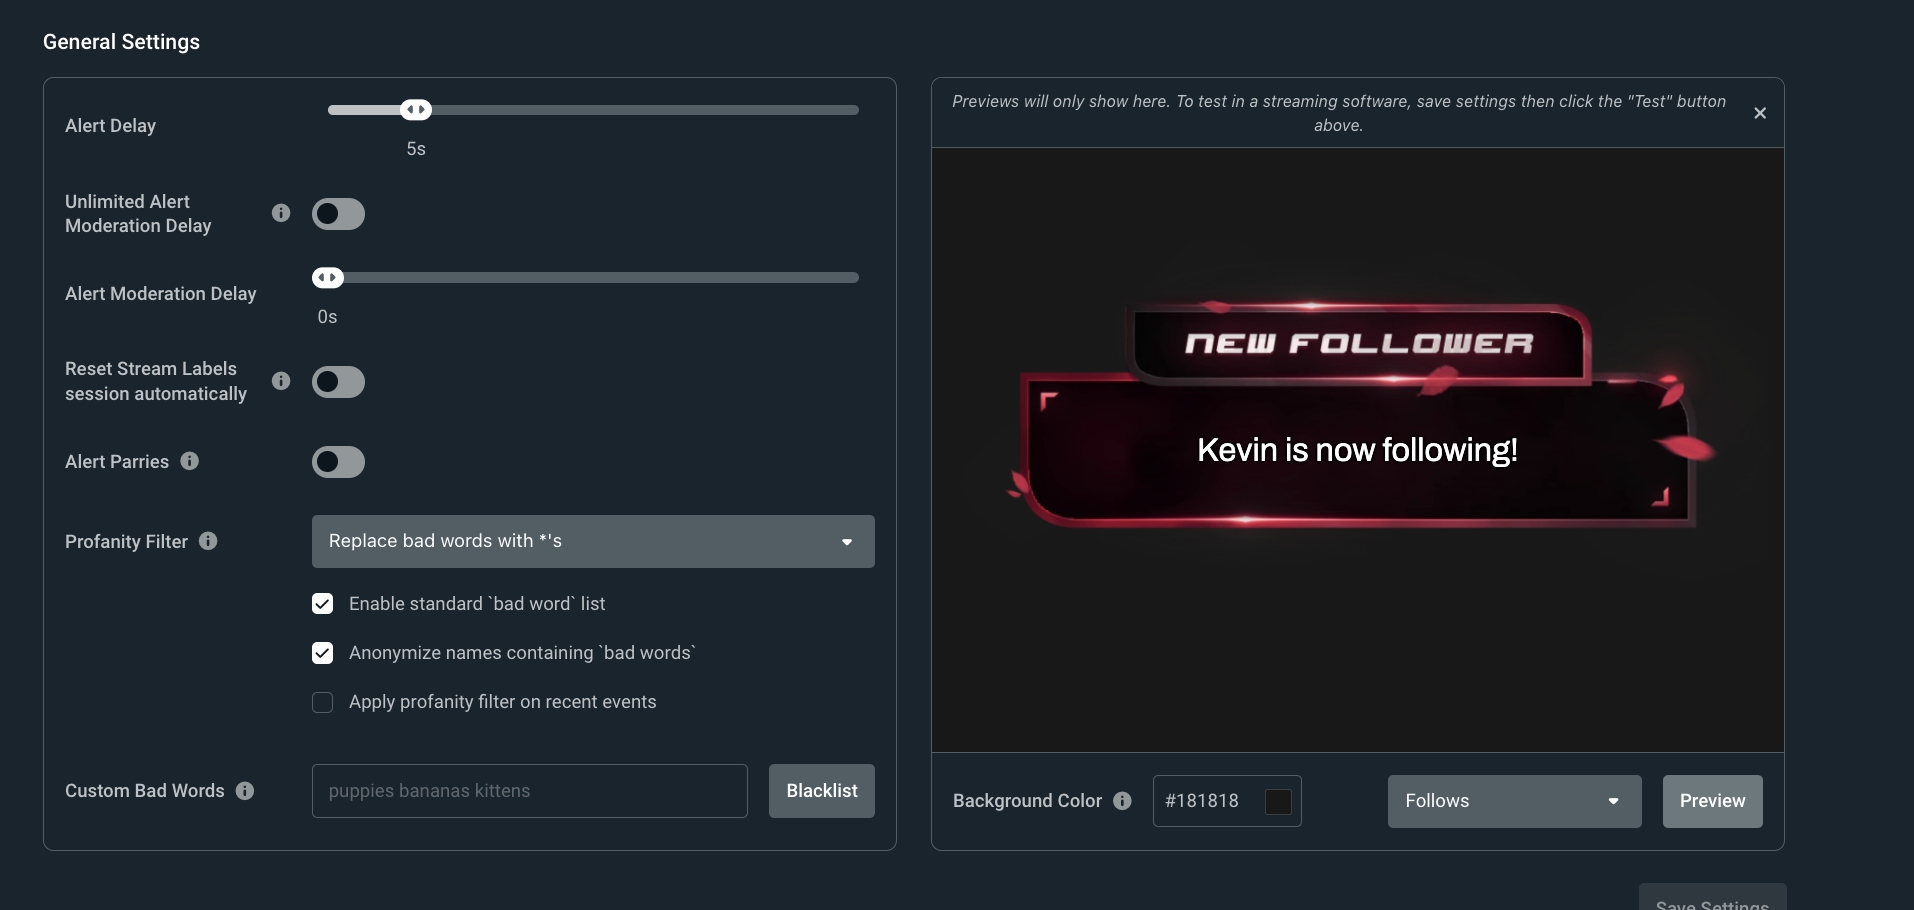
In addition to changing the settings for individual YouTube alert settings, you have the option of tweaking General settings that apply to all alerts (on all platforms). Here, you can edit the alert delay, mod approvals, profanity filters, add custom bad words, etc.
Alert Customization
For each alert type, you can customize the layout of the alert, image, or gif that’s played, as well as the sound, font, animation, duration, text-to-speech, and more, depending on the alert type.
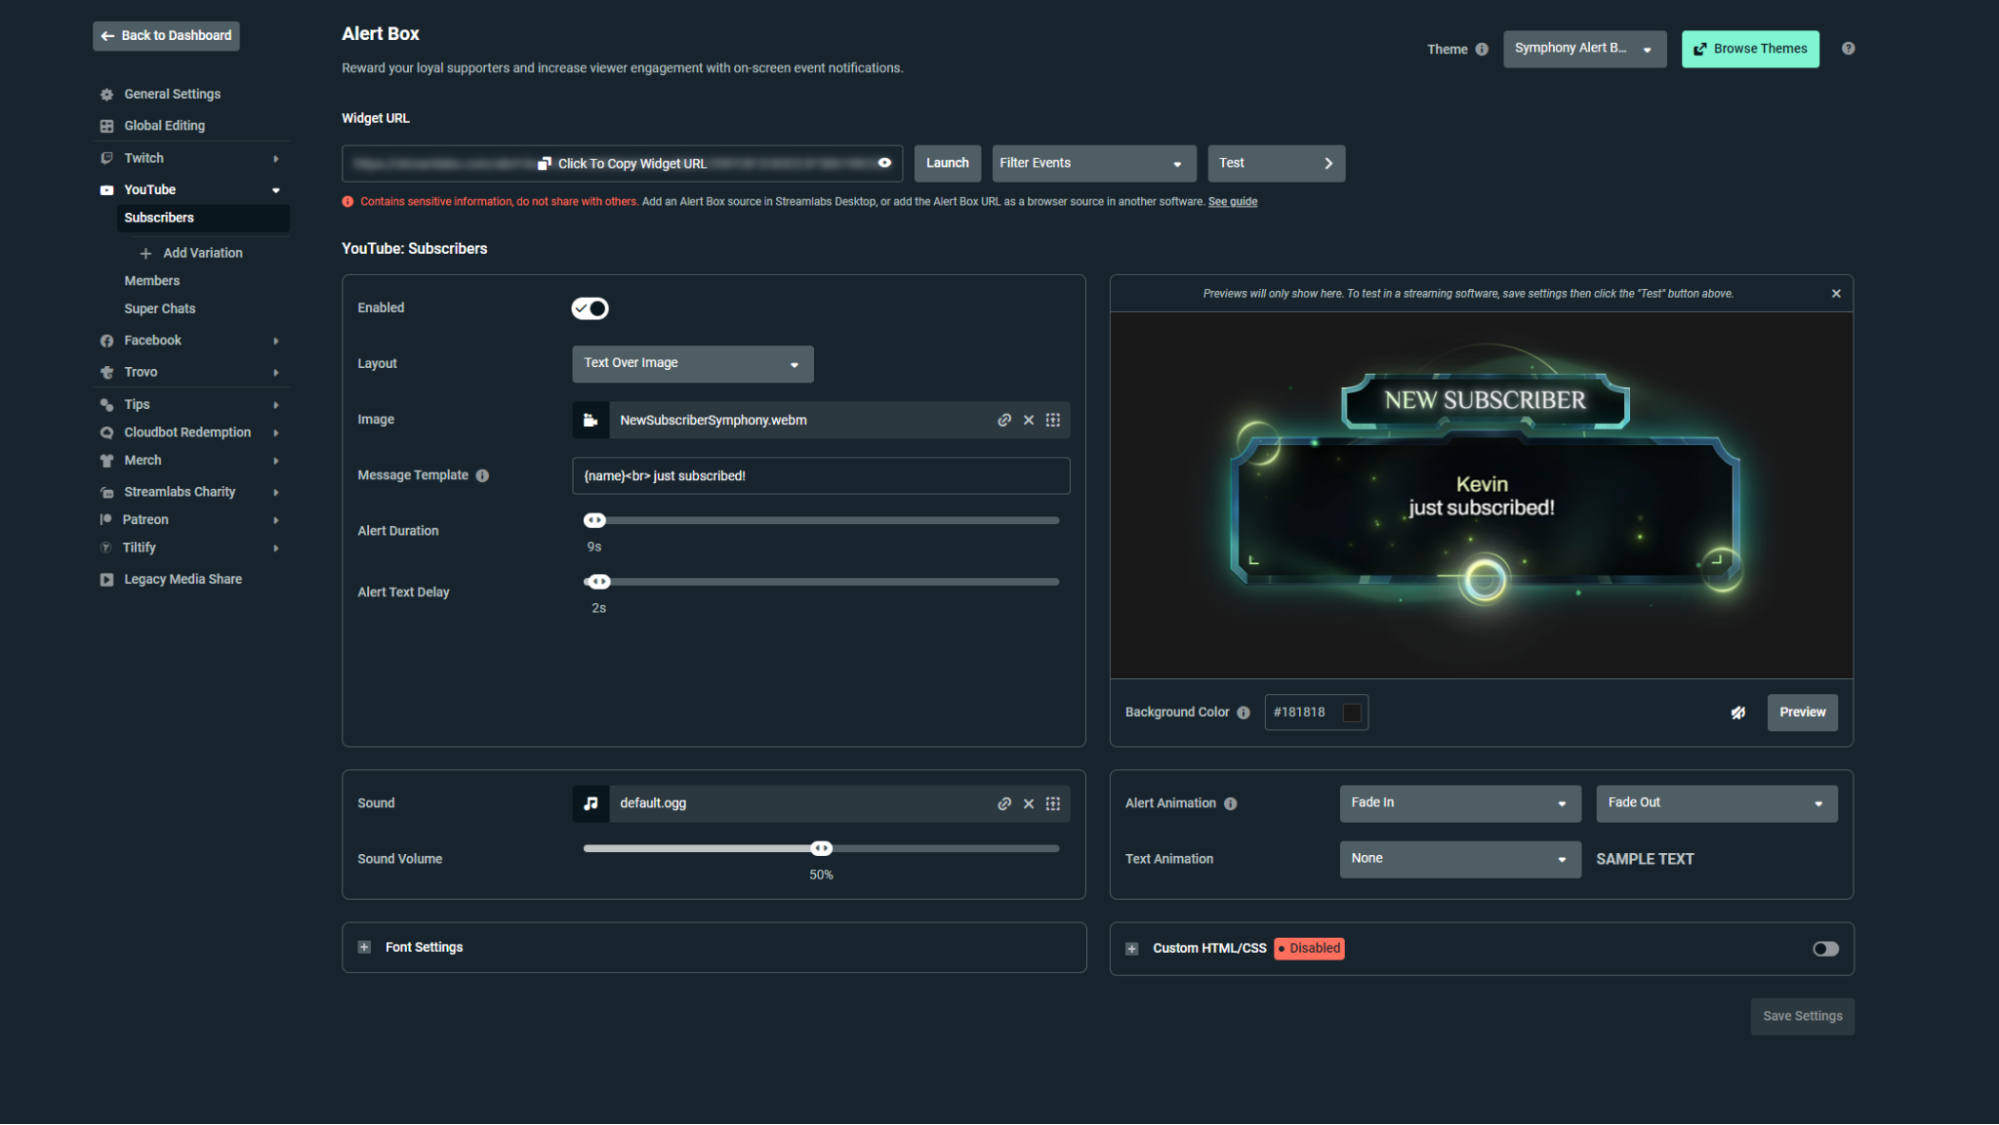
You can also create variations for each alert type to trigger special alerts for different conditions such as exact tip amounts, minimum tip amounts, months subscribed, gift subscriptions and more. Learn more about variations in our variations guide.
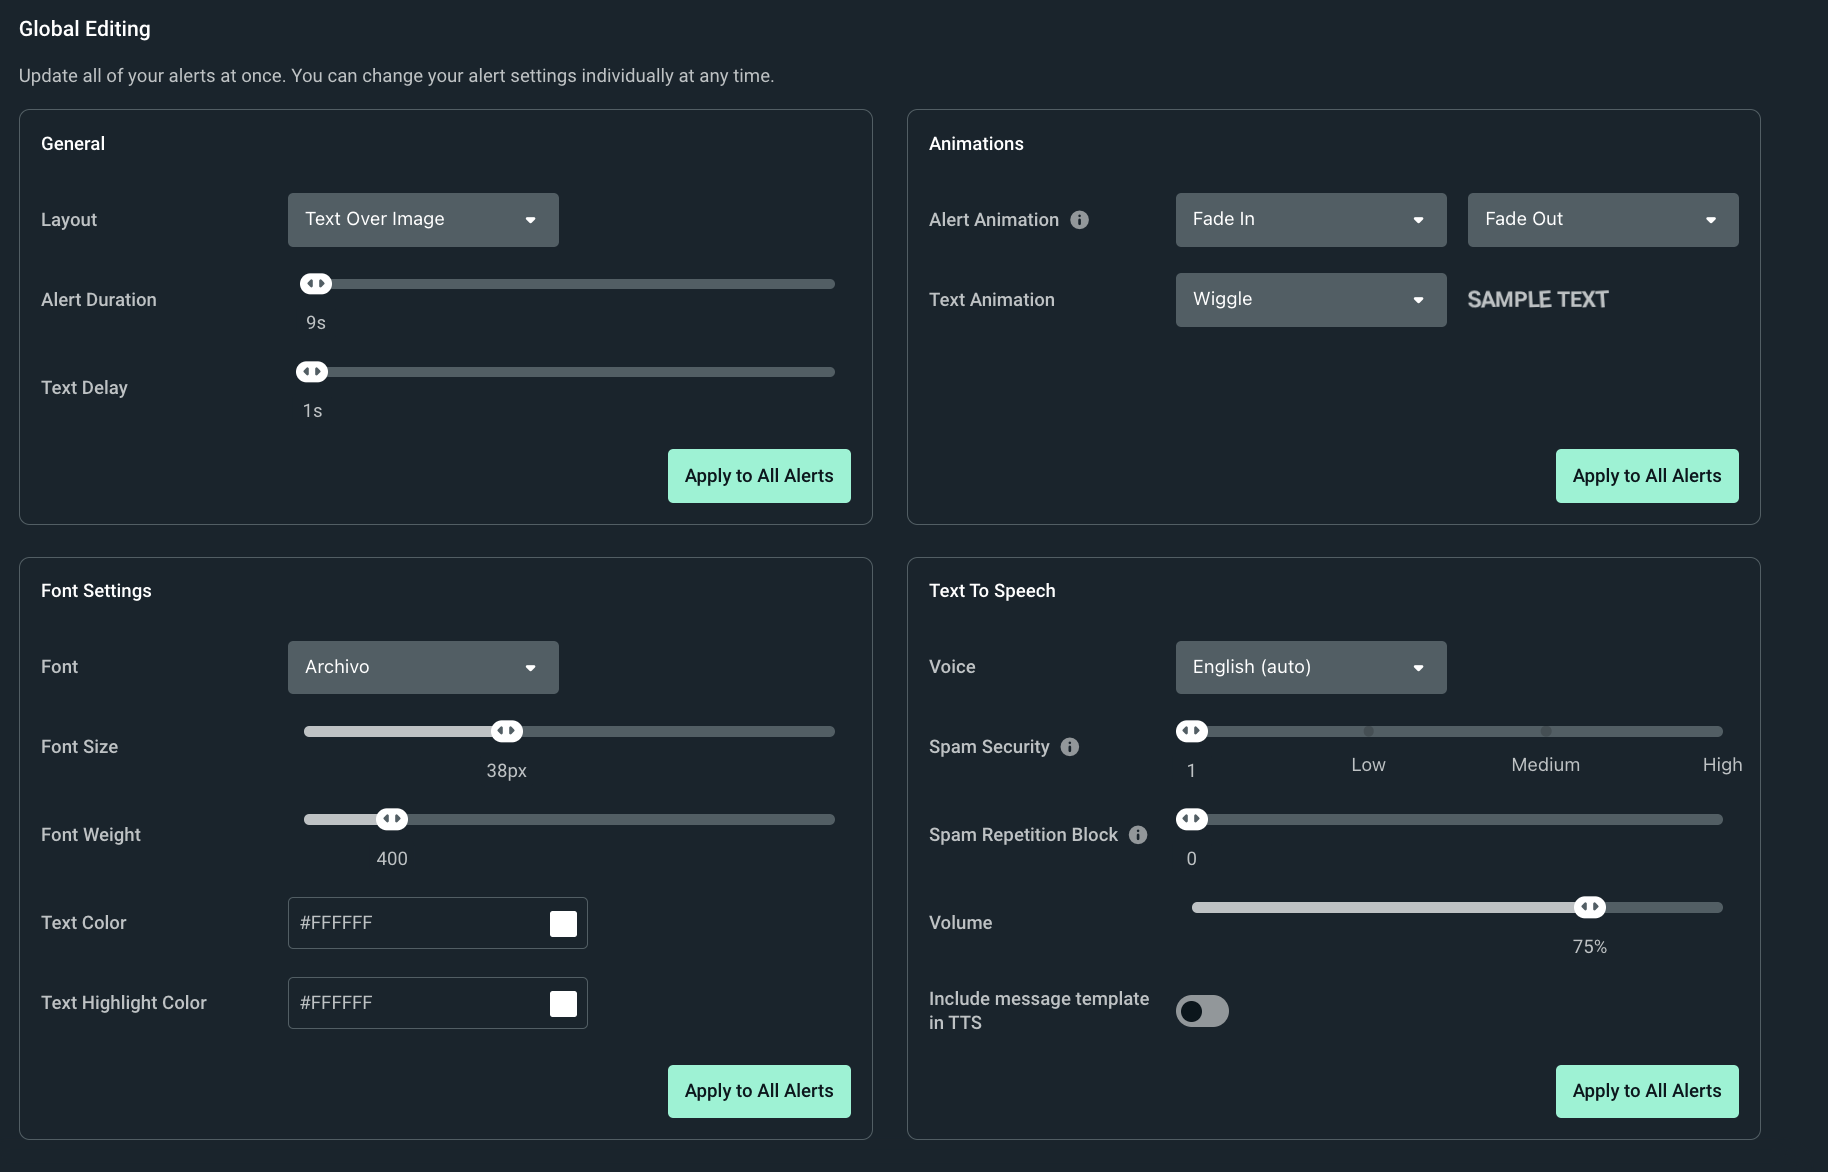
Global Editing
Global Editing is a helpful tool for updating all of your alerts and variations at once.This helps cut down on setup time if you intend to use the same font, text-to-speech, animations, layout or duration settings on a lot of different alert types. However, you can still change your alert settings individually at any time (as mentioned above). Below are some of the changes you can update in the Global Editing window.
How to Add an Alert Box Widget to Your Live Stream
Streamlabs Desktop
As a refresher, widgets are elements you can add to your live stream to help you interact and engage with your viewers. An alert box is just one of the many widgets you can use to make your YouTube live stream more engaging.
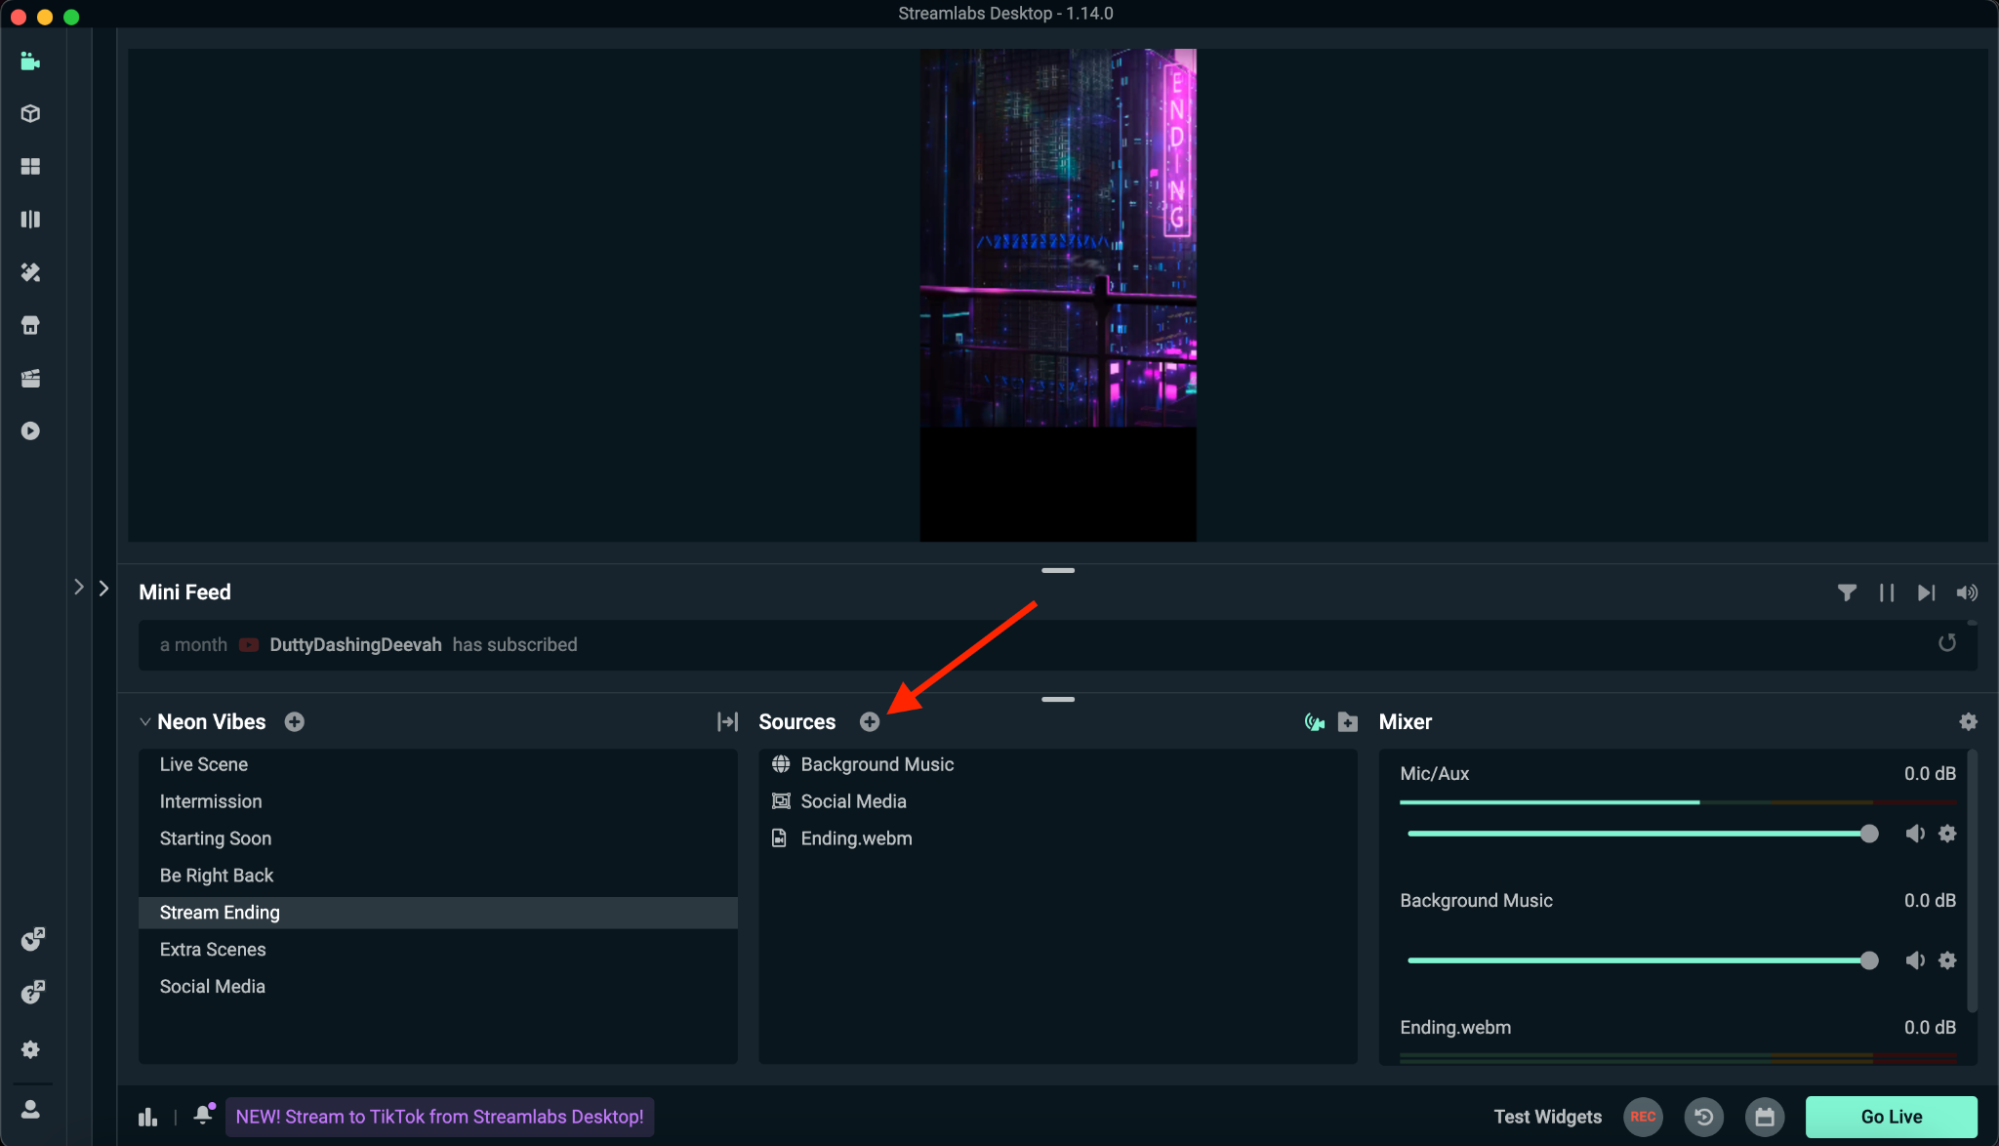
Step 1: To add an Alert Box, press the plus sign in the Sources section of Streamlabs Desktop and select Alert Box.
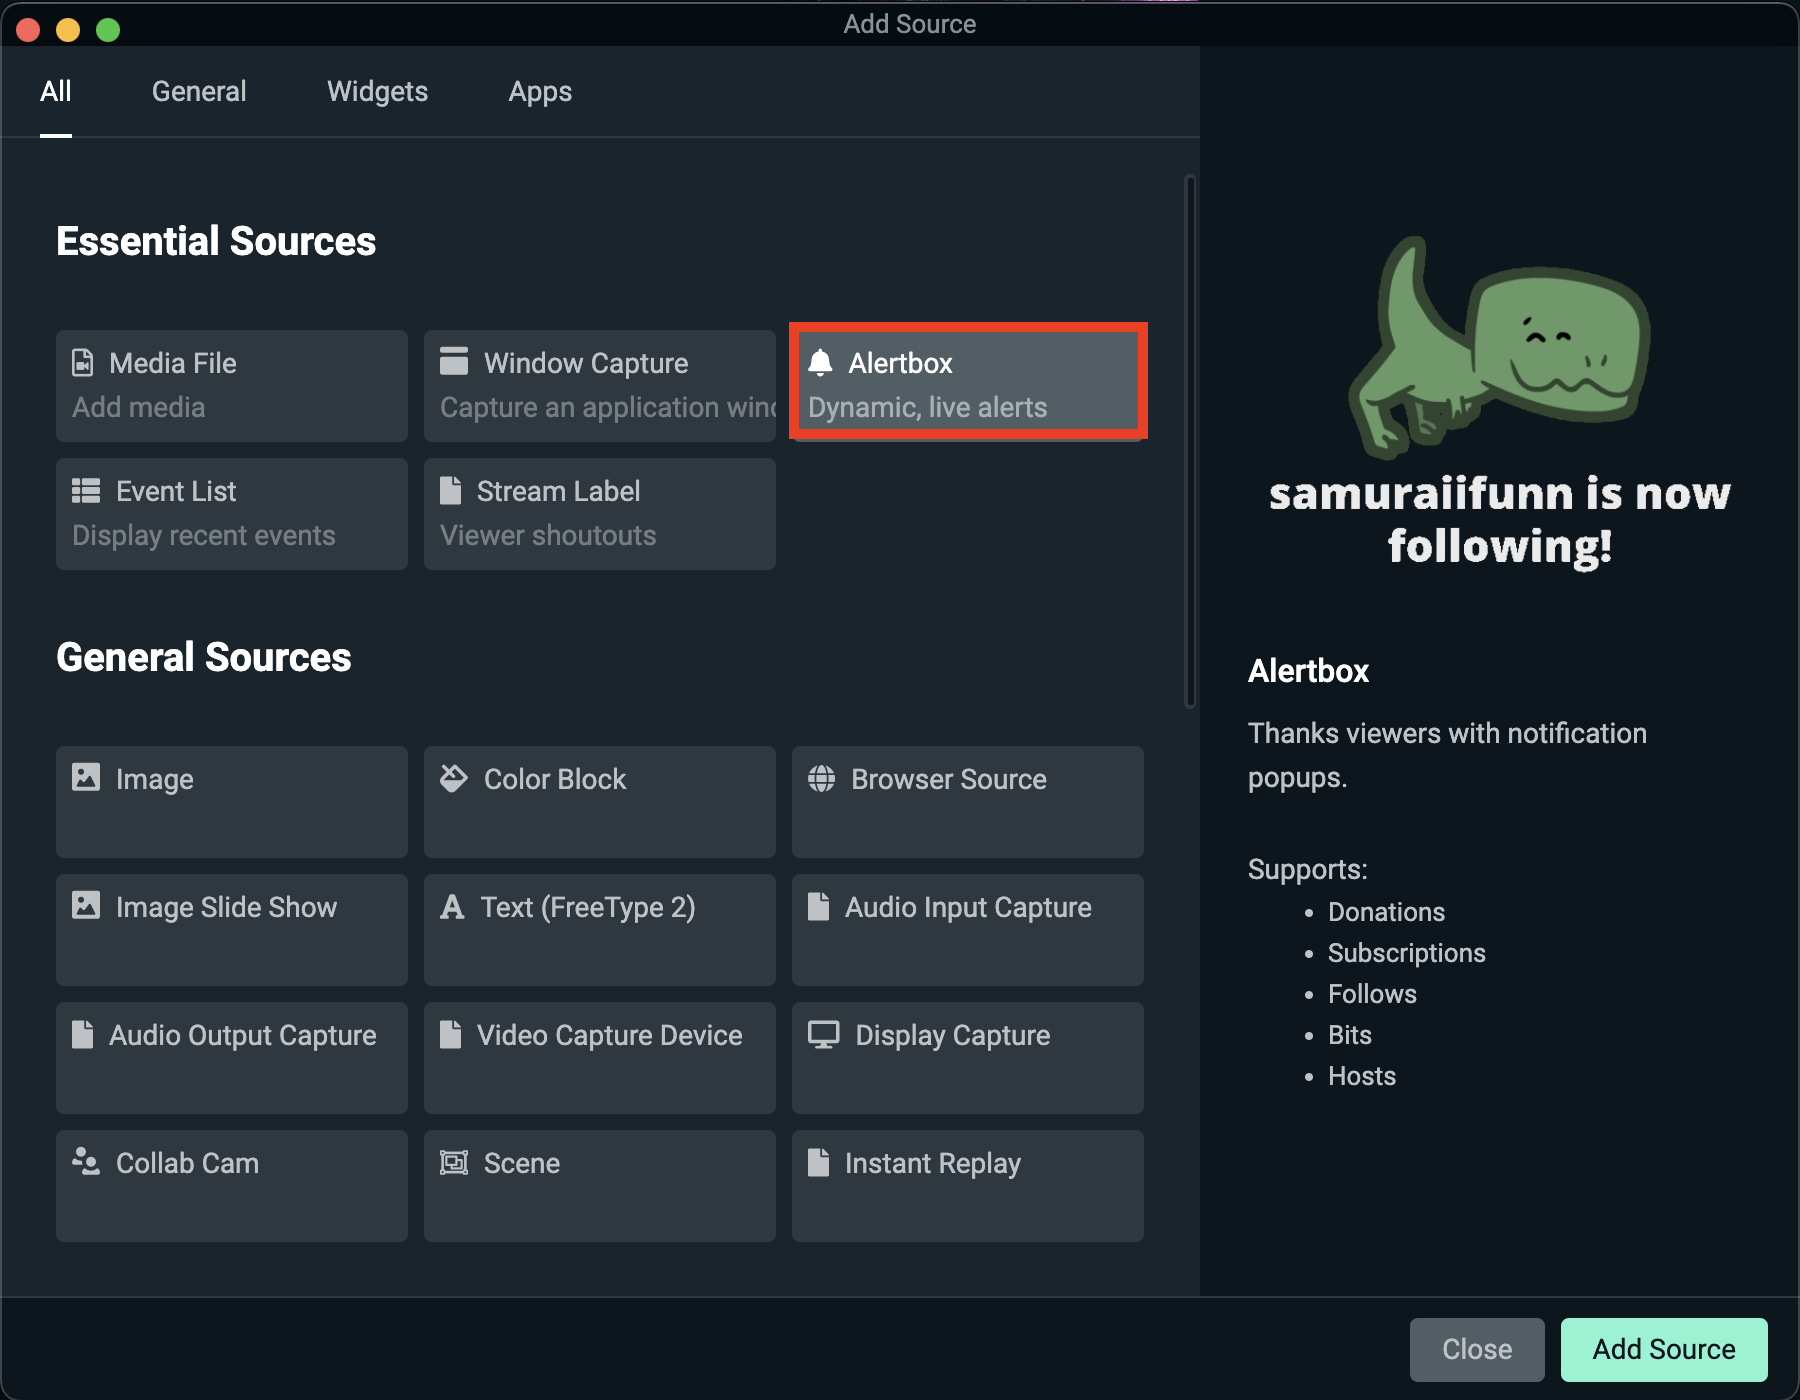
Step 2: Now, select Alert Box from the pop-up menu.
Viewers will now see the default alert appear on the screen when you get a new subscriber, bit donation, follow, host, etc. You can test it out by clicking Test Widgets at the bottom of your screen (near the Go Live button).

Now, viewers will see alerts on the screen when you get a new subscriber or donation, for example. Use this opportunity to acknowledge your viewers for contributing to the stream.
Please note that the Alert Box widget will use Streamlabs’ default alert animation until you customize it (more on that later).
OBS
The Streamlabs Plugin for OBS Studio has officially debuted, offering users a seamless integration of Streamlabs' overlays, alerts, widgets, and more directly within the OBS interface. With the Streamlabs for OBS plugin installed, effortlessly incorporate your Streamlabs alert box theme and settings into OBS.
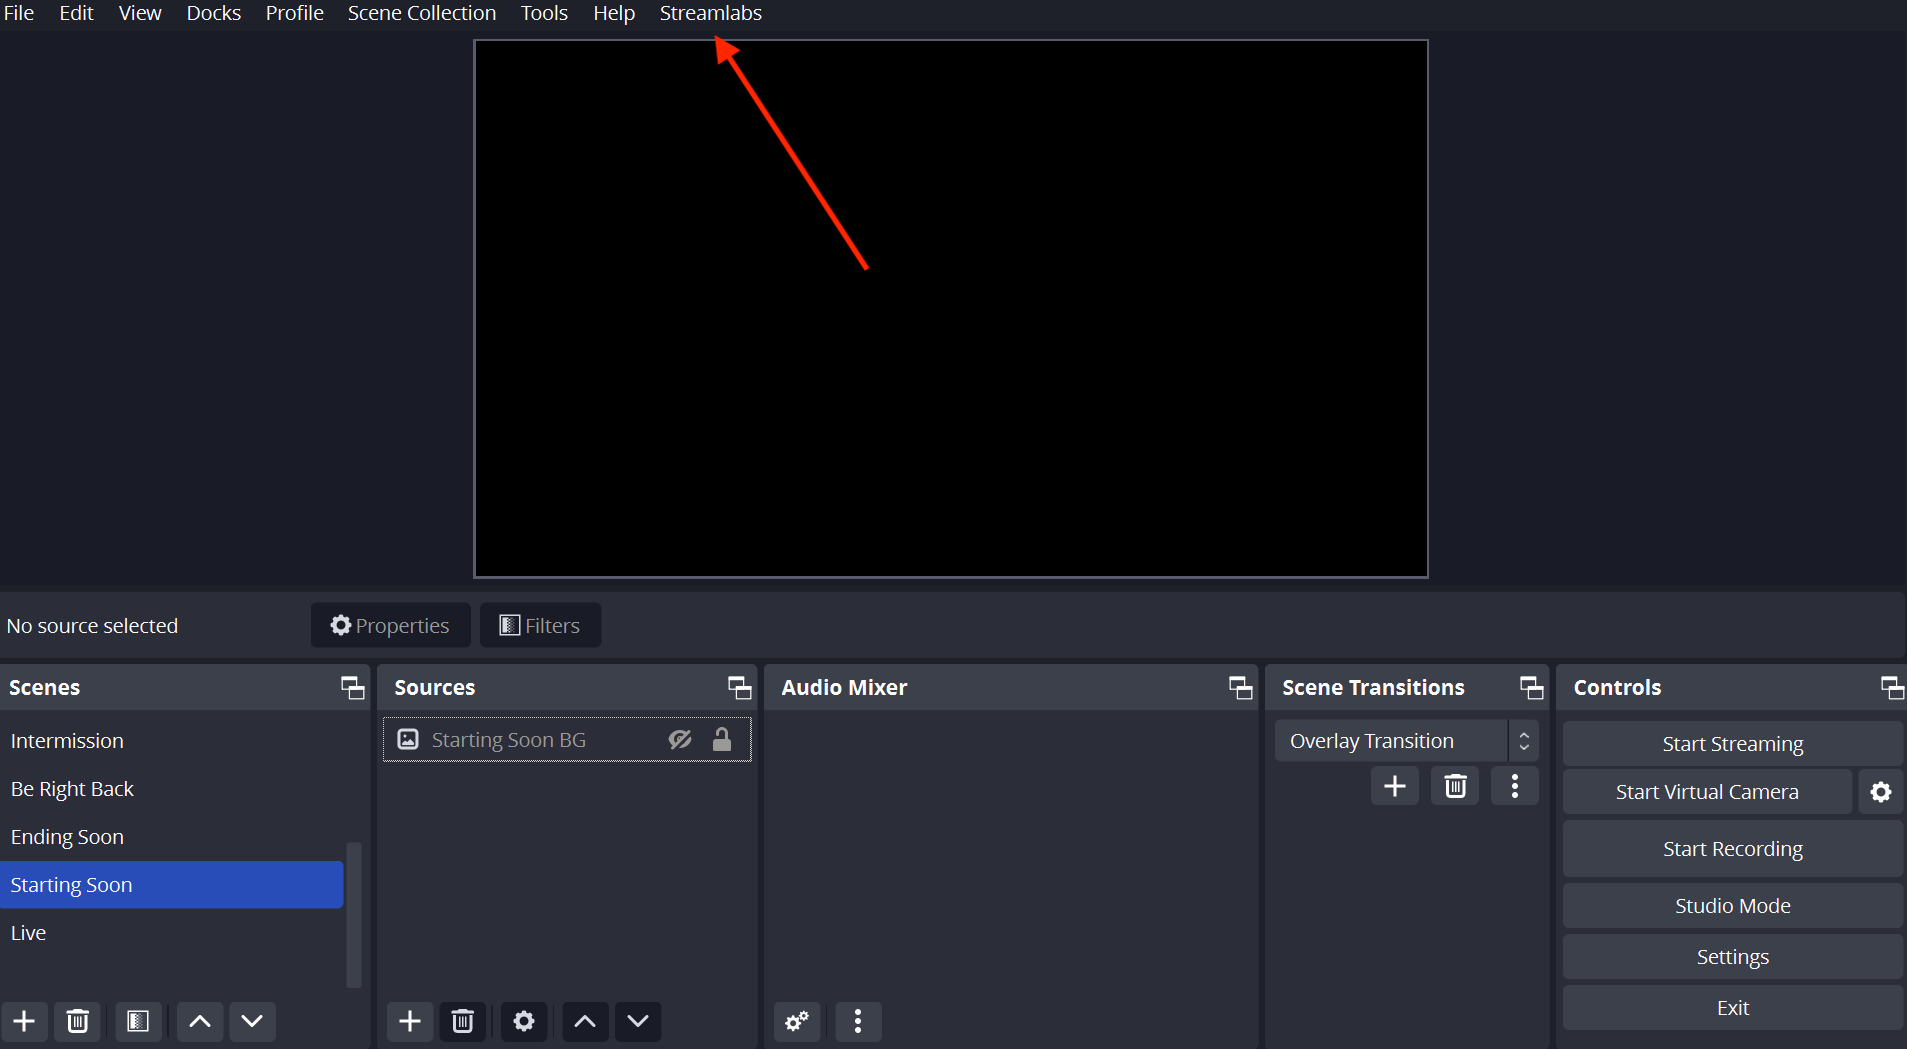
Access Streamlabs directly from the OBS top navigation bar, granting you instant control over your Streamlabs settings.
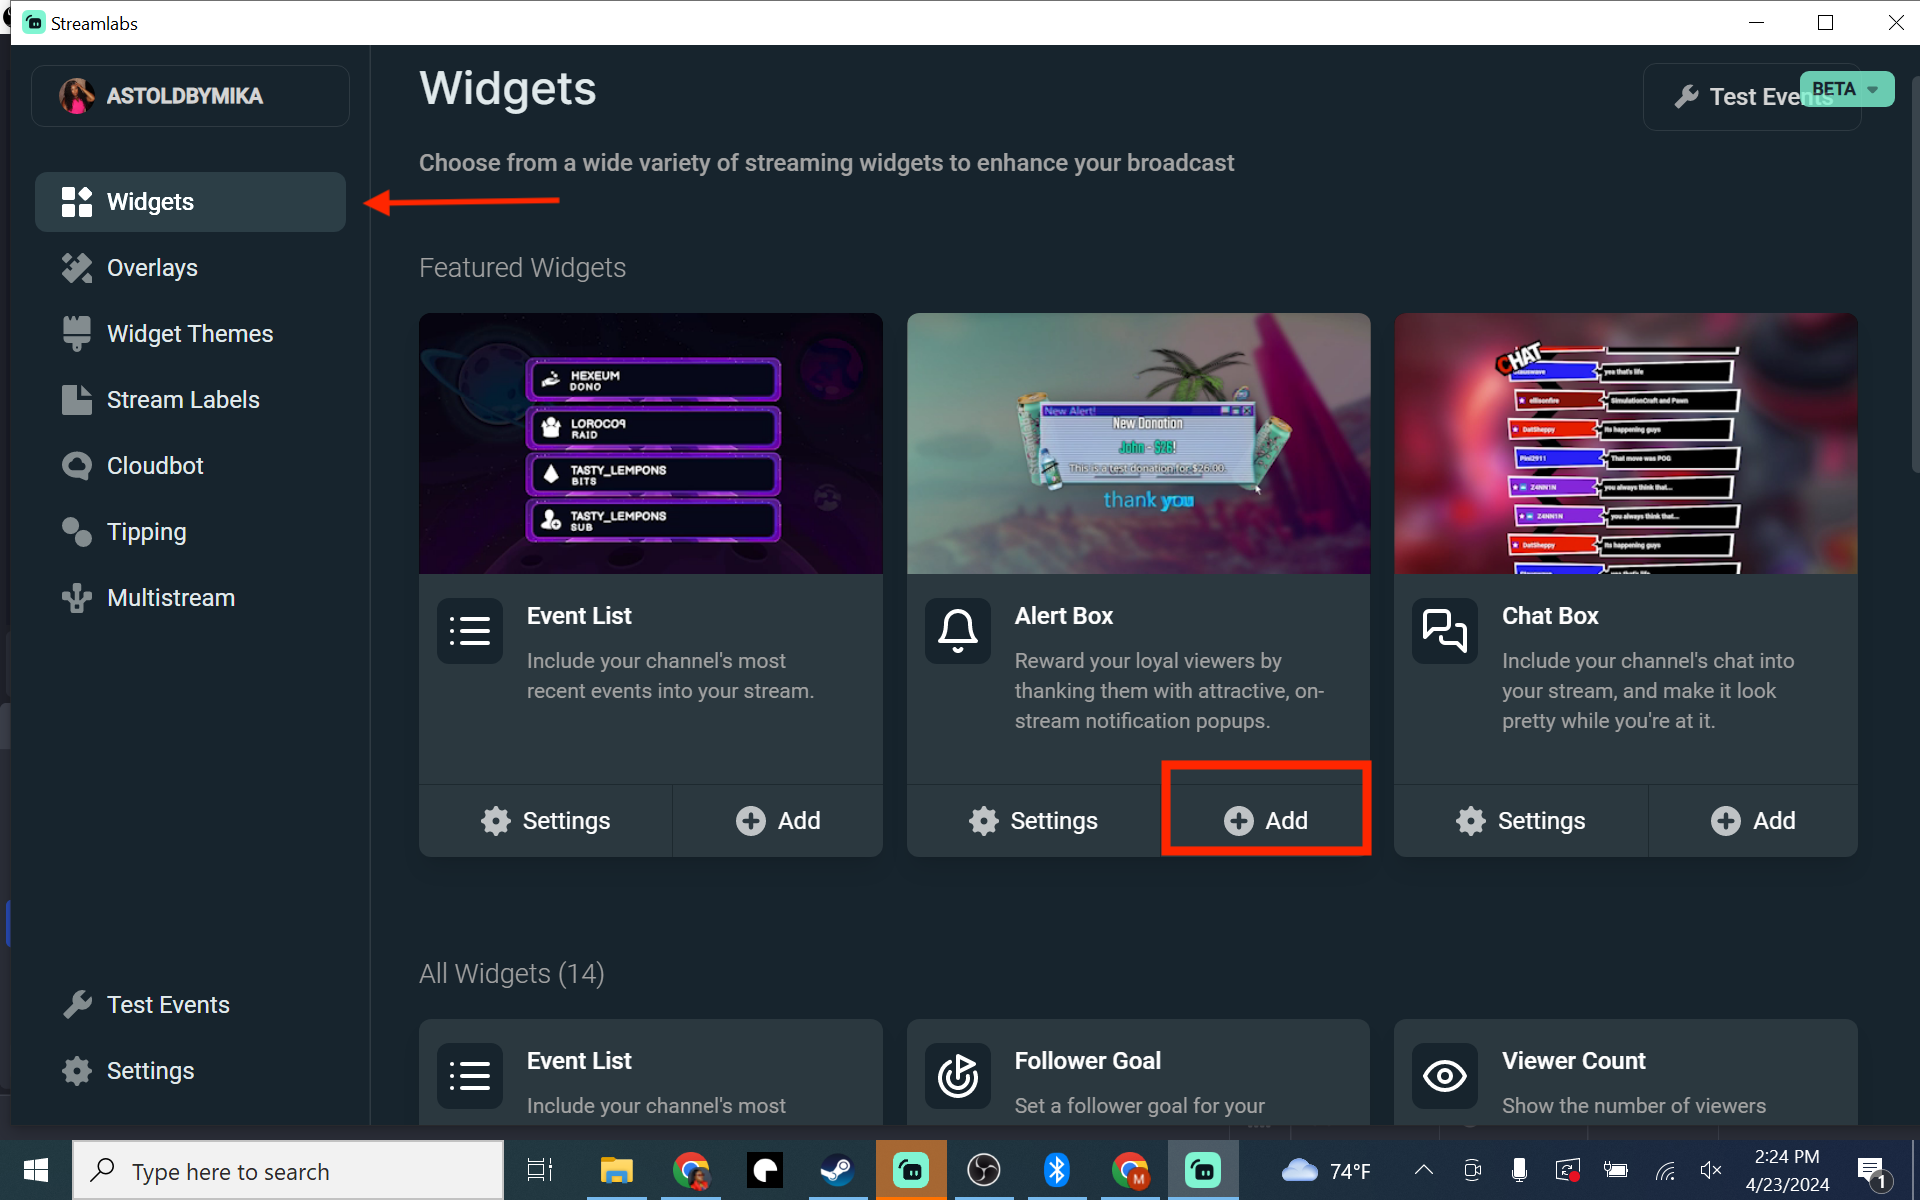
Navigate to the Widgets section on the left-hand side, where you'll locate the Alert Box Widget. Simply click the + Add button under the Alert Box Widget to integrate it into your chosen scene. Repeat these steps for additional scenes as desired.
Be sure to explore our comprehensive guide for detailed instructions on setting up the Streamlabs Plugin for OBS plugin.
Other Streaming Software
Begin by accessing your Alert Box widget link from your Streamlabs Dashboard. If you're looking to customize alert box widgets with specific alerts, simply utilize the filter events feature to select your preferred alerts.
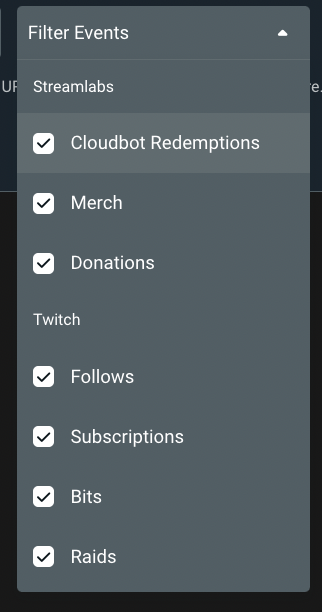
After copying the widget link, only the selected alerts will be displayed in your alert box.
Next, paste the copied widget link as a browser source in your chosen streaming service. To ensure successful integration, use the test function available on your Streamlabs Dashboard to verify the setup.
Your alerts should now be set up and ready to go for your next YouTube live stream. If you have any questions or comments, please let us know by contacting us. Remember to follow us on Twitter, Facebook, Instagram, and YouTube!