Whether you’re watching a TV show or a live stream, it’s safe to say that sound effects make the viewing experience more captivating. When you’re live streaming using Streamlabs Desktop, one way to enhance your stream is by changing your alert box sounds.
Looking to customize your alerts to be on brand or want to mix things up? We’ll walk you through the steps needed to make it happen. By the end of this blog post, you’ll know how to easily change the alert box sounds for different actions, such as receiving donations, tips, or new followers when using Streamlabs.
Changing Alert Box Sounds from Your Streamlabs Dashboard
Step 1: Head over to the Alert Box settings page on your Streamlabs dashboard. You can find it from the homepage of your dashboard by looking under the Essentials tab on the left navigation panel or using the link in the previous sentence.
Step 2: Once on the Alert Box settings page, select the alert type that you would like to change the sound for. For the sake of this tutorial, we’ll be showing you how to change the alert sounds for new followers on Twitch. However, you’d follow the same steps to change any alert sound.
Step 3: As you can see, there are many actions you can take to tweak alerts, such as changing the layout, background color, and text. In this case, you want to scroll down to Sound.
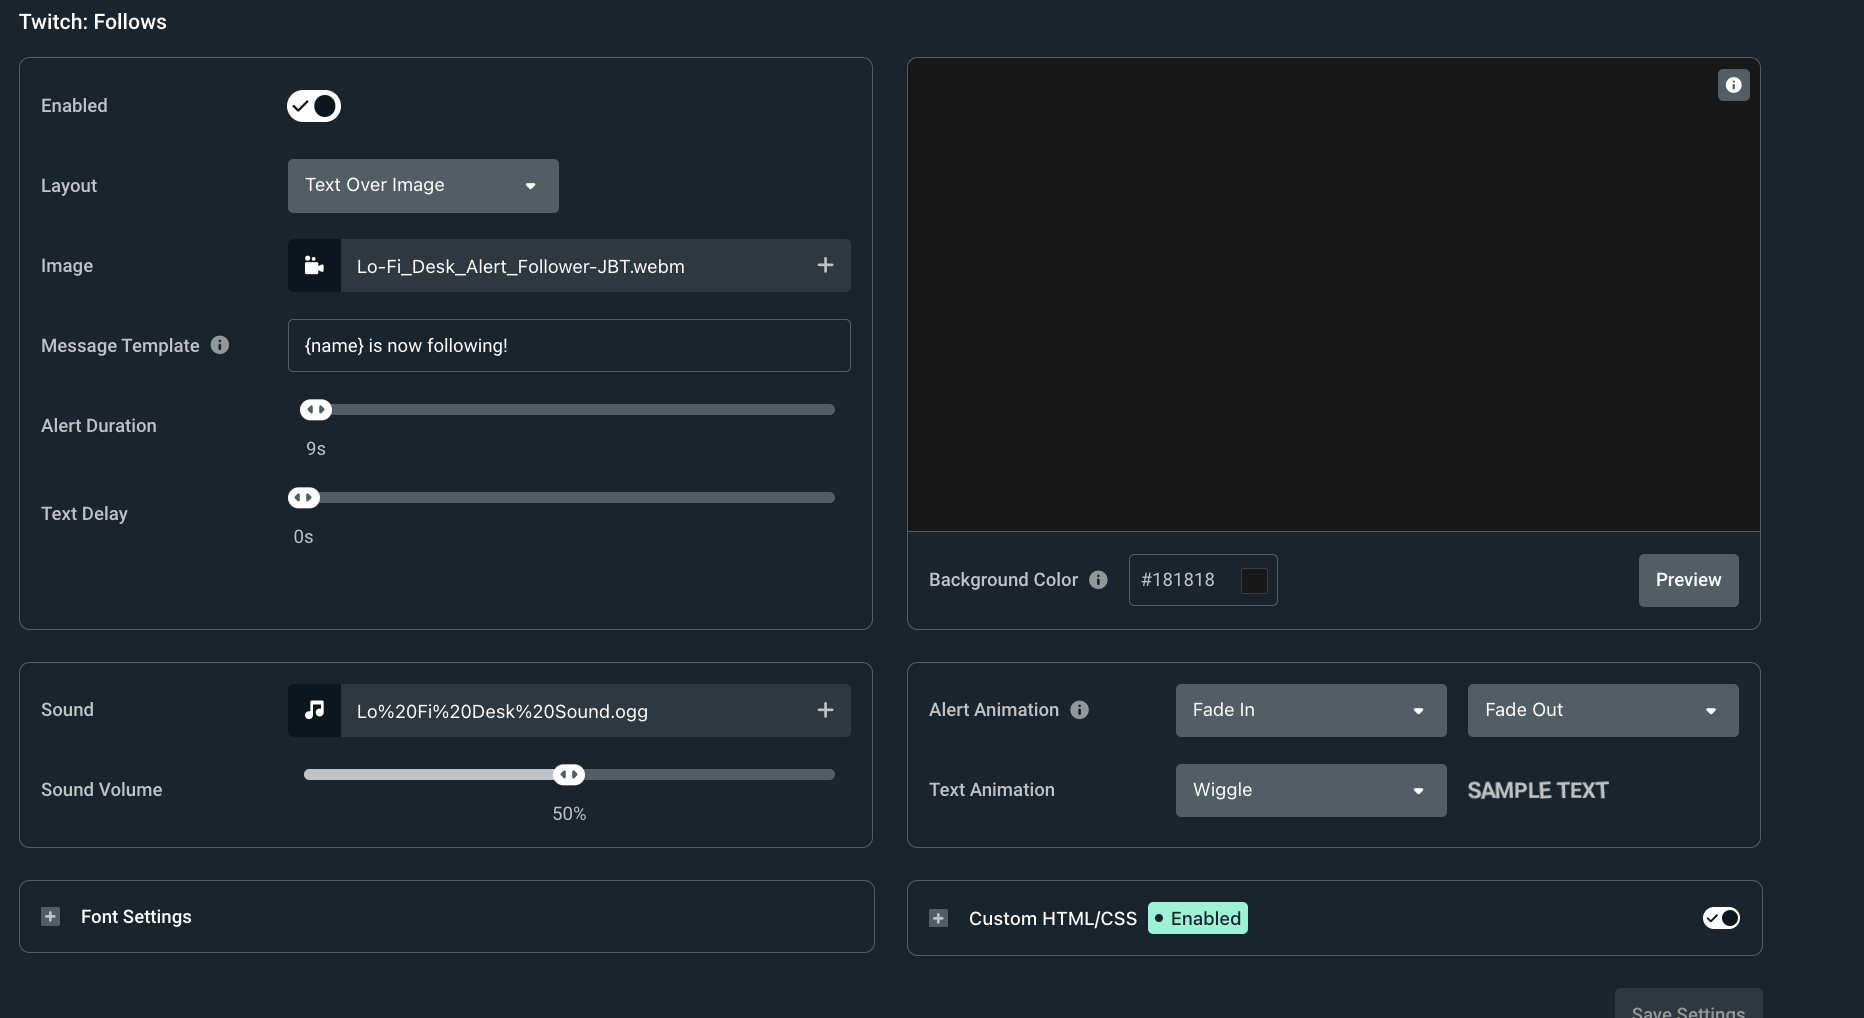
Step 4: Next to Sound, you’ll see the currently applied sound effect. You can remove your current sound by hovering over the plus sign (+) icon and then clicking the X icon.
You can change your sound using an audio URL (link icon), uploading your audio file, or selecting one from the Streamlabs Sounds Library (the latter two options via the upload arrow icon).

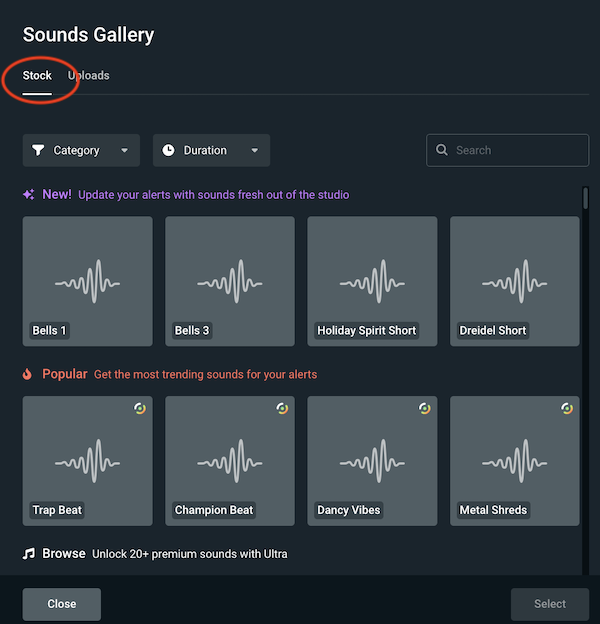
Step 5: When you click the upload arrow icon to change your sound, your screen should show you two ways to change your sound—selecting one from the Stock audio (available from the Streamlabs library) or uploading audio you have the rights to.
When choosing stock audio, you can filter by category or sound duration. You can also use the search bar to find the type of sound you’d like using keywords (e.g., bells).
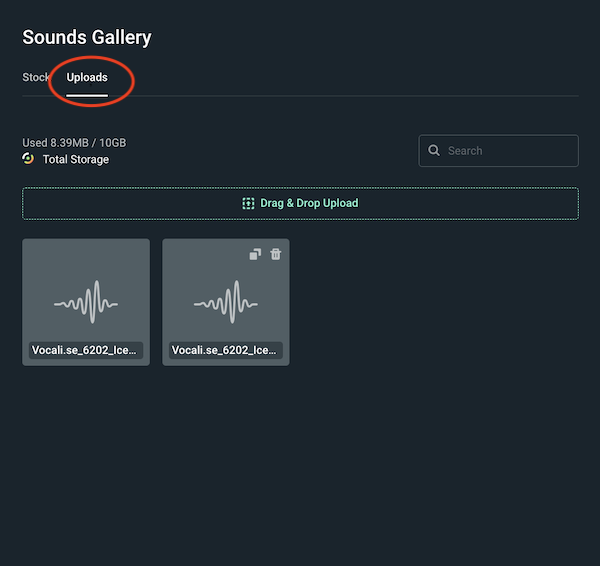
Step 6: To use a custom sound, select Uploads in the Sounds Gallery window. Here, you can select a previously uploaded sound or add a file from your computer by dragging and dropping or clicking Drag & Drop Upload to search your computer for the file.
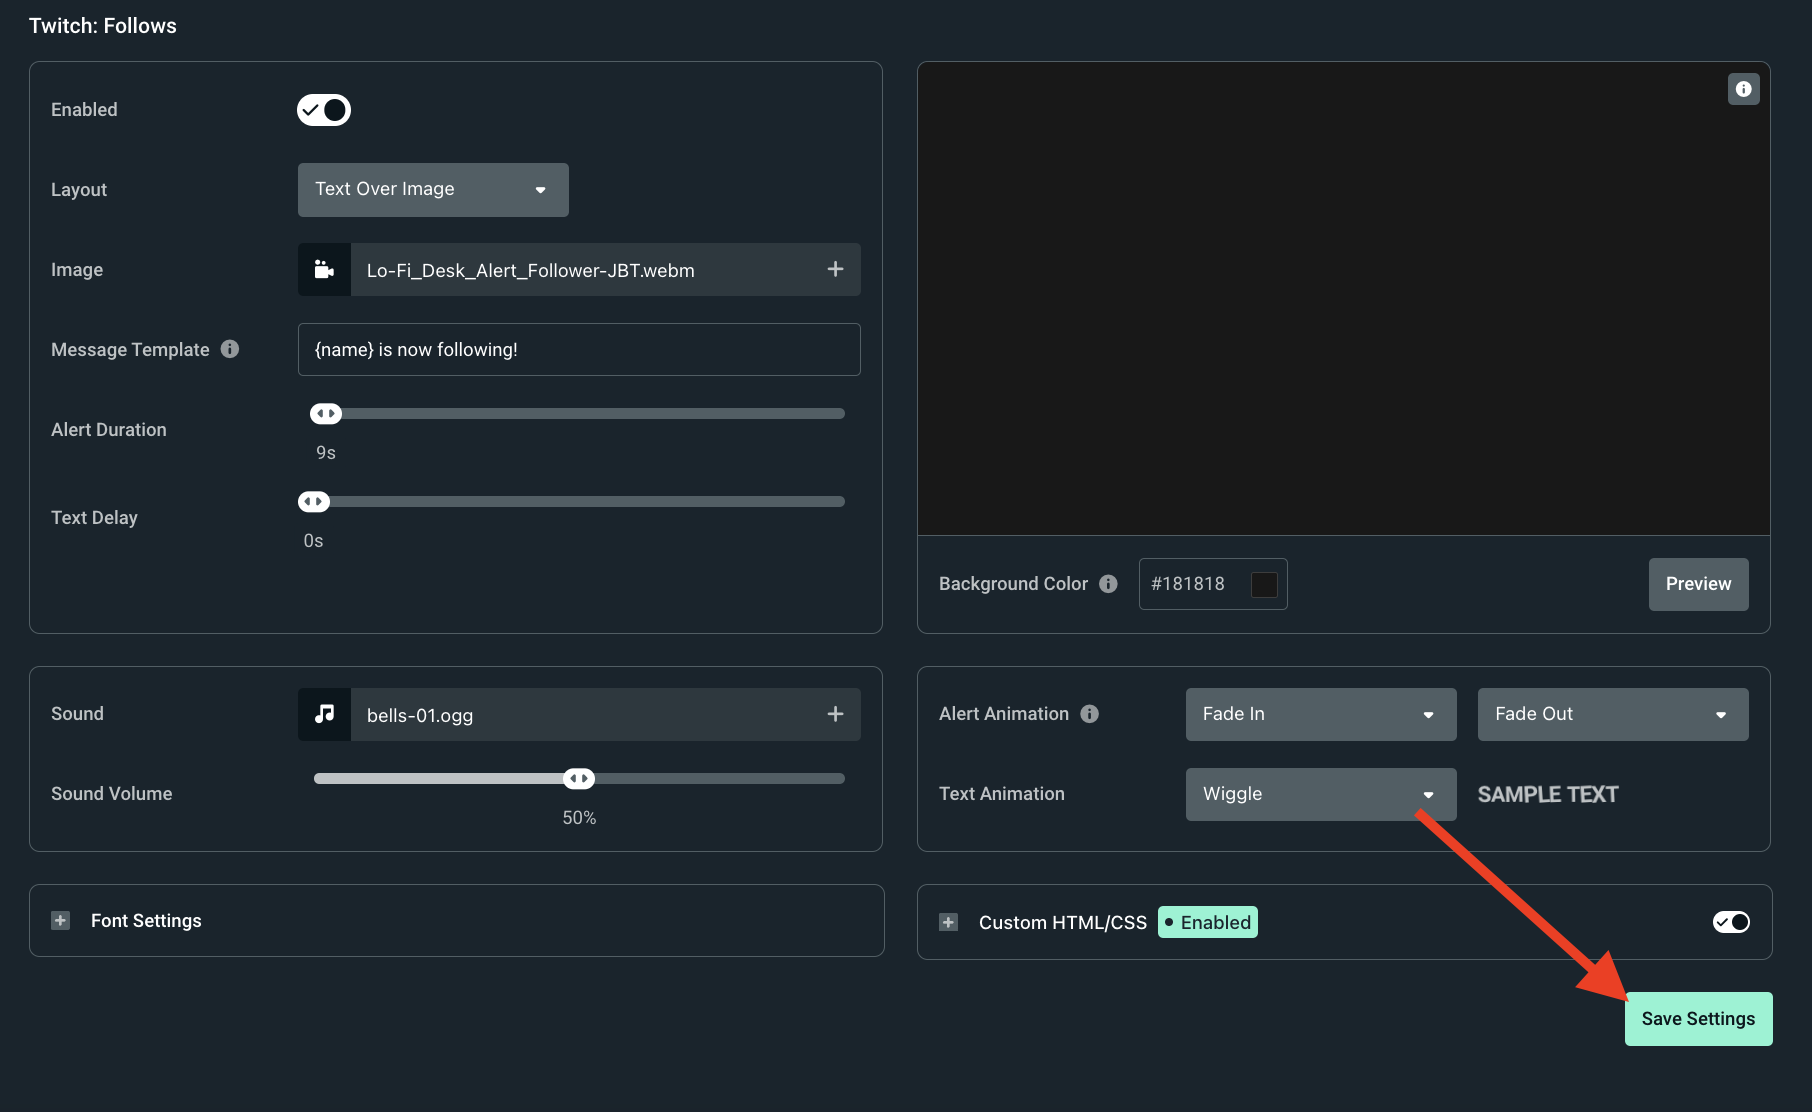
Step 7: Once you’ve found the sound you’d like to apply to your alert, click Select.
Step 8: To save your changes, scroll down to the bottom of the Alert Box setting page and select Save Settings. That’s it! You’ve updated your alert box sounds. Repeat this process for any other event types you like to change alert sounds for.
Changing Streamlabs Alert Box Sounds from Streamlabs Desktop
Step 1: Launch Streamlabs Desktop on your computer.
Step 2: If you haven’t already created an Alert Box, do so by clicking the plus sign next to Sources, then Alert Box. Follow the instructions in this guide, which will walk you through adding your Alert Box to your live stream using Streamlabs Desktop.
Step 3: If you already have your Alert Box created, double-click to begin changing sound settings.
Step 4: Similarly to changing your Alert sounds from your Streamlabs Dashboard, you must work through each event type you’d like to change. Next to Sound, you’ll see the currently applied sound effects. Additionally, you’ll find the option to remove your current sound or change the sound. Choose the icon displaying an arrow in a cloud to change the sound.
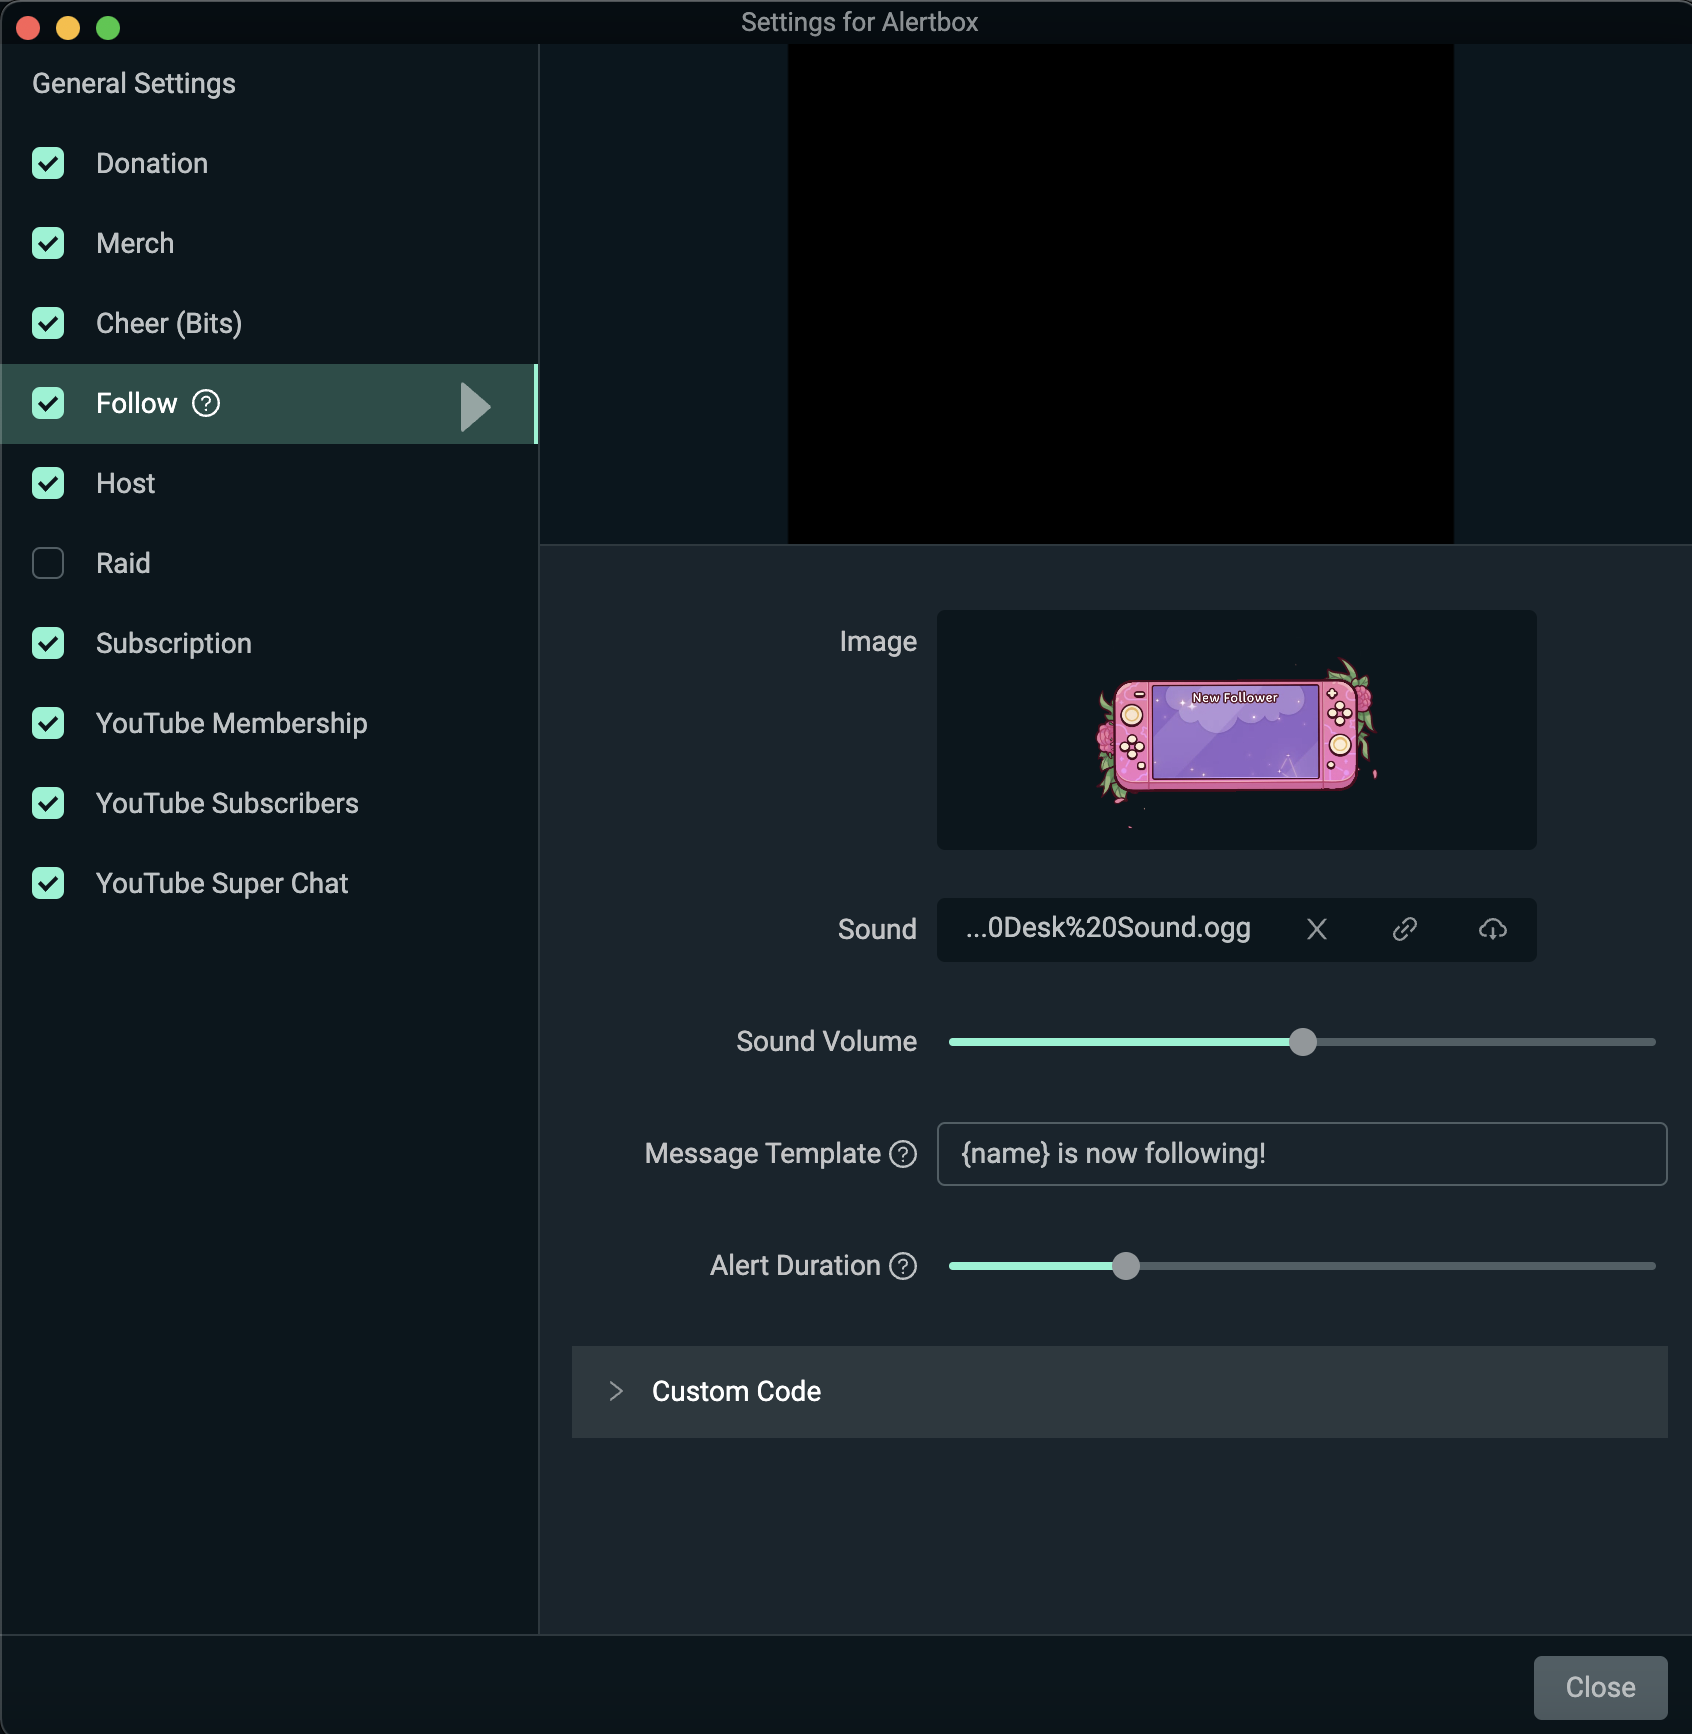
Step 5: Now, you can search for a sound via stock audio available from Streamlabs or upload audio you have the rights to.
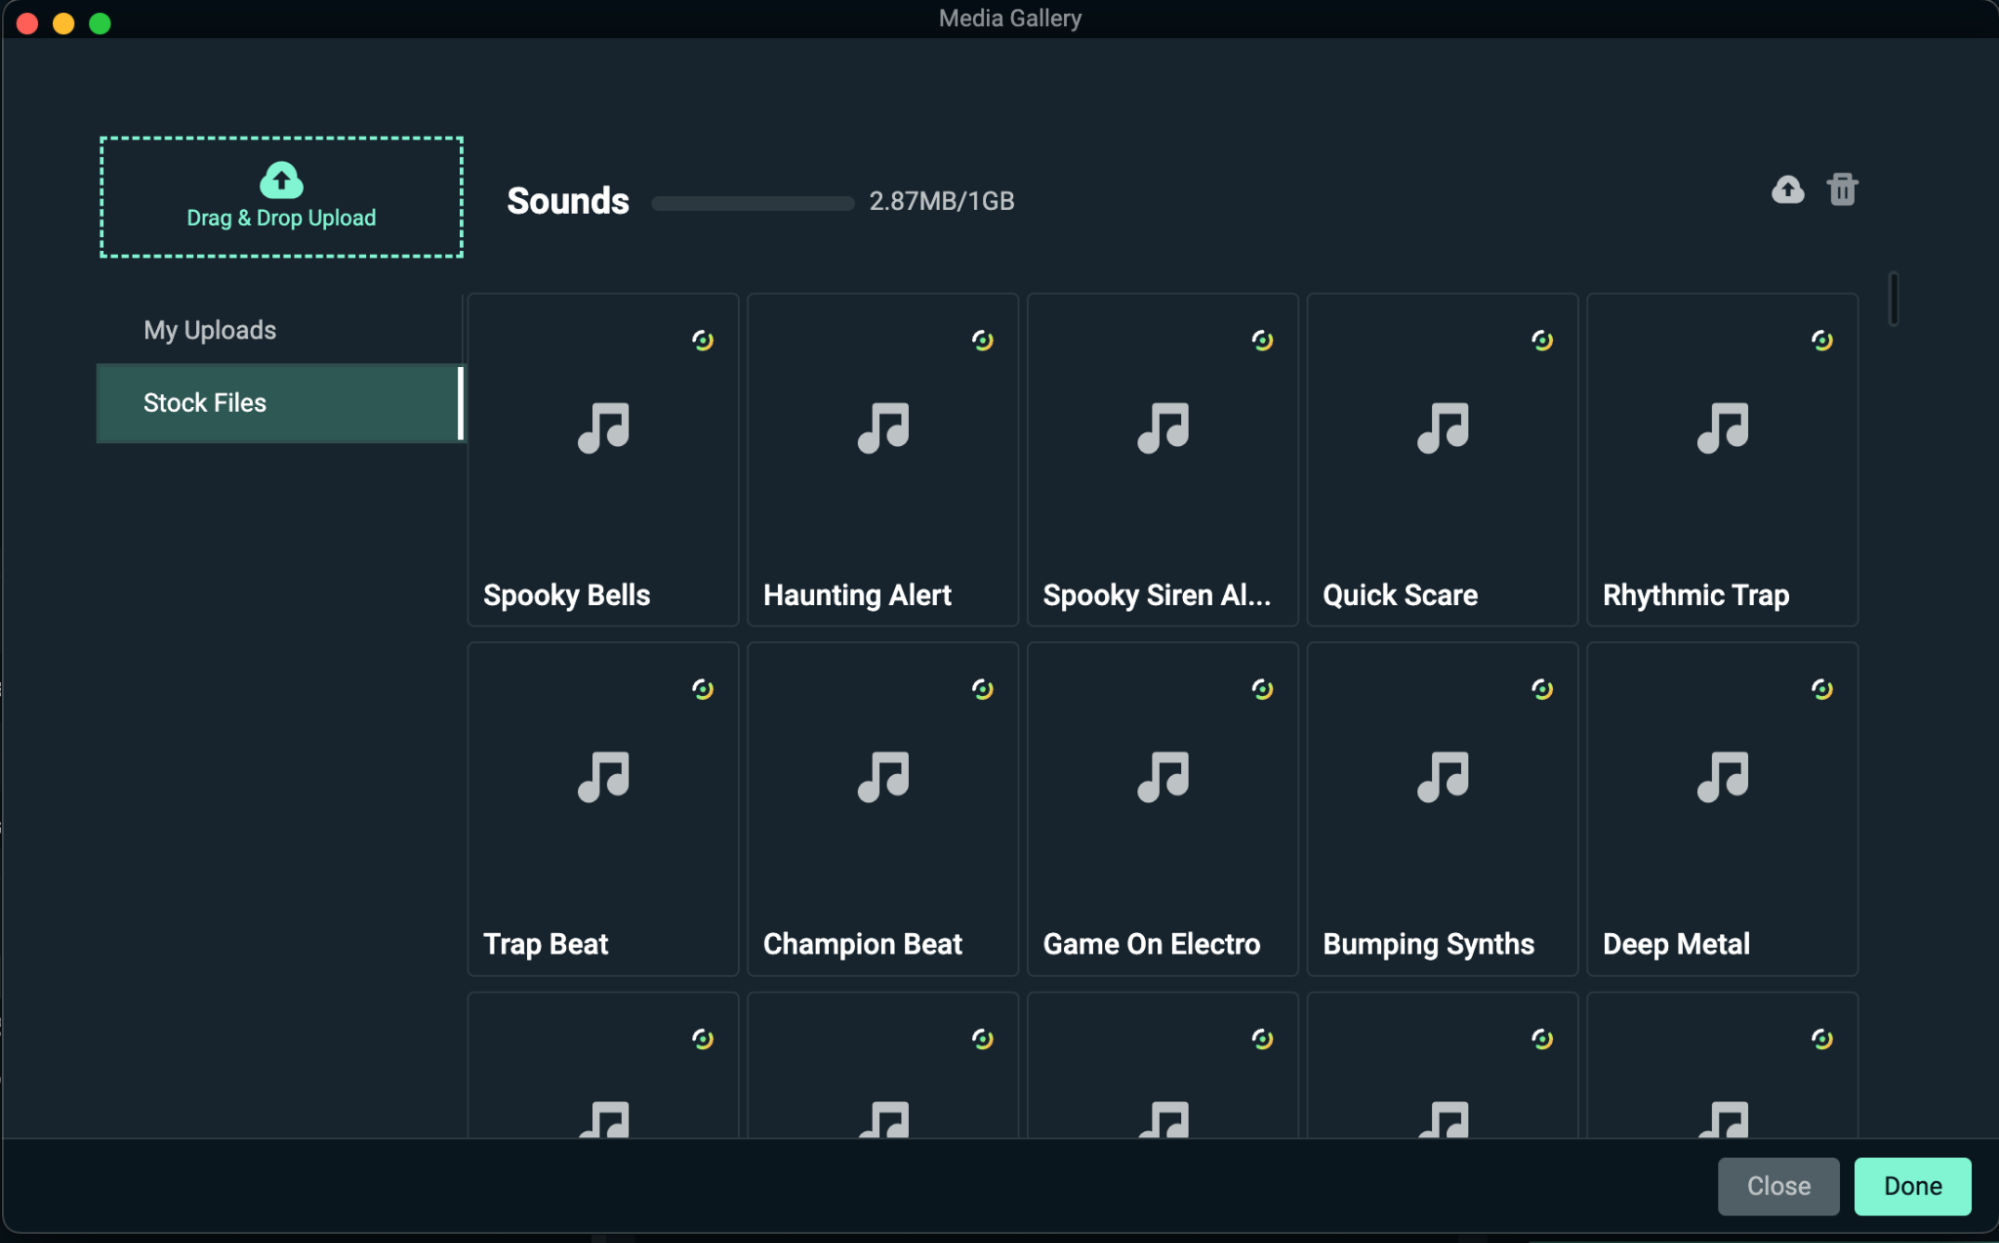
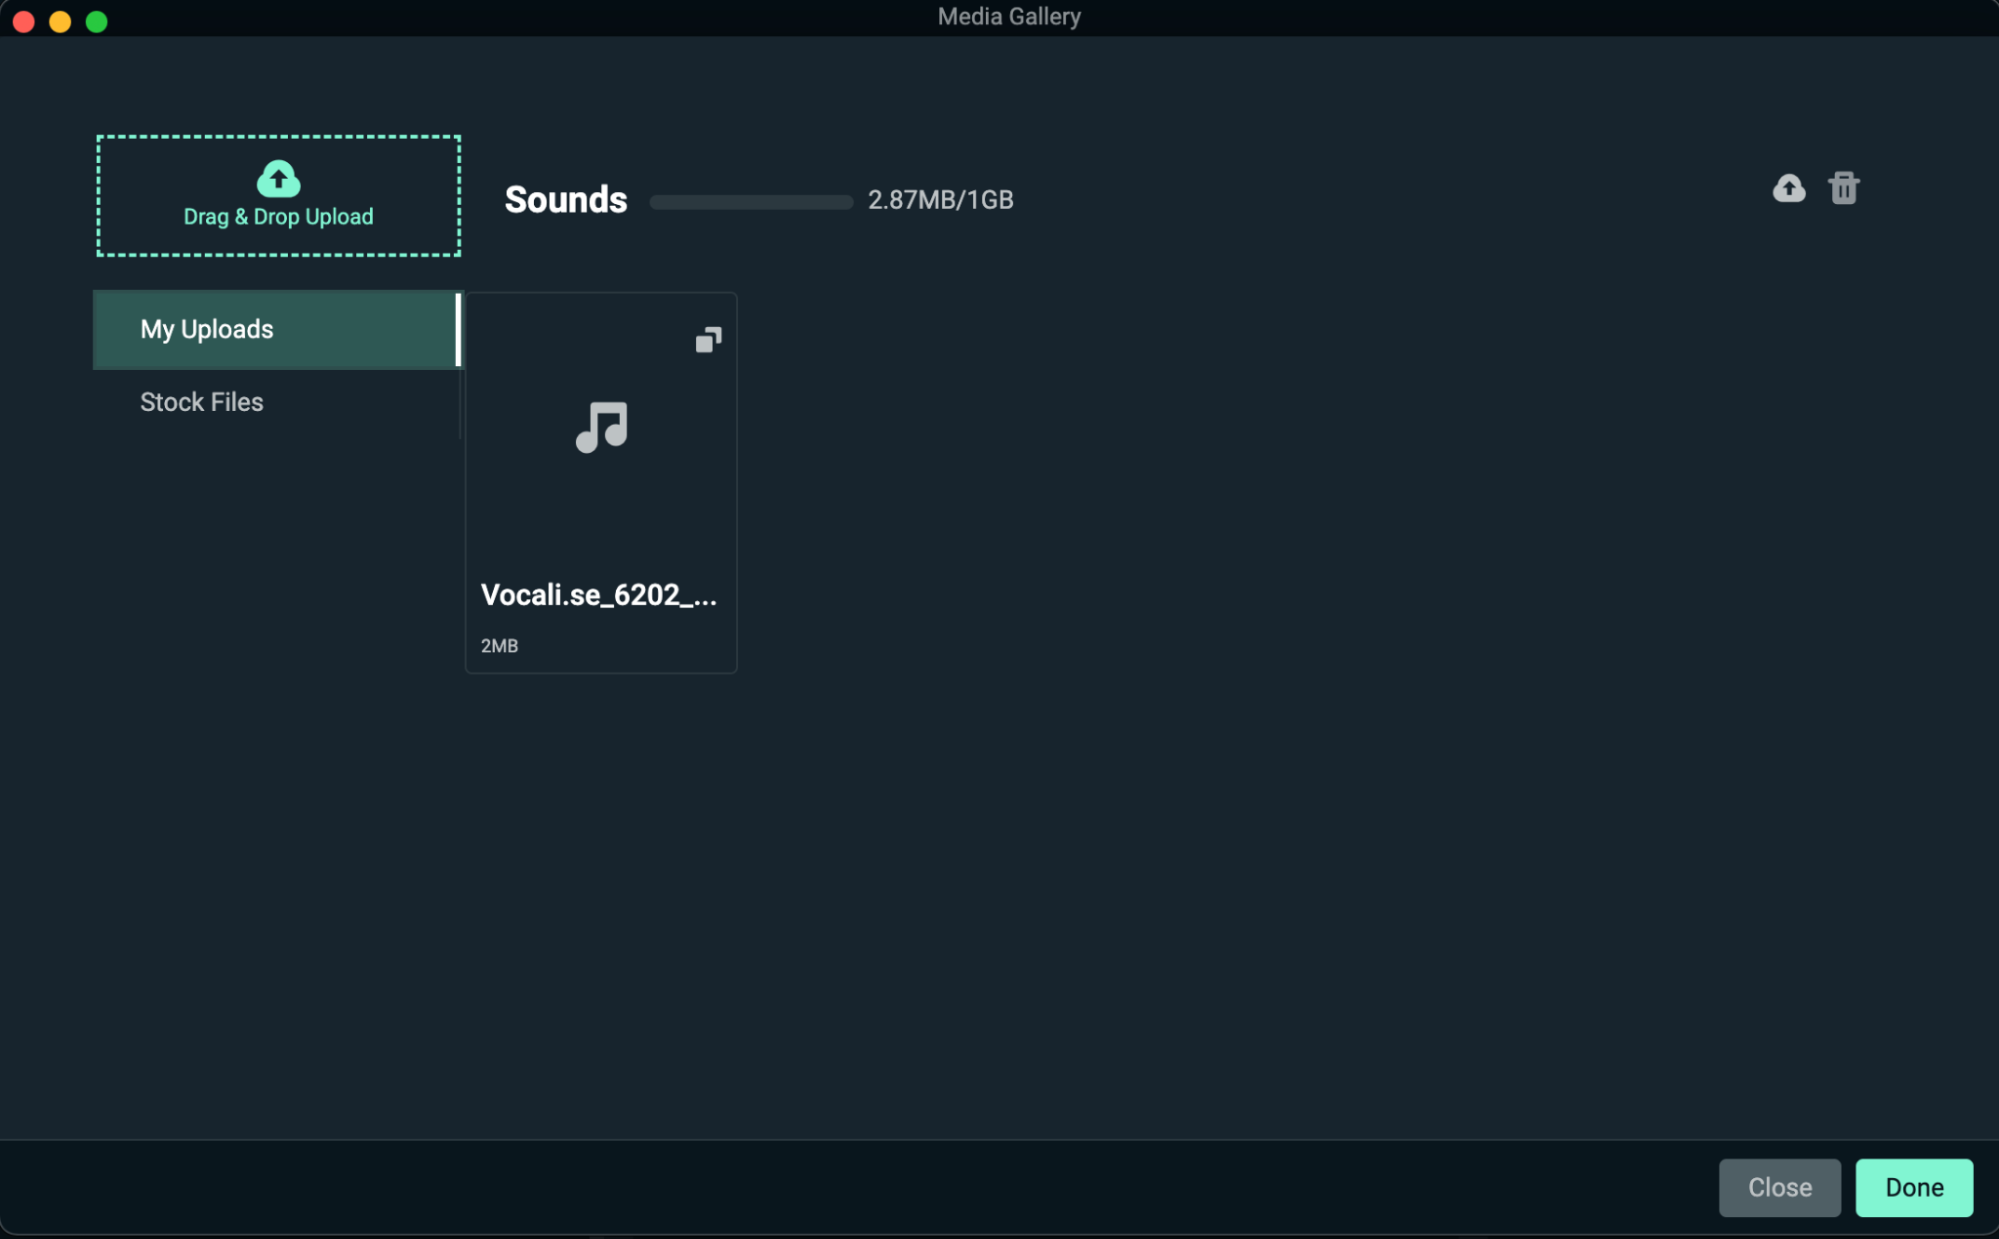
Step 6: Once you’ve selected your new sound, click Done to save your changes.
Step 7: That’s it—you’ve changed your alert sound. Repeat this process for additional sounds you’d like to change. As you can see, changing your Alert Box sounds is simple and can be done in minutes (excluding finding the perfect sound to use, depending on how meticulous you are).
Minor tweaks like this can genuinely enhance your audience’s experience while watching your live stream—we highly recommend testing it out and seeing how it works.