⬆️Back to Top⬆️
Camera & Webcam
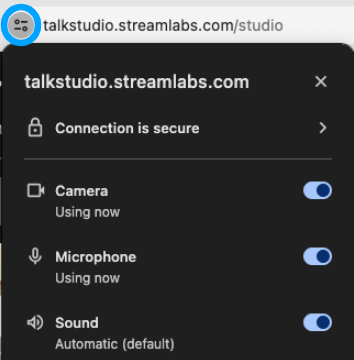
When logging into Talk Studio, your browser will ask permission to use your devices. If you do not see this menu, click the lock icon next to your browser’s address bar. You may need to refresh your browser.
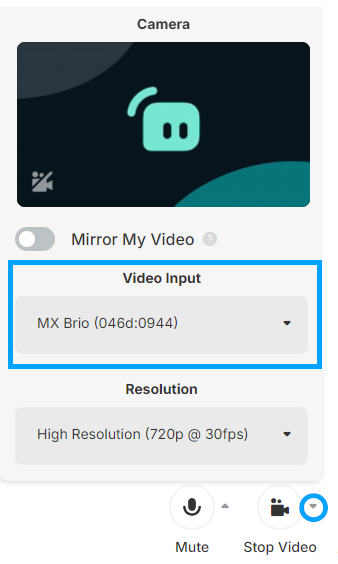
Select your preferred Video Input/Output by locating & clicking the up-arrow next to your Stop Video button.

No Webcam? No problem! You can use a stream avatar to show on stream. You need to go to Settings > Participants. You can also change your name and stream avatar.
⬆️Back to Top⬆️
Microphone
Just like with your webcam, your browser will ask permission to use your devices when launching Talk Studio. If you do not see this menu, click the lock icon next to your browser’s address bar. You may need to refresh your browser.

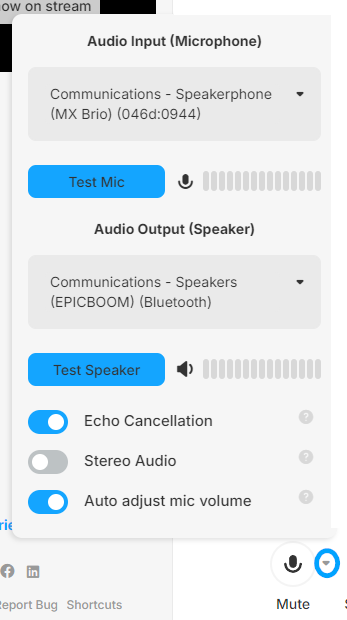
Now, select your preferred Audio Input/Output by locating & clicking the up-arrow next to your Mute button.
⬆️Back to Top⬆️
Setting Up Live Stream Destinations
Your destinations are the places that you want to stream to (Facebook, LinkedIn, YouTube, etc.). Before going live, you'll want to make sure that these are set up. To do this, follow these steps:
- Click on your Profile Picture
- Select Account Settings
- Select Destinations
- At the bottom of the page click Add Destination
- Click on the place you want to go live to and follow the prompts
- Once you're done you'll see it added as a destination
Some destinations have special requirements before going live. To learn more about this please check out our Streaming Destinations guide.
%20Destinations.png)
⬆️Back to Top⬆️
Creating Your Layout
Now that your webcam and microphone are set up, let’s add them to your canvas! At first, your canvas might look empty, but don’t worry - creating a professional-looking stream is a few button clicks away.
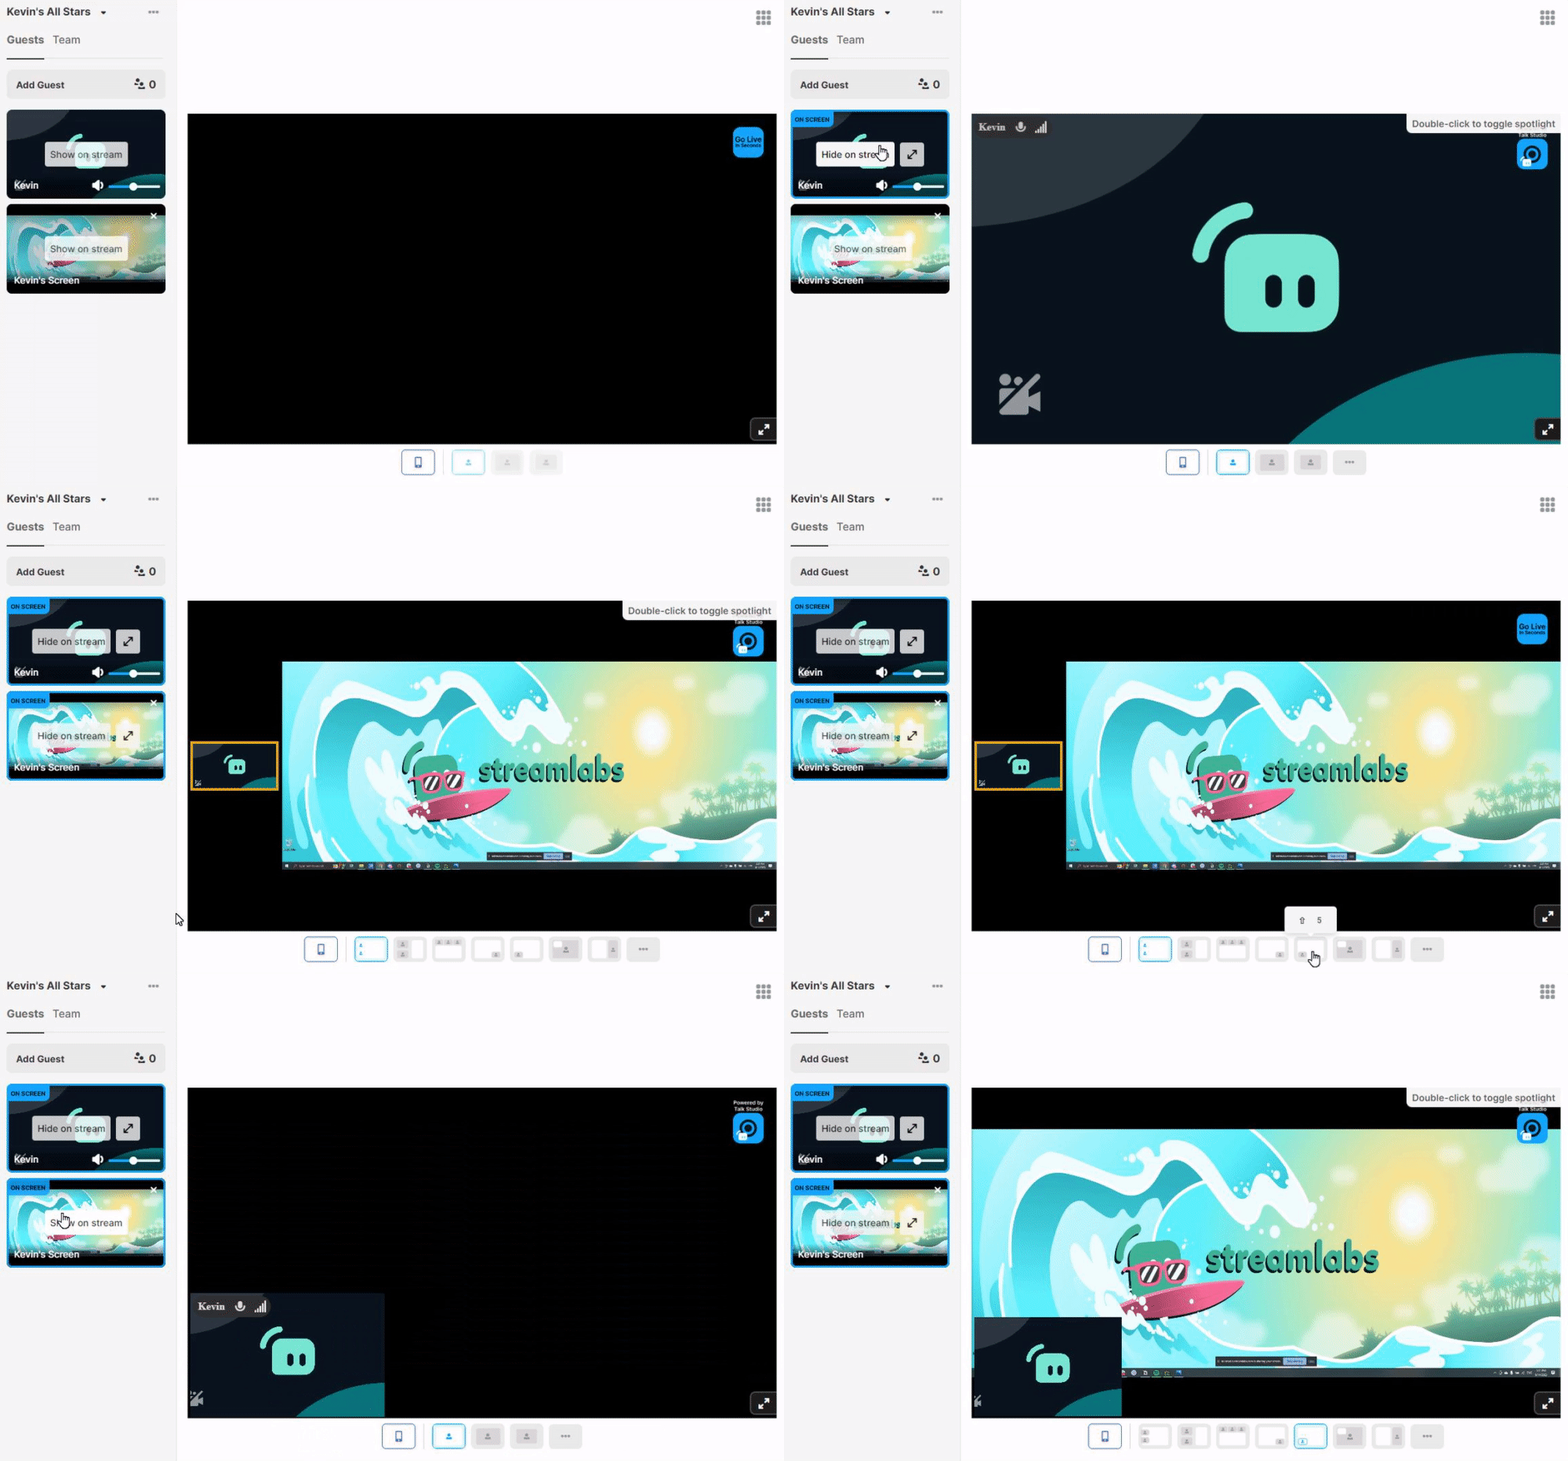
You will see the camera you added earlier on the left-hand side. This section will show cameras, guests, screenshares, and media files. On the right-hand side is the editor window. Unless a tooltip says otherwise, anything visible here will be shown to your audience.
To add a source from the left panel to your editor window, click the Show on stream on the source itself. You'll notice that at the bottom of your editor you will see various layout options. To hide a source click Hide on stream. Each additional source you add will create new layouts for you to select. You can also use hotkeys to change to the layout without clicking on it.
⬆️Back to Top⬆️
Cohosts & Guests
Guests
One of the best features of Talk Studio is the ease of adding guests to your live stream. Each plan has a different number of guests (including co-hosts) you can invite to your stream:
- Standard - Up to 5 guests
- Pro- Up to 11 guests
To invite a guest, you can follow these simple steps:
- Click Add Guest.
 Add Guest.png)
- You can either copy the link or email the link to your guest. This link will change with each invite unless you toggle on Permanent Link.
Share our guest instruction guide to your guests to help them get set up!
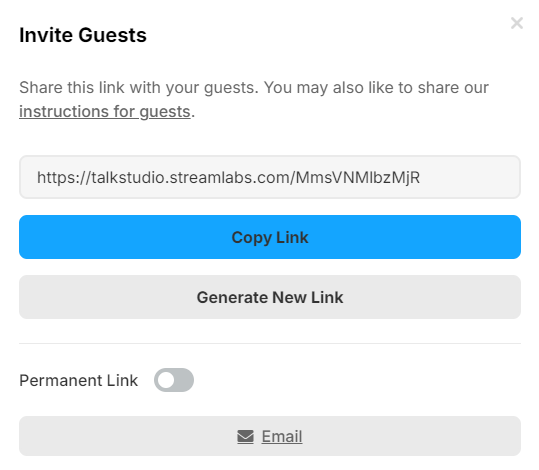
- Once your guest has joined, you will see them on the left-hand side listed under Queue
- Click Show on stream to move them over to your editor!
A guest's microphone will not sound until they are moved to Show on stream.
Cohosts
If you’re working with a team and could use extra help with production, you can invite a cohost to join you. Your cohost will be able to invite guests, control design elements, adjust layouts, add an intro/outro video, and make any necessary configuration changes.
Adding a cohost is simple - head to the Team section, select Invite Member, and enter their email address. They’ll have 24 hours to accept your invitation, but if they don’t get to it, you can always resend it to them.
To get your cohost jumpstarted on all the features they have access to, you can pass them along to this guide!
⬆️Back to Top⬆️
Navigating Talk Studio
Now it's time to get acquainted with Talk Studio. On the right of your studio, you have additional personalized studio options & settings available that pop out additional settings and features.
|
Setting/Feature |
Hotkey |
Guide(s) |
 |
Account - Access your recordings, billing, and other account features.
|
N/A |
Coming Soon! |
 |
Chat - Reply to viewers or guests through your chat window.
|
Shift + C |
Chat Guide |
 |
Schedule - Schedule your stream in advance.
|
Shift + J |
Scheduling Guide |
 |
Design - Add your own logo/watermark, studio background, or add an overlay.
|
Shift D |
Talk Studio Branding Guide |
  |
Styles - Edit your font, name tag, brand color, or theme/layout.
|
Shift + O |
Talk Studio Branding Guide |
 |
Text - Add a banner, ticker, or teleprompter.
|
Shift + T |
Teleprompter Guide |
 |
Video - Add a virtual background, blur or set up videos as your intro or outro.
|
Shift + Y |
|
  |
Settings - Enable custom live stream settings or recording options.
|
Shift + G |
Coming Soon |
 |
Apps - For chat moderation, tips, or alert notifications.
|
Shift + P
|
Integrated Apps Guide |
 |
News - Get the latest announcements from the Streamlabs team
|
Shift + N |
N/A |
 |
Dark/Light Mode - Customize your Talk Studio viewing experience with choosing Dark mode, or Light mode.
|
N/A |
N/A |
⬆️Back to Top⬆️
Going Live and/or Recording
Once you have set up, it is time to create! You can go live to your destinations, record, or do both simultaneously.
Go Live
Simply press the Go Live button (Shift + Enter) at the bottom right of your editor area.
 Next, you'll have to select what destinations you are going live. When you click on a Destination, you'll know it's chosen by the checkmark in the upper right and the entire box will shade the platform's color.
Fill out your information, such as Title, description, and any categories for relevant platforms. Then press
Go Live.
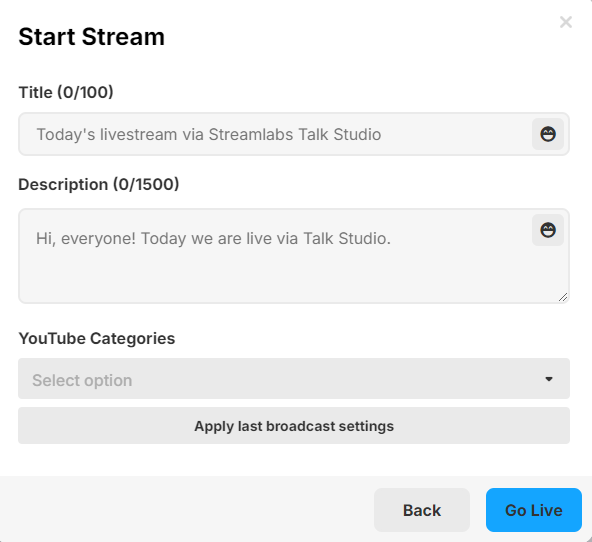
When you are done live streaming, you only need to press End Stream.

If you do not press the End Stream button, your stream will not go offline. Please make sure to press this at the end of your stream!
⬆️Back to Top⬆️
Recording
First, you will need to make sure that you have recording enabled. To do this, click Settings (Shift+G) from your Talk Studio and select a record option under Output:
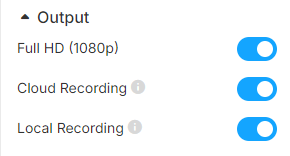
- Cloud Recording: Includes a complete recording and audio-only downloadable file.
- Local Recording: Includes separate tracks (audio/video) available for download per participant.
You can now record once you have enabled Cloud Recording and/or Local Recording. Click the Record button if you want only to record. If you want to record and live stream, you'll see that the Go Live button has a little record icon to the top right, meaning you'll record and live stream simultaneously!

If you are only recording, you will get a section to create a title for your file. If you are streaming and recording, your title for the recording will be the same as the title of your stream.
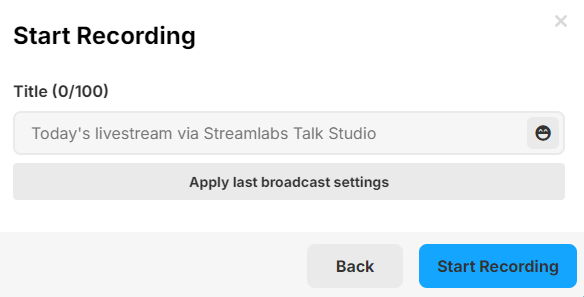
When you're done, press the Stop Recording button if you are only recording.

If you are streaming and recording, you need to press End Stream. Recording and live streaming are tied together in this circumstance, and you won't be able to end one without ending the other.

You will find more information in our recording guide if you want to learn more about our recording feature!
⬆️Back to Top⬆️
Talk Studio Subscriptions
Each subscription has different perks; you can check out our plans here. If you have questions about managing or canceling your subscription, you can check out our guide!
⬆️Back to Top⬆️
Accessing More Creator Tools with Streamlabs Ultra
Looking to take your creative projects to the next level? Meet Streamlabs Ultra - the ultimate toolkit for creators. With a single login using Streamlabs ID and a convenient monthly subscription, you'll gain access to Talk Studio Pro and other tools, including Cross Clip Pro, Video Editor, and Streamlabs Console. It's everything you need to conquer your creative to-do list!
If you have any questions or feedback, please contact our team; we'll be happy to help!


.png)
.png)


%20Destinations.png)


 Next, you'll have to select what destinations you are going live. When you click on a Destination, you'll know it's chosen by the checkmark in the upper right and the entire box will shade the platform's color.


