



 Ultra subscription.
Twitch, YouTube, Facebook, or Patreon? How about Kick or TikTok?
The real question is: Why limit yourself to just one platform? With multistreaming, you can go live on your favorite platforms at the same time, including short-form social media sites like TikTok. Reaching multiple audiences at once? Yes, please!
Let’s face it: it can be hard to grow as a streamer, especially if you’re only going live on one platform. Many content creators have taken the plunge into multistreaming in order to reach as many viewers as possible. Different folks have different preferences for where they like to watch streams. That's why multistreaming is so great—you can meet your viewers where they are. With multistreaming in Streamlabs Desktop, you only have to click “Go Live” once to stream everywhere. And once you’re live you can customize what platforms stay and go with the Live Output Editor feature.
Keep reading to learn more about multistreaming and how Streamlabs Desktop is the perfect companion to set you up for success.
Jump Ahead:
- What is Multistreaming
- Benefits of Multistreaming
- How to Multistream with Streamlabs Desktop
- How to Multistream with Talk Studio (from web browser)
- Multistream Chat
What Is Multistreaming?
Multistreaming lets you broadcast to multiple platforms at the same time, so viewers can watch you wherever they already spend time—whether that’s Twitch, YouTube, TikTok, Facebook, Kick, or another destination.
With Streamlabs, you can connect your streaming accounts once, choose where you want to go live, and manage your destinations from one place. You can also add custom RTMP destinations to reach platforms beyond the ones directly supported.
For creators who want even more flexibility, Streamlabs also supports tools like Dual Output for streaming in horizontal and vertical formats, plus Live Output Editing to add or remove destinations while you’re already live.
What Are the Benefits of Multistreaming?
Multistreaming helps you reach more viewers without creating separate broadcasts for every platform.
- Reach more people: Go live across multiple platforms at once and increase your chances of being discovered.
- Save time: Stream once instead of repeating or reuploading the same content.
- Meet viewers where they are: Let your audience watch on the platforms they already use, while you keep up with conversations through multichat.
- Learn what works: Compare performance across platforms and see where your content connects best.
Multistreaming allows content creators to focus on their true passion—creating.
How to Multistream
For someone already used to streaming, going live on multiple sites is easy! Whatever streaming software and sites you choose will have specific steps, but here’s the overall gist.
To multistream, creators need to:
- Set up accounts on platforms that support live streaming
- Pick their multistreaming solution of choice (more on that below)
- Set up their multistreaming solution
- Go live to multiple platforms
Choosing Where to Multistream
Streamlabs Desktop supports live streaming to Twitch, YouTube, Facebook, TikTok, Kick, custom RTMP destinations, and more.

Here are some strategies for deciding which platforms to choose for multistreaming:
- Stream to the platforms where you already have a growing following. Skip the guesswork and focus on increasing your follower base with multistreaming.
- Make sure you cover the biggest platforms like Twitch and YouTube. By focusing your energy on these mainstream networks, you get the biggest bang for your buck.
- Choose 1-2 big platforms plus a niche or emerging site. This is perfect for diversifying your audience and taking advantage of being one of the first creators on a newer platform.
Remember that it takes time to develop a follower base on these platforms. While you are able to stream to as many platforms as you wish, avoid wasting time and energy on those that do not suit your brand or achieve your goals.
Multistreaming Solutions
There are several types of multistreaming solutions available to content creators. The one that’s right for you will depend on your goals and resources.
Hardware encoders with multistreaming capabilities
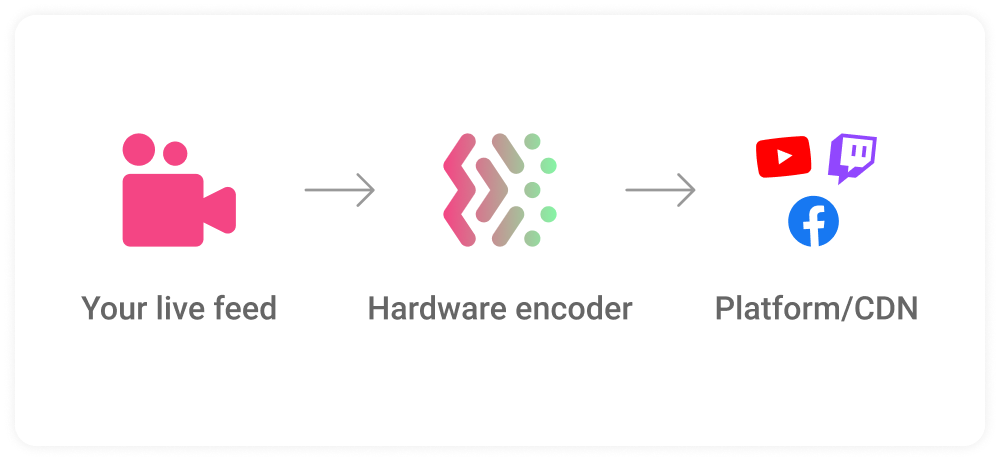
Dedicated hardware encoders like Pearl-2 and Pearl Mini can encode and stream to multiple destinations without relying on your computer for processing. They can be a powerful option for professional productions, though dedicated hardware typically comes with a higher upfront cost and still requires sufficient upload bandwidth.
Multistreaming Software
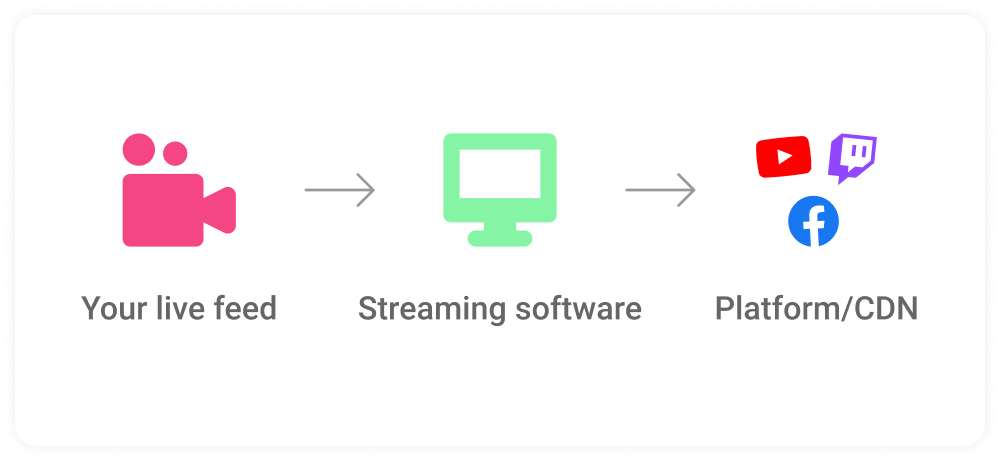
Software such as Wirecast and vMix can send streams to multiple destinations directly from your computer. Depending on your setup, sending separate streams can require additional upload bandwidth and processing resources for each output.
Some streaming software also offers cloud-based multistreaming, which can reduce the processing and upload demands on your computer.
Cloud-based Multistream Solutions
For those new to multistreaming, cloud-based solutions such as Streamlabs and Talk Studio can be the most cost-efficient. Since the cloud platform handles all the processing, there is no bandwidth or hardware requirements for the creators.
Multistreaming with cloud-based platforms is no more demanding than streaming to one platform. They are also easy to set up and use.
Below are some cloud-based solutions and how to set them up for multistreaming.

How to Multistream in Streamlabs Desktop
At Streamlabs, we designed it to be as streamlined and straightforward as possible.
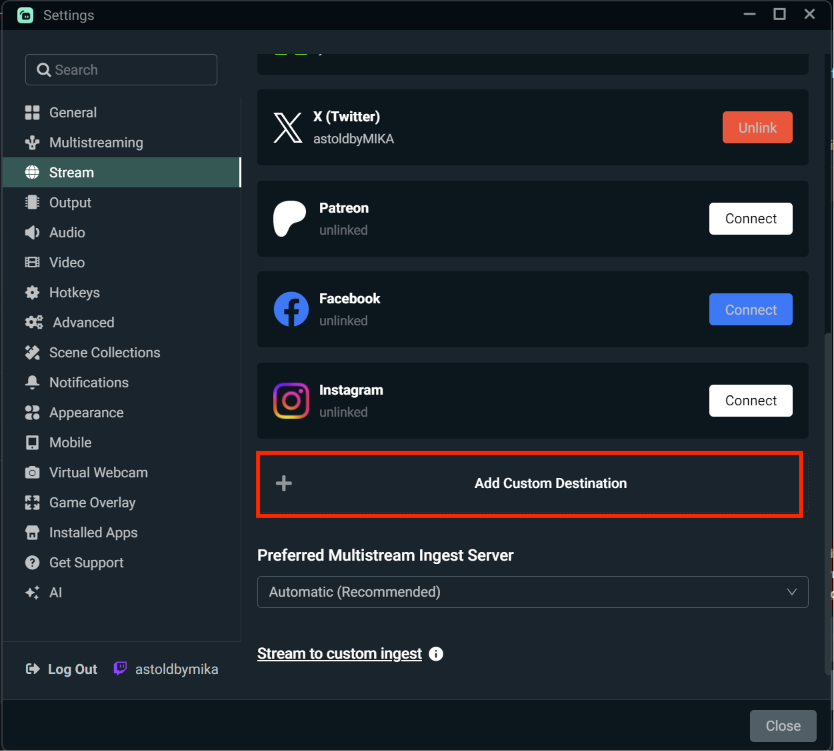
Step 1: Open Streamlabs Desktop and click on the Settings cog.
Step 2: Open your Stream settings.
Step 3: Add a stream destination by clicking Add Destination. Streamlabs Desktop will walk you through the process of adding your platform of choice.
Step 4: Update your stream info. After linking your accounts, click Go Live in the main Streamlabs Desktop editor to open the Go Live window. From here, you can choose which platforms you’d like to stream to.
If you want to stream in both horizontal and vertical formats, turn on Dual Output and assign destinations to each orientation. If you’re using Streamlabs Ultra and want the flexibility to add or remove destinations after your stream starts, turn on Live Output Editing before going live.
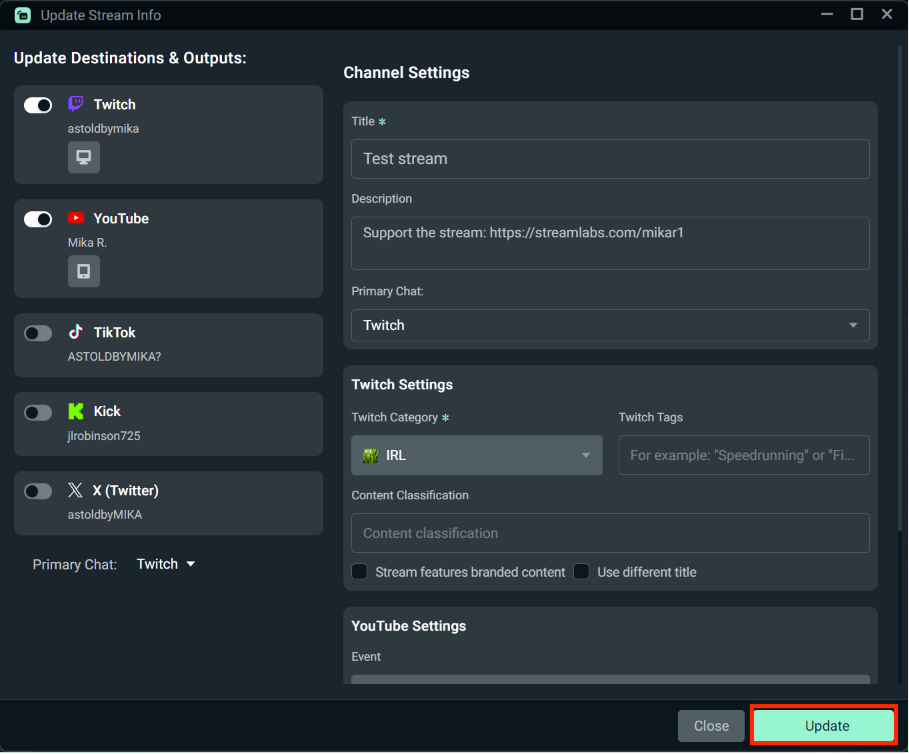
Note: The title and description you choose here will reflect across all streaming platforms (please note that Twitch does not have a description and will not display on your Twitch stream). The game category needs to be selected individually because each platform has a unique game library.
Step 5: When you've filled out all the details of your live stream, click Confirm & Go Live.
If you enable Live Output Editing, you can open Manage Stream while live to add or remove destinations without ending your entire broadcast.
Note: Dual Output includes free multistreaming to one horizontal and one vertical destination. For expanded multistreaming and features like Live Output Editing and multistream chat, upgrade to Streamlabs Ultra.
How to Manage Multiple Live Stream Chats
Streamlabs lets you view and interact with chat from Twitch, YouTube, and Facebook (with support for more platforms coming soon) all in one place—making it easier than ever to connect with your viewers across multiple destinations.
How to Use Multistream Chat
Step 1: Start by going live to your chosen platforms.
Step 2: Once your stream is live, navigate to the Multistream Chat panel in the main Streamlabs editor. Here, you’ll see messages from all your connected platforms appear in real time.
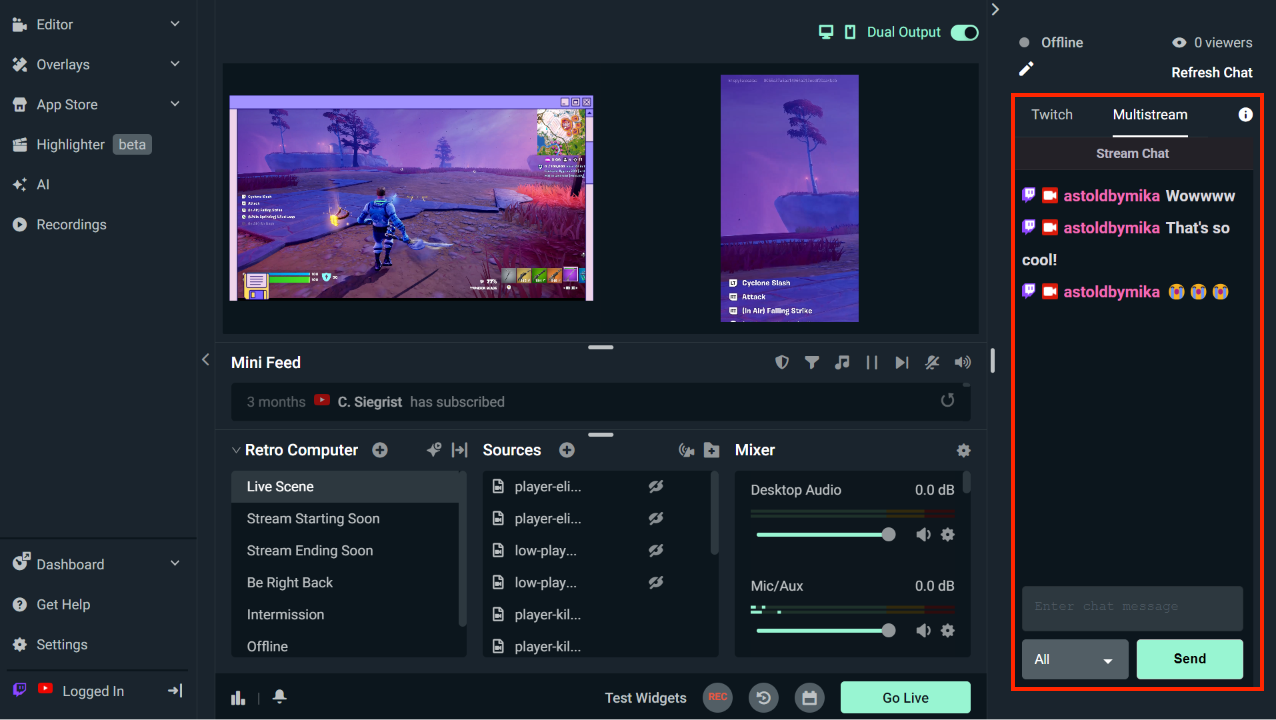
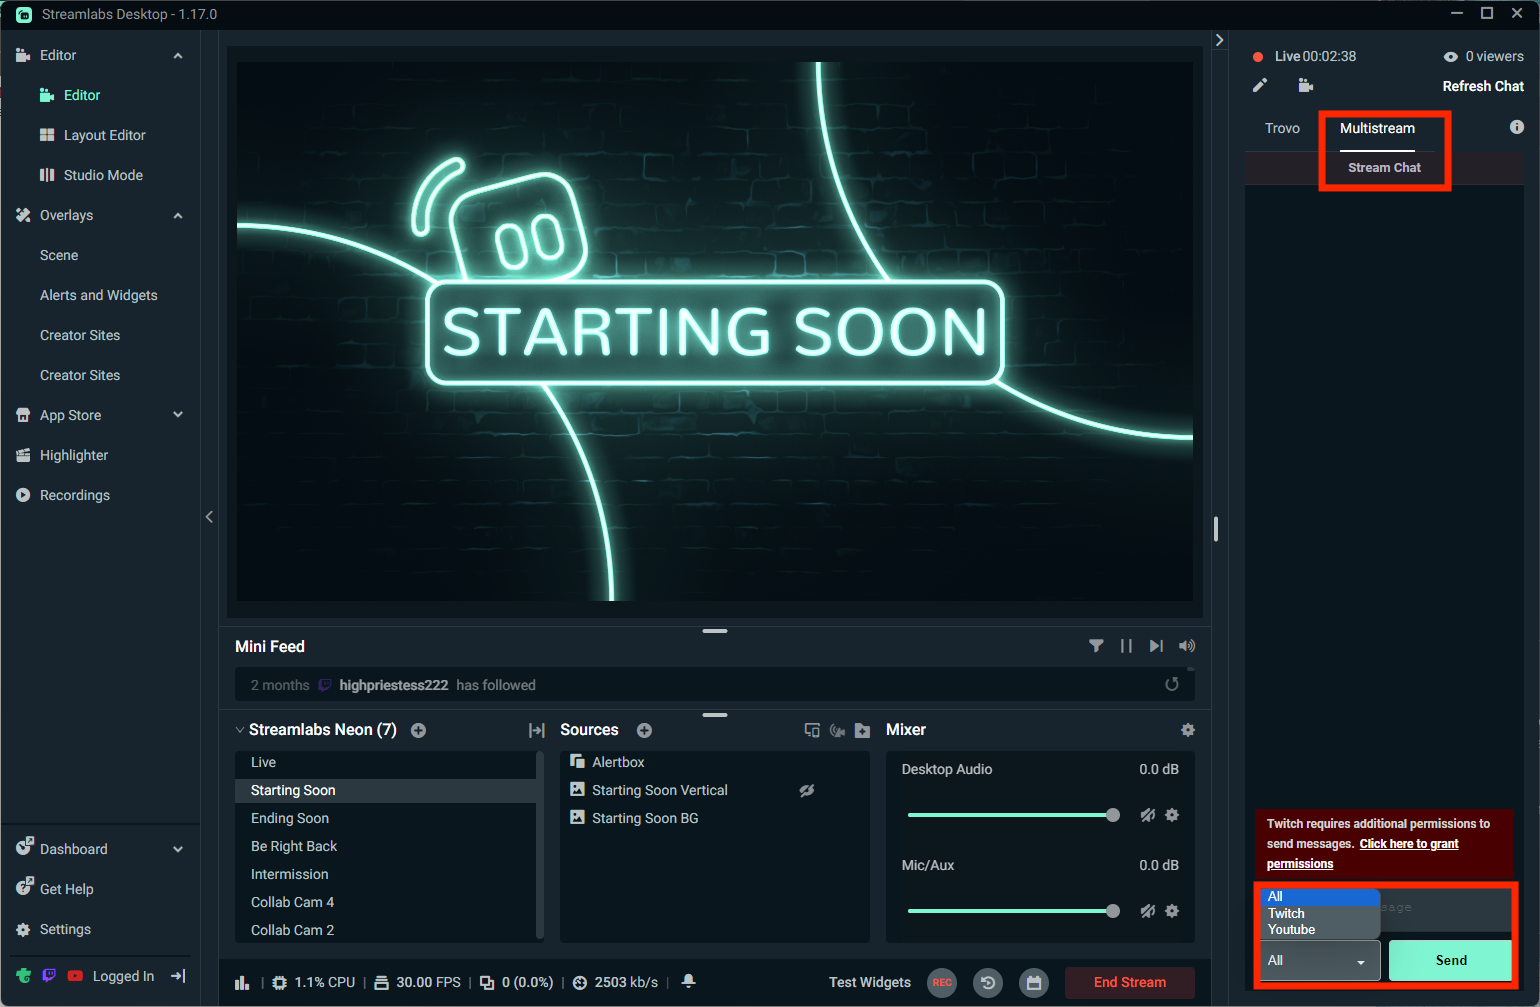
Step 3: The first time you open Multistream Chat, you’ll be prompted to grant Twitch permission to send messages (if Twitch is one of your active destinations).
This step is required before you can chat with your Twitch audience directly. Click the provided link and follow the instructions to complete the process.
Step 4: To change which chat your messages are sent to, use the dropdown menu above the chat box. Selecting All will send your message to every connected platform, or you can choose a specific destination (e.g., YouTube only).
How to Multistream with Talk Studio
Looking for a multistreaming solution that's browser-based (aka, no downloads necessary)? Check out Talk Studio.
Talk Studio is a web-based live streaming service that enables creators to go live with ease. With Talk Studio, all you need is a webcam, a Talk Studio account, and a web browser to multistream within minutes.
To live stream from Talk Studio, visit the website and create an account (if you haven’t already). After you create an account, you will be in “Studio” mode. From the Studio, you can control every aspect of your live stream, including going live, adding guests to your show, adjusting layouts, etc.
To multistream, perform the following steps:
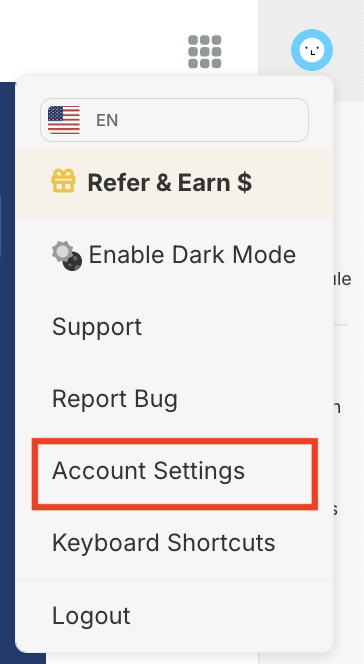
Step 1: Hover over your profile icon and click Account Settings.
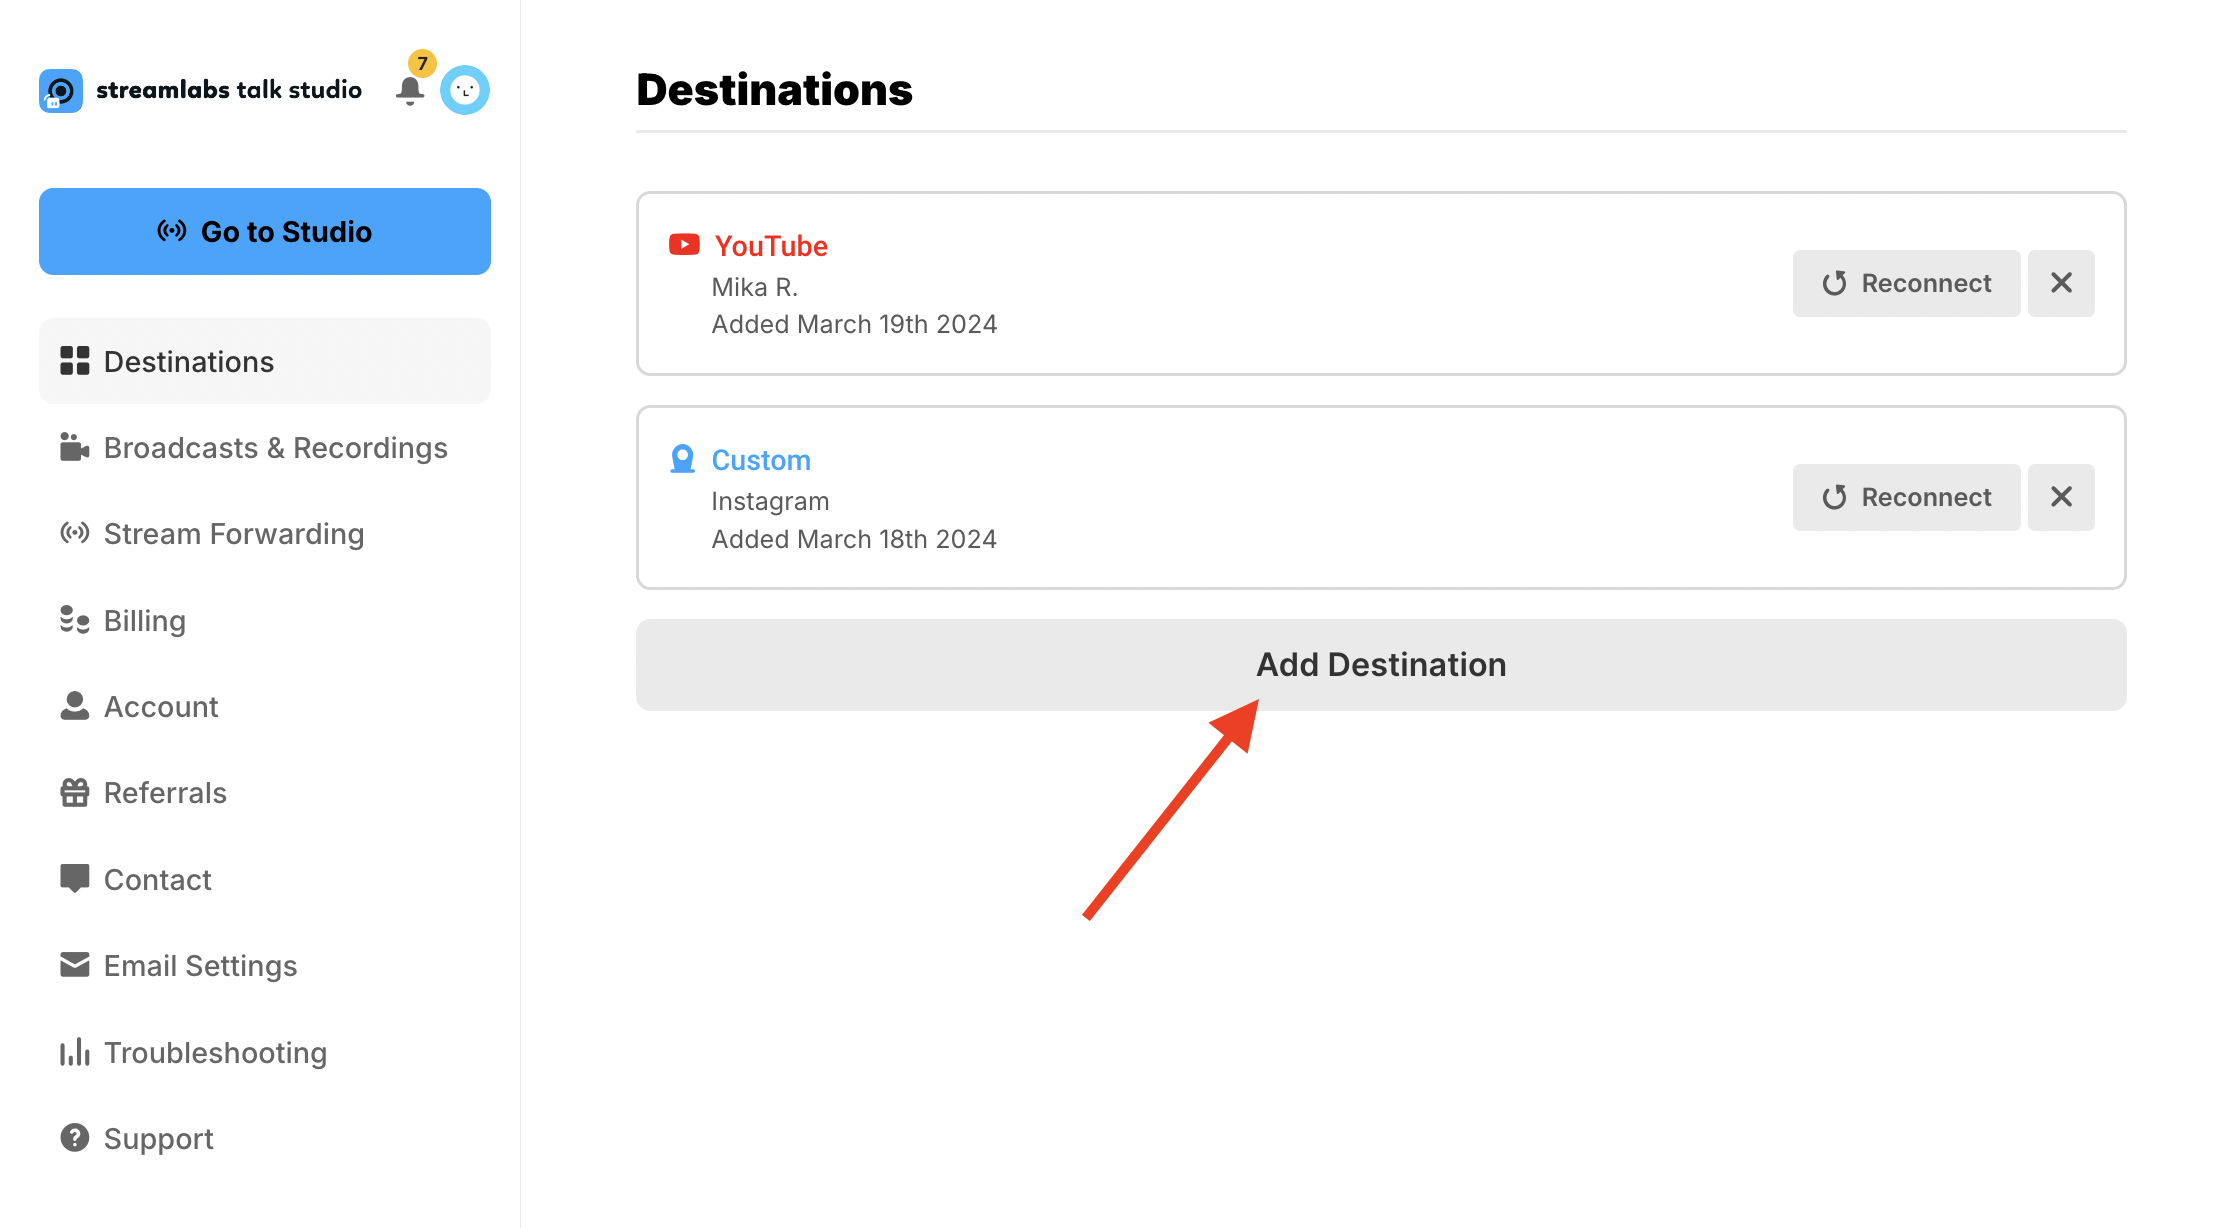
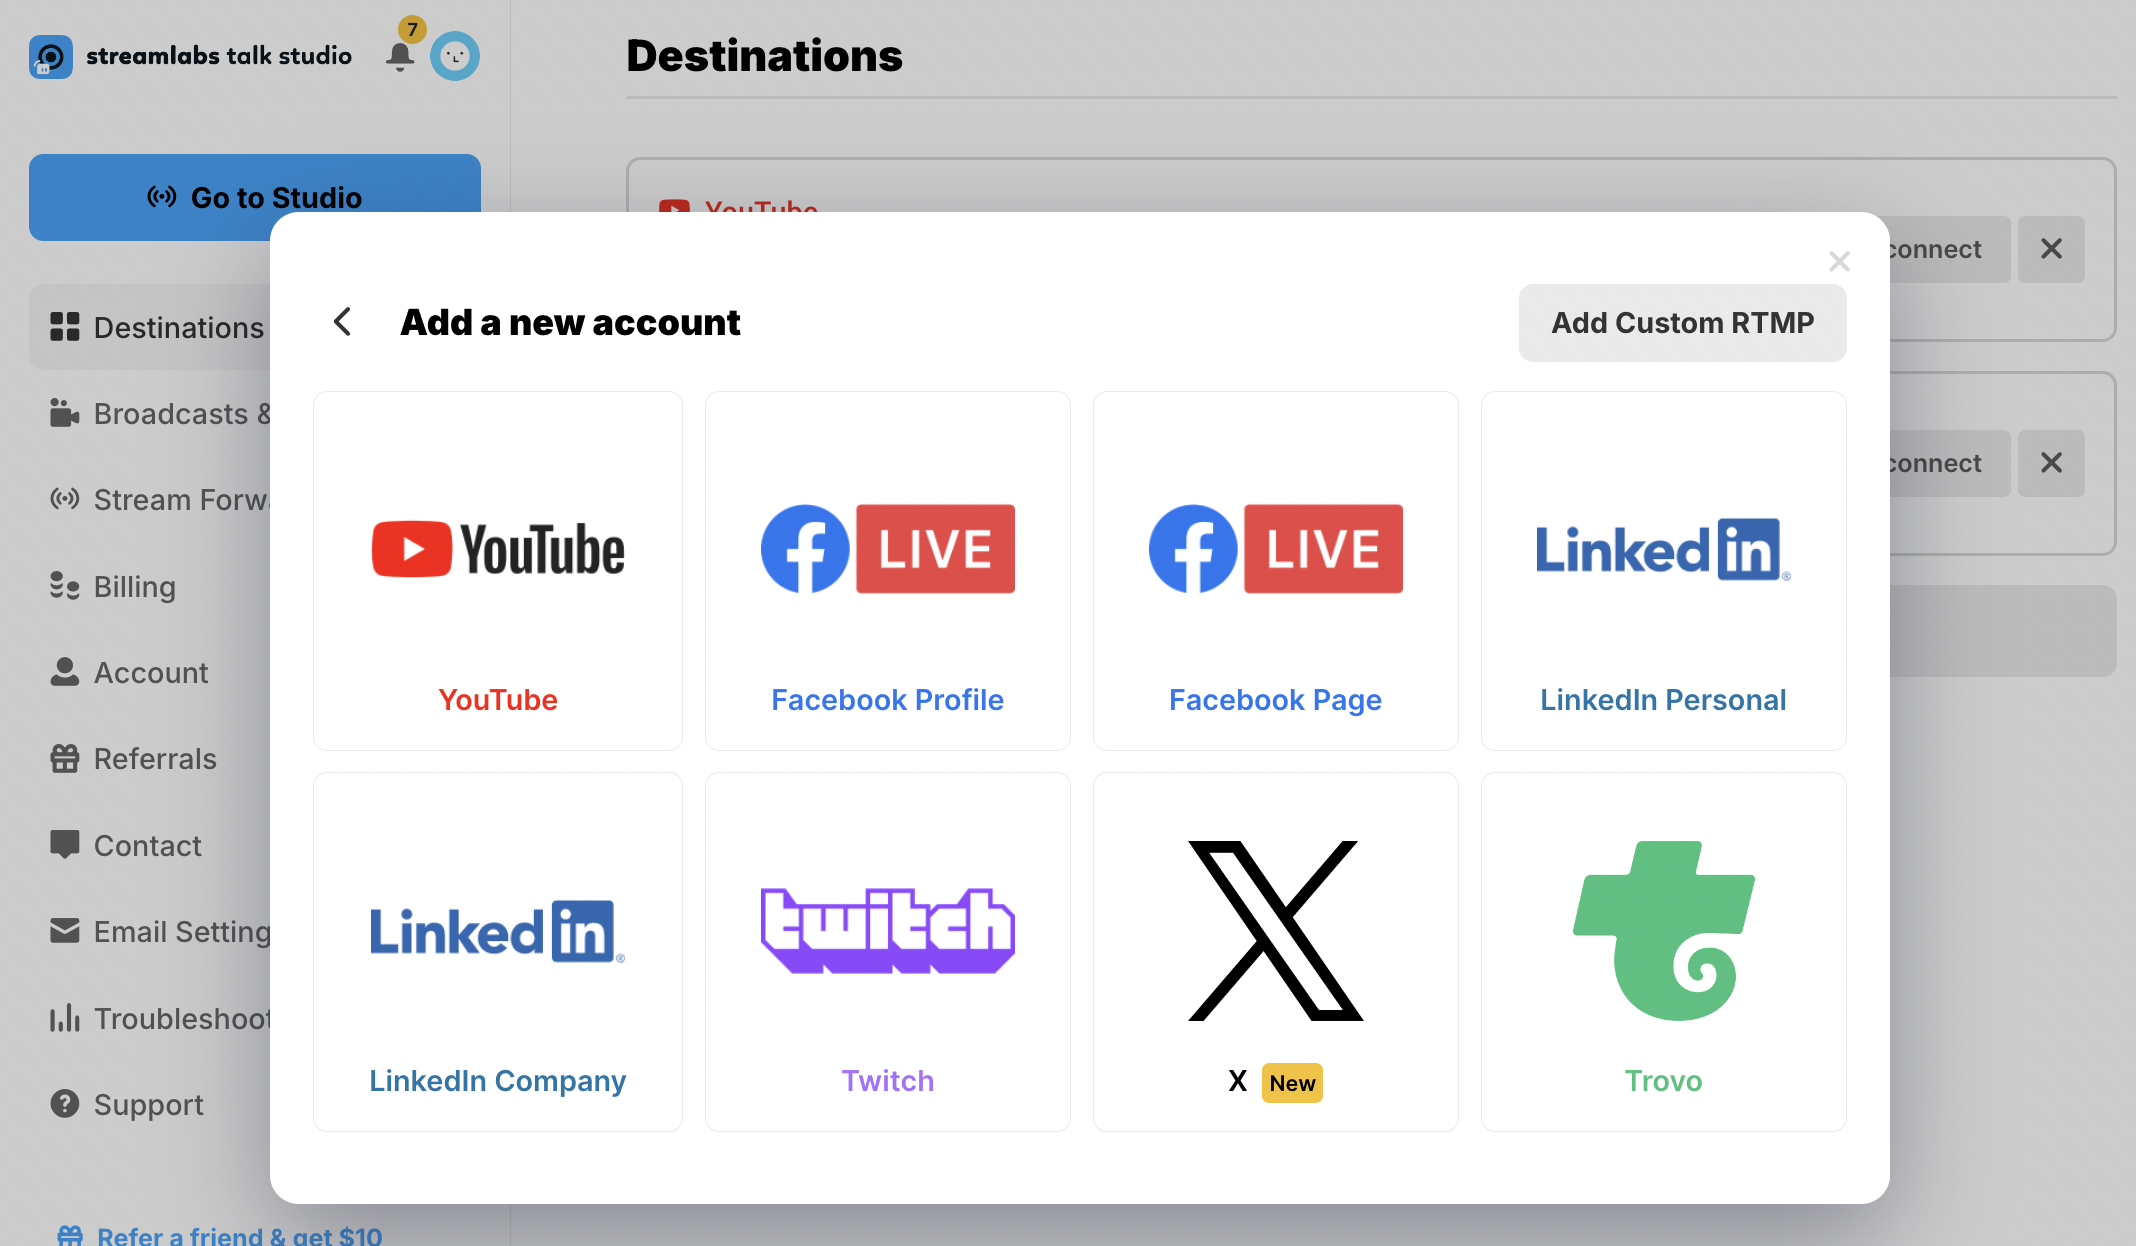
Step 2: In the Destinations section, link your accounts by selecting Add Destination and following the onboarding steps.
Step 3: Go back to the Studio and click Go Live.
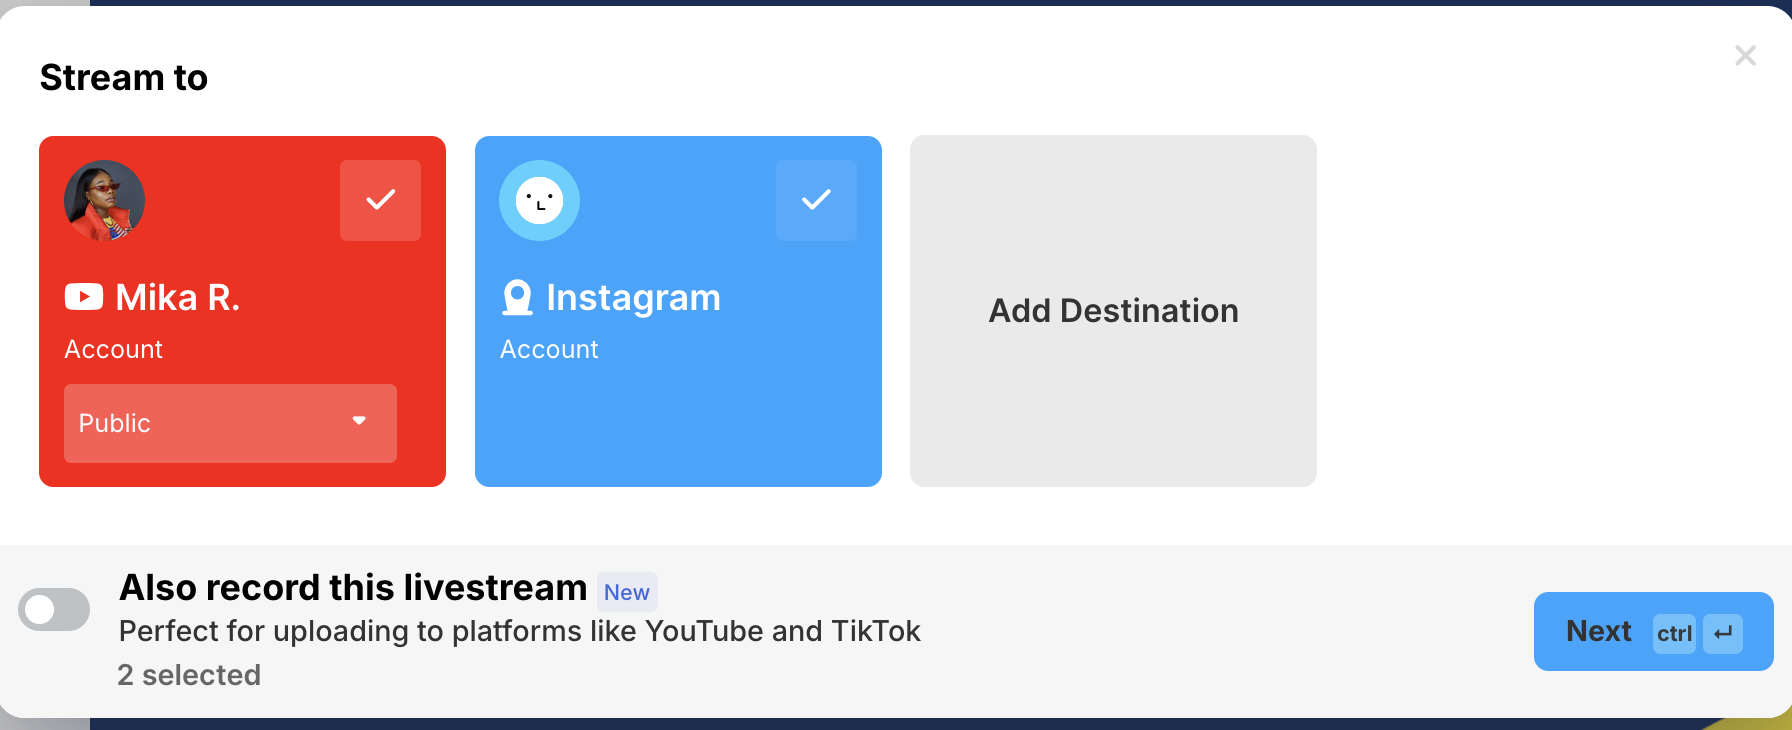
Step 4: Select which platforms you’d like to live stream to by clicking the plus sign (+) on each.
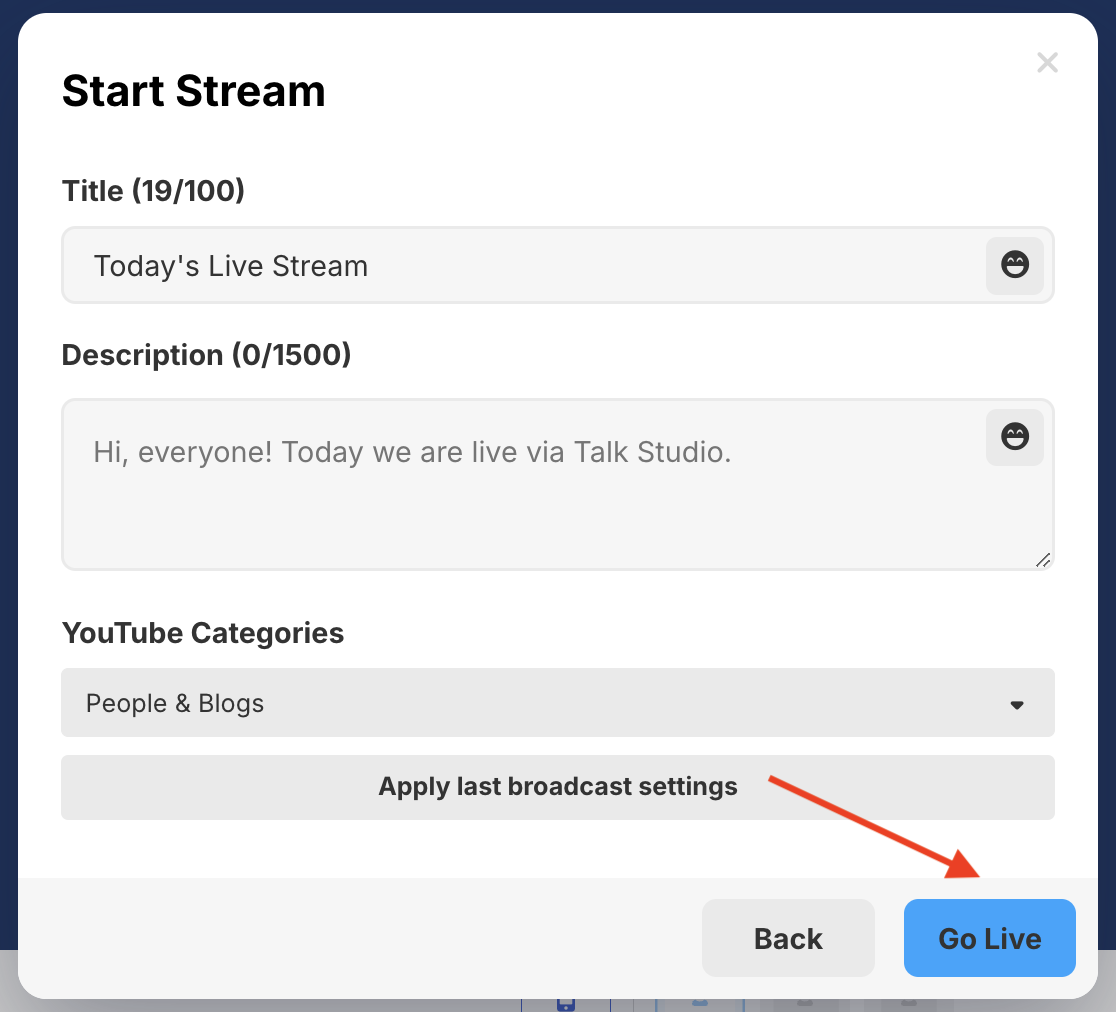
Step 5: Confirm the details of your live stream, then hit Go Live, and you will be ready to multistream!
Conclusion
Multistreaming gives you more flexibility to reach viewers across the platforms that make the most sense for you—without creating separate broadcasts for each one.
With Streamlabs Desktop, you can stream to multiple destinations, create horizontal and vertical experiences with Dual Output, and use Live Output Editing to adjust where you’re live as your stream evolves. If you prefer a browser-based setup, Talk Studio also offers an easy way to multistream.
Choose the setup that fits your workflow, connect your destinations, and go live where your audience is.