

The Streamlabs Plugin brings your favorite Streamlabs features, like alerts, widgets, and overlays, directly inside standard OBS Studio. This guide will show you how to install the plugin, link your account, and add interactive features to your scenes.
- Requirements
- Install and Connect Your Account
- Onboarding
- Adding and Testing Streamlabs Widgets
- Using Stream Labels
- Manage Your Stream with Custom Docks
- More Resources
Requirements
- Only available for Windows
- OBS Studio version 28.0.0 or later
Step 1: Install and Connect Your Account
- Download the installer from streamlabs.com/desktop/plugin.
- Open the installer to start the setup. The program will automatically find your OBS Studio folder and add the plugin files for you.
- Open OBS Studio. You will now see a new Streamlabs onboarding window pop up on your screen.
- Click Log In & Get Started.
Step 2: Onboarding
These steps are to help you get started as quickly as possible with the Plugin. You can continue with each of these, or press Skip to move to the next step.
- Overlays: If you want a complete visual theme, you can click to install one here.
- Tipping: If you haven’t set up tipping, you can do so here.
- Cloudbot: This section allows you to enable cloudbot quickly so it can start moderating your chat.
- Choose your plan: This is where you can choose Streamlabs Free or Streamlabs Ultra.
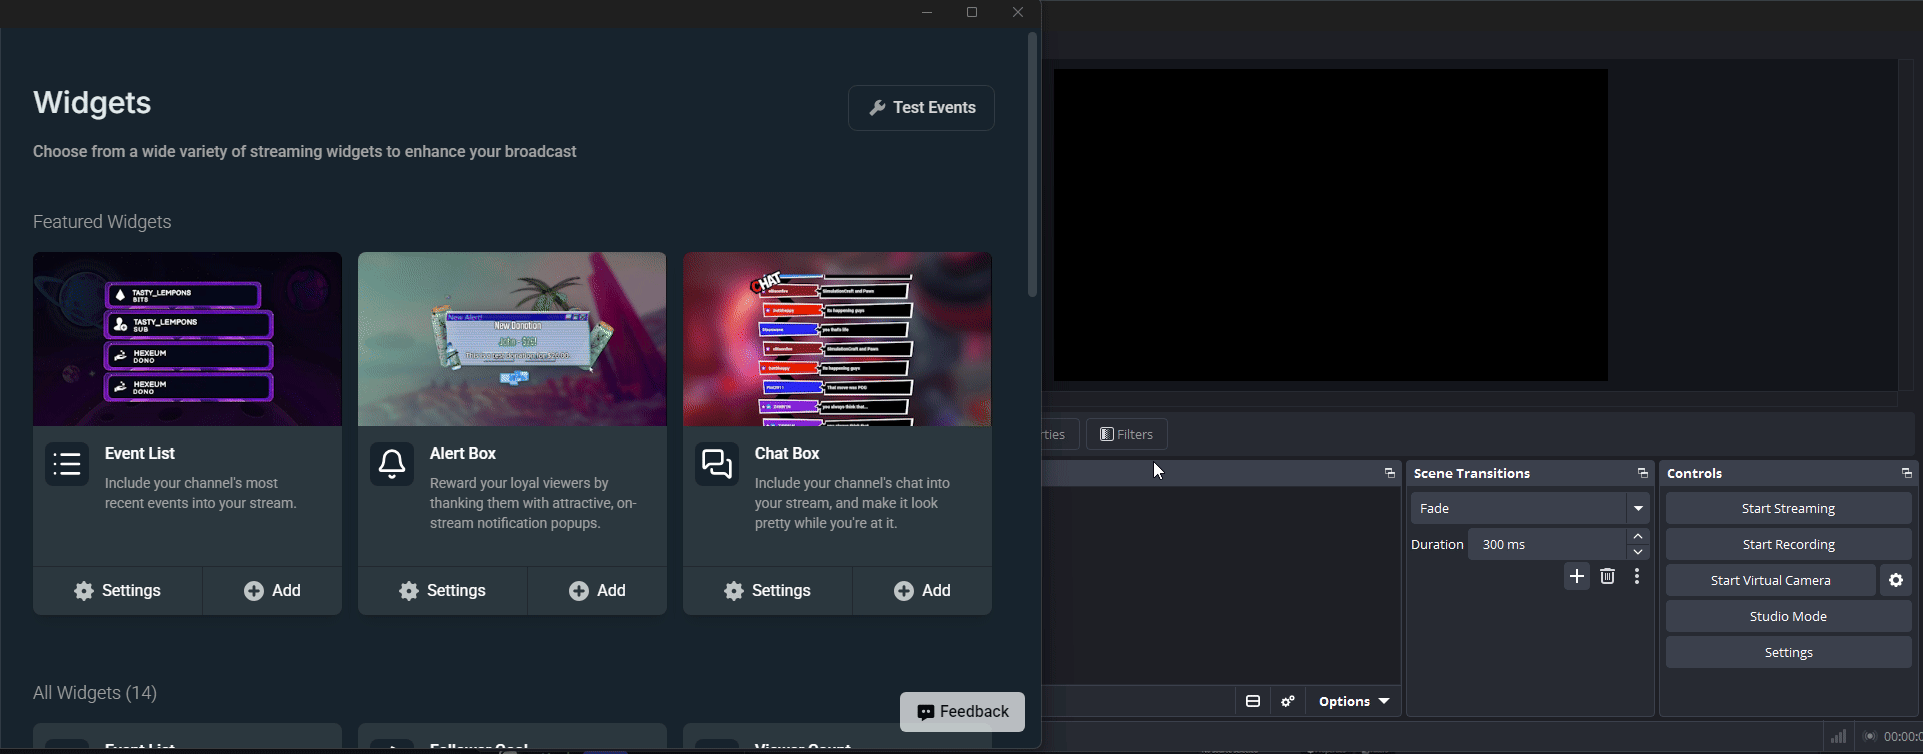
Step 3: Adding and Testing Streamlabs Widgets
The plugin allows you to add and test your widgets.
Adding A Widget
- Click on Streamlabs in the top menu bar of OBS Studio.
- Click Widgets.
- Find the Widget you want to add.
- Click + Add.
- Once you’ve clicked, you’ll see the “Widget Added” notification and the browser source will be on your canvas.

Testing Widgets
- In the Widgets section, click Test Events.
- Hover over the platform that you want to test.
- Move your mouse to the alert that you want to test and click it.
Editing Widgets
You can’t edit widgets through the plugin, but if you click on the ⚙️ Settings button it will launch a new browser window directly to where to edit your widget.
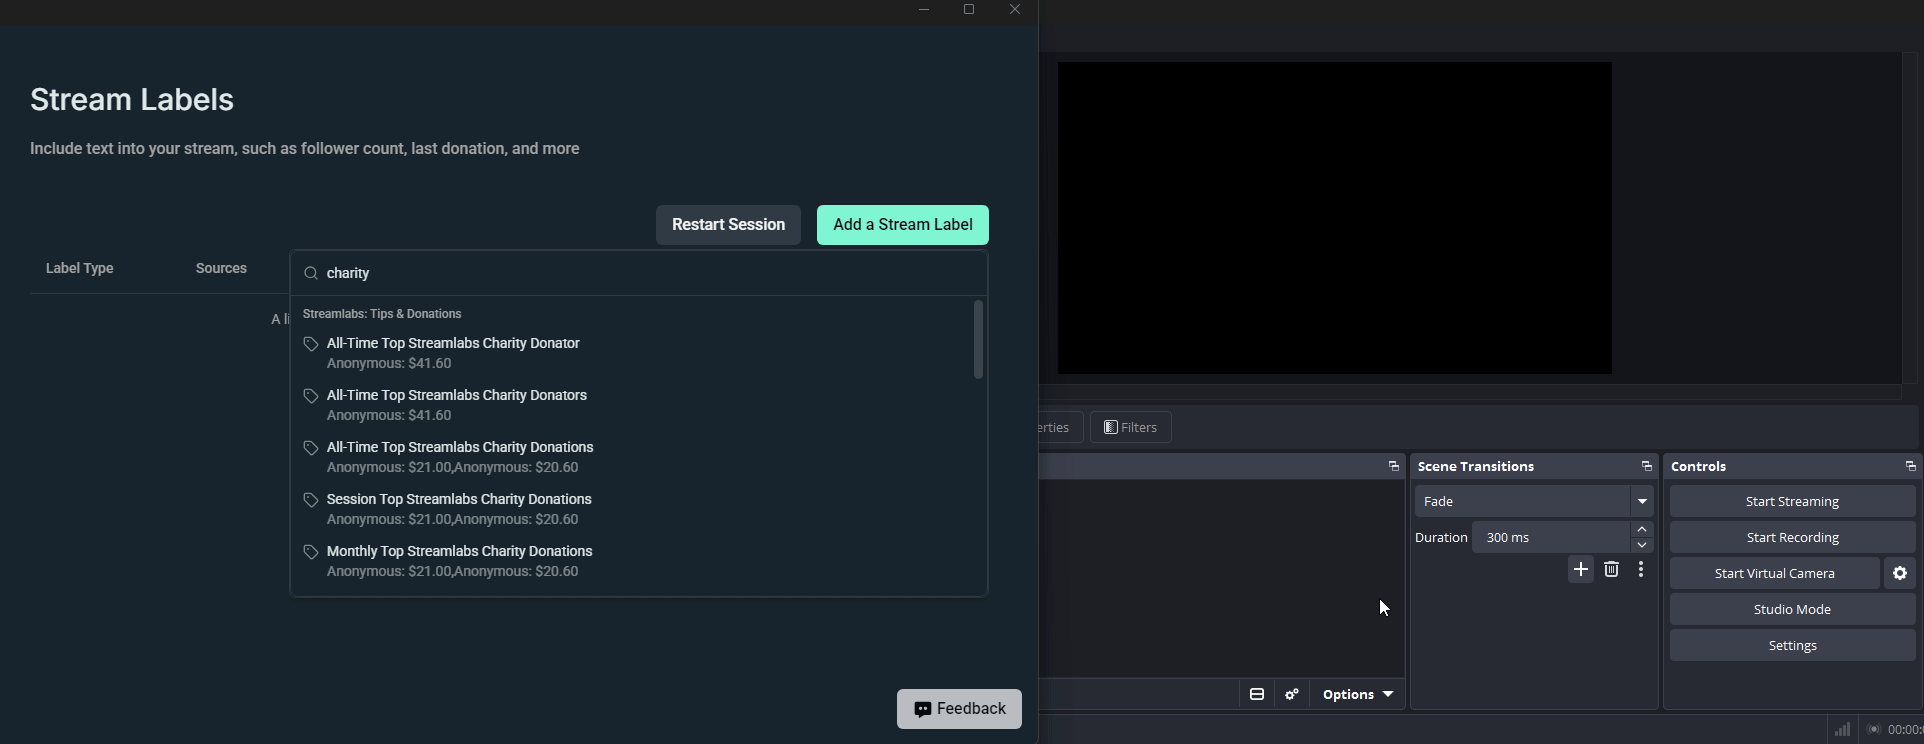
Step 4: Using Stream Labels
Stream Labels are text sources that update whenever an event happens, like a new follow.
Adding a Stream Label
- Click on Streamlabs in the top menu of OBS Studio.
- Click Stream Labels.
- Click Add a Stream Label.
- You can scroll or type out what stream label you want to add and click on it.
- If you want to add it to multiple scenes, click the Add to Scene dropdown and click the scene you want it in.
Editing a Stream Label
- On the right hand side, click on the ⋮ icon.
- Click Edit.
- You can add text and variables to adjust what the label says.
- Click Save Changes.
Deleting a Stream Label
You will need to manually delete the source from your scenes. If you want to remove it from your labels list, click on the ⋮ icon and click Delete.
Step 5: Manage Your Stream with Custom Docks
The plugin adds custom side panels, called Docks, directly into your OBS interface so you can read chat and control your stream without opening a web browser.
- Look at the top menu bar in OBS Studio and click on Docks.
- Check the box next to Streamlabs Activity Feed to see your recent followers, subscribers, and tips in real time.
- Check the box next to Streamlabs Chat to embed your stream chat directly into your OBS layout.
- Drag and drop these new panels anywhere you want inside your OBS window to lock them into place.
More Resources
Want a deeper dive into the plugin? Read our official, deep-dive guide on maximizing the Streamlabs Plugin for OBS Studio.
Need Help?
Our team is happy to help at https://streamlabs.com/support.