

Stream Labels is a fantastic way to customize the look of your stream, acknowledge users, or show off impressive stats. Pick and choose from over 60 different labels including your top tip, highest donor most recent follower, and most recent subscriber.
Stream Labels will continually display the information you have chosen to include making it a useful tool to increase engagement from viewers who want to see their name on the screen.
In this guide, we will show you how to add a Stream Label in Streamlabs Desktop, customize it, some tips and tricks, and how to add it to other streaming software like OBS Studio.
Table of Contents:
- Whare Are Stream Labels?
- What Are the Benefits of Stream Labels?
- How to Add a Stream Label to Streamlabs Desktop
- How to Customize Your Stream Label Settings in Streamlabs Desktop
- How to Make Stream Labels Scroll
- How to Add Stream Labels to OBS Studio
What Are Stream Labels?
Stream Labels is an application that runs on your computer that generates text files. These text files contain stats, including your top tipper for the day, your most recent follower, and many others. You can include these text files directly into OBS, XSplit & other streaming software.
Streamlabs Desktop has full support for Stream Labels built-in, so there is no need to download or run any external app. If you’re not using Streamlabs Desktop already, you can download it here.
What Are the Benefits of Stream Labels?
- Engage Viewers: Many viewers want to see their name on the screen and may interact with your stream to get their name to appear.
- Monetize: Having a top tipper displayed on your live stream may incentivize others to contribute and support you as well.
- Celebrate Your Community: Scrolling text filters allow you to celebrate everyone that has participated in your stream during your live stream session.
How to Add a Stream Label to Streamlabs Desktop
Adding Stream Labels to Streamlabs Desktop is a very simple process because the application is already pre-built into our software.
Note: For Streamlabs Desktop built-in Stream Labels to work properly, you must have an Alert Box widget source added to your stream. You can hide the Alert Box if you don't want it to show or you can add a Stream Label to Desktop using the same method as adding Stream Labels in OBS.
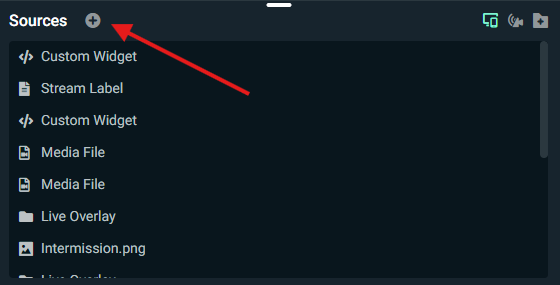
Step 1: Open Streamlabs Desktop and click on the + sign in the Sources section.
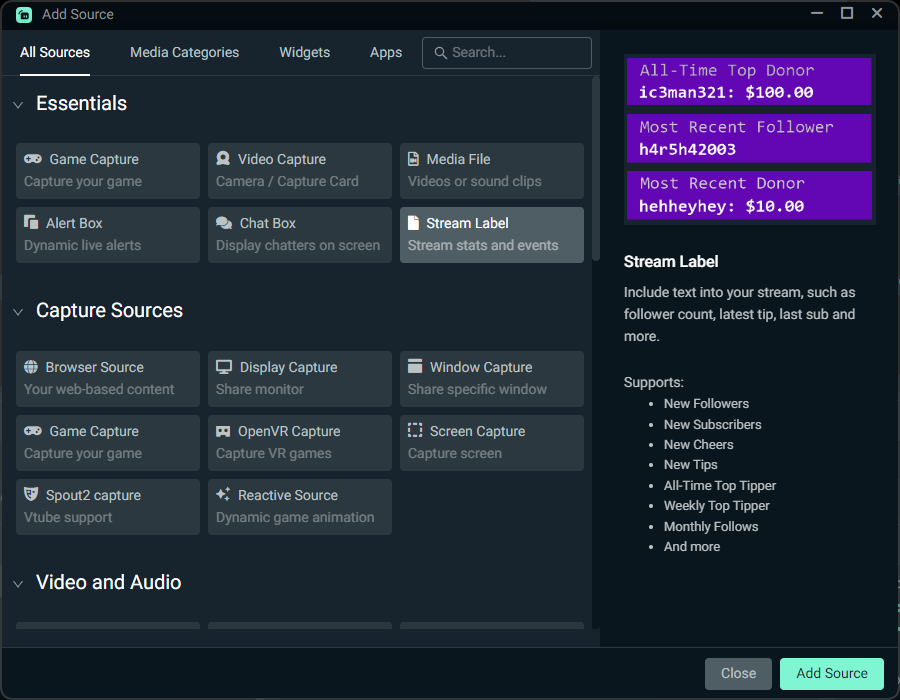
Step 2: Now under Essentials, click on Stream Label, name your source, and add it to your stream.

How to Customize Your Stream Label Settings in Streamlabs Desktop
After you add a Stream Label source, a screen will appear that allows you to customize your label. In this section, we’ll briefly go over the various options you can customize.
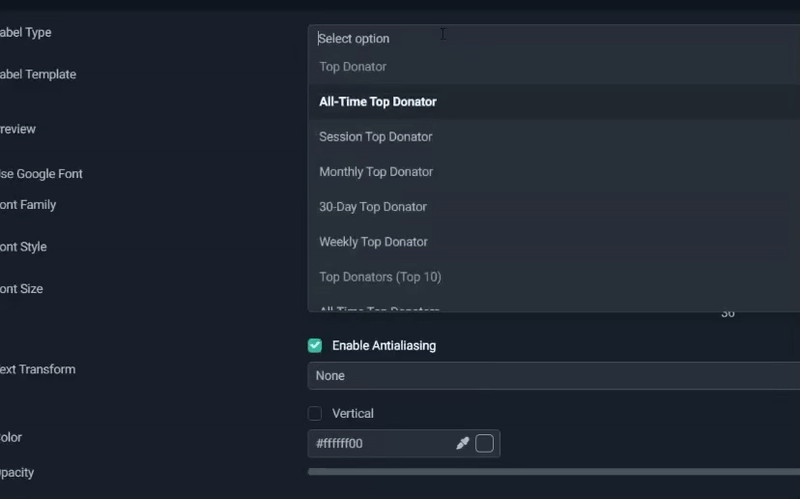
Label Type: There are over 65 different types of labels you can choose from. Pick everything from top tipper of all time, sub gifters, most recent followers, subscribers, and much more. There is a label for almost everything you could think of, so go through the list or use the search bar to try and find the label you are looking for.
Label Template: This allows you to customize the text that will appear on your label. Items in brackest like {name} are variables that will be automatically populated with the relevant information.
Font Family: Choose to use the default font types or fonts from Google.
Text Transform: Use this to select if you want your text all lowercase, uppercase, or start case.
Verticle: Enable this if you want your Stream Label text to appear verticle.
Custom Text Extents: If you are using stream overlays with a custom Stream Label frame, it can be common for a viewer's name to extend beyond the frame of your label. In this case, you can use custom Text Extents to ensure the name will cut off after it reaches a certain length. To do that, play with the with the width and height until the text ends where you want it. Please note, if you turn on Custom Text Extents, the “Wrap” toggle may turn on as well. If this happens, feel free to turn it off.
How to Make Stream Labels Scroll
One property of Stream Labels that many of you may not know, is that you can actually add filters to your labels to make them scroll. To do that, perform the following steps:
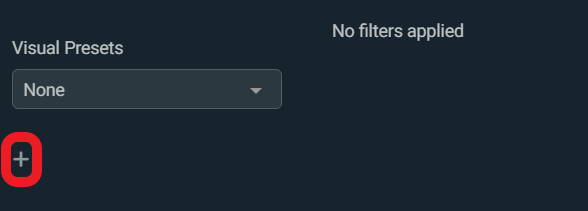
Step 1: Right-click your label and click on Filters > Edit Filters.
Step 2: Click on the plus sign to add a new filter.
Step 3: Open filter type and click on Scroll.

Step 4: Click Add and now adjust the horizontal or verticle speed and if you want to loop your text.
How to Add Stream Labels to OBS Studio
Step 1: Download the Stream Labels app from the Streamlabs Dashboard and run it.
Step 2: Upon opening the app and you will be prompted with a login window.
Step 3: Log in using your Streamlabs ID or via your preferred streaming platform. If the login window never appears it usually means something is blocking the pop-up. We suggest allowing Stream Labels through any antivirus software. Try disabling any antivirus if you have any issues with logging in.
Step 4: Onced logged in, you will be prompted to set an output directory. This is where your Stream Labels files will be stored. Find or create a new folder to save all your new text files. Creating a Stream Labels folder under your Documents folder is usually a good place. Now all the files will be added to the folder.
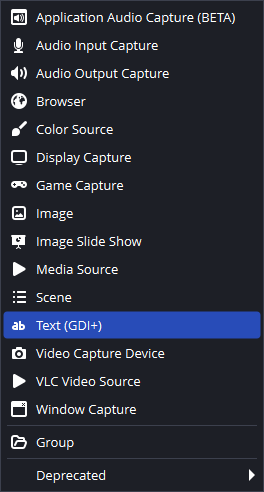
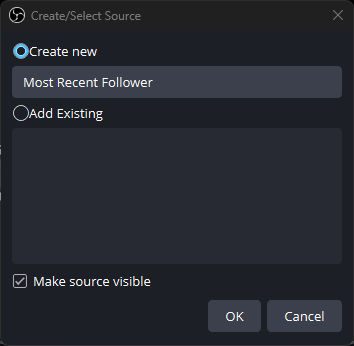
Step 5: Next you need to add your text sources to your streaming software. Open your OBS Studio or whichever streaming software you are using and click to add a source and choose Text. Name your source. We recommend naming it the name of the Stream Label you wish to display.
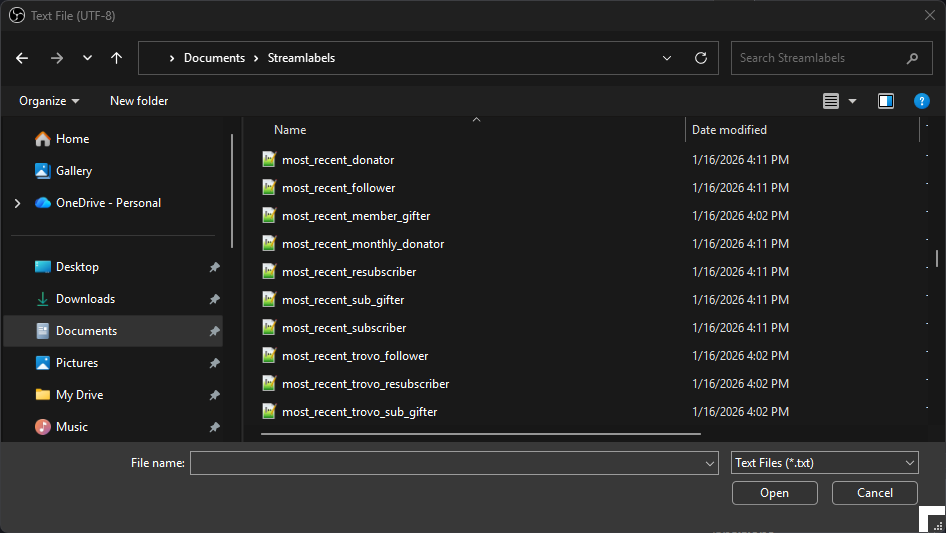
Step 7: Check Read from file, then Browse and find the read from the file section and check it and then click the browse and navigate to the folder you created earlier. Decide what you want to display from the many files. For example, if you want to display your most recent follower use most_recent_follower.txt.
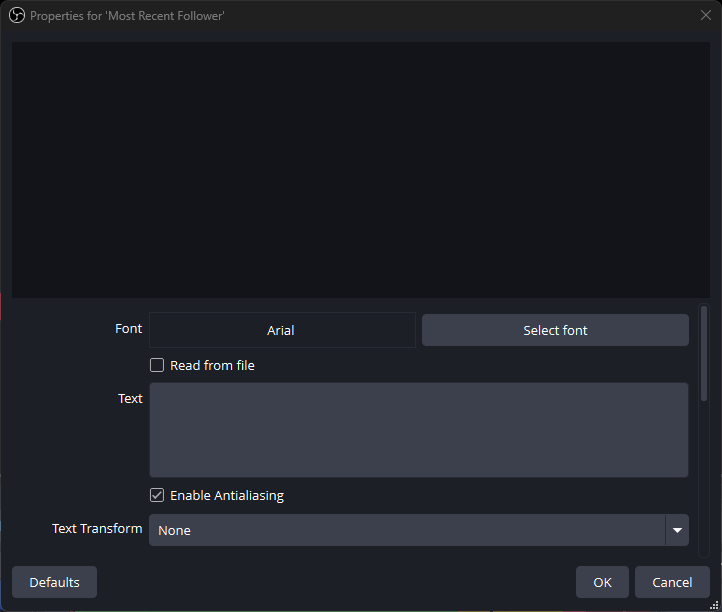
Step 8: Set your preferred font settings by clicking Select Font, adjusting your settings, and clicking OK when you're done.
Step 9: Adjust the size and location of your Stream Label until you're happy, then repeat Steps 5 through 8 for any additional Stream Labels you wish to add.
Remember: The Stream Labels app needs to be running on your computer for it to update the text files in real-time.
We hope you found this guide helpful! If you have any questions or comments, please let us know by contacting us or joining our Discord server.