

Alerts are sounds and messages that pop up on your screen when you stream. Creators use them to celebrate events like a new follow or subscription. This guide will teach you how to get your alerts set up quickly.
- Link Your Channels
- Find your Alert Settings
- General Settings
- Fast Design (Global Editing)
- Customize Specific Alerts & Variations
- Adding the Alertbox to your Software
- Testing your Alerts
- More Resources
Before You Start: Link Your Channels
If you stream on multiple platforms like Twitch, YouTube, or Kick, you can link them all together. We highly recommend creating a Streamlabs ID to combine your accounts. If you need help creating a Streamlabs ID, check out our step-by-step guide on how to set up your Streamlabs ID here. Here’s how to merge your accounts:
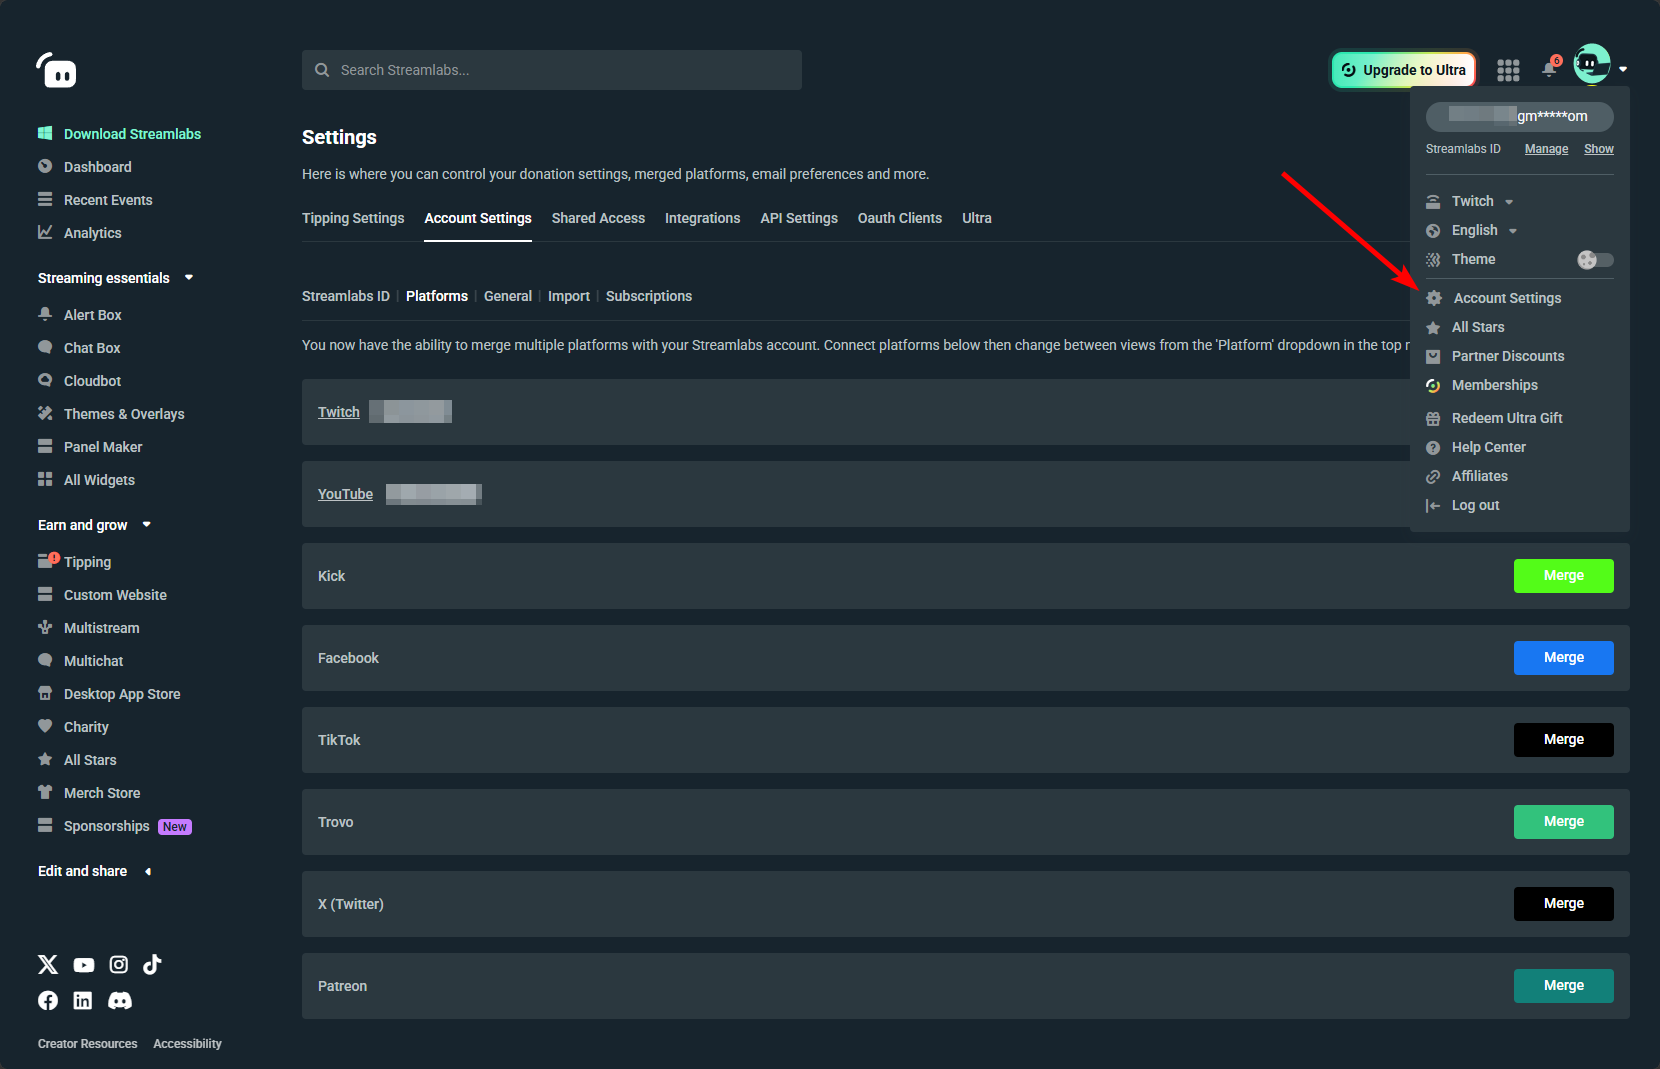
- Log into streamlabs.com.
- Click the arrow next to your profile picture in the top right corner.
- Click Account Settings.
- Click the Platforms tab on the left menu.
- Find the platform you want to add and click the Merge button next to it.
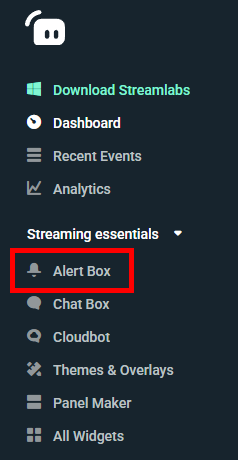
Step 1: Find your Alert Settings
- On the left side, find Streaming essentials.
- Click Alert Box.
Step 2: General Settings
This is where you can control how alerts work overall.
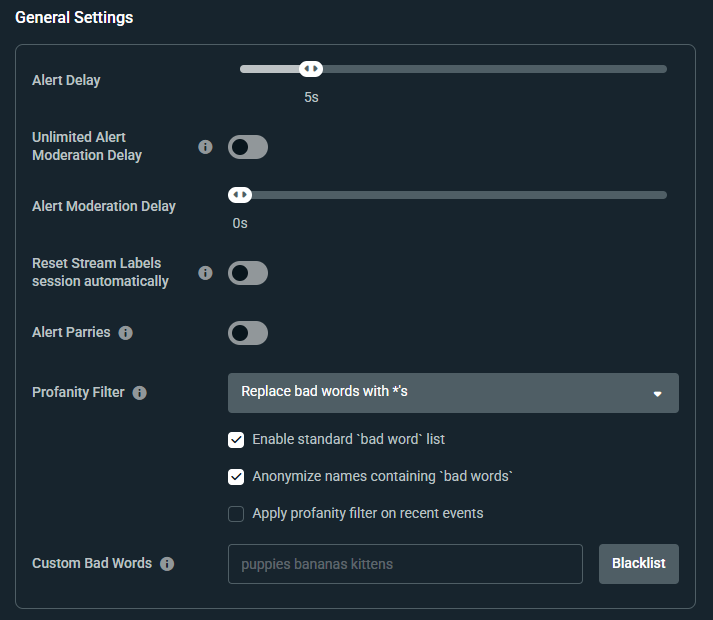
- Alert Delay: Pick how many seconds to wait before the alert shows up. We recommend between 2-5 seconds.
- Moderation Settings: You can turn on "Alert Moderation" to approve alerts before they appear on stream. The difference between Unlimited and regular is that with Unlimited you have as much time as you want to approve, while regular requires approval within a certain timeframe or it won't appear.
- Profanity Filter: This blocks "bad words" from appearing in your alerts.
- Custom Bad Words: You can type in your own list of words to block.
Step 3: Fast Design (Global Editing)
Use the Global Editing tab to give every alert the same look at the same time.
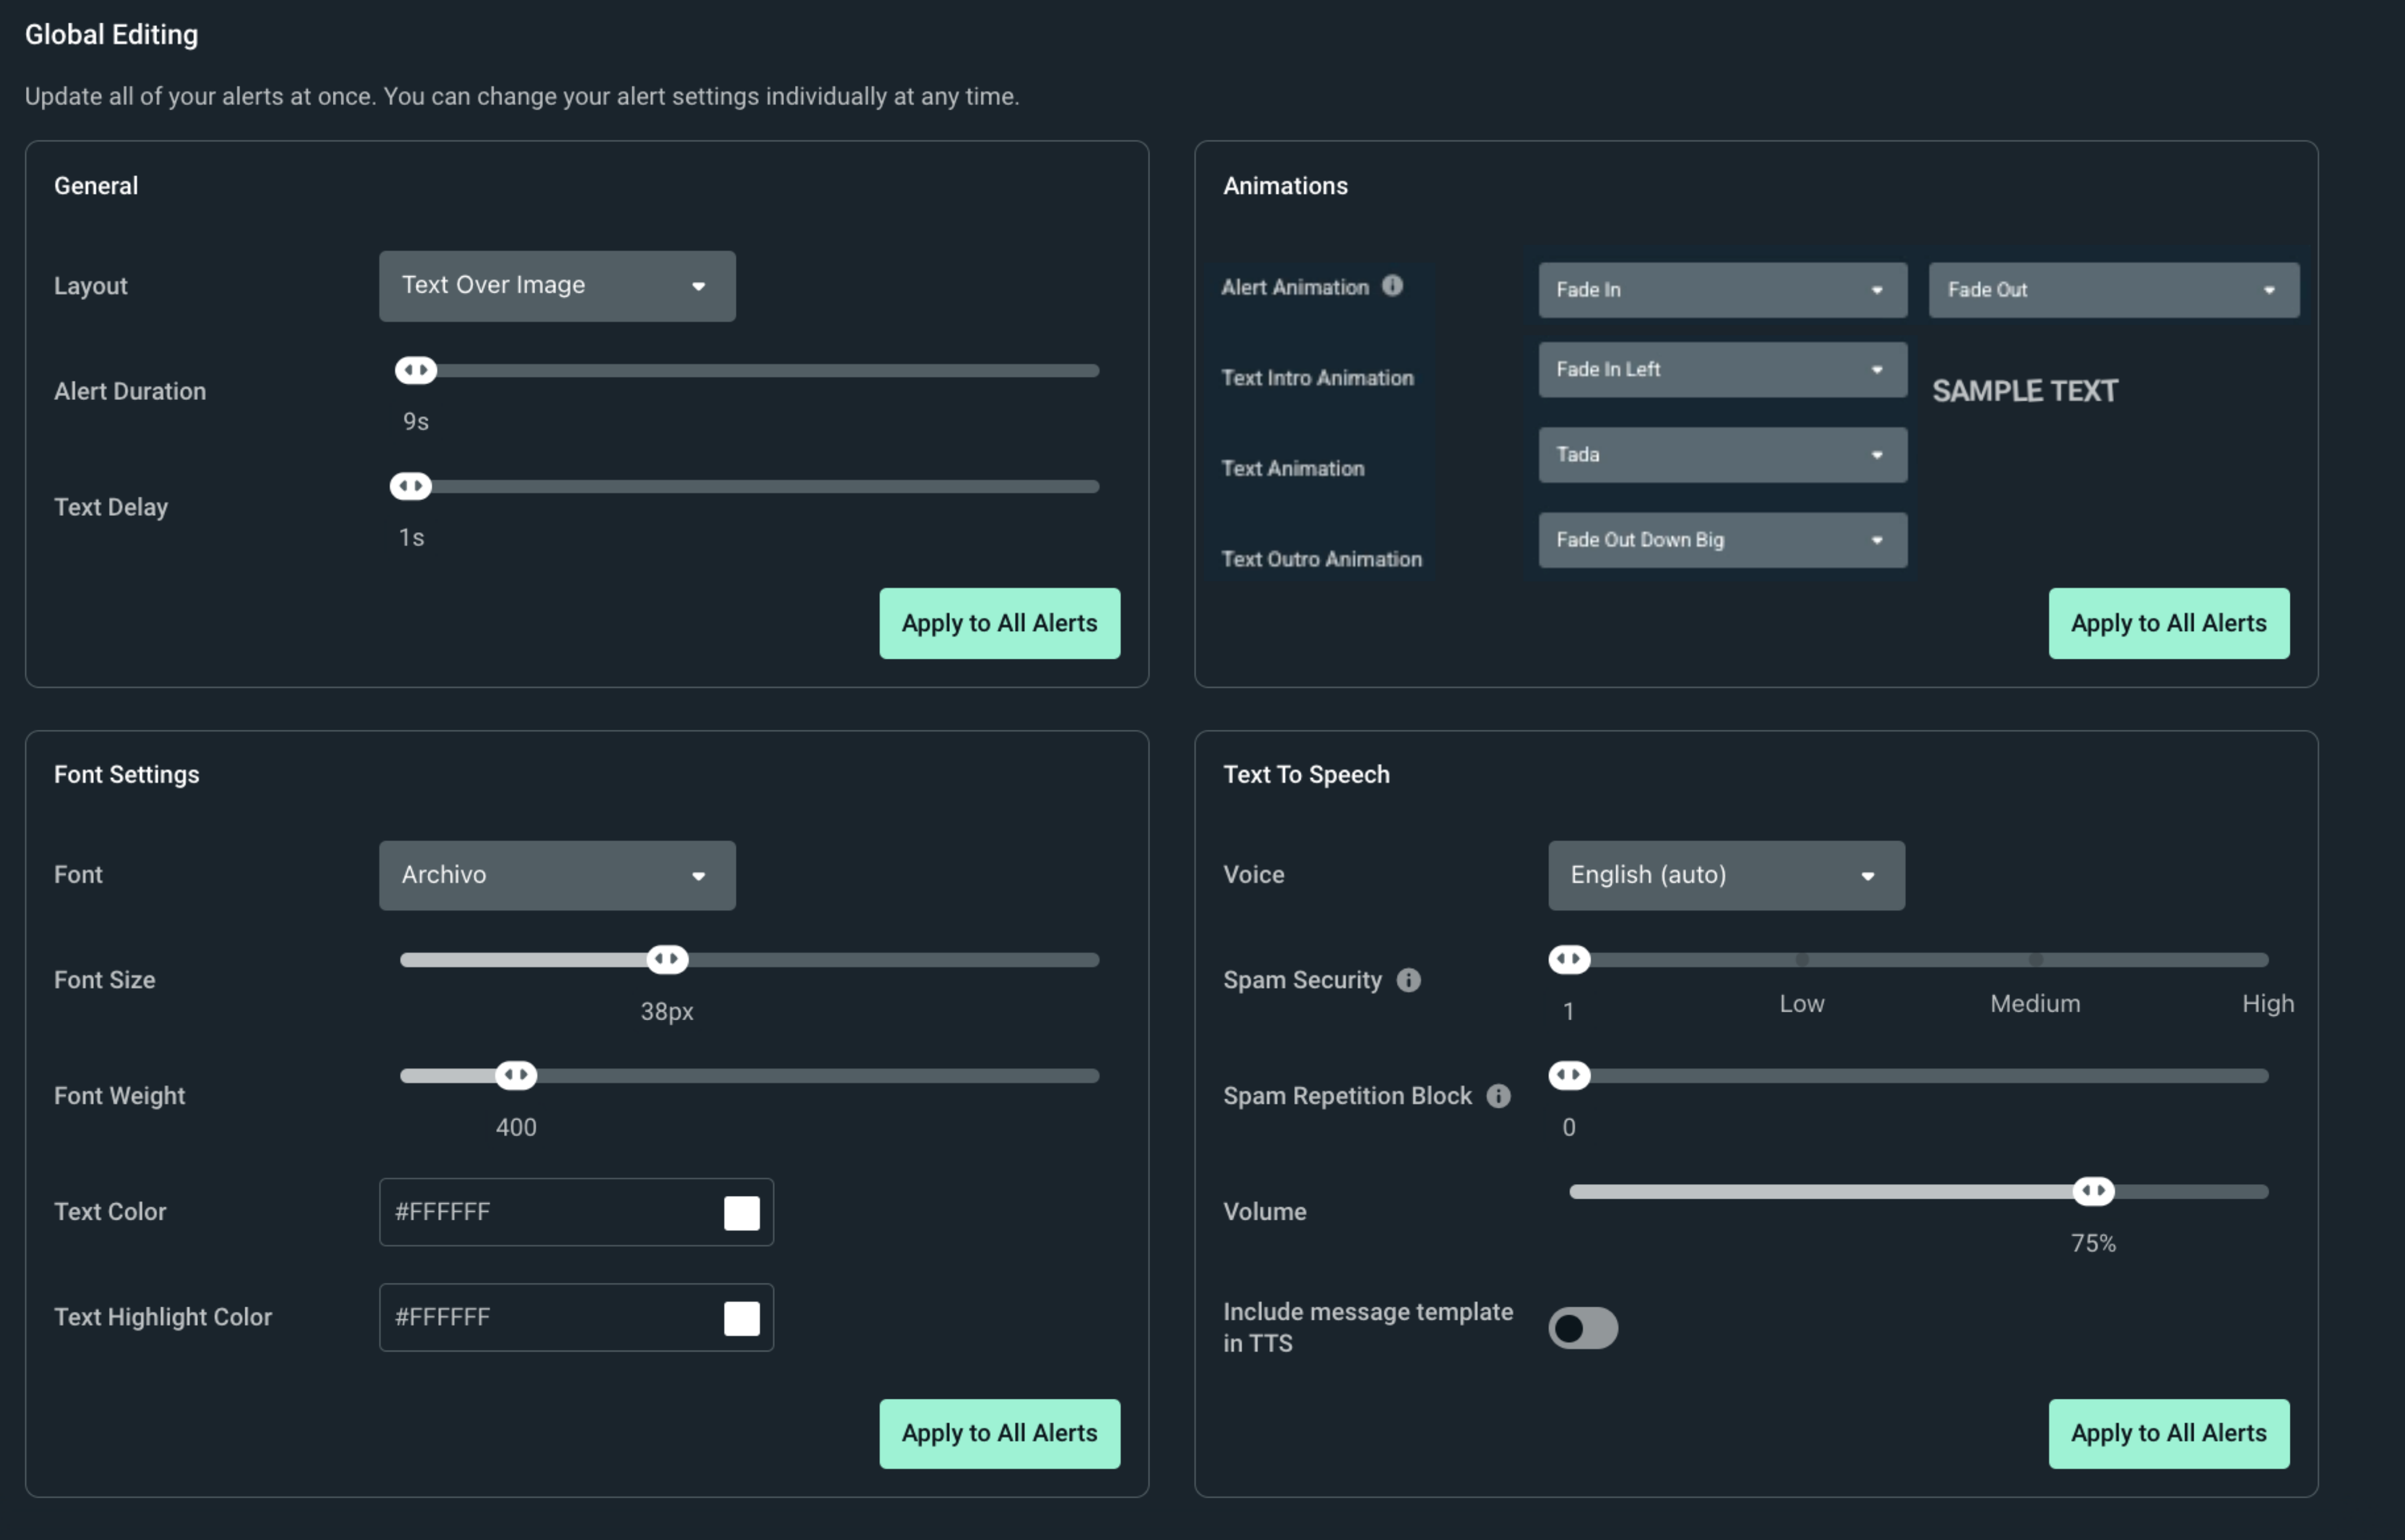
- Layout: Choose if the text goes over, under, or next to your image.
- Text and Alert Animations: Pick how the alert and the text moves onto and off of the screen. You can also animate the text while onscreen.
- Font Settings: Change the size, color, and style of your text.
- Text to Speech: Set a voice to read alerts out loud.
Step 4: Customize Specific Alerts & Variations
Once your general look is set, you can customize individual events like "Twitch Follows."
- Platform Alerts: Click a platform (like Twitch) and pick an event (like Follows) to change its specific image or sound.
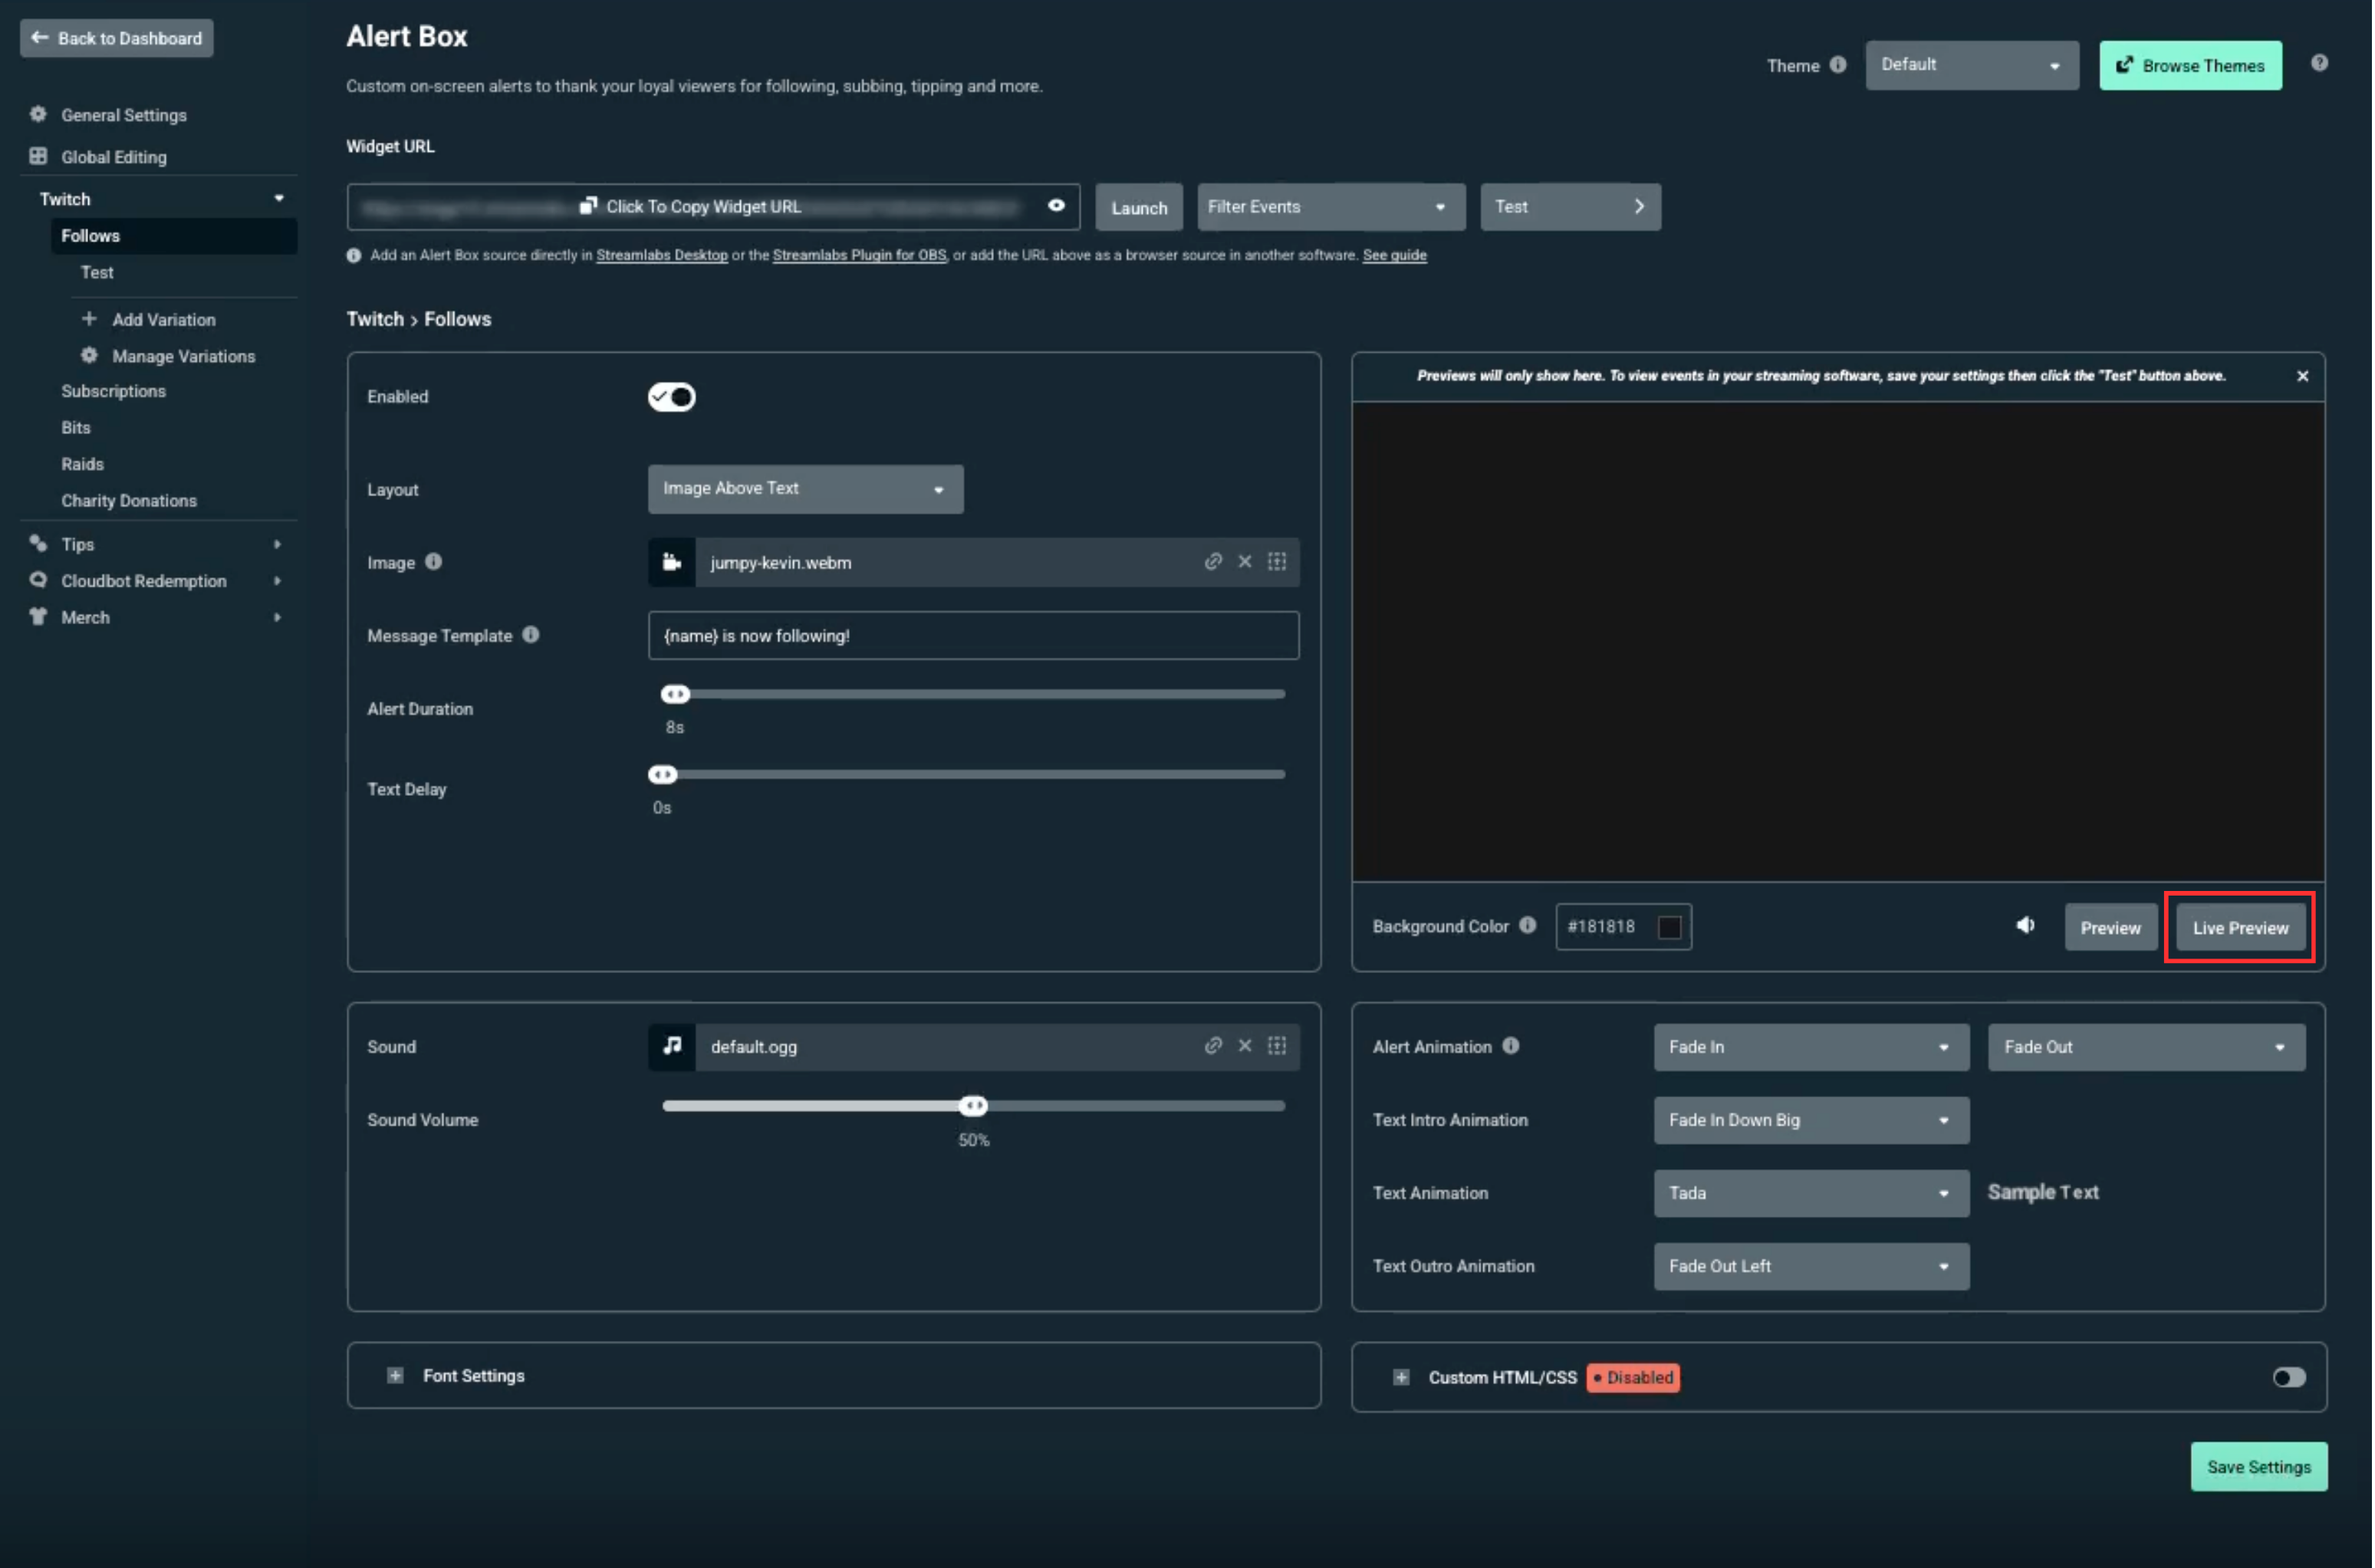
- Live Preview: Click the Live Preview button to see your changes in real-time. The only changes you will not see until you end the Live Preview are the outro animations, which will be triggered as soon as you click End Live Preview.
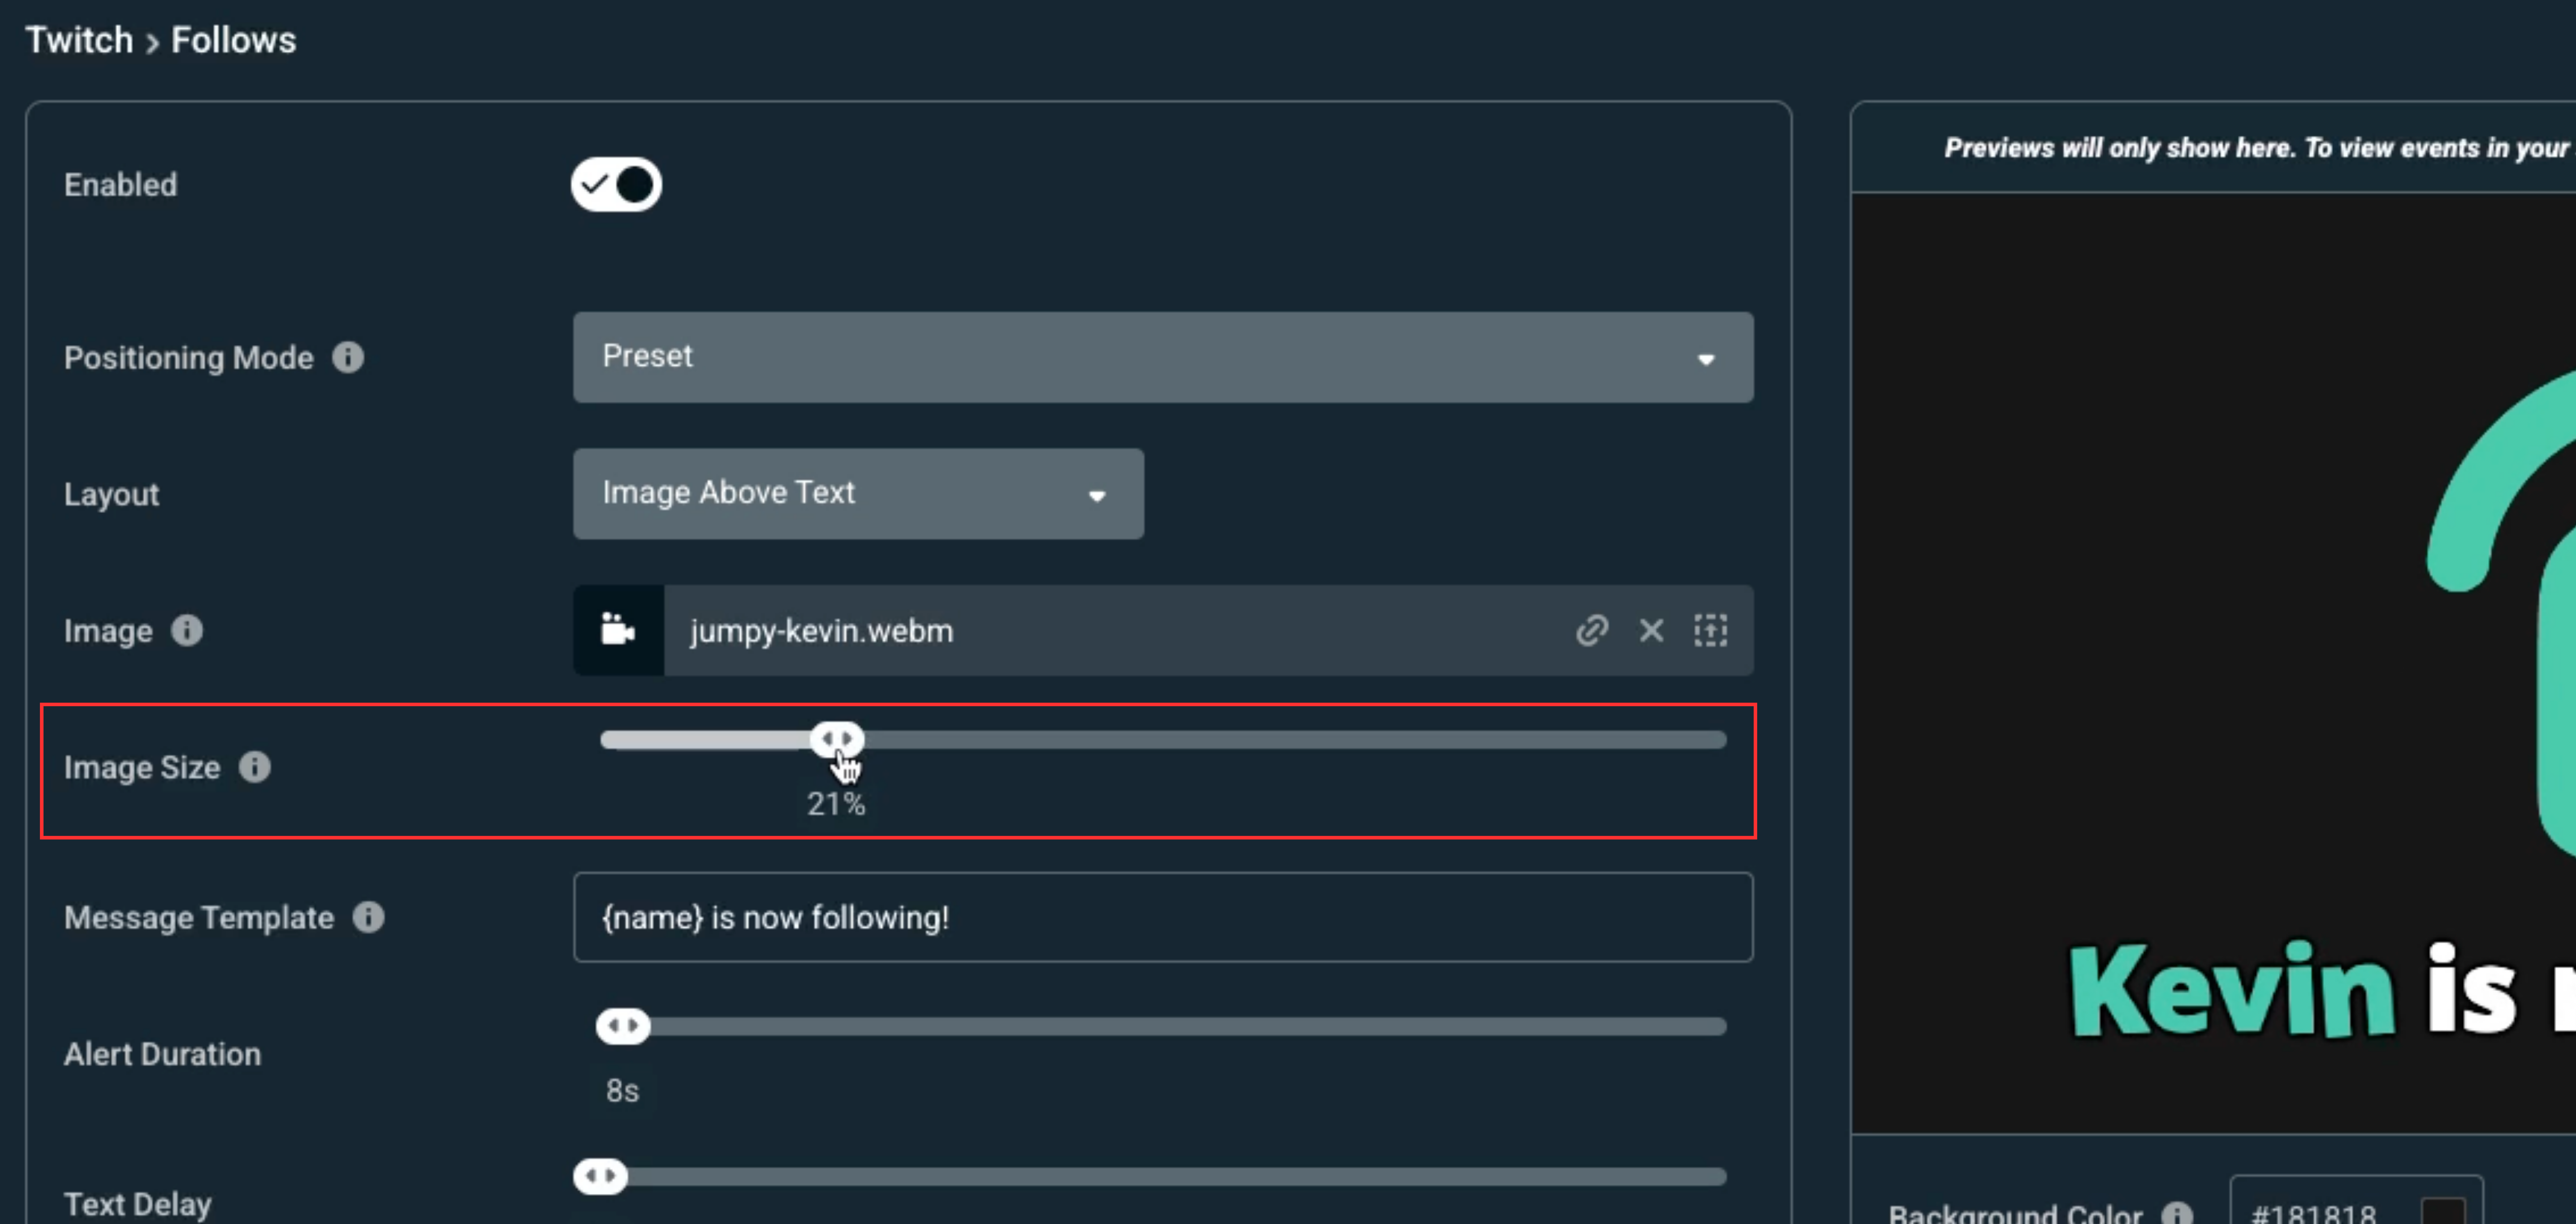
- Image Size: You can change the size of your image, and view it in real-time with Live Preview enabled.
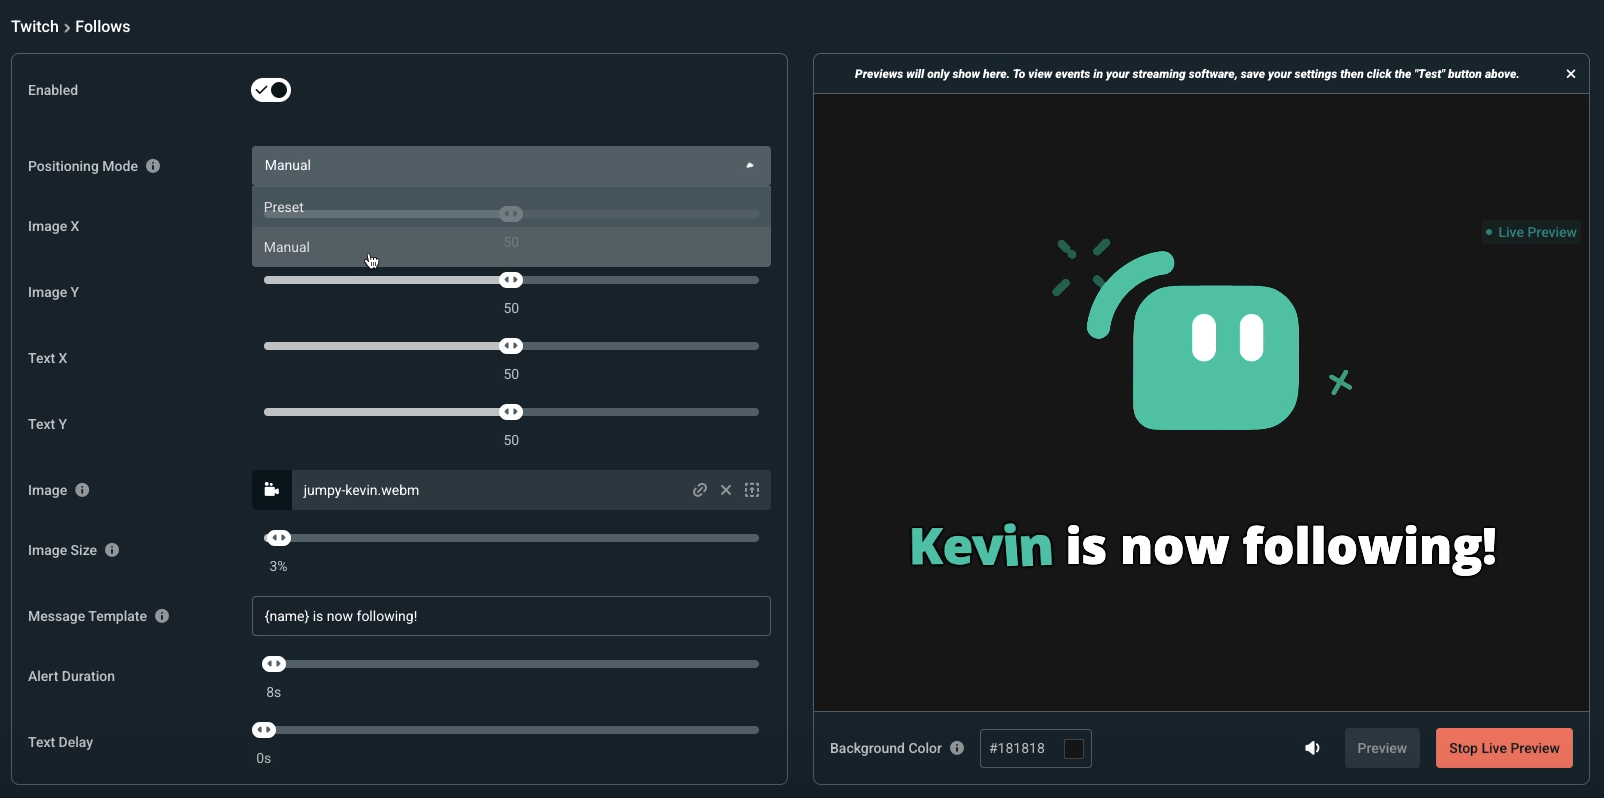
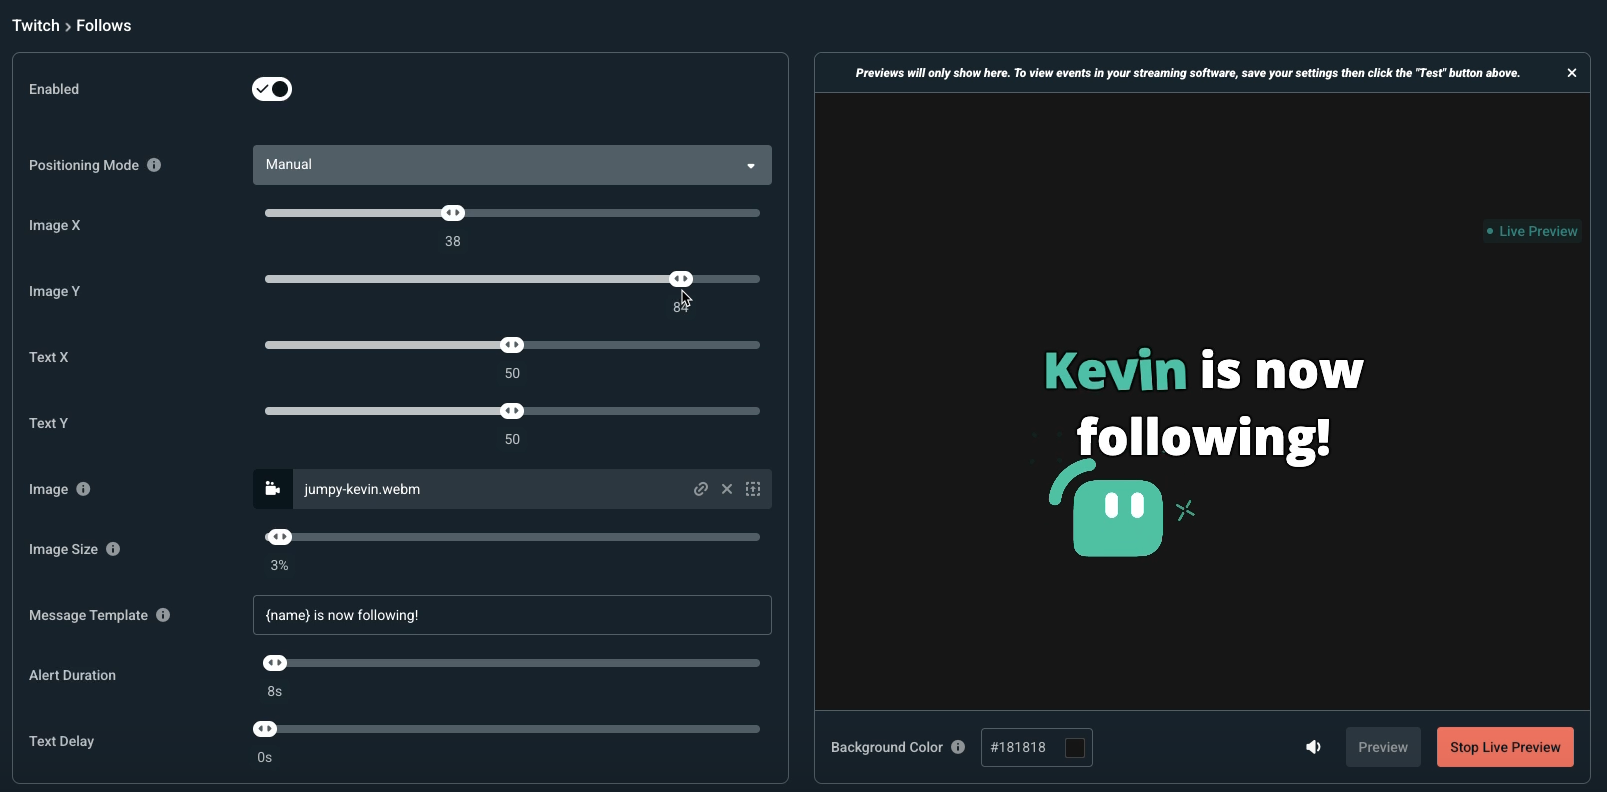
- Image and Text Positioning: Click Positioning Mode and then Manual. You will then see options to position your image and text. You can change the layout of both and view your changes in the Live Preview window.
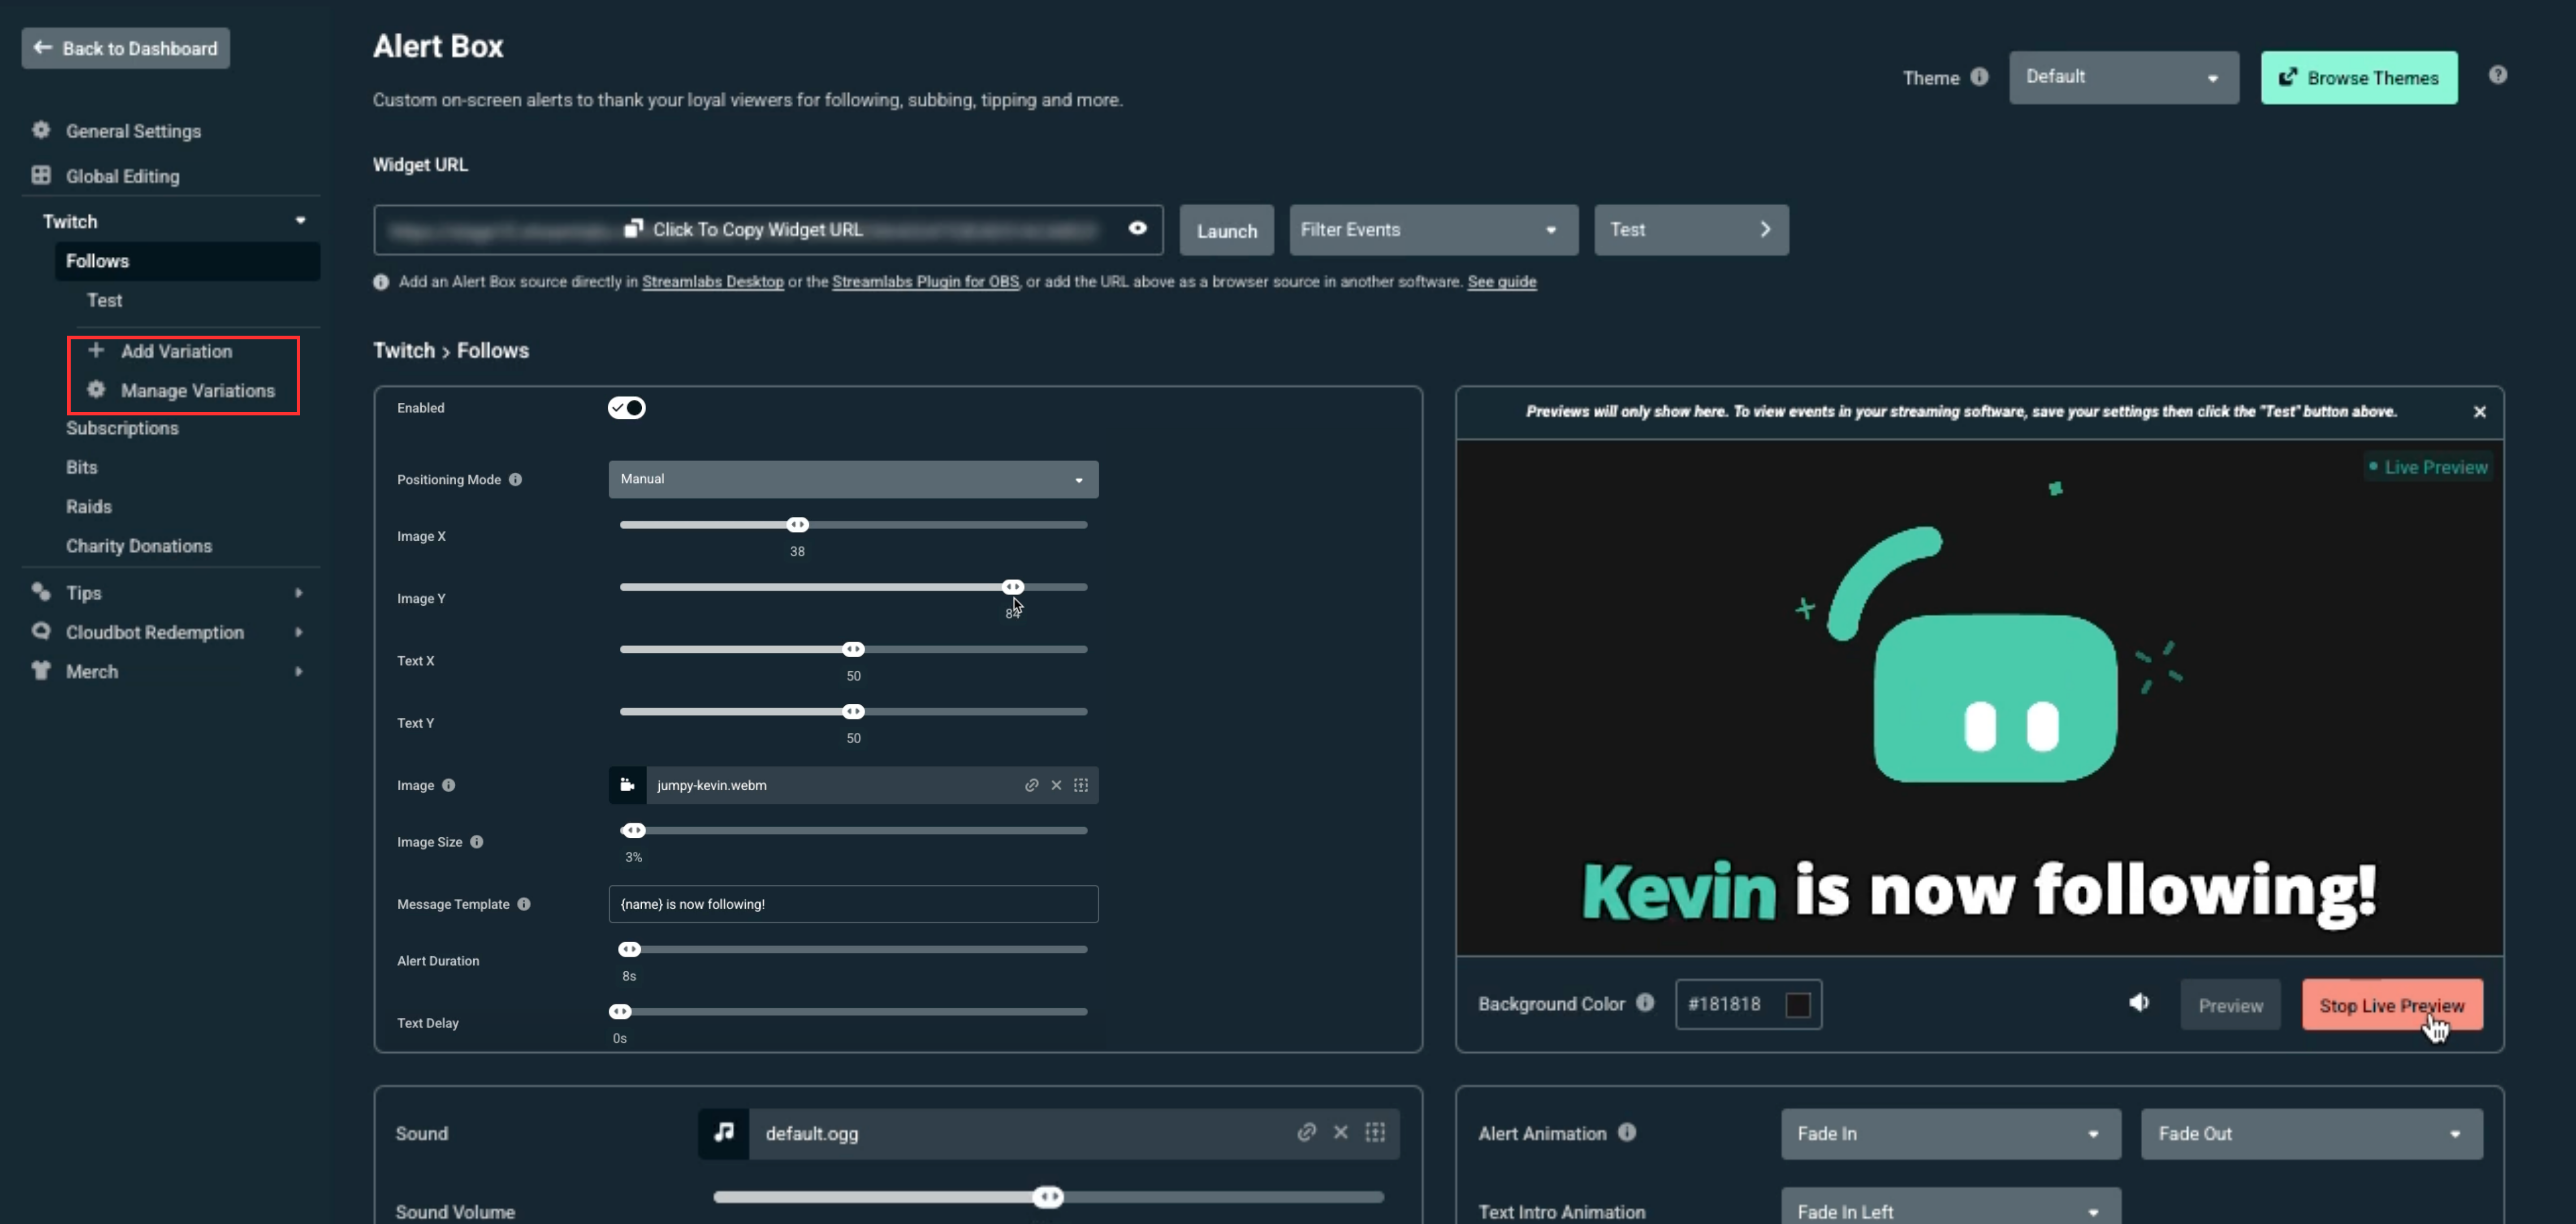
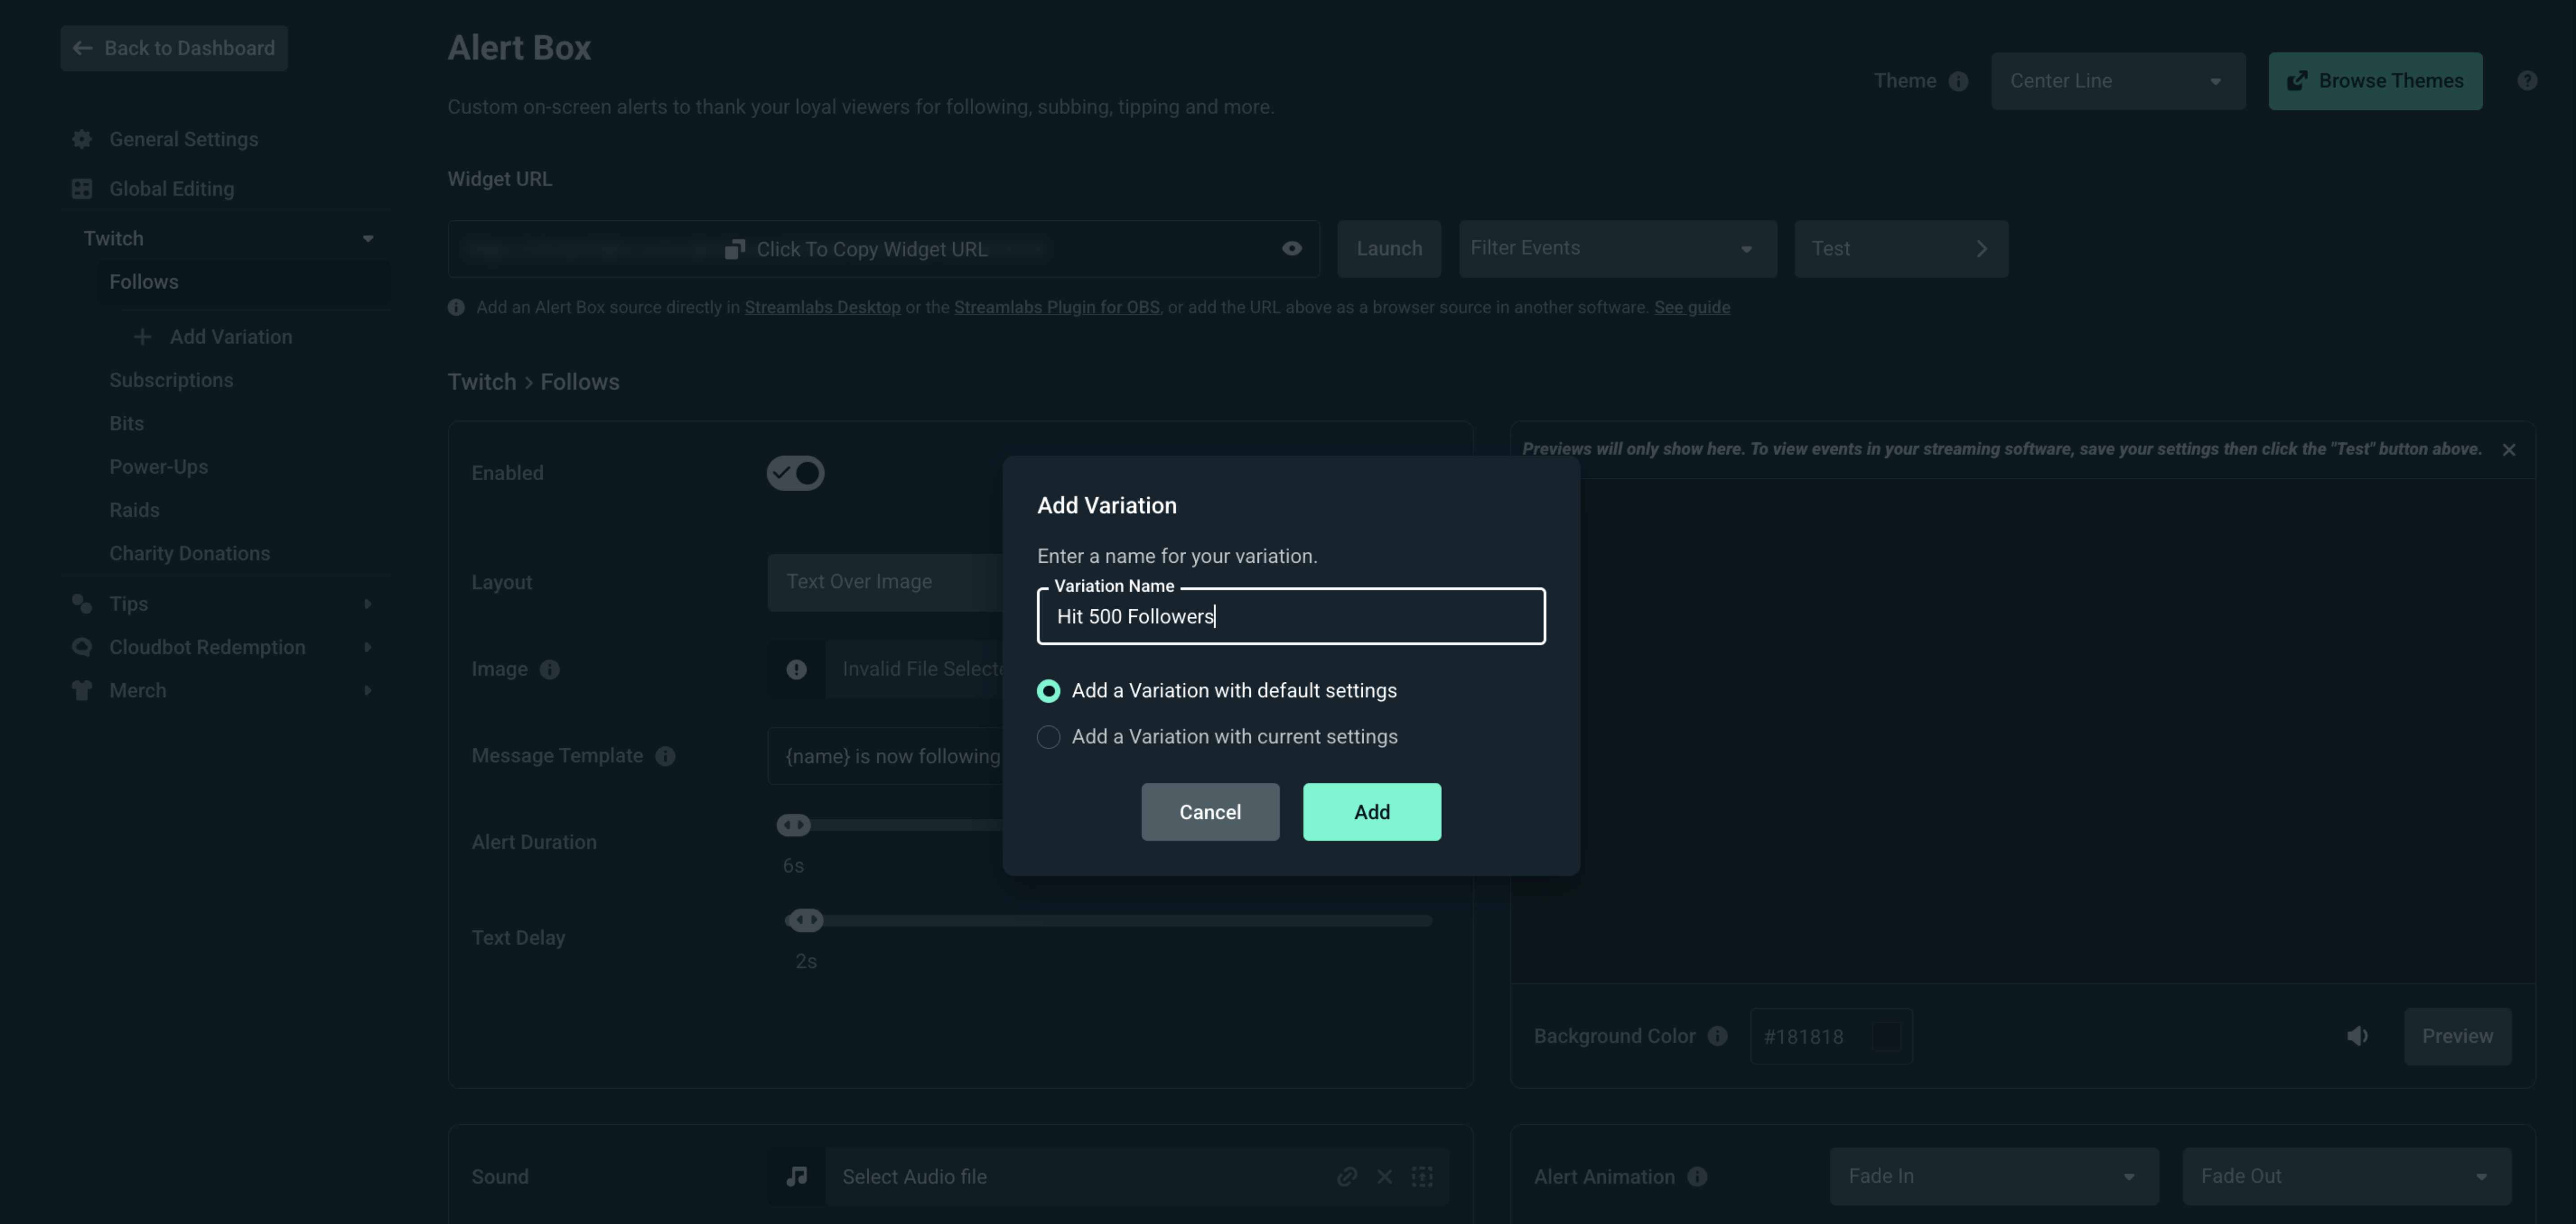
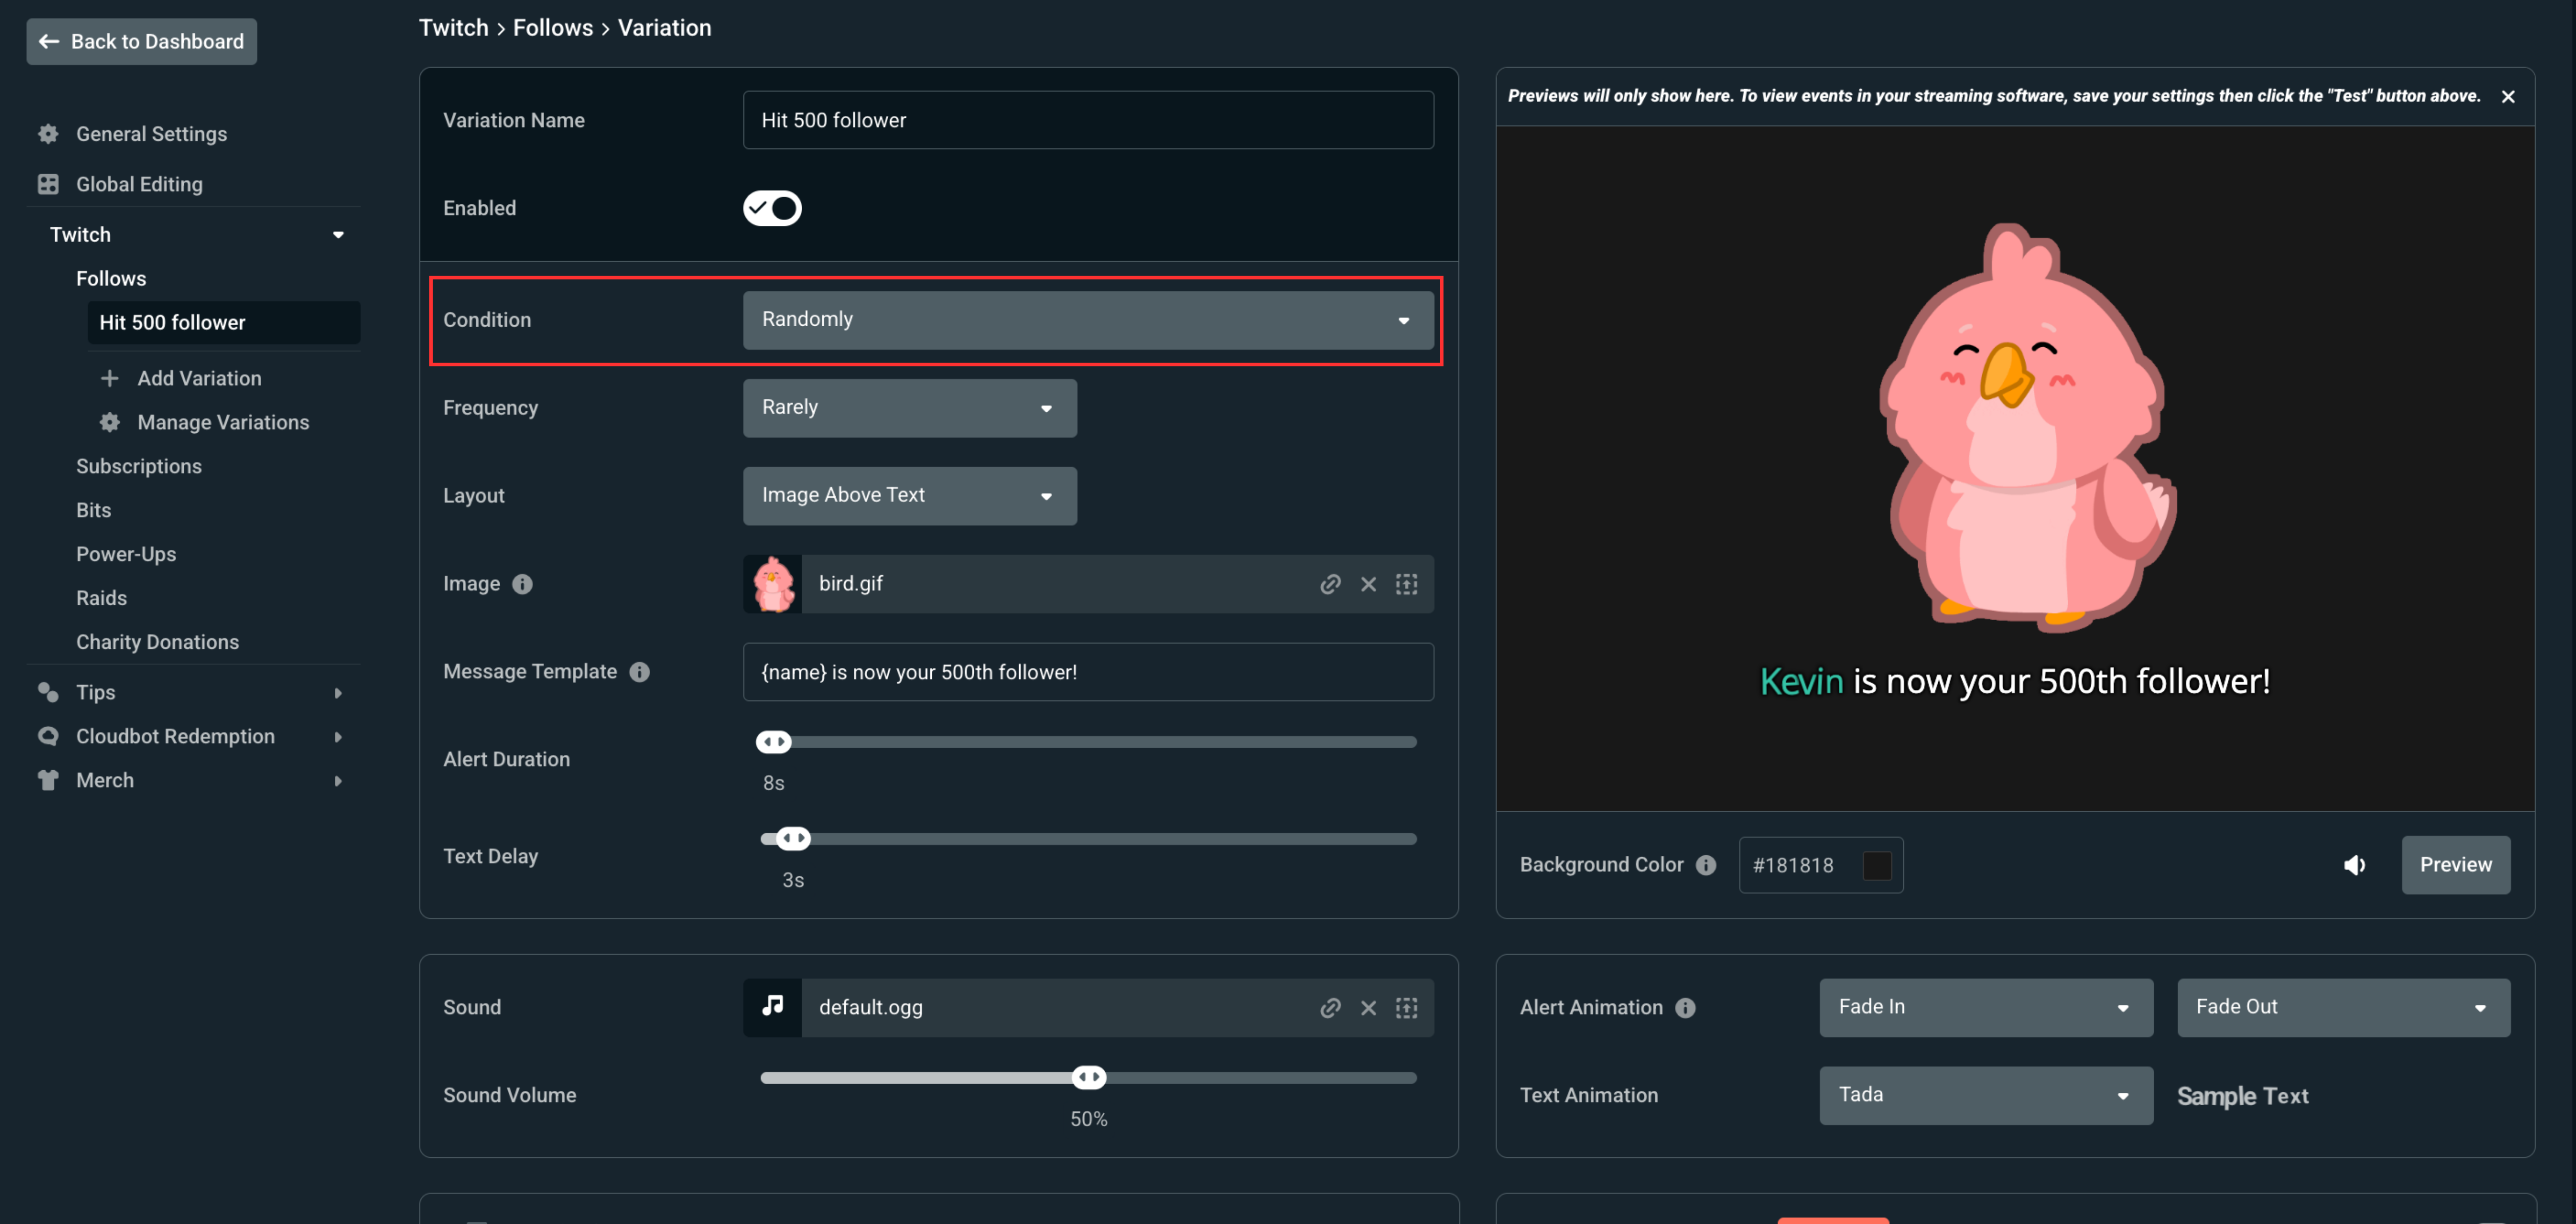
- Variations: Click + Add Variation under the specific alert you want a variation for. Then use the Condition setting to adjust what will trigger this alert.
Step 5: Adding the Alert Box to Your Software
- Streamlabs Desktop: Click the plus (+) sign in your Sources box and pick Alert Box.
- Streamlabs Plugin for OBS: Click Streamlabs in the top menu, click Widgets, and then click Add on the Alert Box widget.
- Other Software: Copy the Widget URL at the top of the page and paste it as a Browser Source in your streaming program.
Step 6: Testing Your Alerts
This is how you can see what your alerts look like before you go live. There is a Live Preview button in Settings that you can click to view your changes in real-time.
- You can also click Test in the top right of the settings.
More Resources
Looking to take your alerts to the next level? Check out our deeper guides below:
- How Do Alert Box Variations Work?: Learn how to play completely different alerts based on viewer milestones, like different layouts for sub milestones or big tips.
- Live Stream Alert Box Sounds: Ready to add custom sounds to your layout? Find the best places to source clear audio beats and effects for your alerts.
- Alerts and Widget Troubleshooting: Alerts not popping up on your screen? Follow this step-by-step checklist to clear cache and resolve hardware source errors.
Need Help?
If you have any questions or run into trouble setting up your notifications, our support team is happy to assist you at https://streamlabs.com/support.