If you've ever tried to use Streamlabs Desktop to record or stream on a Mac and wondered why sound from your computer isn't being captured, you're not alone.
The short answer: macOS doesn't allow apps (like Streamlabs Desktop) to grab audio directly from other apps. So, while Streamlabs Desktop can easily capture your microphone, it can't hear your system audio (like music, game sounds, or Zoom calls) unless you set up a special tool to make it work.
In this article, we'll walk you through the process of capturing sound from your computer when streaming or recording using Streamlabs Desktop, a process otherwise known as audio routing.
Step 1: Download and install BlackHole. Click here for BlackHole's Github page, where you can find instructions on how to download the installer.
📝Note-You must either donate or skip, then fill in the short form (first name, last name and email address) to be sent the download link for the file. BlackHole is a free, open-source software developed and maintained by a small team-any support helps keep them up and running.
Once you have the .pkg file downloaded, open it and you should see this:
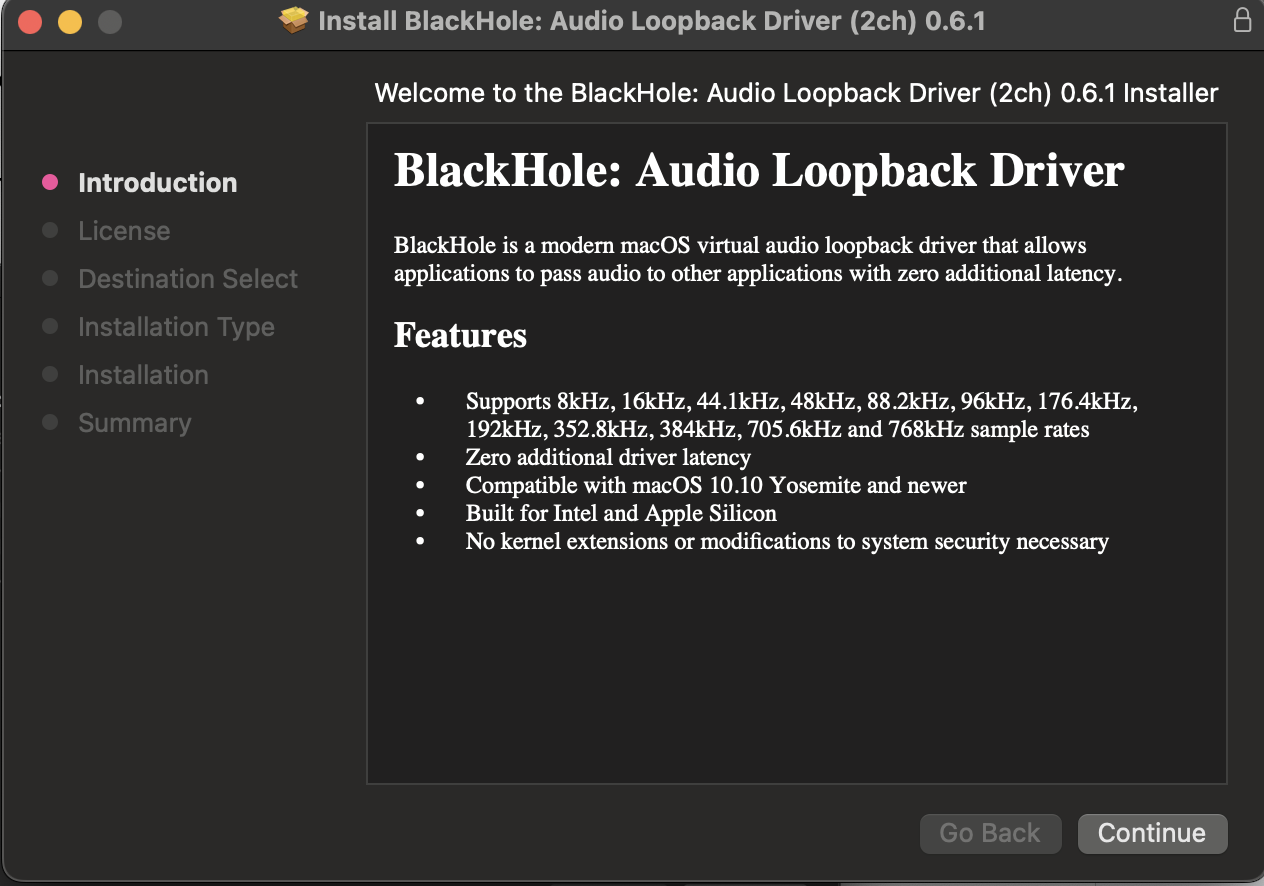
Follow the instructions to finish installing, entering your password when prompted.
Step 2: There are several different ways to utilize the features that BlackHole offers, however for the scope of this article and Streamlabs Desktop in particular, we'll only cover setting up a Multi-Output device so that you can capture and monitor desktop audio.
Start by opening the Audio MIDI Setup utility on your Mac.
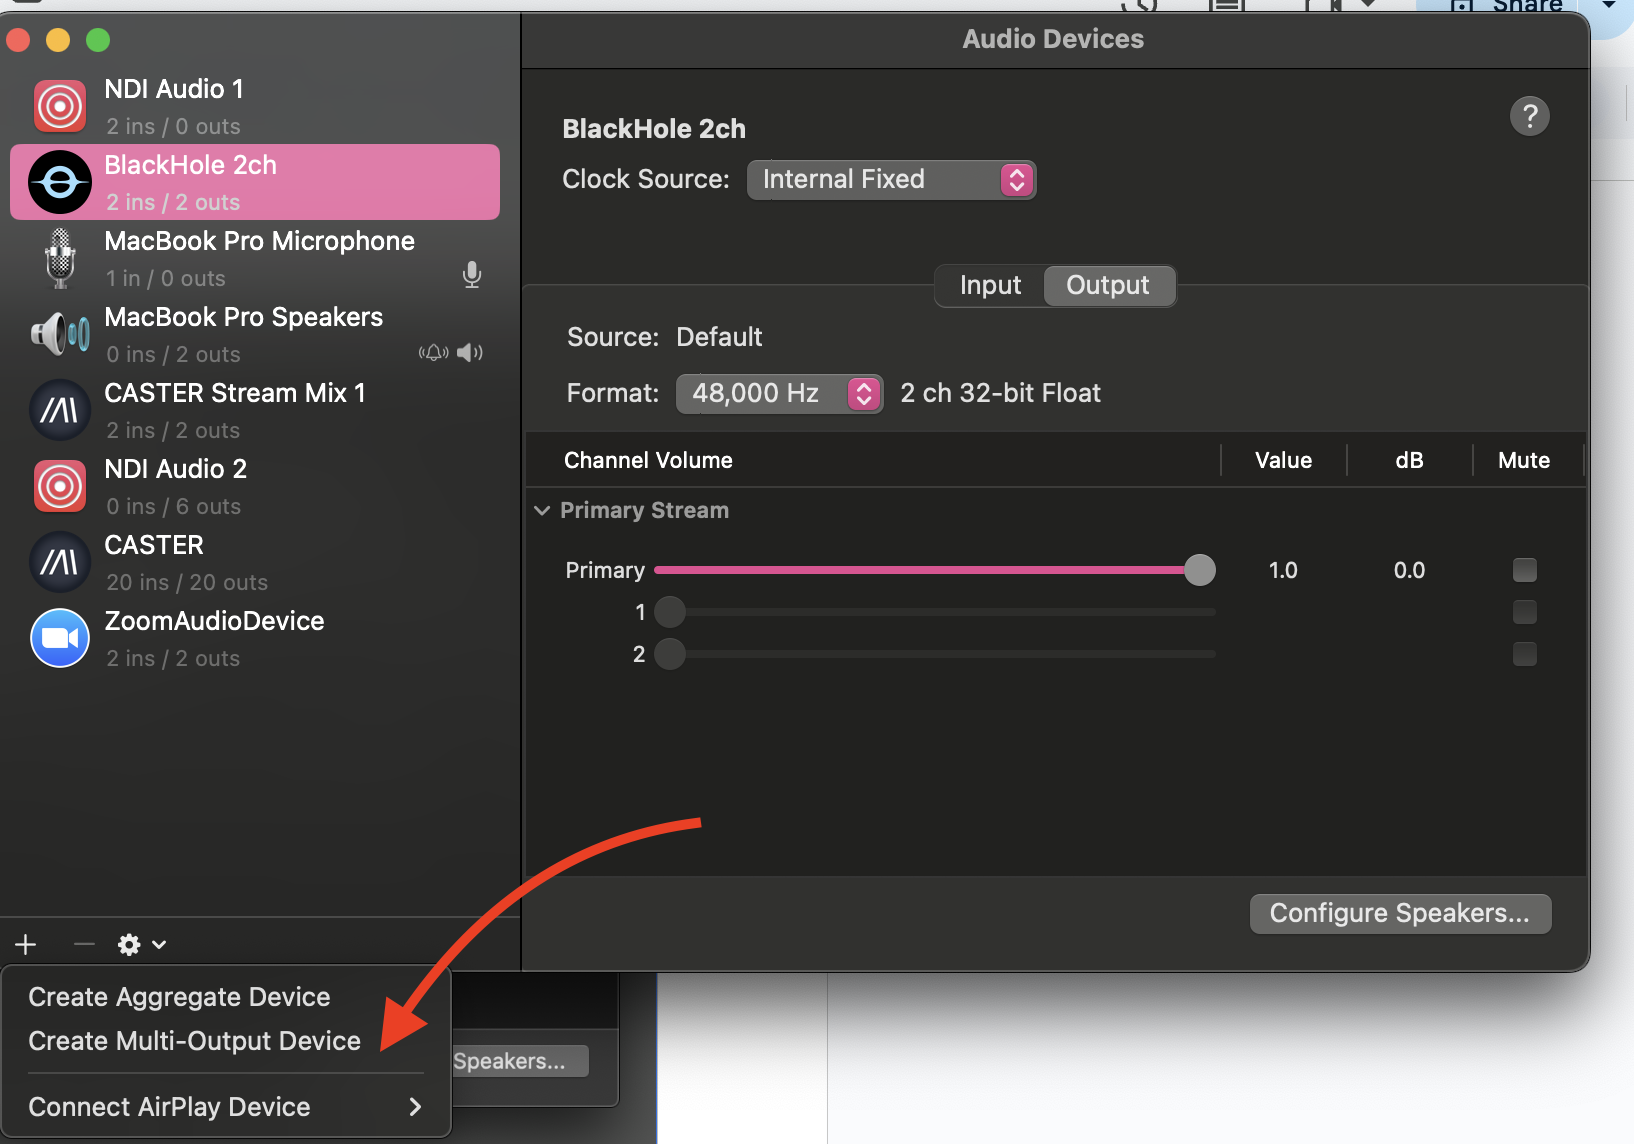
Step 3: Click the Plus (+) button in the bottom left corner and click Create Multi-Output Device.
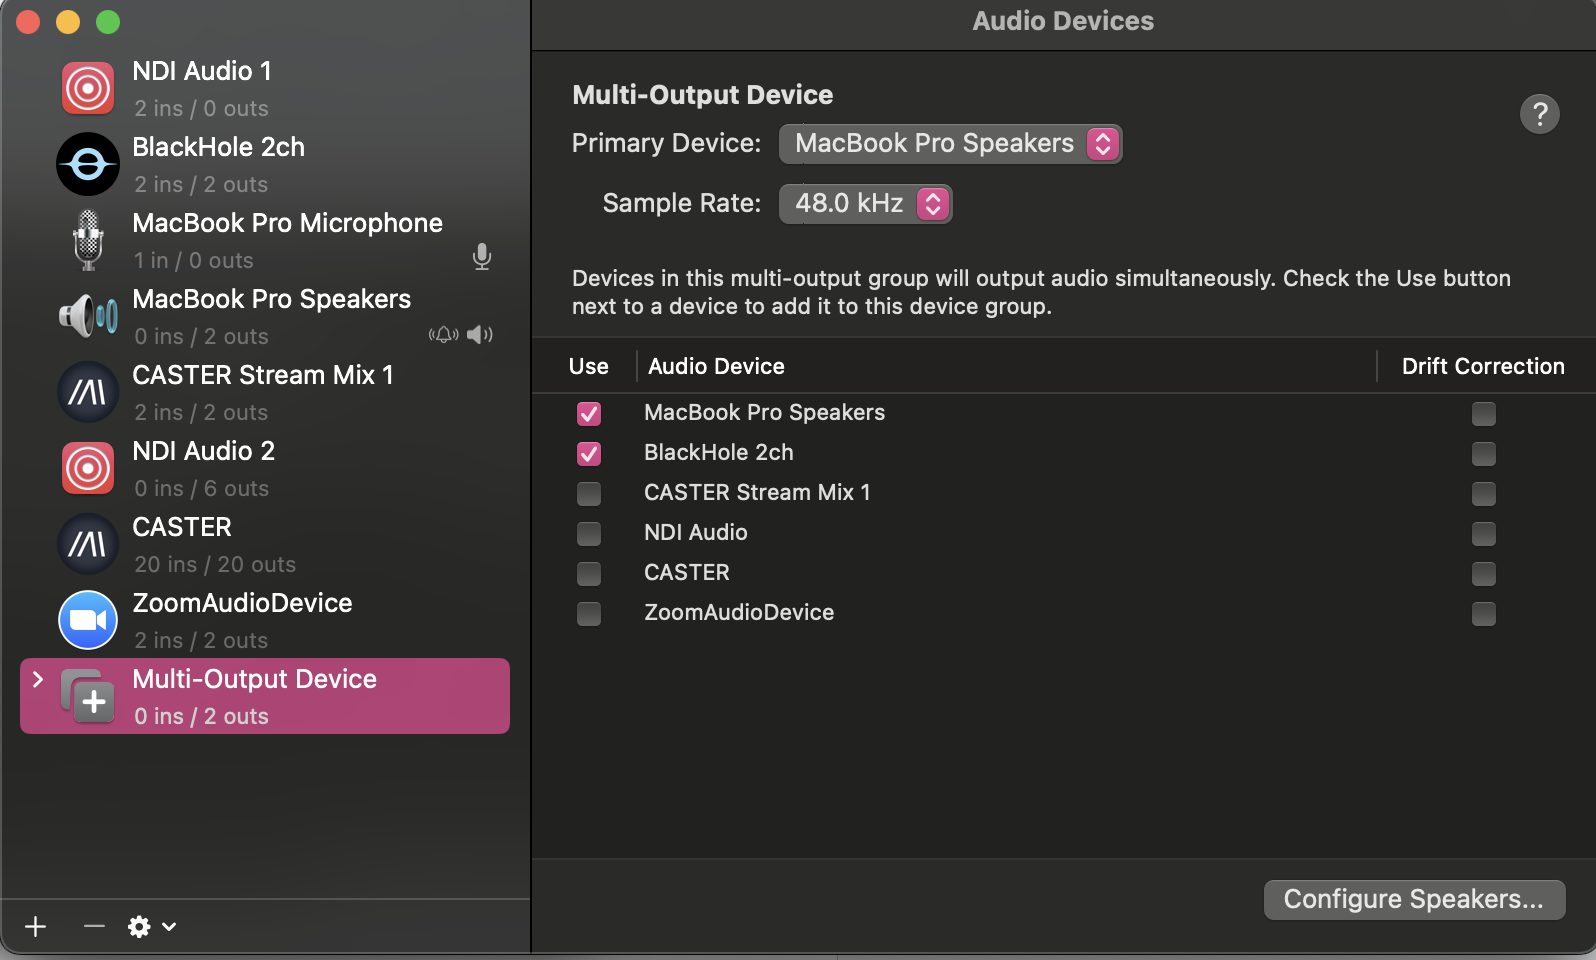
Step 4: Check the box next to BlackHole, the Built-in Output, and any other devices you want to use for monitoring.
👉 Important: Make sure Built-in Output is listed above BlackHole in the device order. If it's not, uncheck and recheck the box under "Use" next to Built-in Output to bump it up.
Why this matters: macOS uses the top device as the "primary" output. If BlackHole is listed first, your Mac won't play any sound through your headphones or speakers. Putting Built-in Output first ensures you can still hear everything while Streamlabs captures your system audio through BlackHole.
Step 5: Right-click on the Multi-Output Device and select "Use This Device For Sound Output". Now it's set as your default output device! All desktop audio will go to both your built-in output and the virtual BlackHole device.
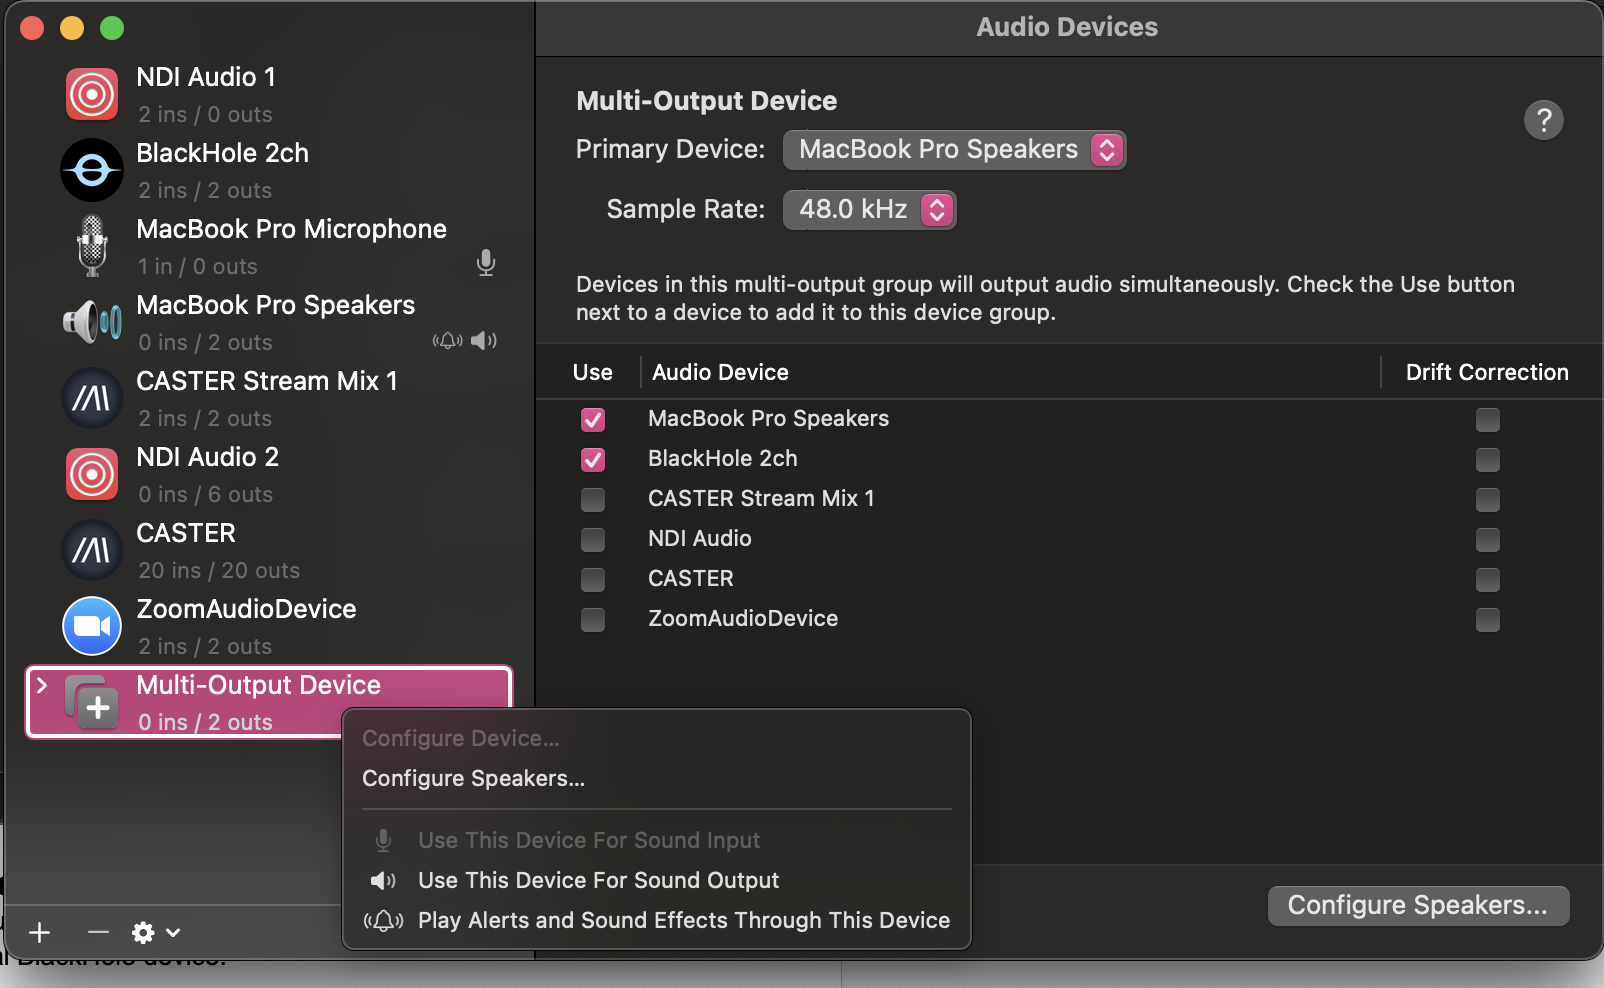
Optional: You may see a setting that says "Play alerts and sound effects through this device." We recommend leaving this set to your Built-in Output or speakers only, so things like calendar reminders or error beeps don't get recorded into your stream or video.
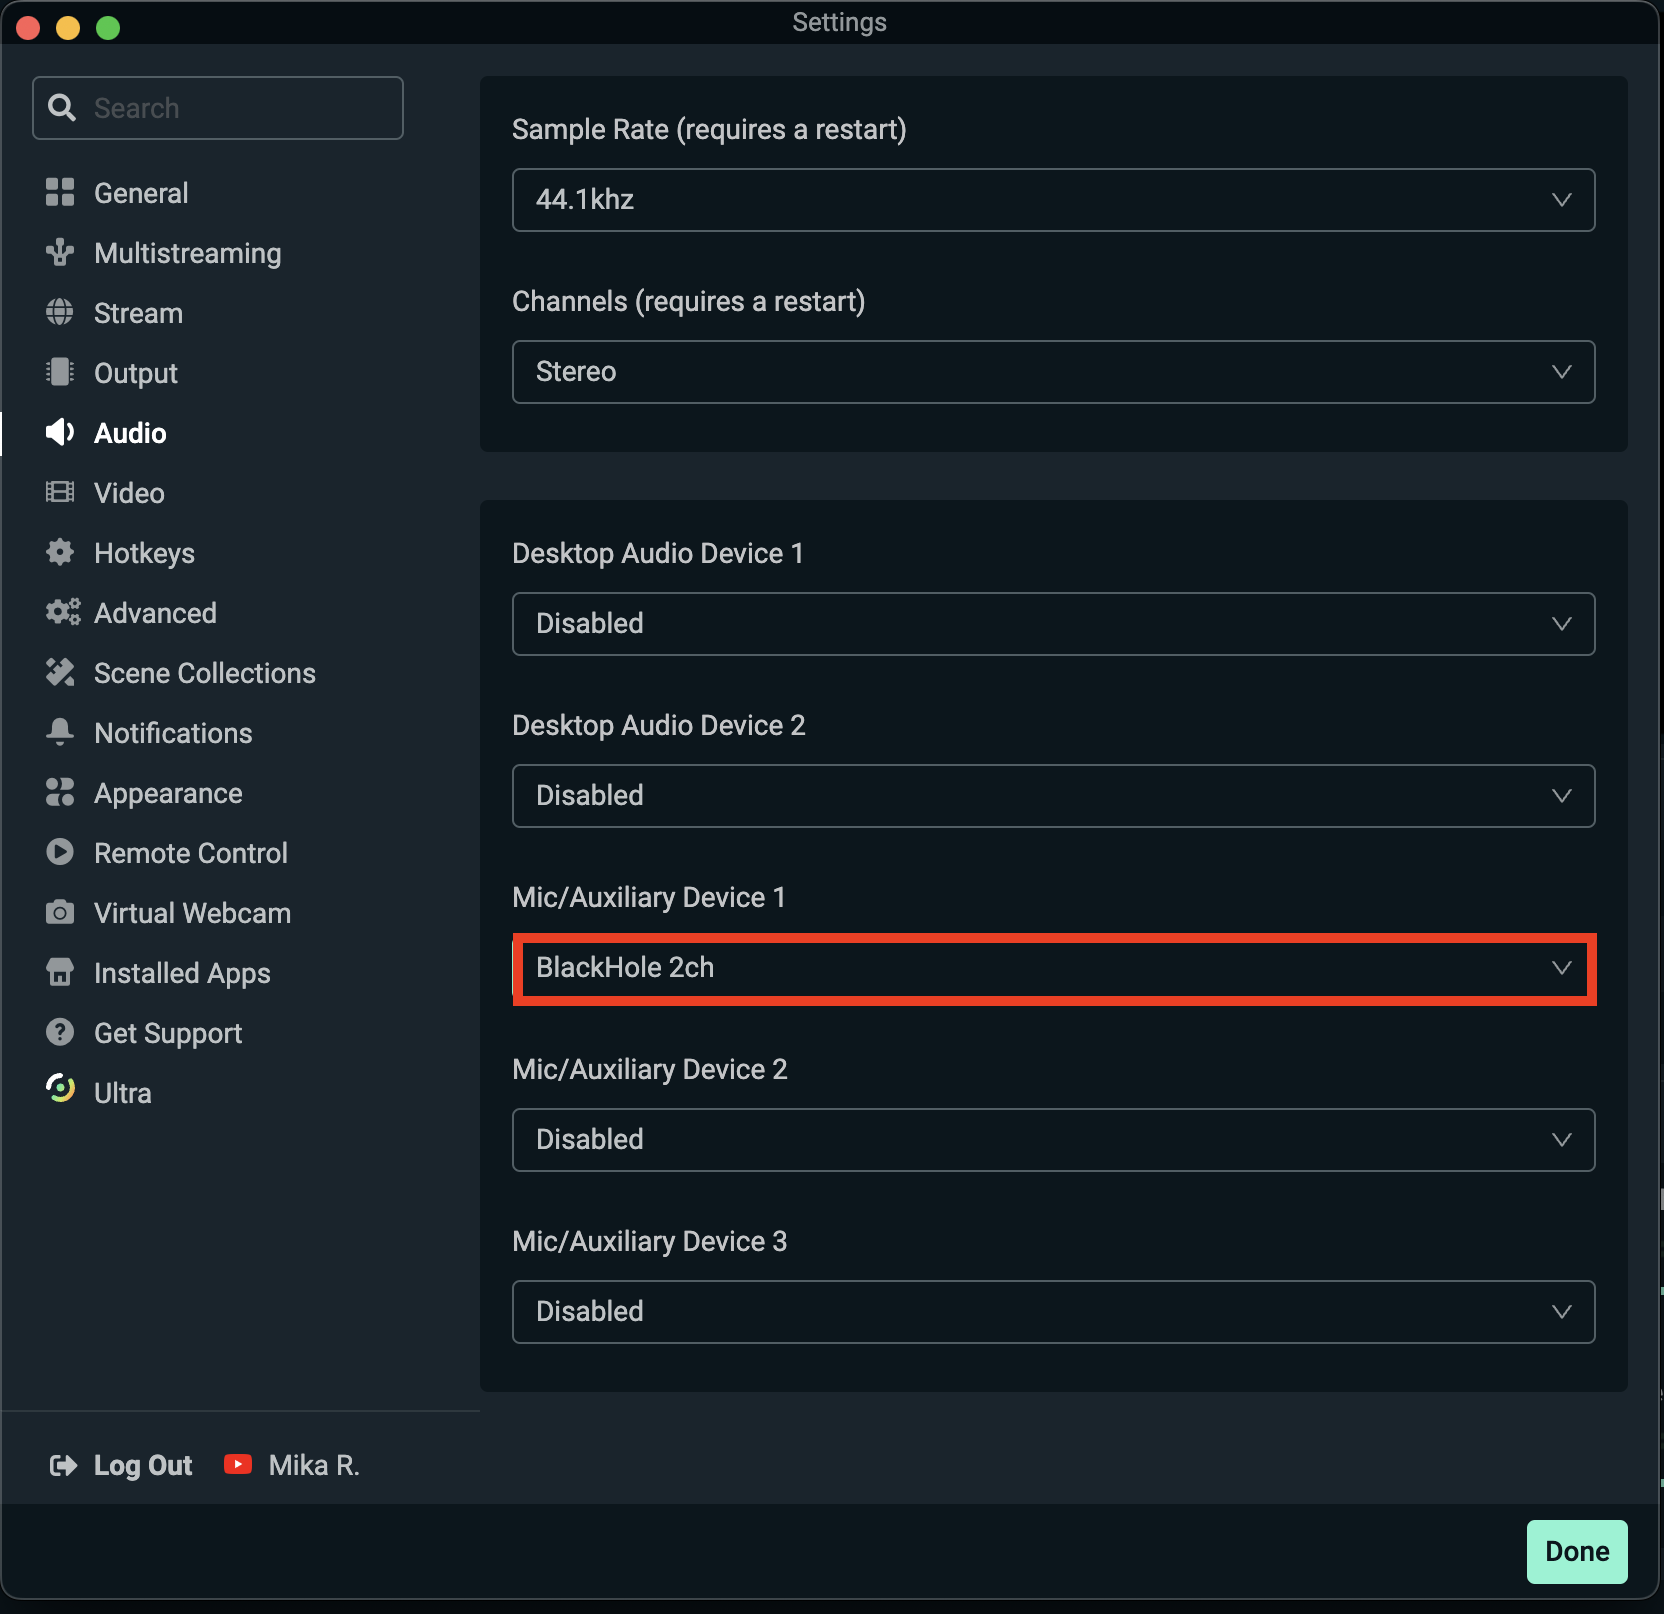
Step 6: Now open Streamlabs Desktop and make sure that BlackHole is selected as one of your Mic/Auxiliary devices in Settings > Audio. This tells Streamlabs Desktop to capture all the sound coming from your Mac-like app audio, music, or browser tabs-through the BlackHole virtual device, which acts like a microphone input but for the internal audio coming from your computer.
You're done! For additional questions or troubleshooting, please refer to BlackHole's Github FAQ and Wiki.