Streamers who stream to multiple platforms, such as Twitch, Youtube, and Facebook can link all platforms in their account settings when first getting started. When you link your accounts, all events, such as Follows, Subscriptions, Memberships, Super Chats, Tips, and bits will all show on the same widget URL for all linked accounts. The benefit of this is that you can use one source for the same widget regardless of what platform you're streaming on and your events will come in in order, without overlapping.
In this blog, we’ll walk you through linking multiple accounts using Streamlabs and how to customize settings for them individually and as a collective,
How to Link Your Account
Start by linking your accounts in the account settings of your Streamlabs Dashboard.
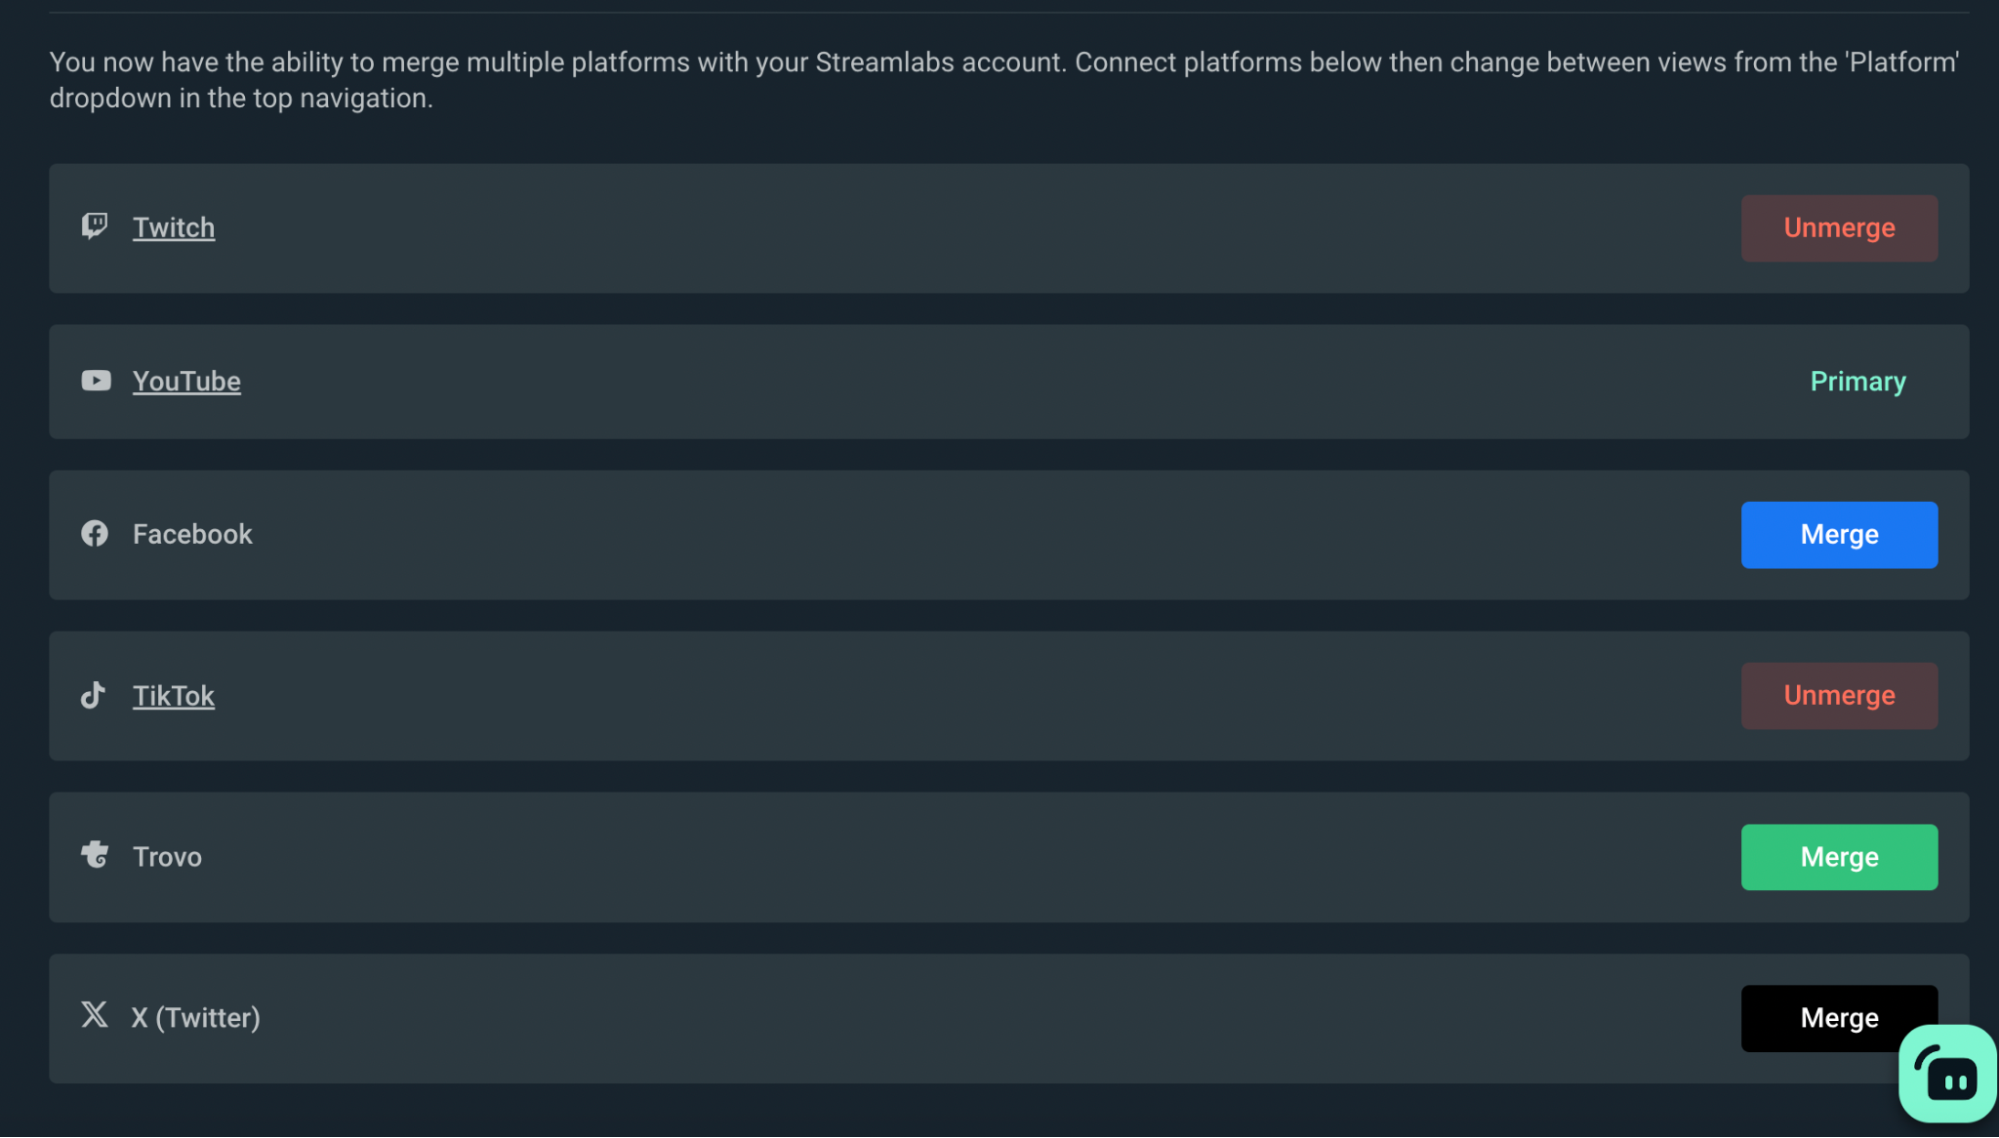
You have the option to link any of the supported platforms available including Twitch, Youtube, Facebook, TikTok, Trovo and X.
How to Change Your Settings by Platform
Alert Box
With Alert Box, you can now manage all of your alert settings from the Alert Box left navigation. To get started, click Alert Box under the Essentials tab in the left navigation panel.
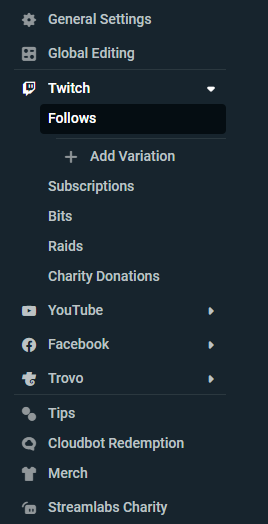
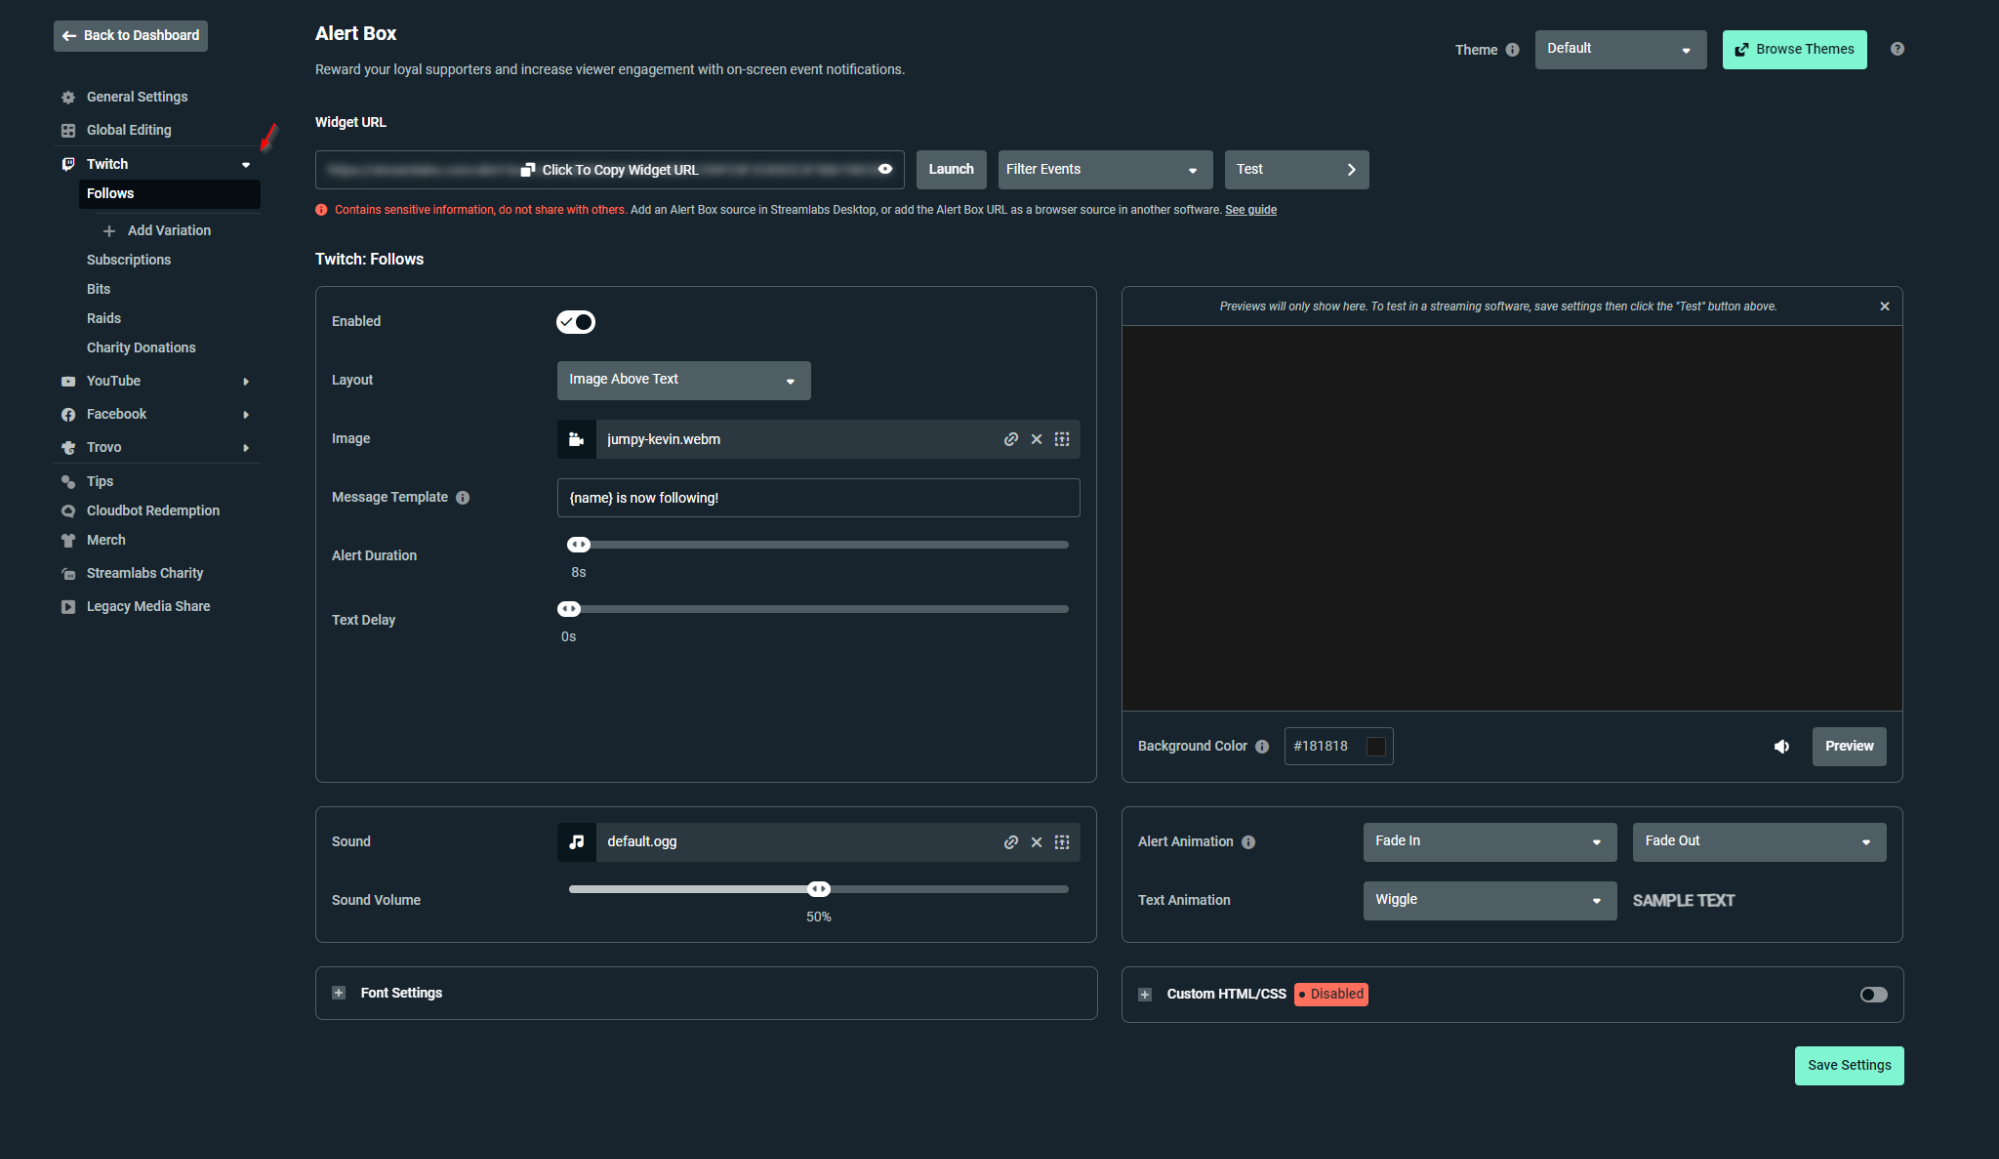
Once you’re on the main Alert Settings page, you have the option to manage your alert settings for all of your linked accounts.
Individual Platform Settings—Choose the platform for which you wish to change settings from the left navigation panel to reveal which events you can change alert settings for.
For example, when choosing Twitch, you can change settings for Follows, Subscriptions, Bits, Raids, and Twitch Charity Donations. You can also create alert variations for actions according to specific conditions that you set.
Learn more about customizing alerts in our Streamlabs Alerts Setup Guide.

The end result:
- You can now have custom alert settings for each account you've linked in account settings.
- When you receive alerts and other events from each of your linked accounts, they will all work from the same widget URL. However, If you wish to create different alert box widgets (that have different alerts selected within), click filter events and select the events you wish to include in the Alert Box.
*Pro tip: When using filtering, you must add this custom URL as a browser source in your streaming software (Streamlabs Desktop, OBS, X Split etc). Filtering does not apply to Alert Box widget sources added through Streamlabs Desktop or the Streamlabs OBS plugin. Instead, select Add source> Browser Source> and paste the custom URL into the browser source.

As you can see, setting up and managing multiple accounts via Streamlabs only takes a little bit of effort in the beginning, which can have a major payoff in the end. If you need any further assistance, don’t hesitate to reach out for support.
Widgets
For Widgets other than Alert Box, you must configure each Widget for each of the linked platforms that you are using.
First, navigate to the widget you would like to edit by clicking on “All Widgets” in the left nav> then select your desired widget.
You can configure the widget for the currently active platform when you arrive. Then, you can switch to each platform you need to configure the Widget for from the top right dropdown of the dashboard.
For example, when I have Twitch active on the Event list widget, I see options to configure the Event list for Twitch.
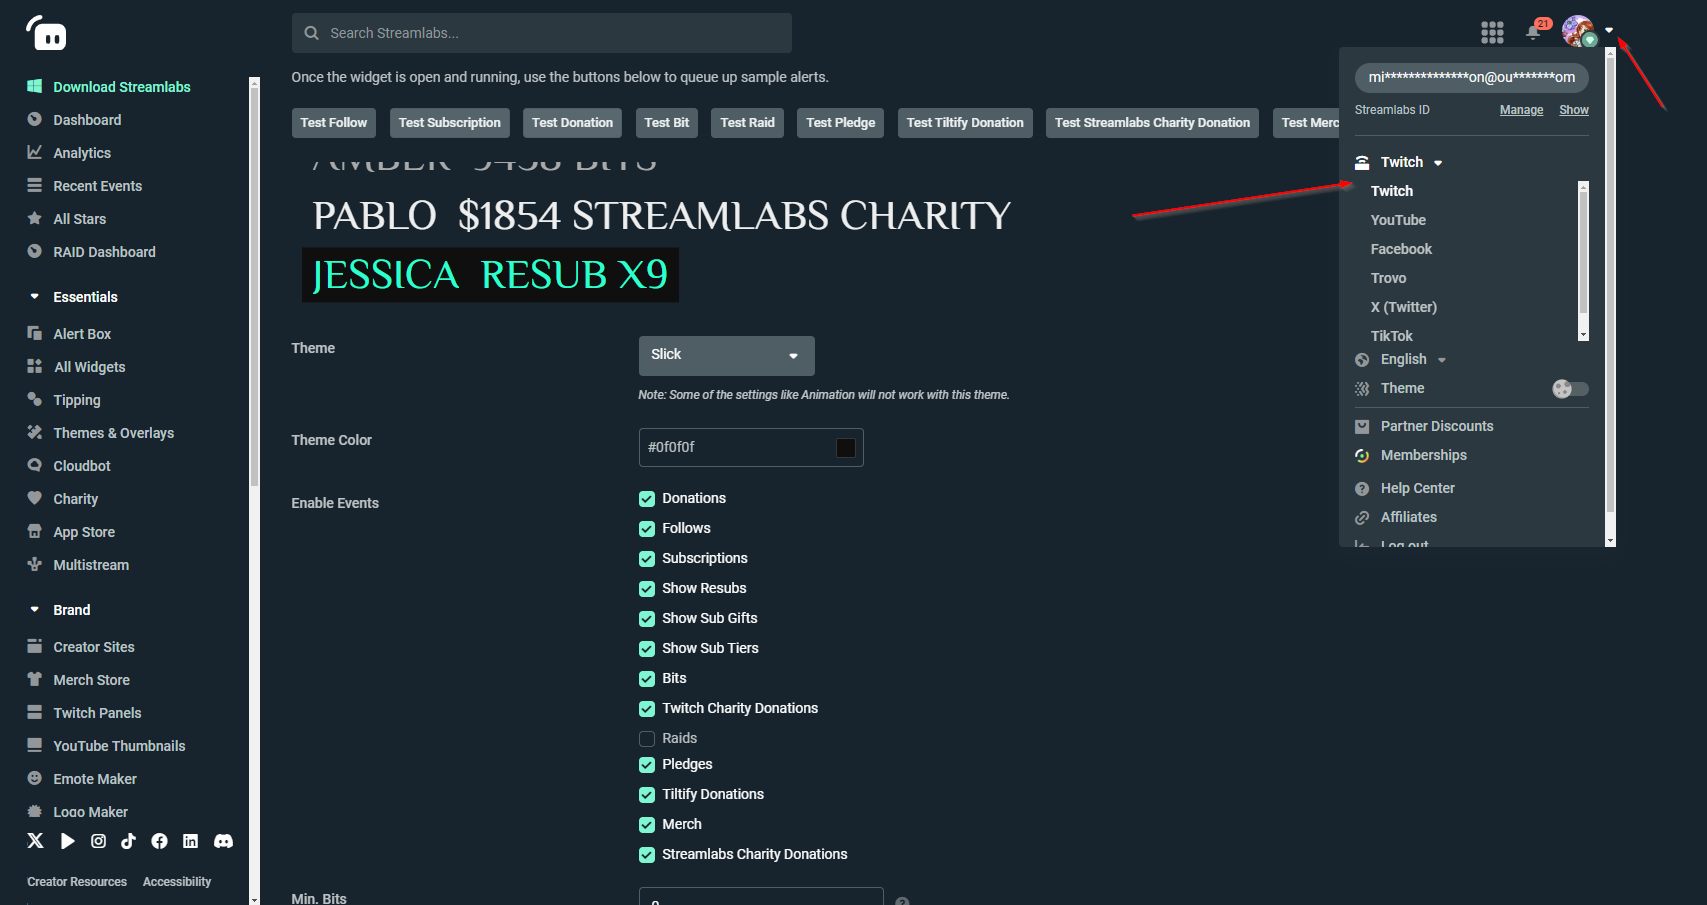
Once I switch to YouTube in the top right dropdown, I can see the options to configure the Event list for YouTube.
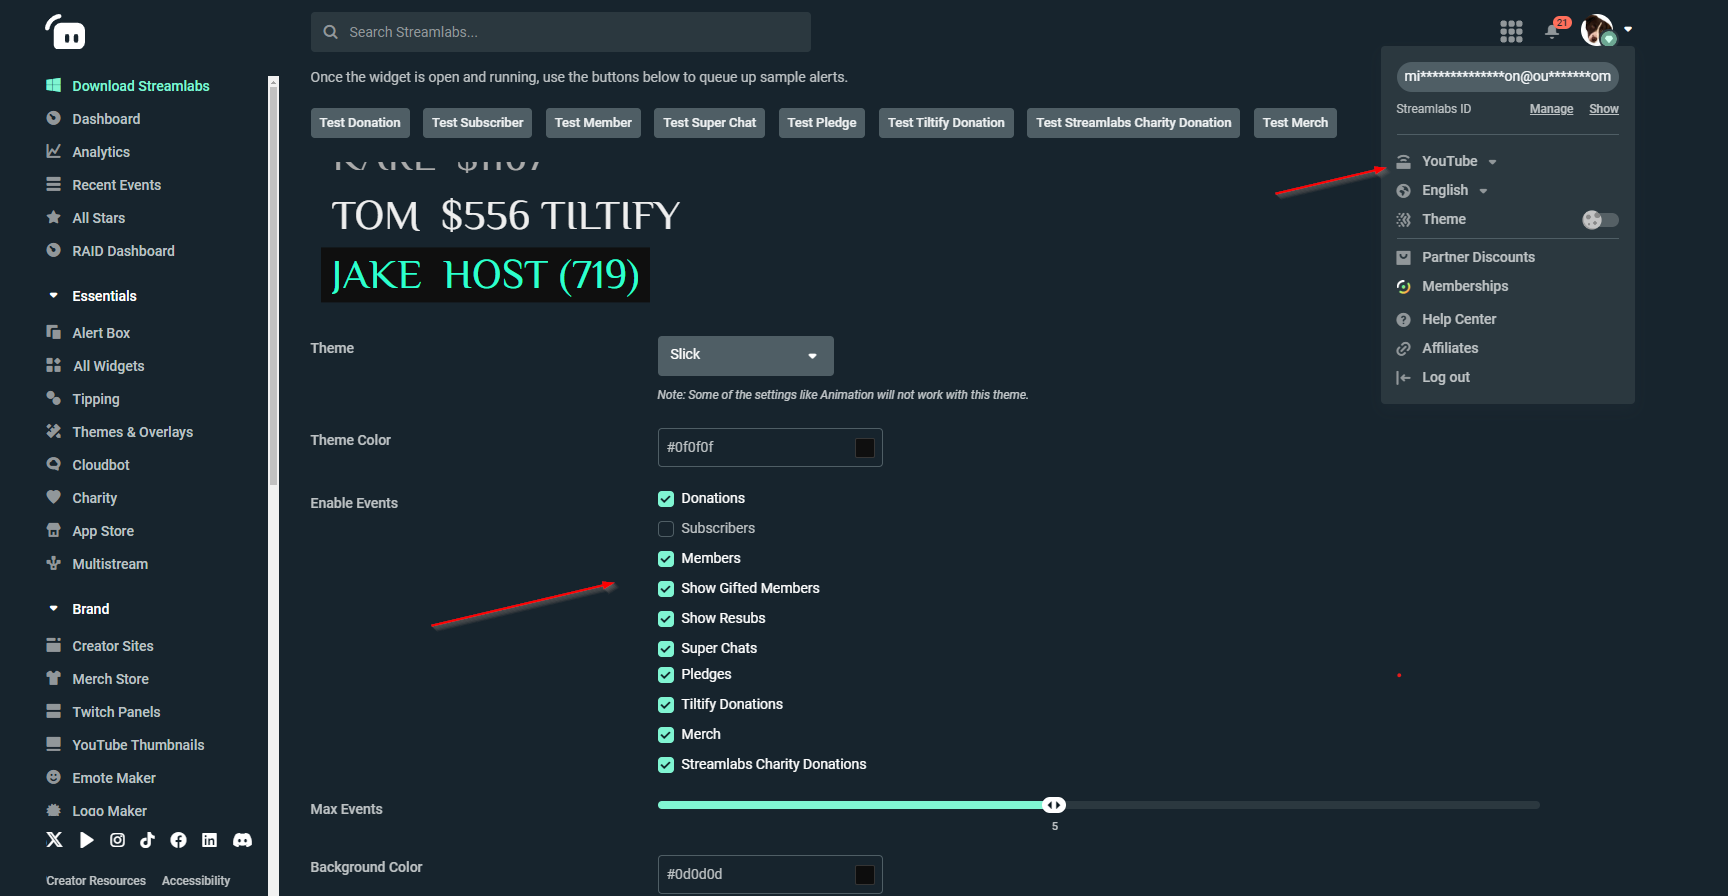
Repeat this process and save your settings for each platform. The Widget URL is the same for all platforms, so you only need one Widget source for each Widget.
If you would like to create different Widgets per platform, you will need to disable all other platform events on one Widget Theme, then create a new Widget Theme for each platform with all of the other platforms disabled. Then, use the method for using widgets from multiple themes, outlined in our guide here. Learn more about Widget themes in our Widget Themes guide.