This will guide you through the Windows settings to change your default DNS (Dynamic Name Server) to another server in case your local or default DNS, usually automatically given by your ISP or set in your router, is having issues and you are unable to connect to certain services.
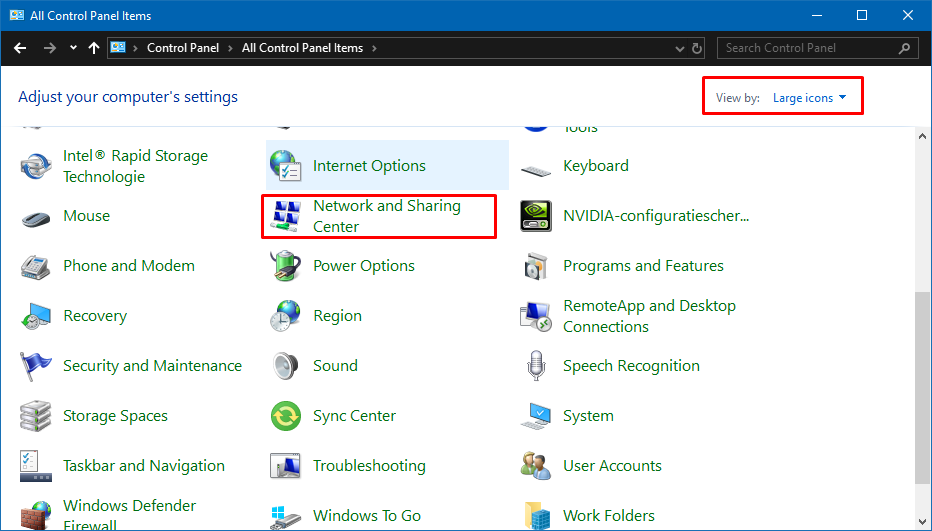
Start by opening the Control Panel in Windows (search it) and select Network and Sharing Center.
If you are in Category view, select Network and Internet first, or change the View.
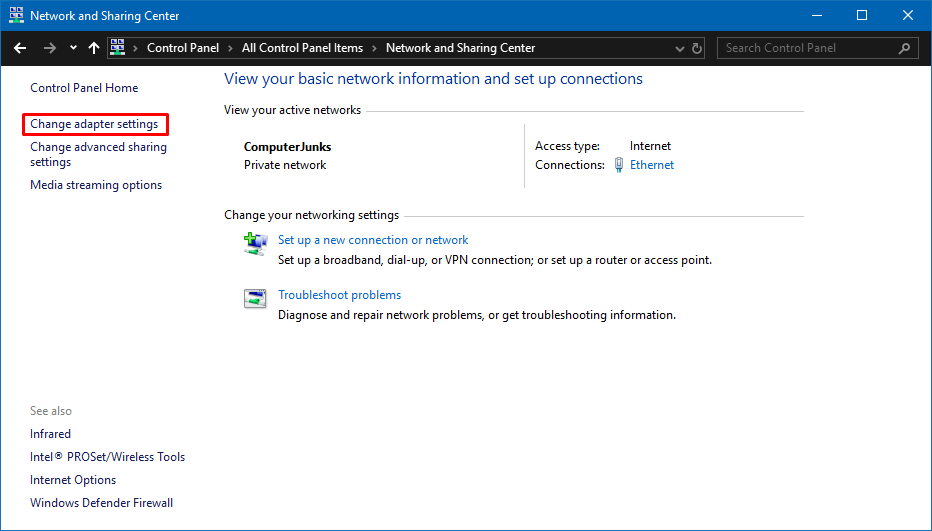
Click on Change adapter settings found in the left menu.
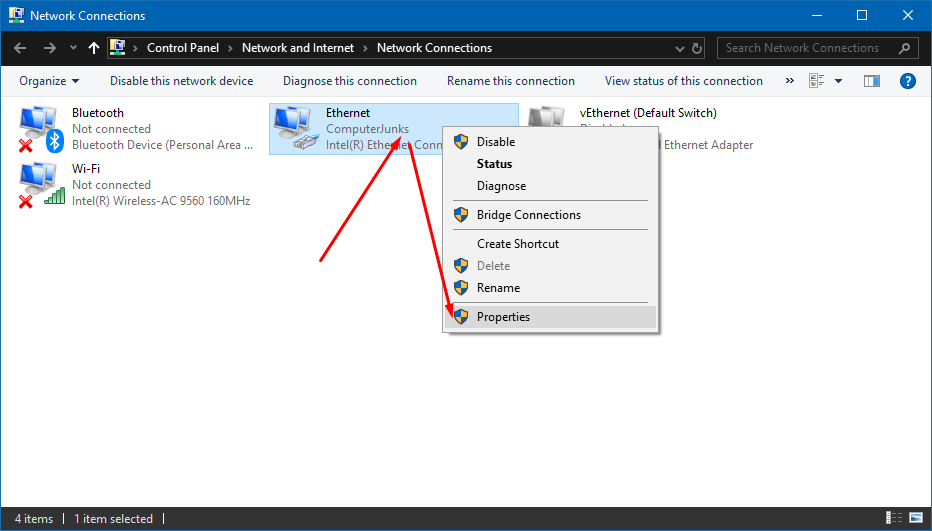
Right-click the active ethernet- or wifi-connection and select properties.
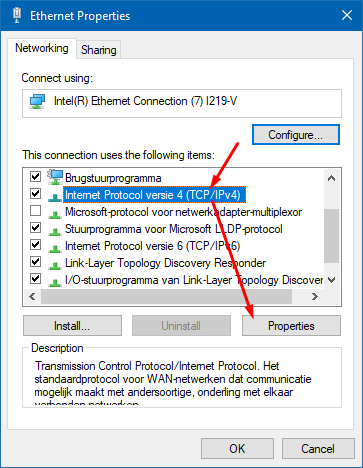
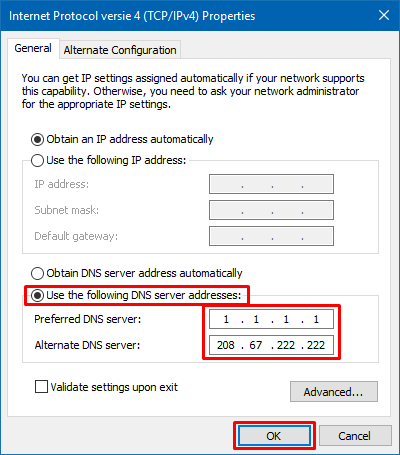
Find Internet Protocol version 4 (TCP/IPv4) in the list, select it and press properties.
Check Use the following DNS server addresses and enter the following;
- 1.1.1.1 as the Preferred DNS server
- 208.67.222.222 as the Alternate DNS server
Alternative DNS IPv4 addresses
OpenDNS uses 208.67.222.222 and 208.67.220.220
Cloudflare DNS uses 1.1.1.1 and 1.0.0.1
Google DNS uses 8.8.8.8 and 8.8.4.4
IPv6 (needed in some cases when you are on a IPv6 connection)
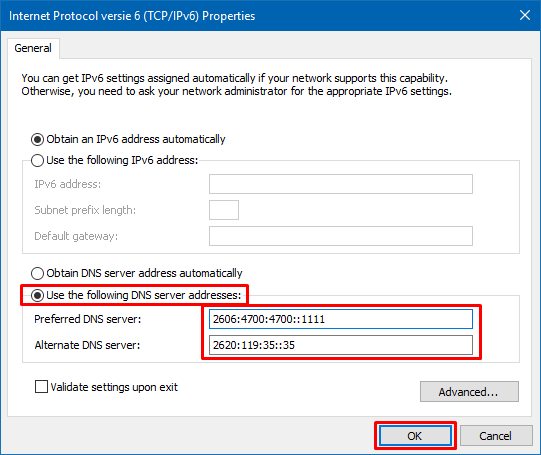
Adjust the Internet Protocol version 6 (TCP/IPv6) properties instead of the IPv4.
- 2606:4700:4700::1111 as the preferred DNS server
- 2620:119:35::35 as the Alternate DNS server
Alternative DNS IPv6 addresses
OpenDNS uses 2620:119:35::35 and 2620:119:53::53
Cloudflare DNS uses 2606:4700:4700::1111 and 2606:4700:4700::1001
Google DNS uses 2001:4860:4860::8888 and 2001:4860:4860::8844
