

Streamlabs Ultra is entirely optional and Cloudbot under the Streamlabs name is completely free to use. With Streamlabs Ultra, you get a suite of supplementary features designed to increase the production value of your stream and boost audience engagement. To learn more about Streamlabs Ultra, visit our website for more information.
Merge Primary Account
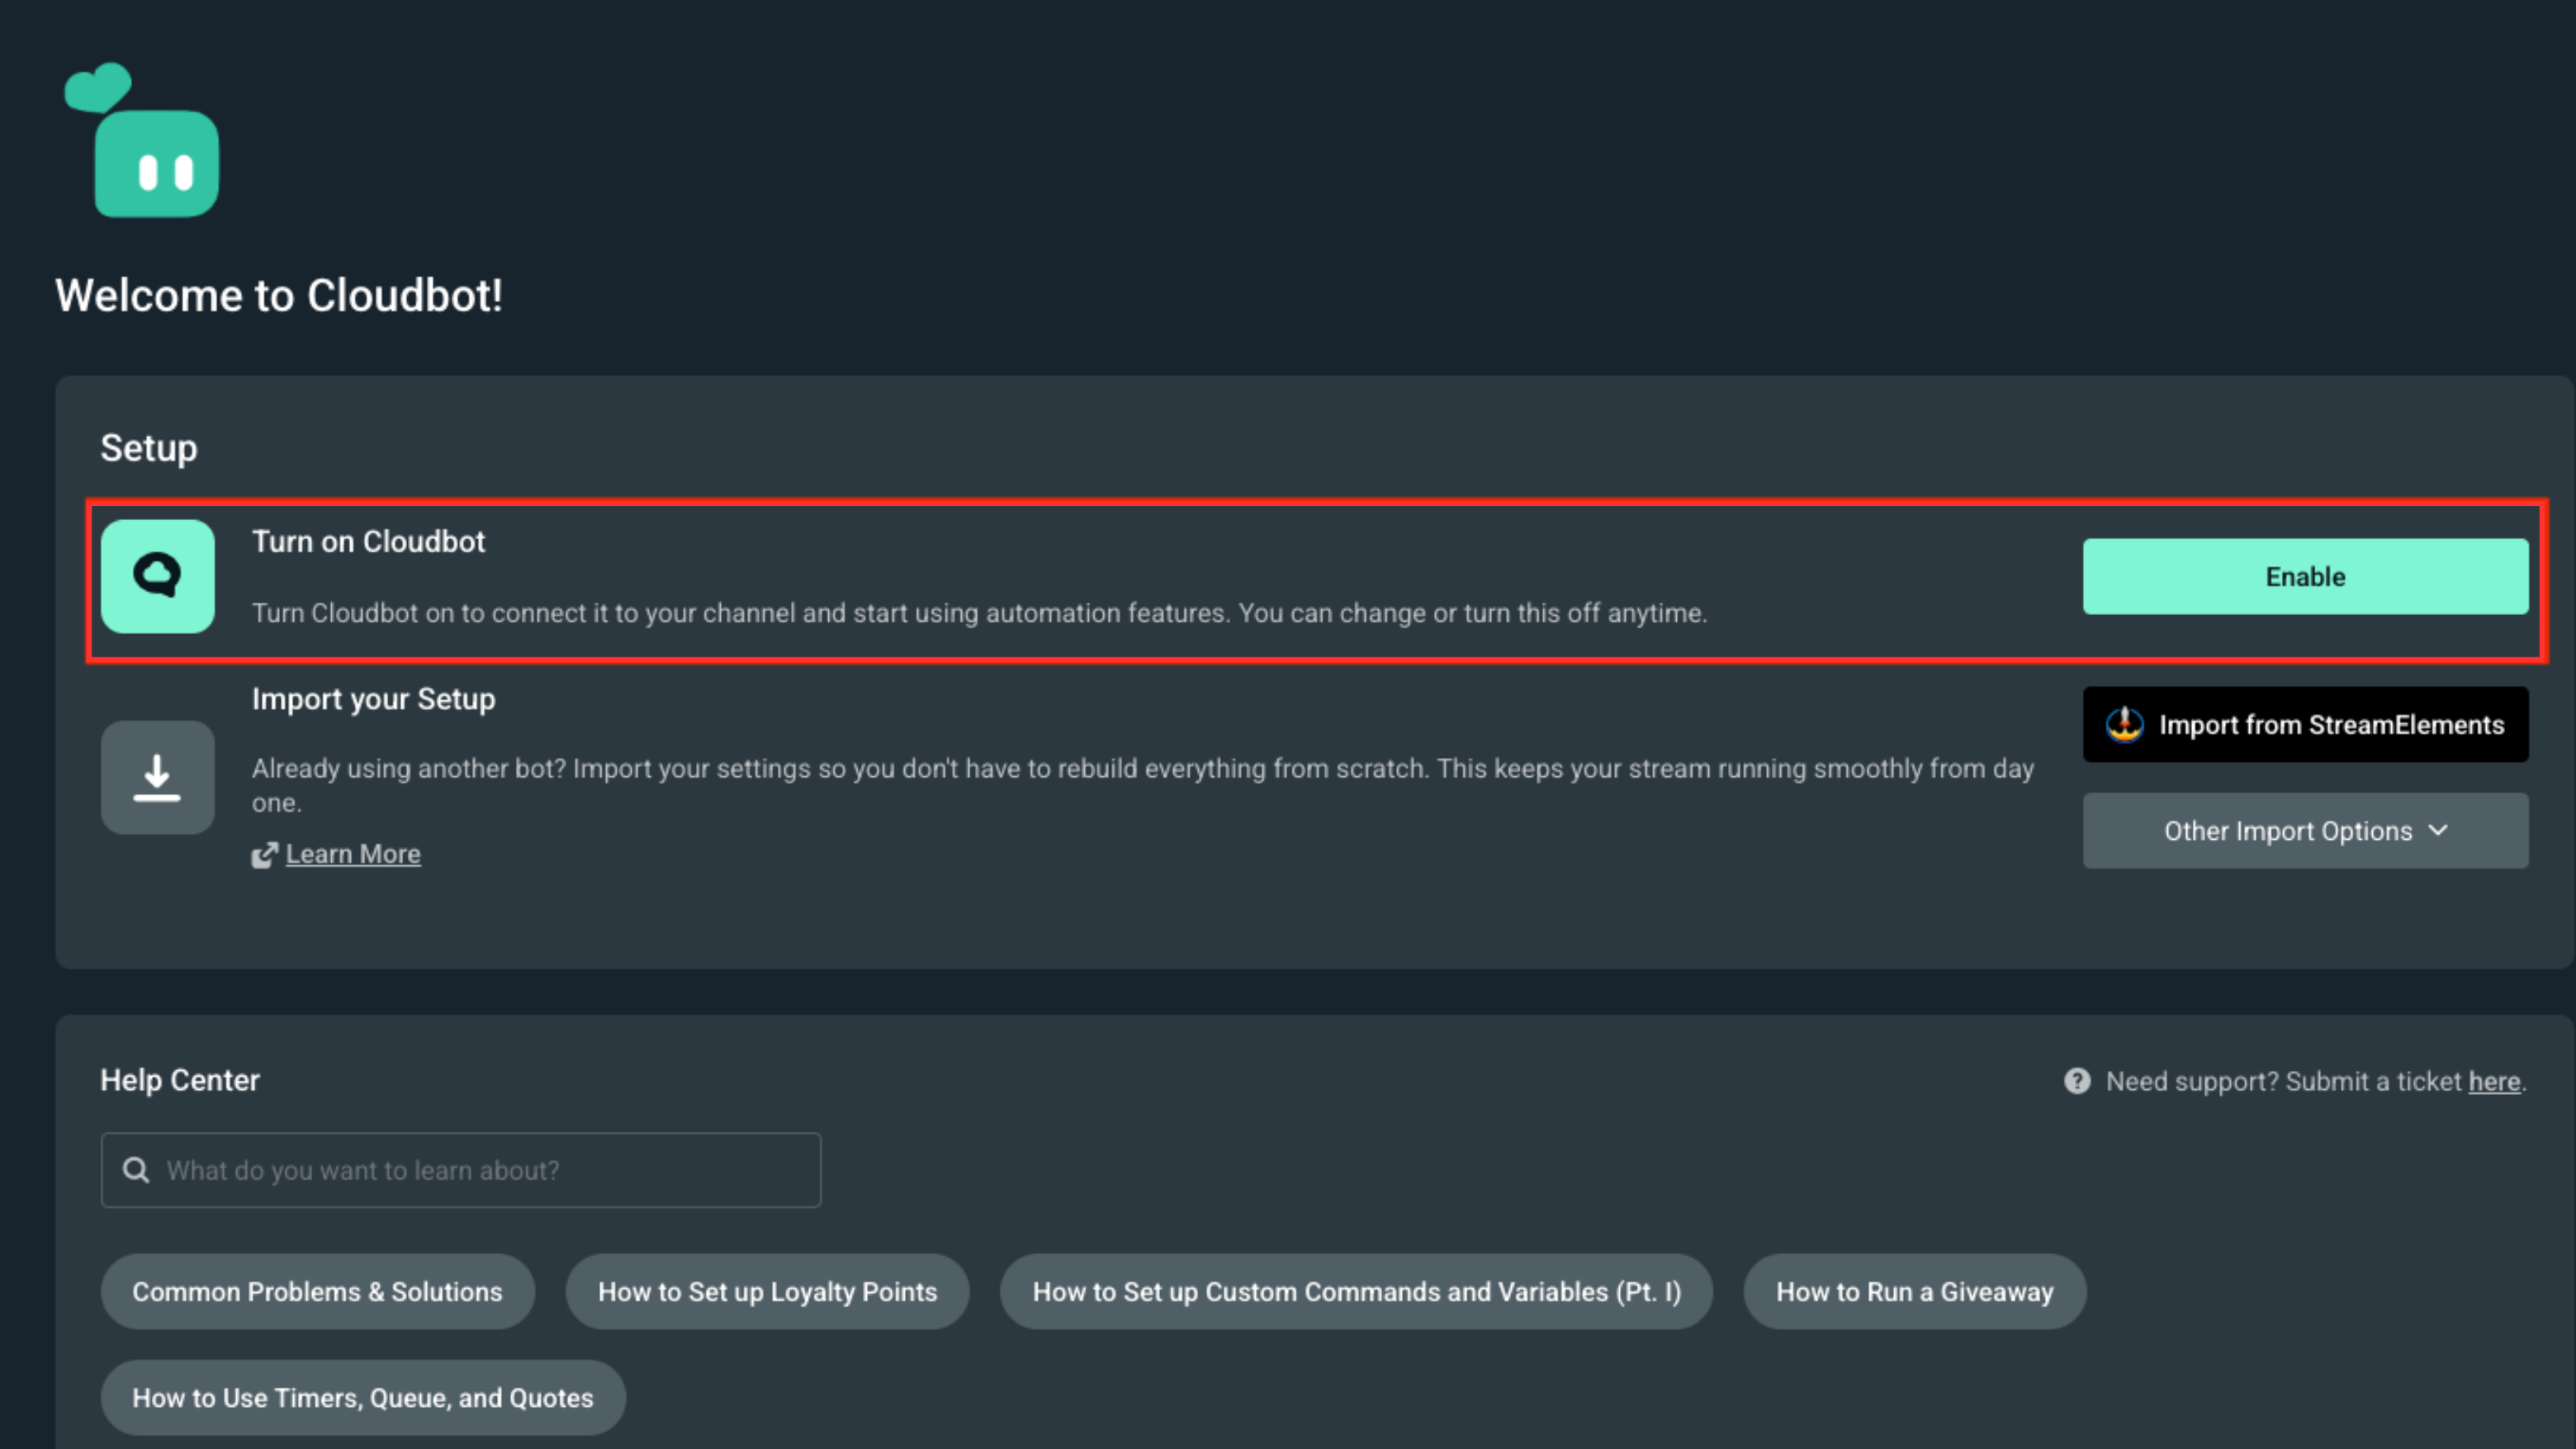
To begin, be sure you are logged in to your primary account. If you’d like to add another account, you can do so from the Account Settings page. After your account is merged, login, and navigate to Cloudbot to make sure it is enabled by clicking the Enable button on the main page of the dashboard.
Name Your Bot
Navigate to the Settings tab in your Cloudbot dashboard.
To update the name of Cloudbot, first, create a new account. Your new Cloudbot will use the username of any account you connect. If you don’t have an account specifically for your bot, create one now. If you already have an account for your bot, you can move on to the next step.
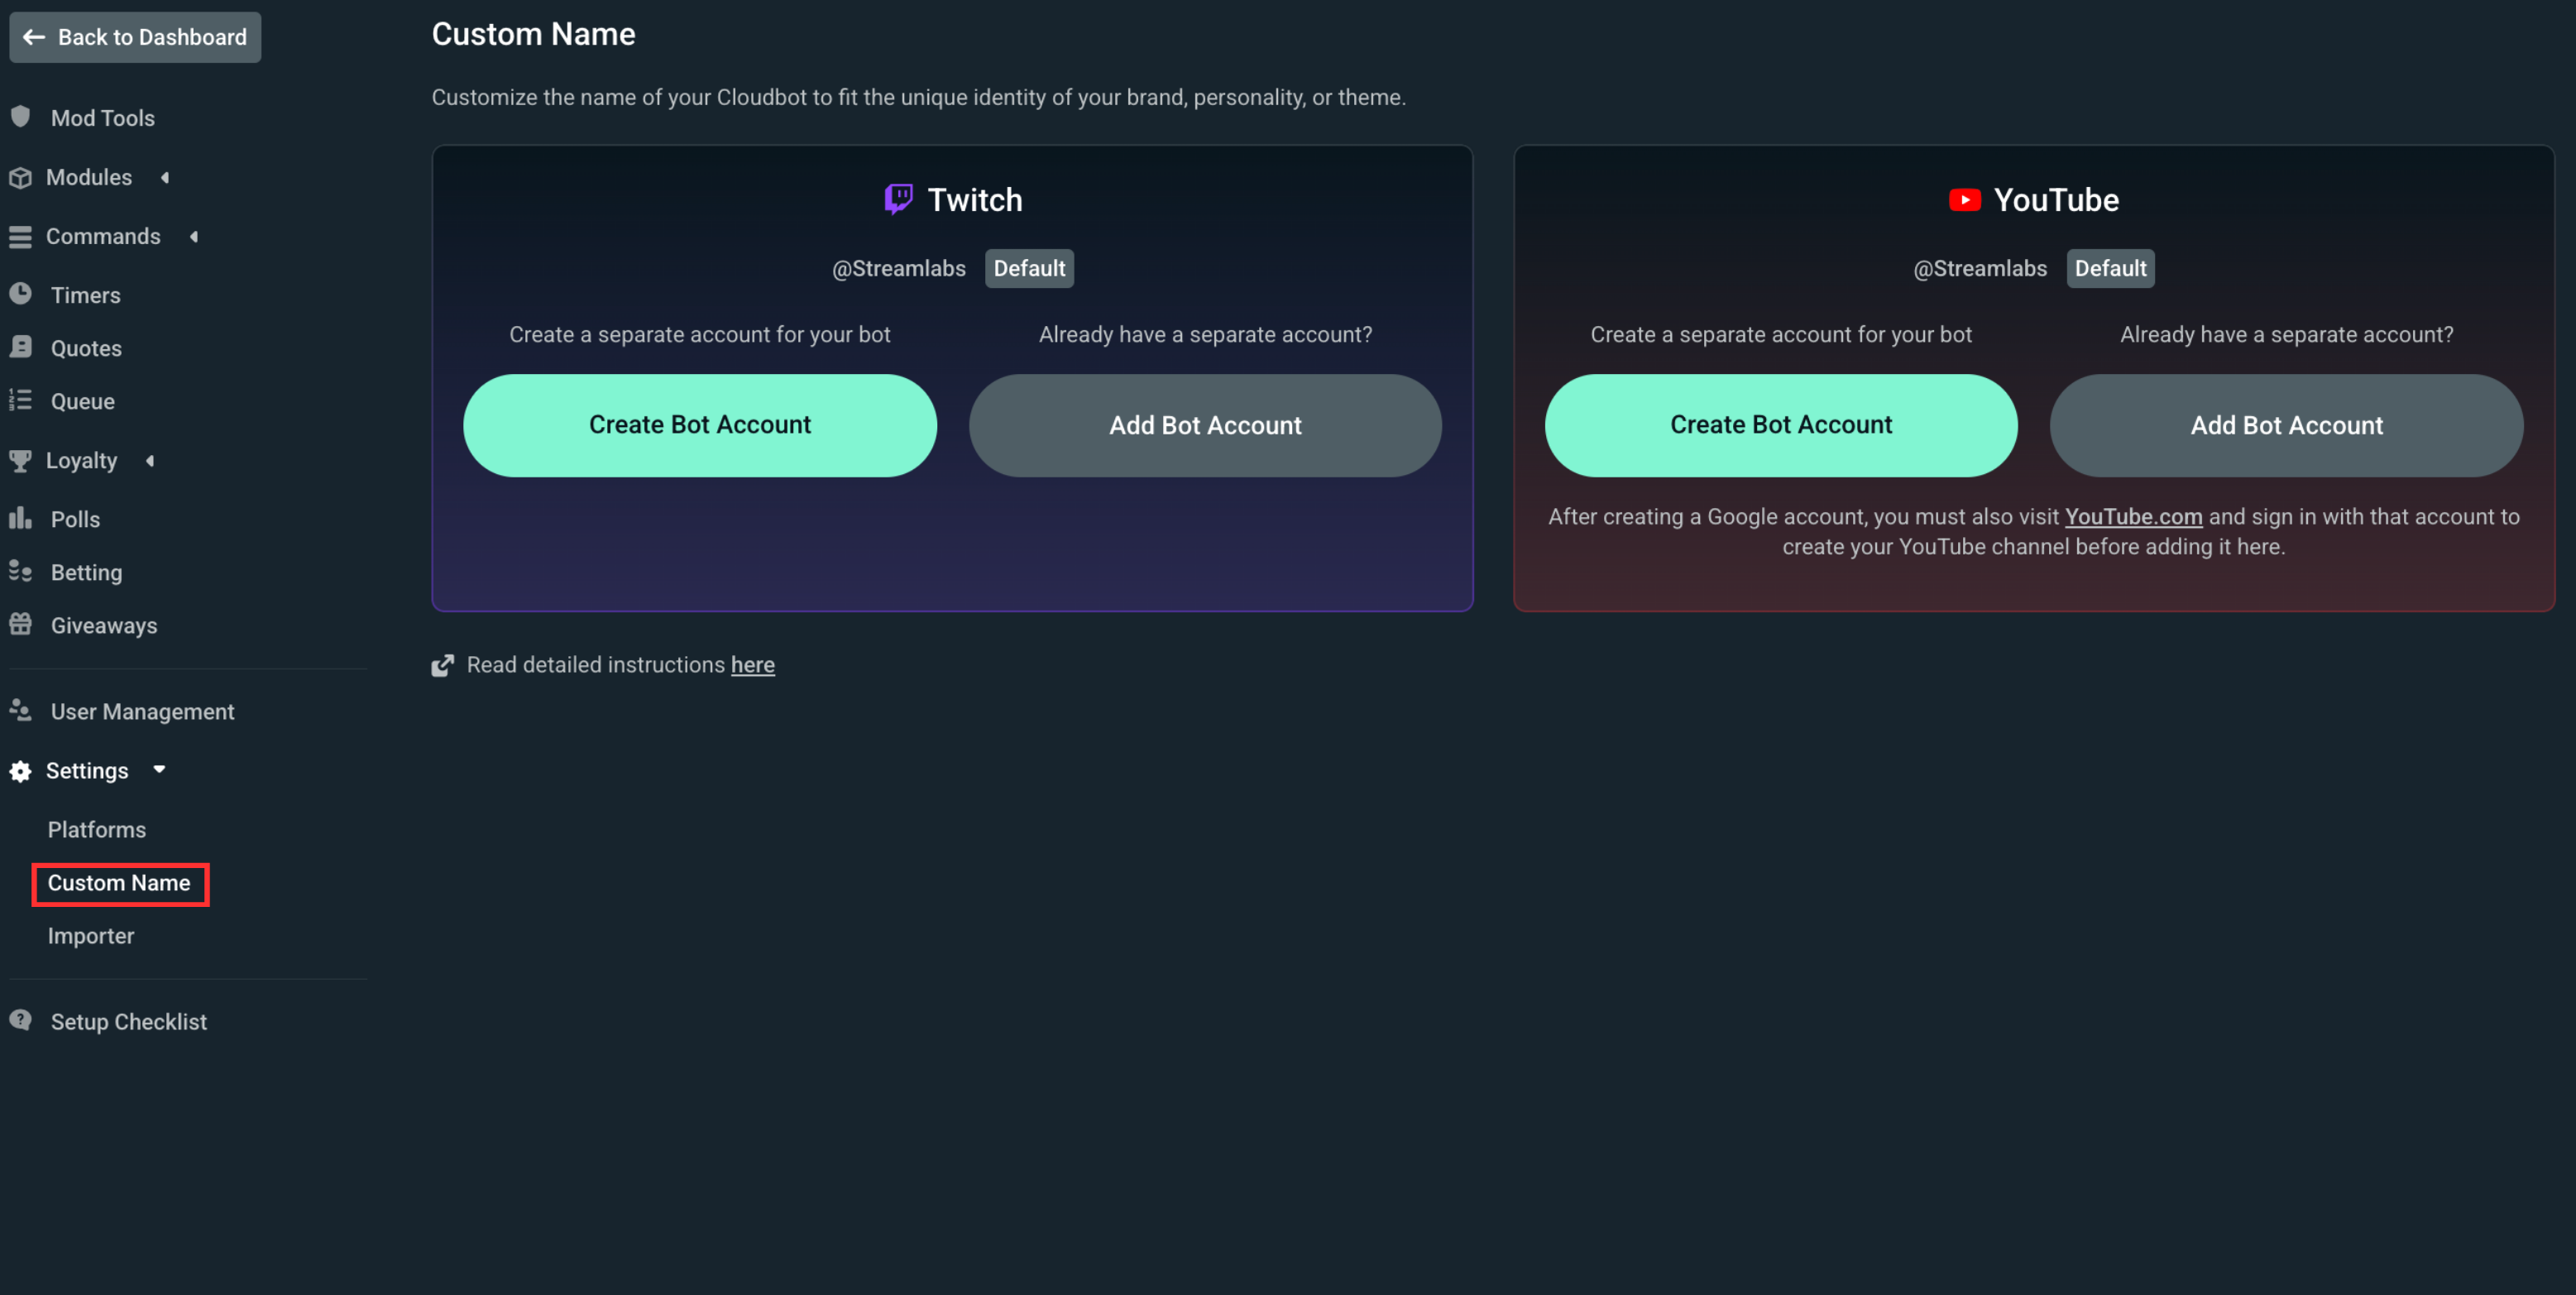
Connect Your Bot Account
Once you’ve created an account for your bot, connect it to Twitch by clicking Click here to add. You will be prompted with a screen from Twitch to authorize your account.
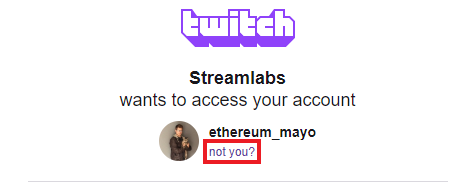
***Be sure you authorize your new bot account, not your primary account!***
By default, Twitch will ask you to authorize your primary account. To authorize your new bot account, click “not you?” at the top of the authorization page.
You’re All Set!
Make sure you have the Alert Box open and go to your primary Twitch channel to test out your new bot name. You can follow the same steps to add a custom name for your bot on YouTube as well.
If you have any questions or comments, please let us know by contacting us or joining our Discord server.