



 Ultra subscription.

Creating content is hard. But then again, nobody said it was easy. There is a ton of prep work and planning to create an entertaining live stream. But even if you do everything right, your viewers are entertained, you hit your goals for the stream, and you gained new followers, the work is only beginning.
Successful content creators understand that live streaming is only one aspect of their job. Posting highlights from your stream is essential if you want to reach new audiences. This is where Streamlabs enters the picture. Streamlabs Desktop includes free gameplay screen recording functionality to record your screen in full HD quality.
Any successful streamer will tell you that uploading your stream highlights to platforms like YouTube and TikTok is a great way to grow your audience. Unlike your live stream, which is only available for a short time, your YouTube videos and TikTok highlights are online forever, waiting to entertain people for eternity.
Today, we will show you how to use Streamlabs Desktop to record and save your stream highlights and upload them to your favorite social media platforms.
How to Save Your Recording in Streamlabs Desktop
Streamlabs Desktop allows you to record your gameplay in a variety of different ways. The tool you use will differ depending on whether you want to capture specific clips or record your entire live stream session.
Replay Buffer
Replay Buffer is a feature in Streamlabs Desktop that will automatically capture and record up to the last two minutes of your live stream. You can specify the length of the desired time, and you can even include an instant replay source in your stream so that your viewers can watch a replay in real-time.
Check out this guide to learn more about setting up Instant Replays in Streamlabs Desktop.
Recording Your Full Gameplay
Sometimes you may want to record your full gaming session. Thankfully, Replay takes care of it for you by auto-recording your gaming sessions, pulling out exciting moments like kills, victories, streaks and more, and compiles all of those clips in one place to make it easy for you to edit them. To learn more about Replay, head to our setup guide.
Where Does Streamlabs Desktop Save Recordings?
One of the best benefits of using streaming software is that you can customize settings like recording bitrate, encoder, and file format, and location.
Perform the following steps to change the location of your save file:
Step 1: Open Streamlabs Desktop.
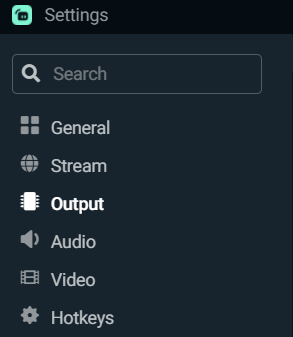
Step 2: Open the setting and click on Ouput.
Step 3: Scroll down until you see Recording.
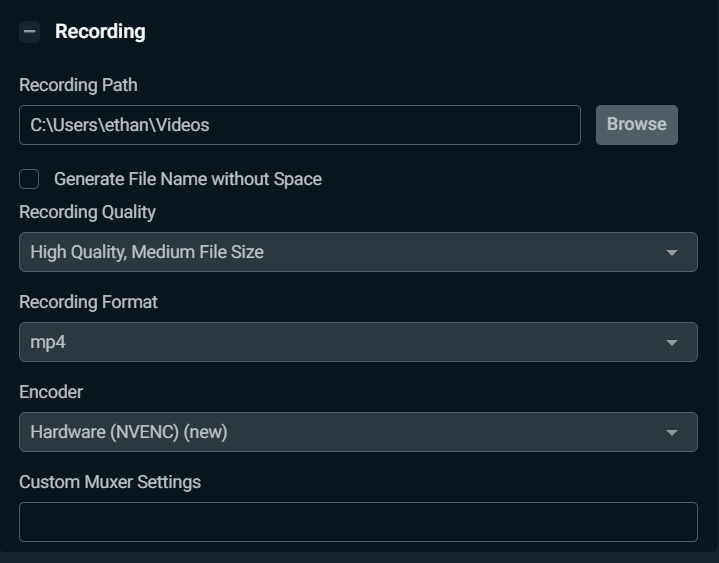
From here you can adjust the recording path, quality, file format and choose the encoder you’d like to use.
Hopefully, this article helps you create and record awesome content you can use to share with your viewers across all of your social media platforms.
If you have any questions or comments, please let us know by contacting us or joining our Discord server.