Introduction
This small guide will show you how to force a certain application, like a game, to use a different playback device other than the Windows default selected playback device. This is handy if you want the game audio separated from your desktop (default) audio in order to fine-control this and the application does not have an option to do so!
The main use of this would be forcing the audio from an application on a virtual playback device, added when you installed either Virtual Audio cables and/or VoiceMeeter Banana/Potato, refer to this article.
Windows 10
Since the April update in 2018 for Windows 10, Microsoft has made it pretty easy and straight forwarded to do this without the use of any external applications that do not always work (properly)
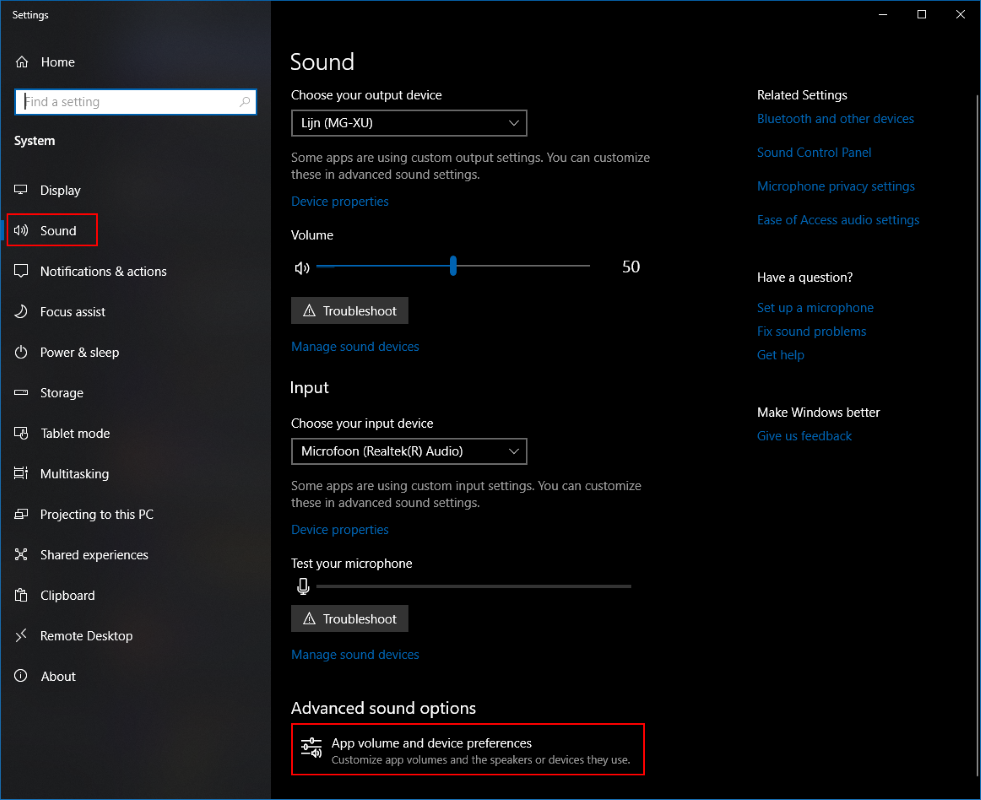
Open the Windows 10 Settings (Windows Logo →  or search Settings). Once the settings are open, navigate to System and then Sound. You can also right-click the
  icon in the system tray and select Open Sound Settings to navigate directly to the Windows Sound settings.
In here you can make sure your default output (playback) and input (recording) device are still set how you want it. To force an application to another device than the set default you need to open the App volume and device preferences found at the bottom of the Windows Sound settings.

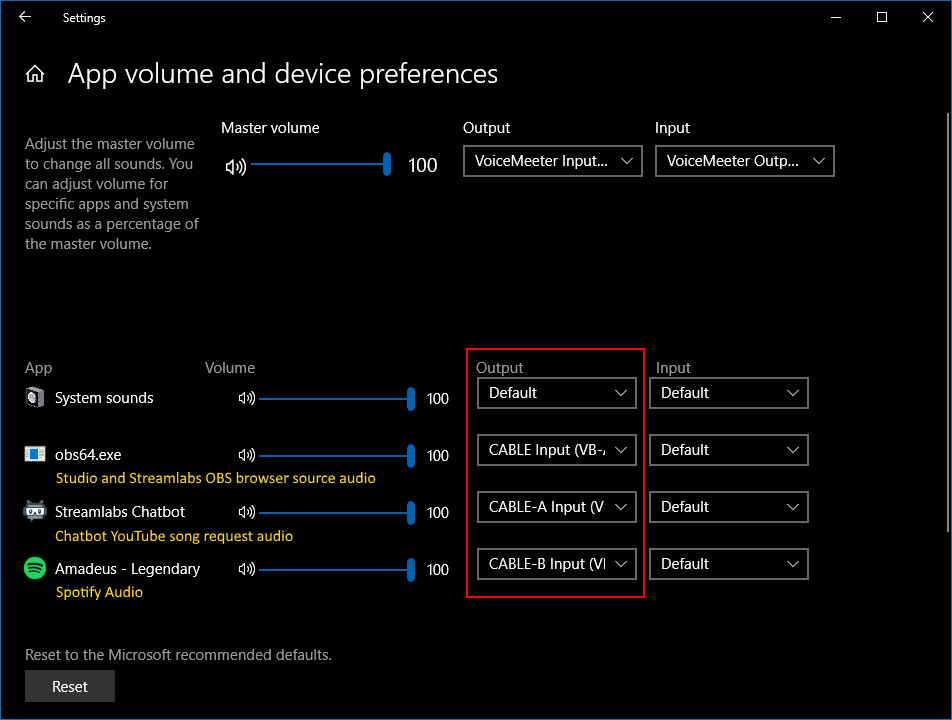
In the next settings screen you have, you can “force” the output device that will be used by the application. In the example here, we have forced Streamlabs Desktop (or OBS Studio) to output browser source audio to a VAC called “Cable Input”. Furthermore, we have forced Streamlabs Chatbot and Spotify to a VAC called “Cable-A Input” and “Cable-B Input” respectively so all audio is separated from desktop and even from each other!
