Polls
Polls are a way for your viewers to directly vote through chat using !Vote <option> on a potential choice / option to determine a course of action.
How Do I Create a Poll?
To get started all you need to do is go here and make sure the Cloudbot is enabled first. It’s as simple as just clicking on the switch.

Once you’ve done that it’s time to create your first poll profile. You can do this by clicking on the Add Poll Profile button. This will open up a modal where you can set:
- Title: This is the title for your poll.
- Options: These are the responses your chat can vote for. Give your option a name and a custom command that chatters can use tho vote. At least two options are required, though you may add more.
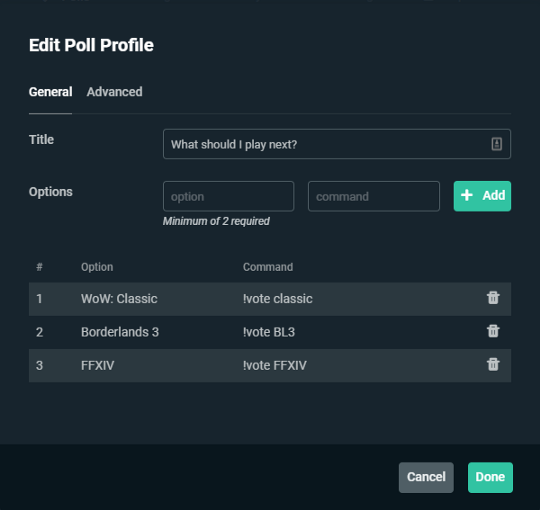
Once you’re done with the basics let’s move to the Advanced section.
Edit Poll Profile: Advanced
This is where you can set up additional settings include:
- Use Timer: This sets your poll on timer. When the timer is enabled, Cloudbot will automatically close the poll for you when time runs out.
- Duration: This is how long you want the poll to stay open.
- Notifications: This setting sends a message to viewers letting them know when their poll vote has been entered successfully.
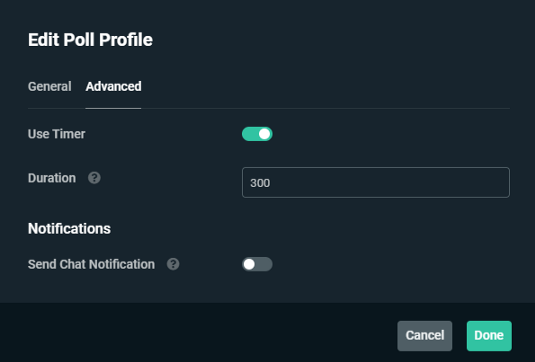
When you are finished configuring click Done and your profile will appear in the list below. Because we use poll profiles, you are able to re-use your polls without having to create one each time.
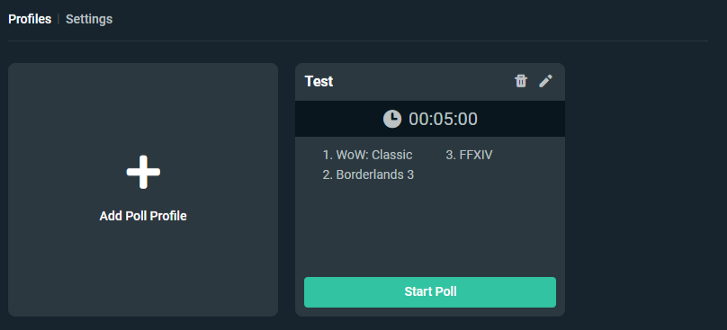
When the time comes and you are ready to start your poll, all you would need to do is click Start Poll which will launch the following screen where you can see your poll's progress:
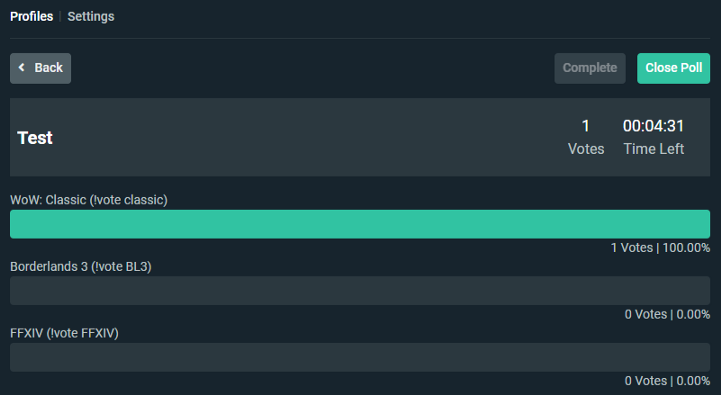
From this point onwards the bot will let your viewers know through chat that the poll has started and how they can vote using !vote <option>.
Poll Settings
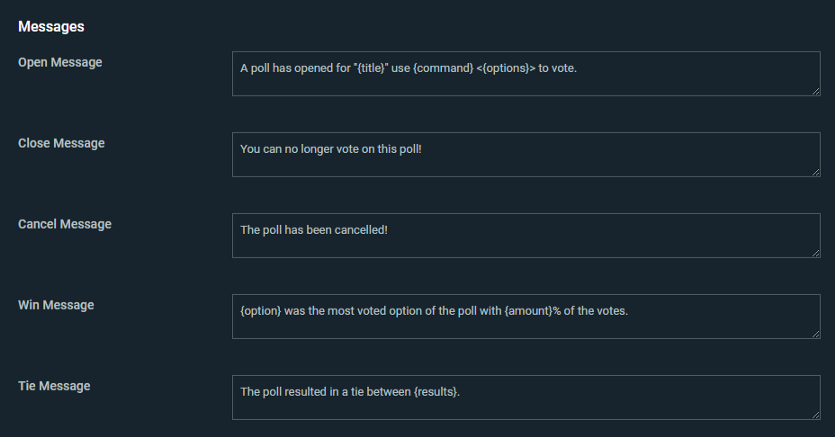
Under the poll Settings, you are able to customize settings and default messages for the poll system including:
- Use Repeat Message: Check if you want the message alerting chat that betting is open to repeat after a set number of other messages from chat.
- Repeat Message: The content of the message you want repeated.
- Chat Lines: How many lines should pass in chat before the repeat message is posted.
- Open Message: The message sent in chat letting users know that the poll is open.
- Close Message: The message sent in chat letting users know that the poll is closed.
- Cancel Message: The message sent in chat letting users know if the poll is cancelled.
- Win Message: The message sent in chat letting users know the outcome of the poll.
- Tie Message: The message sent in chat if the poll is tied.

Once you’re done adjusting everything simply click Save Settings and you’re done. We're excited to see how you use polls to liven up your streams! If you have any questions or comments, please let us know by contacting us or joining our Discord server.