If you are experiencing connection drops or choppy bitrate while streaming, IPv6 settings may be the cause. While IPv6 is the modern standard for internet addresses, it is not fully adopted and some network hardware or streaming servers still struggle with it. This guide will teach you how to adjust your IPv6 settings to resolve connection issues.
Do You Have iPv6?
The first thing is not everyone's computer is set up to have iPv6. the easiest way to check your connection for iPv6 is to go to this website: https://test-ipv6.com/. It will check to see if you have an iPv6 connection. If you don't, you don't need to continue with this troubleshooting guide.
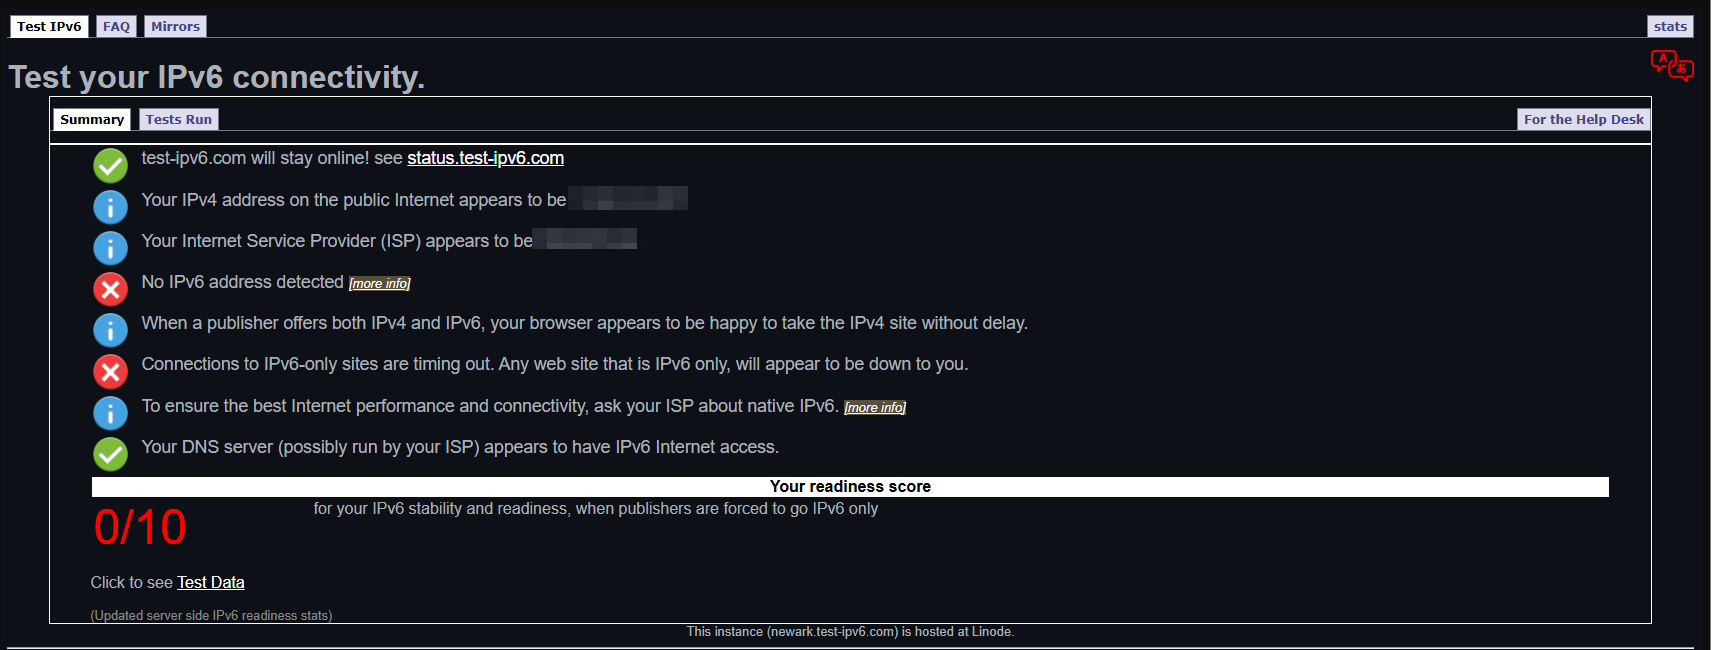
If you don't have iPv6, then you would not need to continue with this troubleshooting. This is what that would look like:
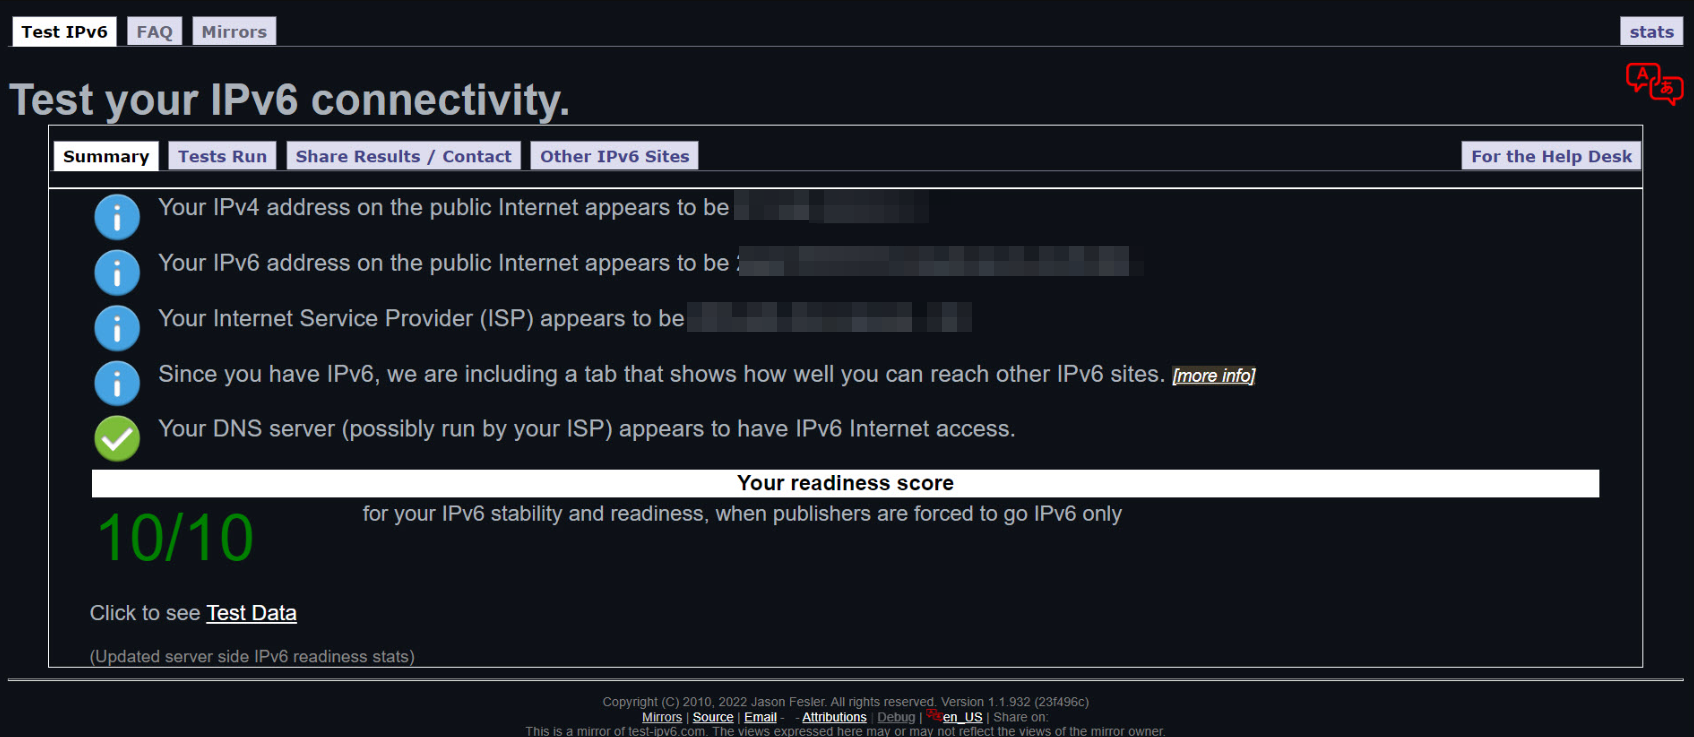
If you do have iPv6, you would want to continue with the rest of the guide. Your results would look like this:
Windows 10
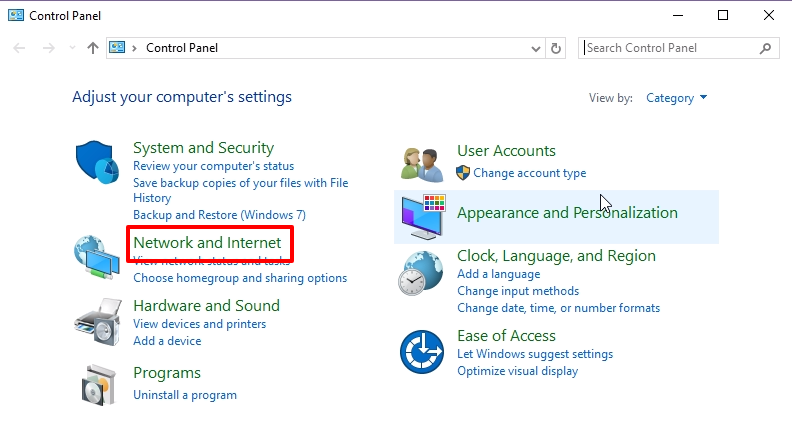
- Open the Control Panel: Press the WinKey and search for "Control Panel".
- Open Network and Sharing Center: If your view is set to Category, click Network and Internet first.
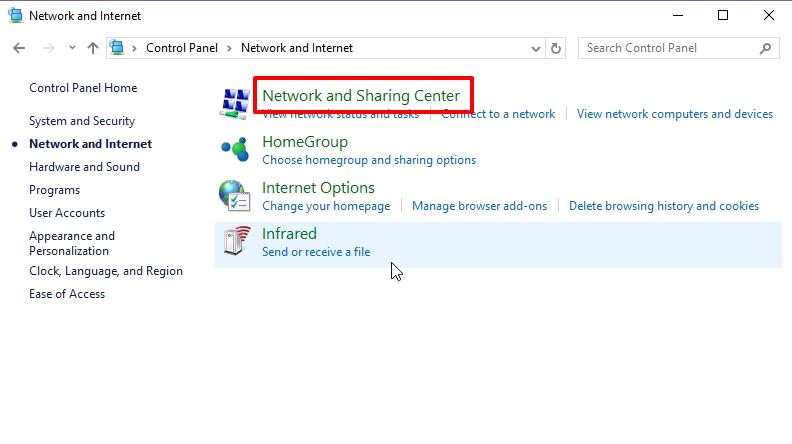
- Select your connection: Click on your active connection device (usually titled Ethernet or Wi-Fi).
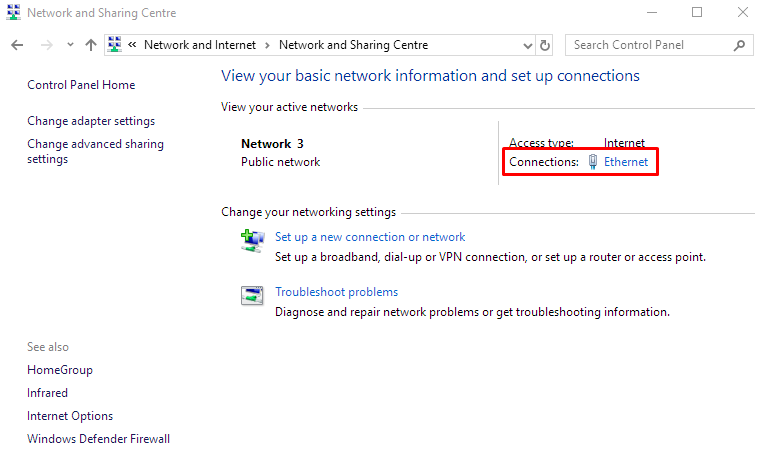
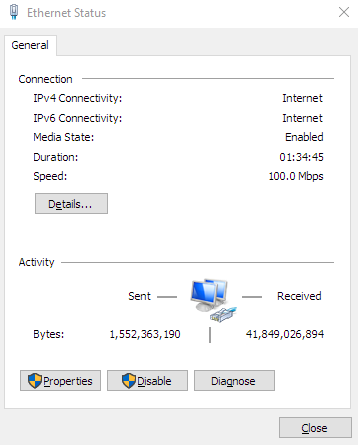
- Open Properties: In the General tab, click the Properties button.
- Locate IPv6: Scroll down to Internet Protocol Version 6 (TCP/IPv6).
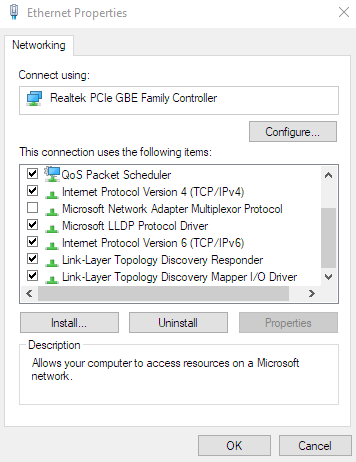
Solution 1: Force IPv6 DNS Server (Recommended)
- Double-click Internet Protocol Version 6 (TCP/IPv6).
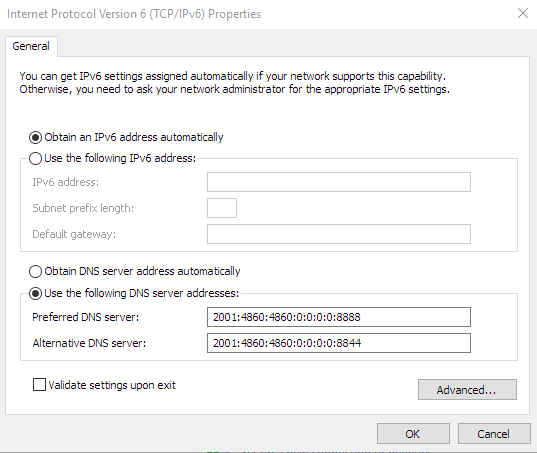
- Select Use the following DNS server addresses.
- Set Preferred DNS to:
2001:4860:4860:0:0:0:0:8888 - Set Alternate DNS to:
2001:4860:4860:0:0:0:0:8844 - Check Validate settings upon exit and click OK twice, then Close.
Solution 2: Disable IPv6 (Last Resort)
- Uncheck the box next to Internet Protocol Version 6 (TCP/IPv6).
- Click OK, then click Close.
Windows 11
- Open Network and Sharing Center: Press the WinKey, search for Network and Sharing Center, and press Enter.
- Change adapter settings: On the left side, click Change adapter settings.
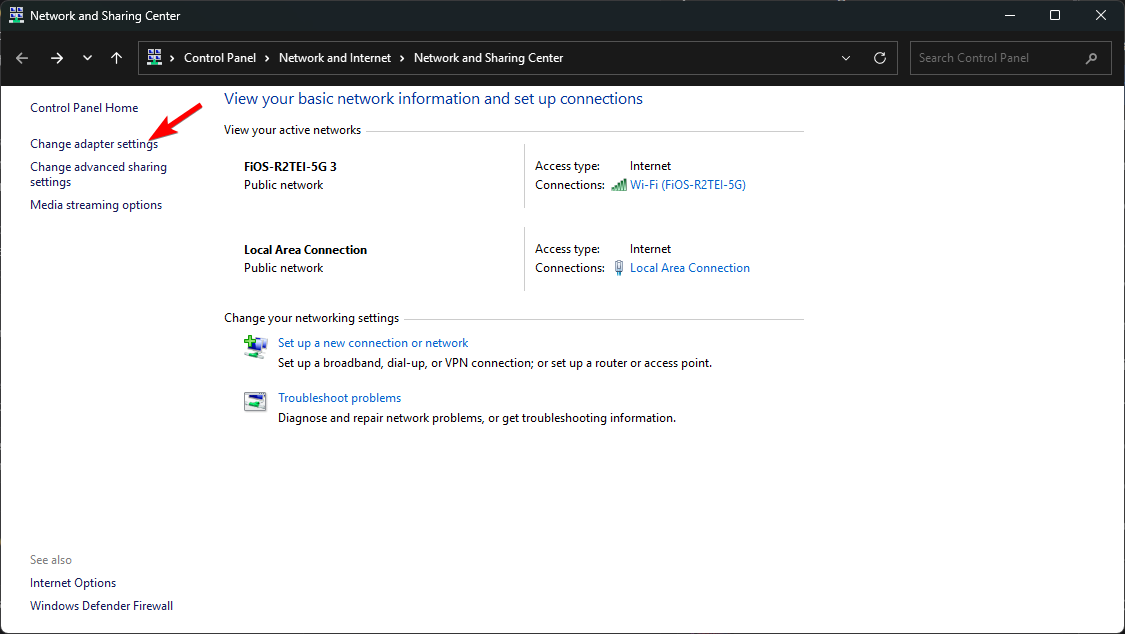
- Identify Connection: Locate your active connection (Ethernet is recommended).
- Open Properties: Right-click your connection and select Properties.
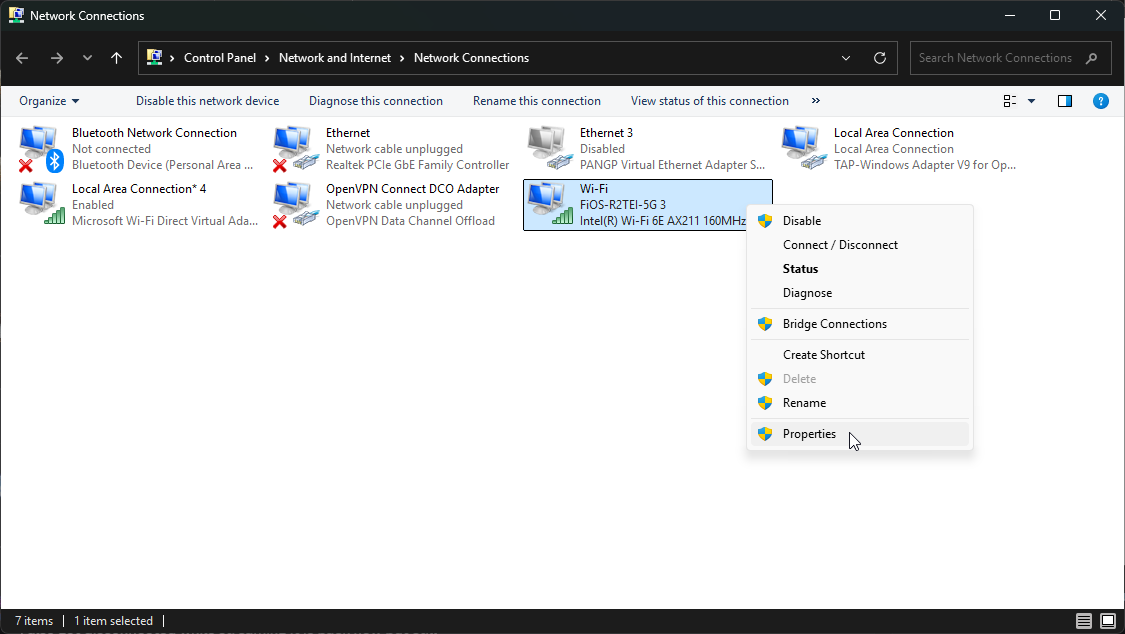
- Locate IPv6: Scroll to Internet Protocol Version 6 (TCP/IPv6).
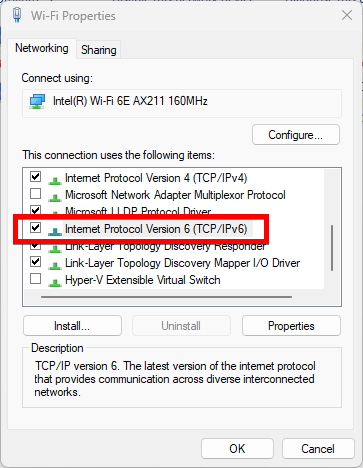
Solution 1: Force IPv6 DNS Server (Recommended)
- Highlight Internet Protocol Version 6 (TCP/IPv6) and click Properties.
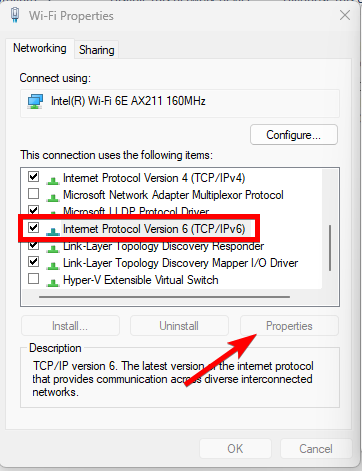
- Select Use the following DNS server addresses.
- Enter Google IPv6 DNS:
- Preferred:
2001:4860:4860:0:0:0:0:8888 - Alternate:
2001:4860:4860:0:0:0:0:8844
- Preferred:
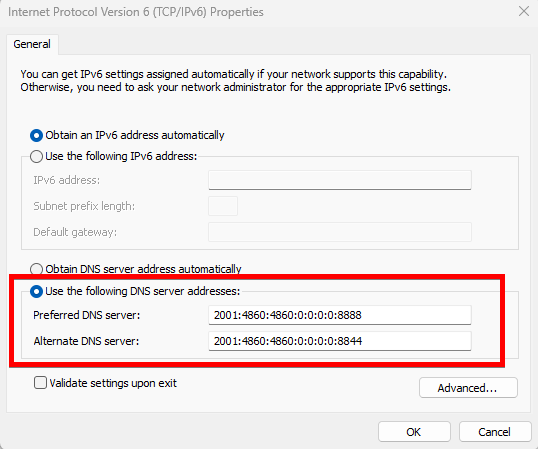
- Check Validate settings upon exit and click OK.
Solution 2: Disable IPv6 (Last Resort)
- Uncheck the box next to Internet Protocol Version 6 (TCP/IPv6) and click OK.
macOS
- Open Network Settings: Click the Apple Menu and select System Settings (or System Preferences) > Network.
- Select Connection: Select your active network (Ethernet or Wi-Fi).
- Access Details: Click the Details... button (or Advanced on older versions).
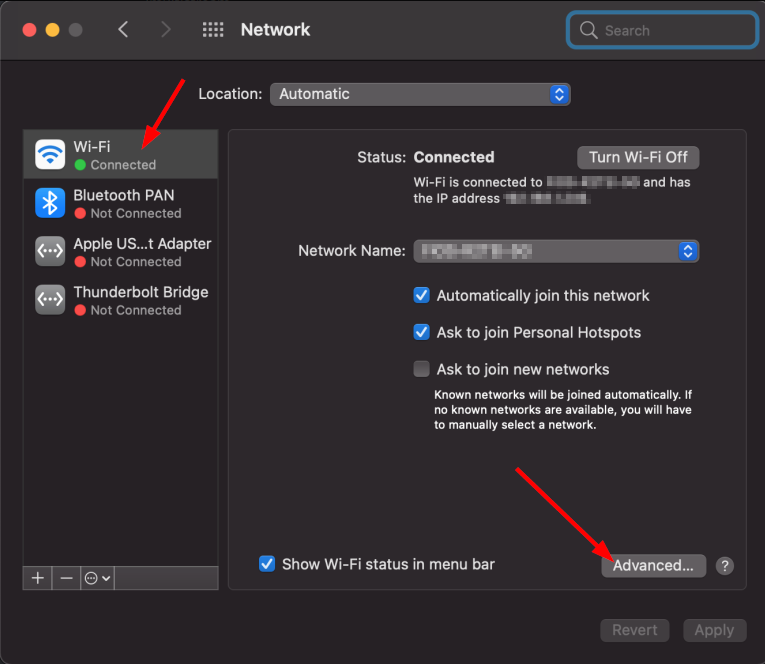
- Navigate to TCP/IP: Click the TCP/IP tab.
- Configure IPv6: Set the drop-down to Link-local only.
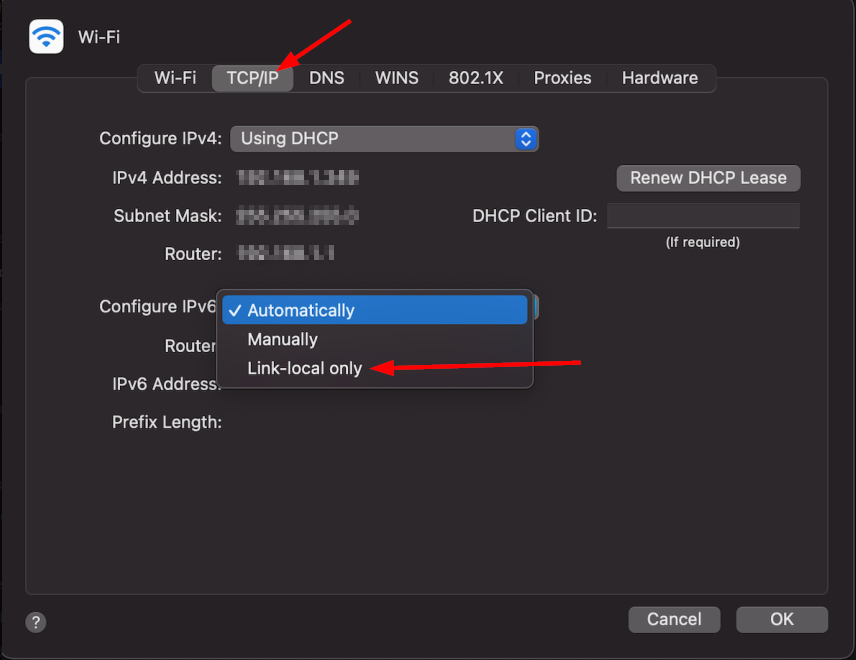
- Click OK and then Apply if prompted.
- Restart your computer.