When live streaming or recording, multiple cameras may be handy and affect engagement positively. In this guide you will learn how to set it up and why you even need multiple cameras for content creation.
Why You Need Multiple Cameras
Potential of using multiple cameras is limitless. Just imagine how professional you will look switching the angles of your view during the podcast. It will add cinematographic touch and can take your video to the next level. Endless possibilities come with the multiple camera support. Here are some ideas where using multiple camera setup will be essential:
- Showing / unpacking products. Essential to show your expression along with the product closeup view;
- Teaching people to play instruments. Musicians can point a couple of cameras to the instrument from different angles and have one more view capturing the body & hands position;
- Cooking class. Capture wide angle with the main camera & add extra cameras to highlight the process that can show oven or cutting board;
- Drawing in progress. Set one camera on you explaining what you’re about to draw and a second camera on paper where magic is happening.
- Showing podcasting studio setup. People like seeing behind the scenes magic and how your setup looks. Highlight it on the show by switching camera angles.
And more!
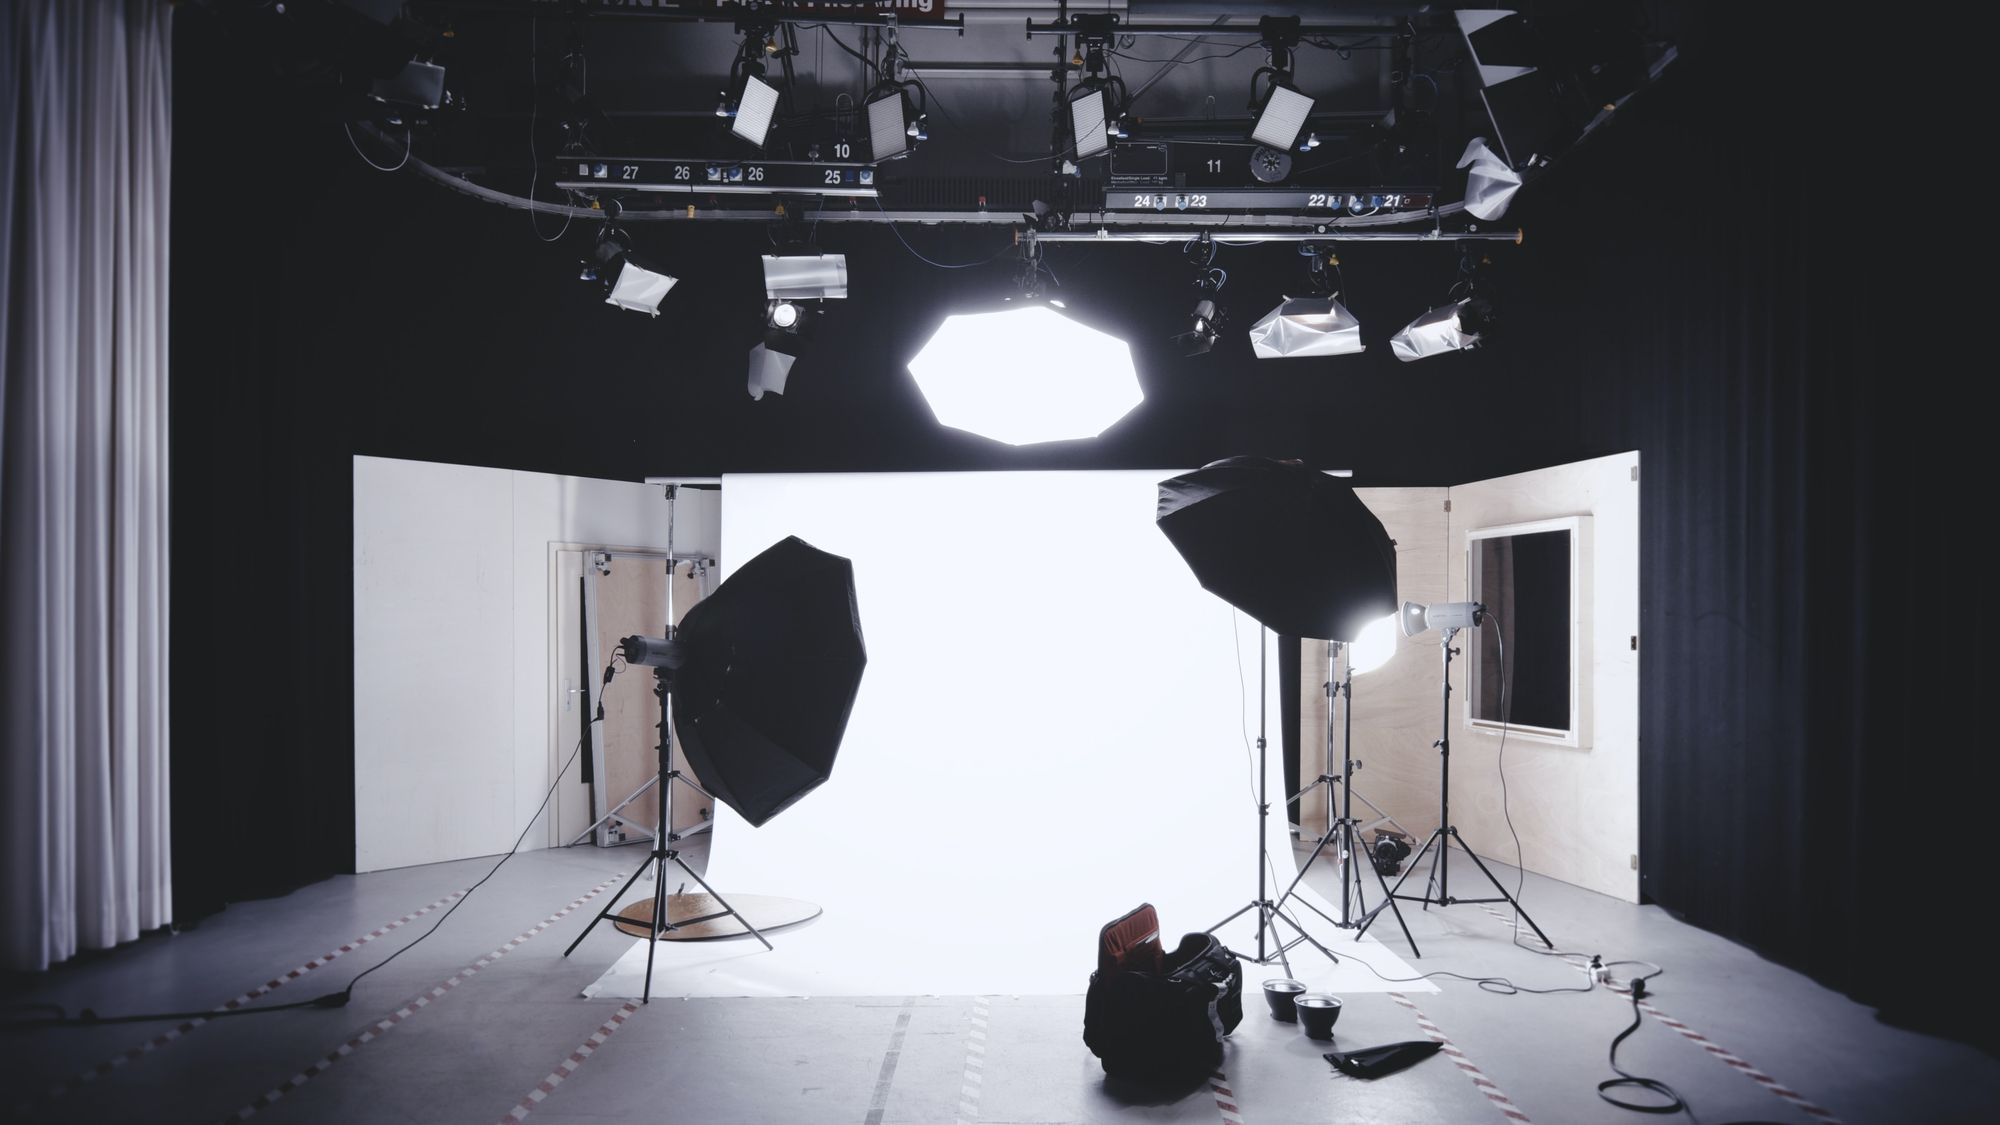
Multiple Camera Setup
It’s crucial to have a good camera and lighting. We will give some recommendations for the different budget options that result in a good picture quality.
Cameras:
- Logitech C920s Pro Full HD Webcam. Delivers remarkably crisp and detailed Full HD video (1080p at 30fps) with a full HD glass lens, 78° field of view, and HD auto light correction—plus dual mics for clear stereo sound. As low as $69.99;
- Logitech StreamCam. Full HD camera with USB-C for live streaming and content creation. Streams and records in 1080p resolution with 60fps. Comes with tripod and monitor mount in the box. From $169.99;
- Mevo start. Perfect HD live streaming camera with a wireless control for compelling content creation. Starts from $399.
- You can also use your phone as an additional camera and connect it with your device through apps like EpocCam.
Lighting:
- Litra Glow - Premium stream light with TrueSoft. Starts from $59.99;
- Softbox lighting kit to create more of a studio light setup. Can be necessary if you showcase products during your recordings or streams. Available on Amazon from $86.99;
- Elgato Key Light - has Versatile color temperature: 2900 – 7000 K that produces cold through warm white. Available from $199 per single light (2 items recommended).
Camera stands (optional):
- Floor stand from Mevo team - lightweight, secure and compact with detachable swivel mount for a full flexibility. You can order here for $79.99. Or, if you would like to keep it compact, check table stand here;
- UBeesize 67” Camera Tripod that can be used with cameras like Canon, Nikon etc. Starts from $37.99 on Amazon
Tools To Consider
There’s multiple tools that can be used to add multiple cameras and record or stream. We will cover 2 examples below:
- Streamlabs Desktop - powerful streaming and recording tool that you can download and use for free on your laptop.
- Talk Studio - browser based software that helps you create stunning streams and recordings without a complicated setup. 5 clicks in the browser and you’re live!
Connect Extra Sources with Streamlabs Desktop
Adding an Extra camera source with Streamlabs Desktop is easy. You should follow these steps:
- Download Streamlabs here;
- Launch it and click on + icon next to Sources;
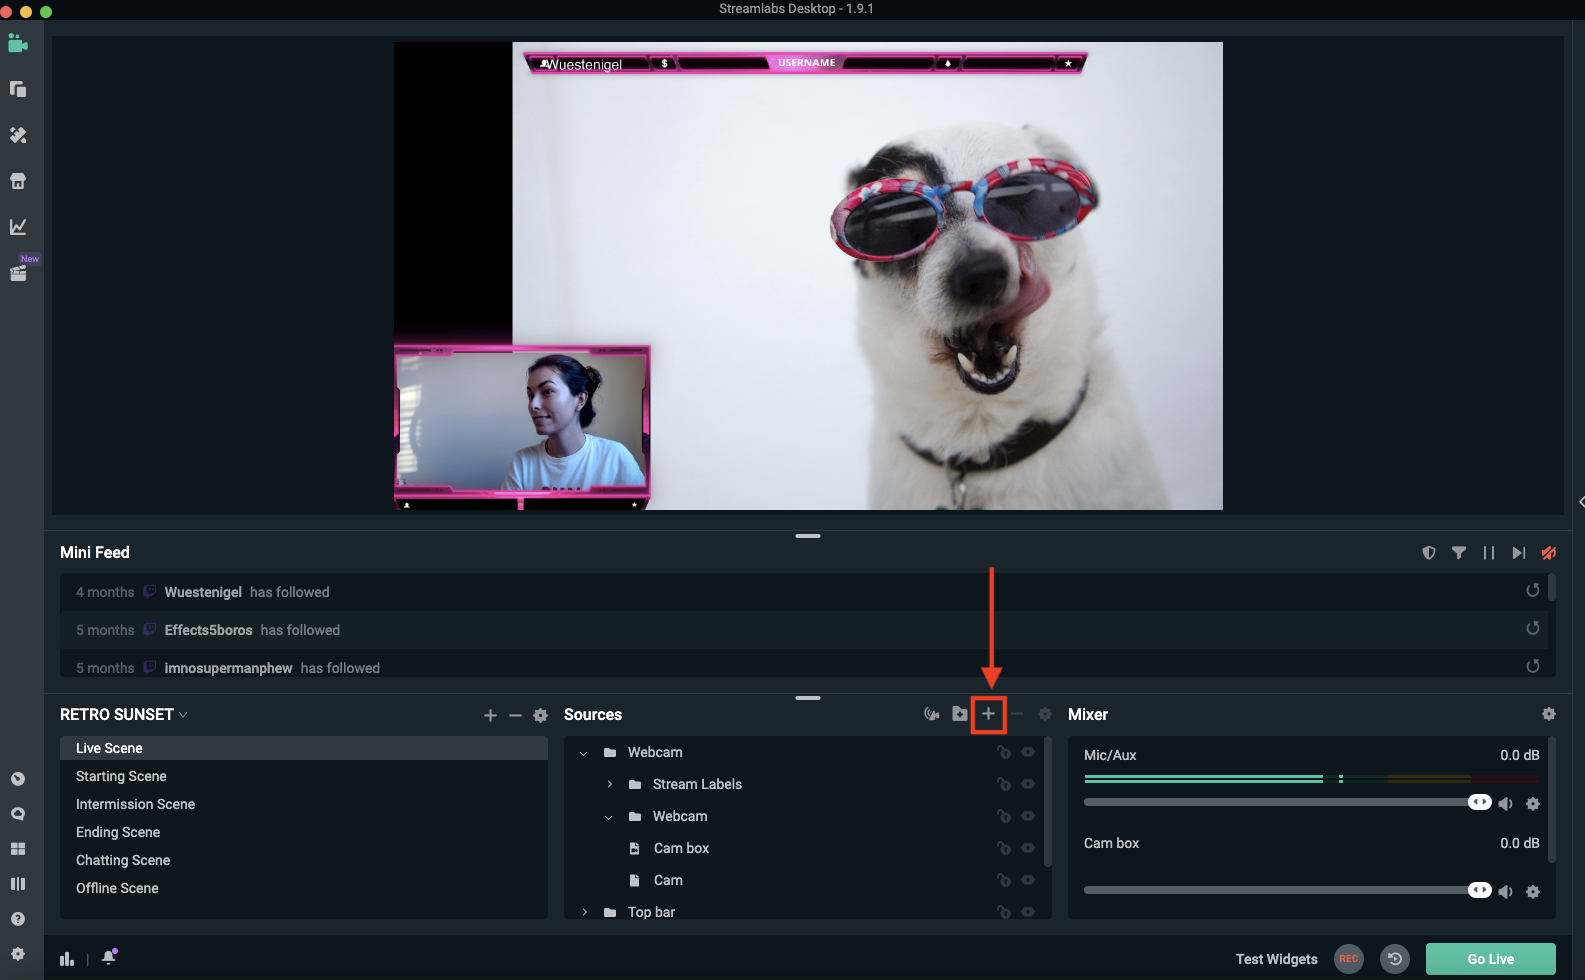
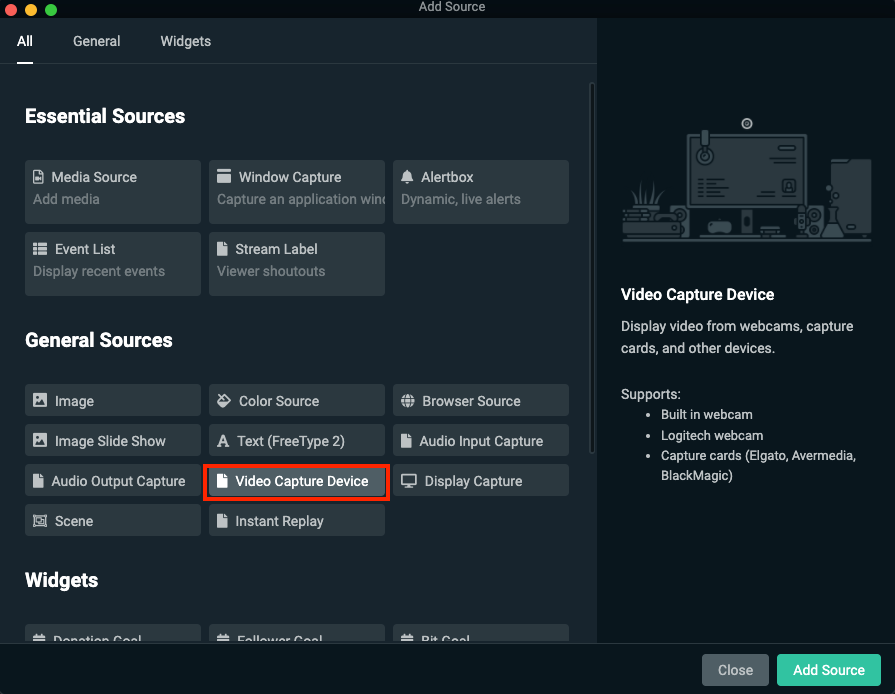
3. Click on Video Capture Device and hit “Add Source”;
4. Add the source;
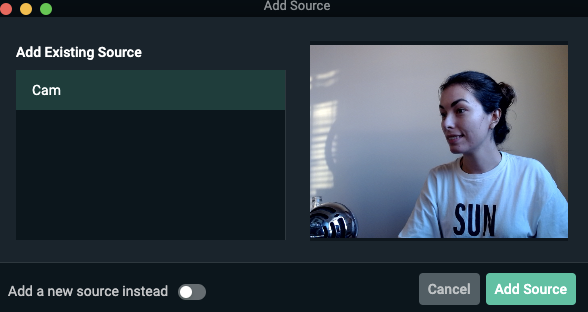
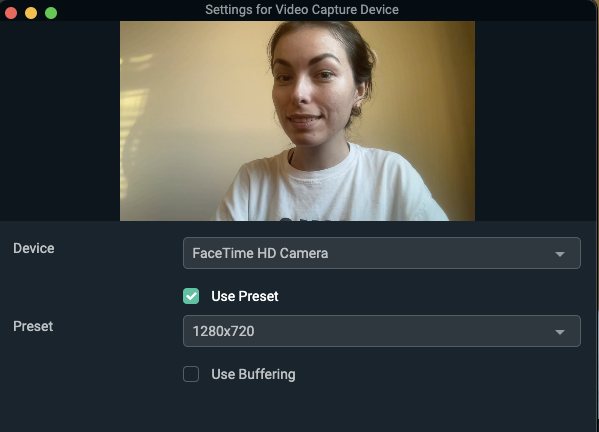
5. Pick the device option and resolution and add it to the screen;
6. If you’d like to add another camera, repeat step 2 and 3 then toggle “Add a new source instead” to add another camera;
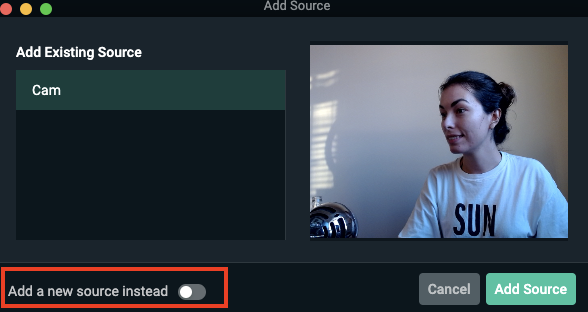
7. Select a different camera option from the dropdown and pick the preset or resolution accordingly:
How Talk Studio Can Help
Multiple camera setup with Talk Studio is as easy as possible. All you need to do is:
- Go to Talk Studio;
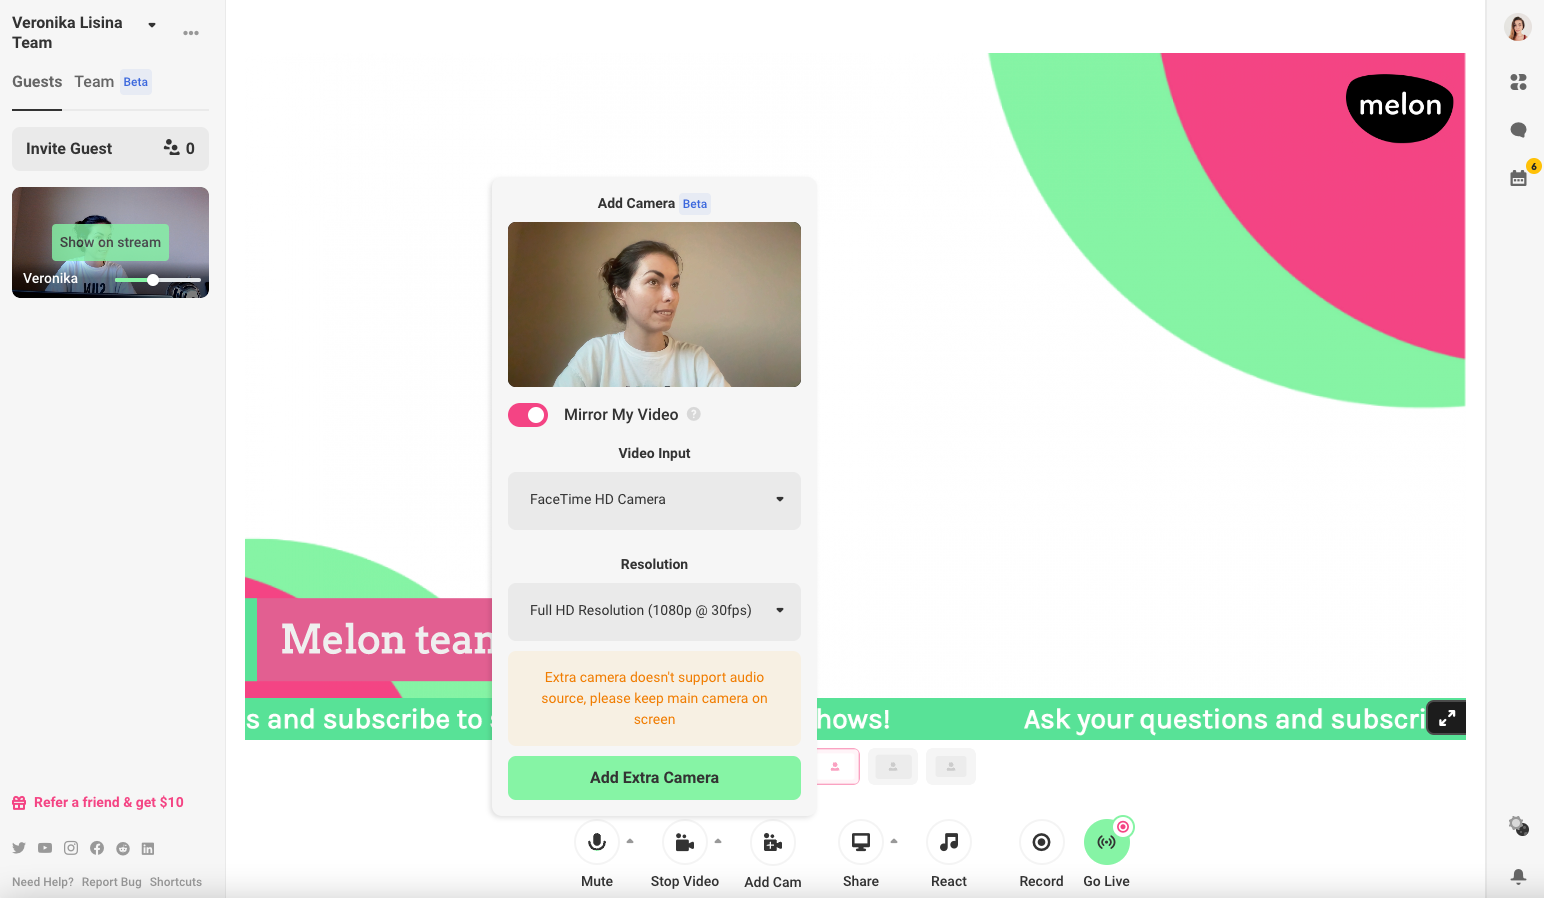
- Click Add camera (or Shift + K);

3. Select the camera from the dropdown under Video Input. Set your resolution, mirror your camera (optional), and click Add Extra Camera.
4. Your added camera source will be displayed on your left navbar - add it to the main screen anytime.
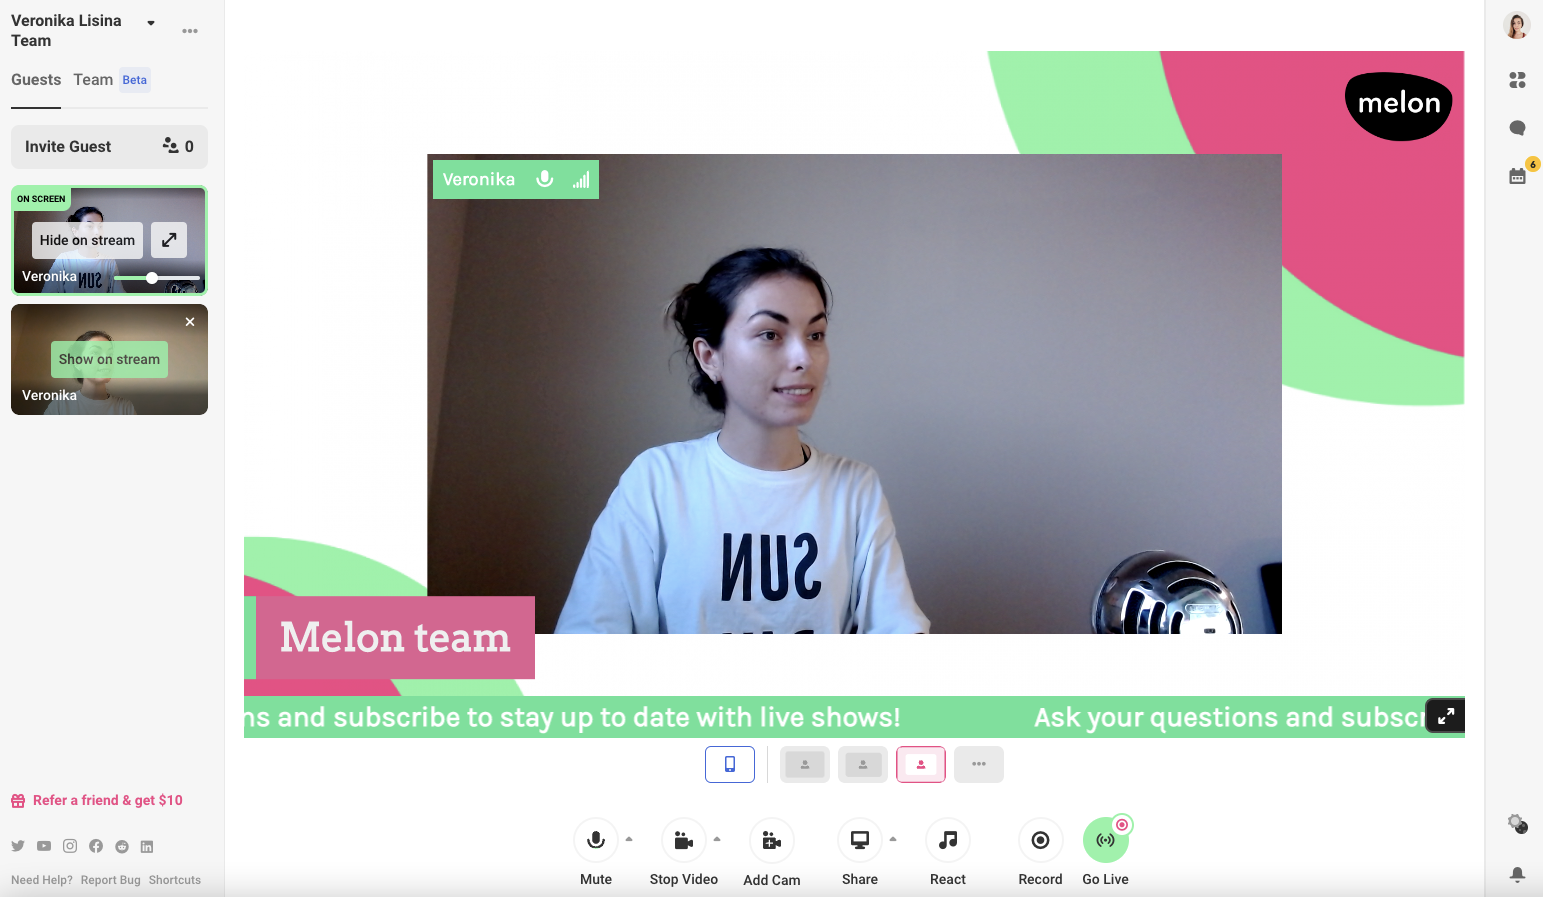
Talk Studio supports up to 12 cameras on screen in total.
Conclusion
Multiple camera setup is your show booster. Regardless of the content theme or idea, adding extra video source will help you drive more attention to your stream or recording.
If you have any questions left, send us a message at [email protected] and we will assist you with your setup.
Happy streaming and recording - now with multiple camera access!
Talk Studio team