

TL;DR:
When enabled, Twitch automatically saves past broadcasts (VODs) for up to 60 days, depending on your account type. You can find them under a streamer's Videos tab, but once they expire, they're gone unless reuploaded elsewhere.
If you stream and want to keep your VODs, we recommend using Streamlabs Desktop to record locally and keep every stream for future editing or uploads
What Are Twitch VODs?
Twitch VODs (Video on Demand) are recordings of live streams that let viewers catch up on missed streams or revisit memorable moments. When a streamer enables the Store past broadcasts option in their Stream Settings on Twitch, the platform automatically saves each stream as a VOD.
These videos are only stored for a limited time:
- 7 days for standard Twitch users
- 14 days for Twitch Affiliates
- 60 days for Twitch Partners, Turbo subscribers, and Prime members
After that, they expire and are automatically deleted from Twitch's servers.
How to Watch Old Twitch VODs
Step 1: Go to the streamer's Twitch channel by heading to twitch.tv. Type the streamer's username in the search bar.
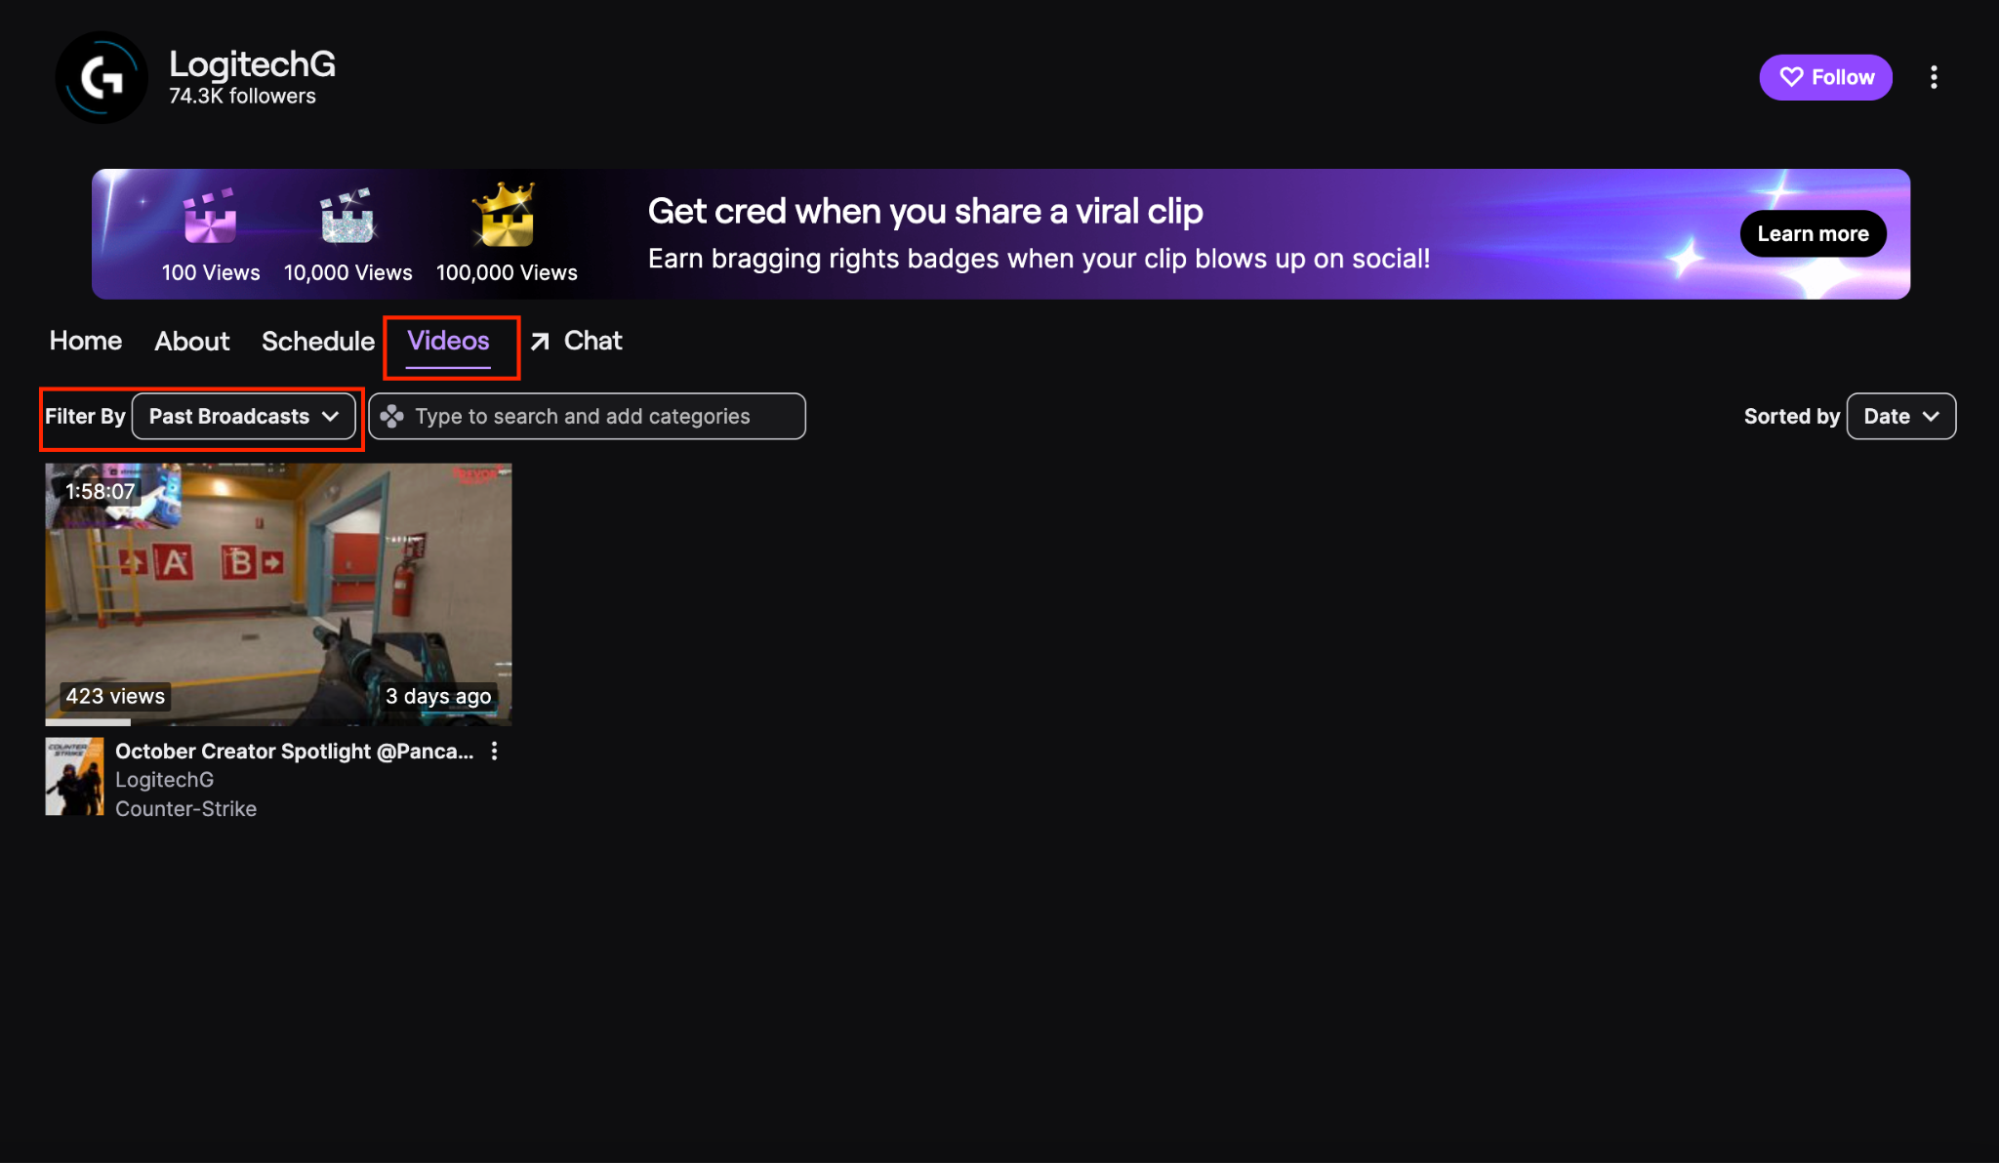
Step 2: Click the Videos tab below the channel banner. This is where Twitch stores all uploaded clips, highlights, and past broadcasts.
Step 3: Next, you should see a list of the streamer's saved content, including VODs, highlights and clips. Scroll down to Recent Broadcasts or use the filter to select Past Broadcast to only show previous streams.
Step 4: Click on the video thumbnail of the old stream to start watching right from the Twitch player.
Keep in mind that if the VOD has expired, been deleted, or contained copyrighted content, it may no longer appear here. The next section dives deeper into this.
How to Watch Deleted or Expired Twitch VODs
Unfortunately, once a Twitch VOD expires, it's gone from the platform permanently. However, many creators re-upload their streams to other platforms. If you're looking for an old VOD, try searching on YouTube or Google for terms like:
"[Streamer name] VOD" or "[Streamer name] past broadcast"
Some streamers even organize their replays into playlists or highlight compilations for easier viewing. If you remember when the stream originally aired or a key moment, try typing in keywords that may help you resurface the content.
How to Save or Record Your Own Twitch Streams
If you're a live streamer, relying on Twitch's storage limits can be risky especially if you want to repurpose your content later. The best way to keep your full broadcasts safe is to record them locally (on your computer) while you stream.
Streamlabs Desktop makes this easy by allowing you to stream and record at the same time. This way, even if your Twitch VODs expire, you'll have a high-quality copy saved directly to your computer.
You can use these local recordings to:
- Upload full replays to YouTube or another platform
- Create highlight clips or shorts
- Archive your content for future editing/projects
To enable this in Streamlabs Desktop:
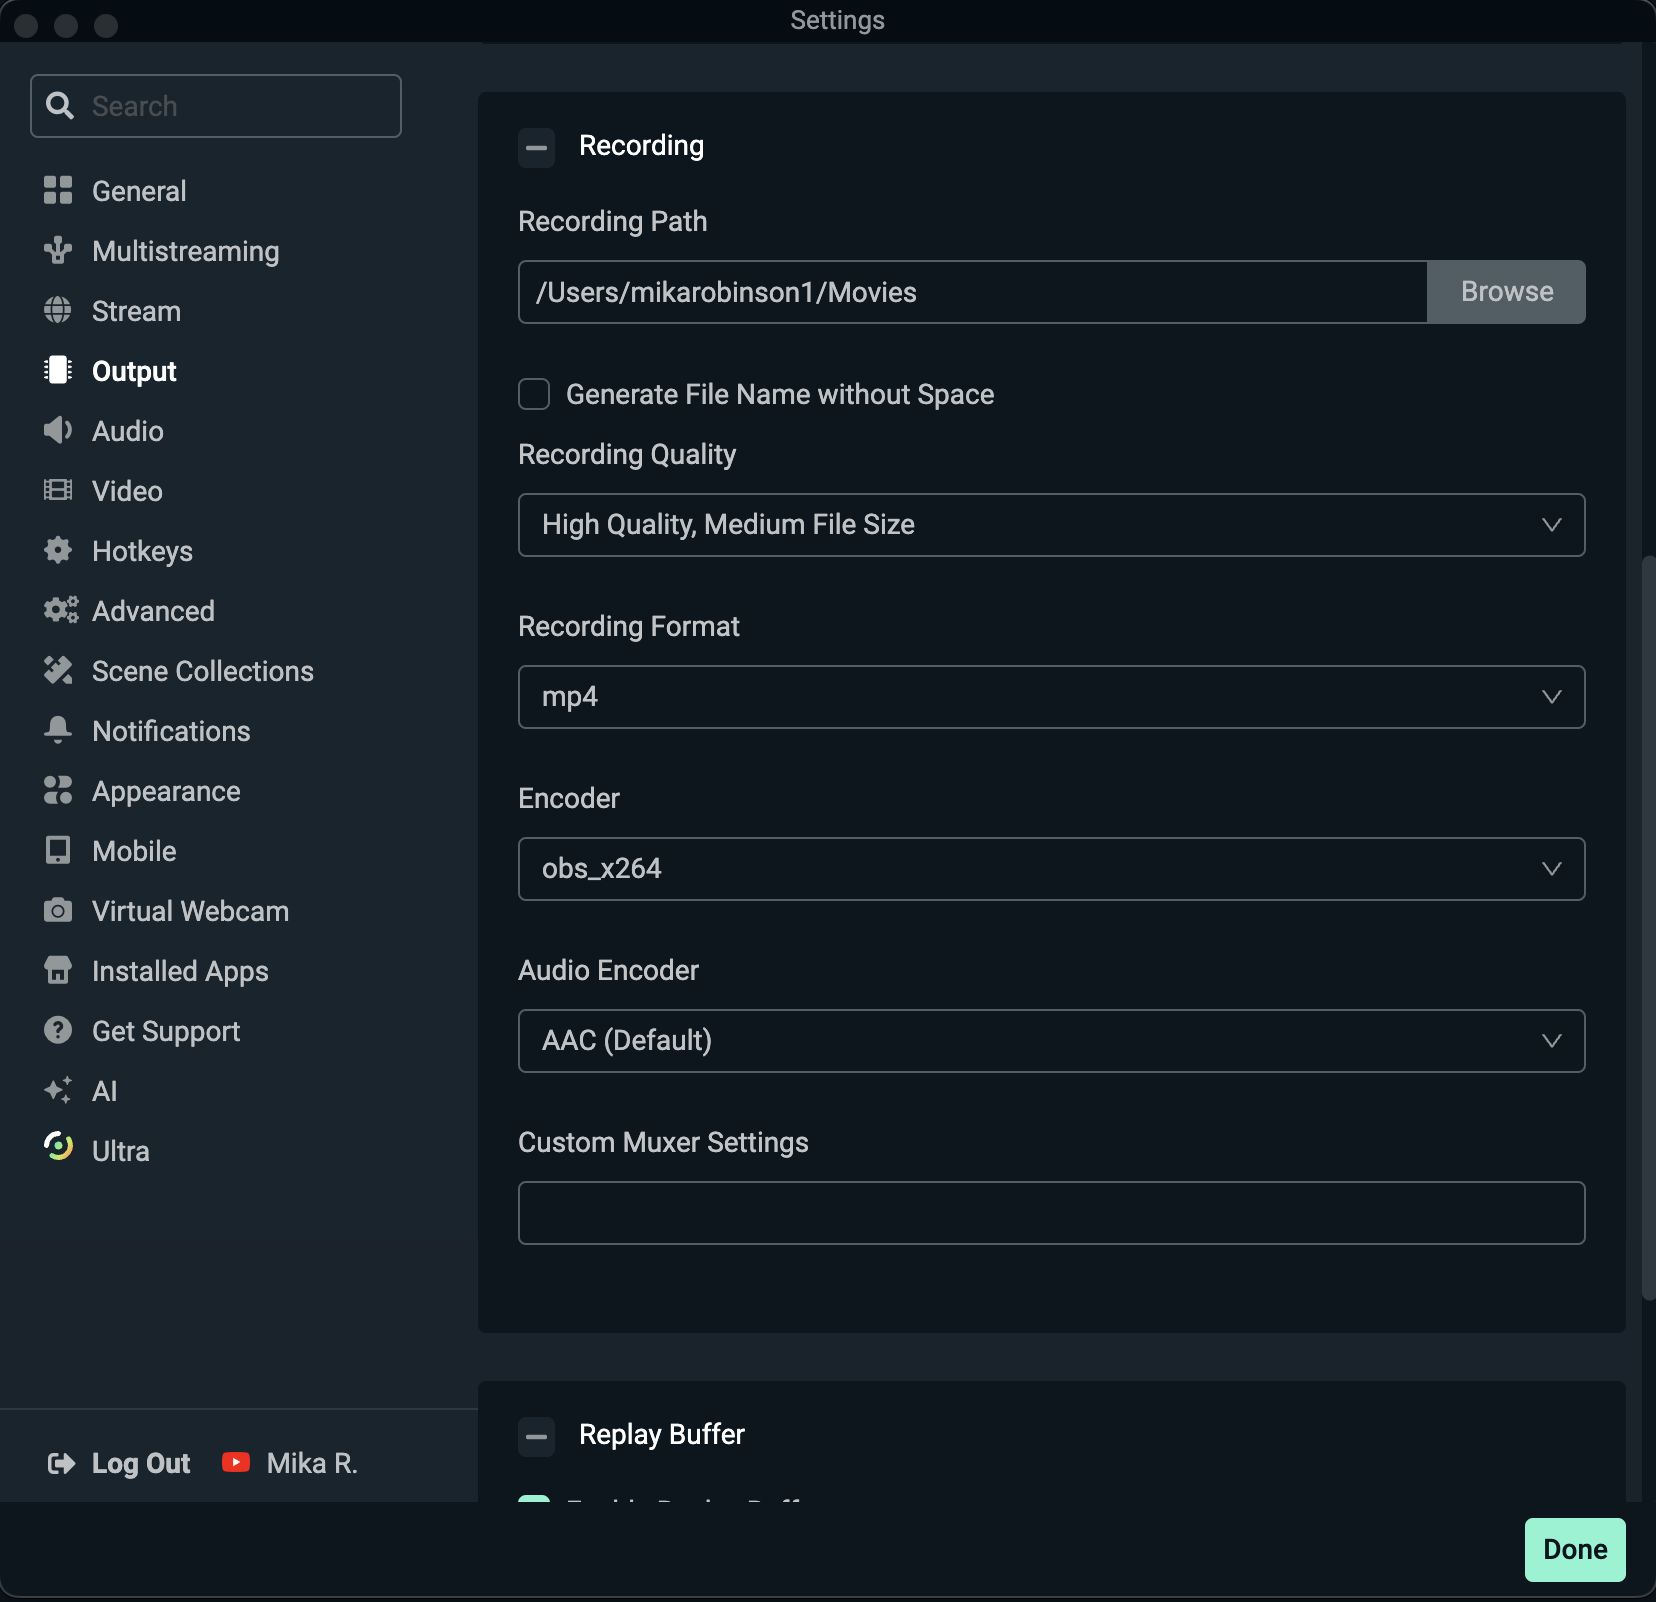
Step 1: Open Settings → Output → Recording.
Step 2: Choose your desired recording format and file location.
Step 3: Click the record button ![]() when you go live to save a local copy automatically.
when you go live to save a local copy automatically.
Whether you're catching up on your favorite streamer's past live stream or preserving your own, understanding how Twitch VODs work is essential. By enabling VOD storage and recording locally with Streamlabs Desktop, you'll never miss a moment or lose good stream content again!